Medion ERAZER MD89100 User manual

Contents
3
Contents
About these operating instructions ............................................................... 5
Explanation of symbols ......................................................................................5
Safety information .......................................................................................... 7
Never carry out repairs yourself........................................................................9
Package contents ............................................................................................ 9
Device parts....................................................................................................10
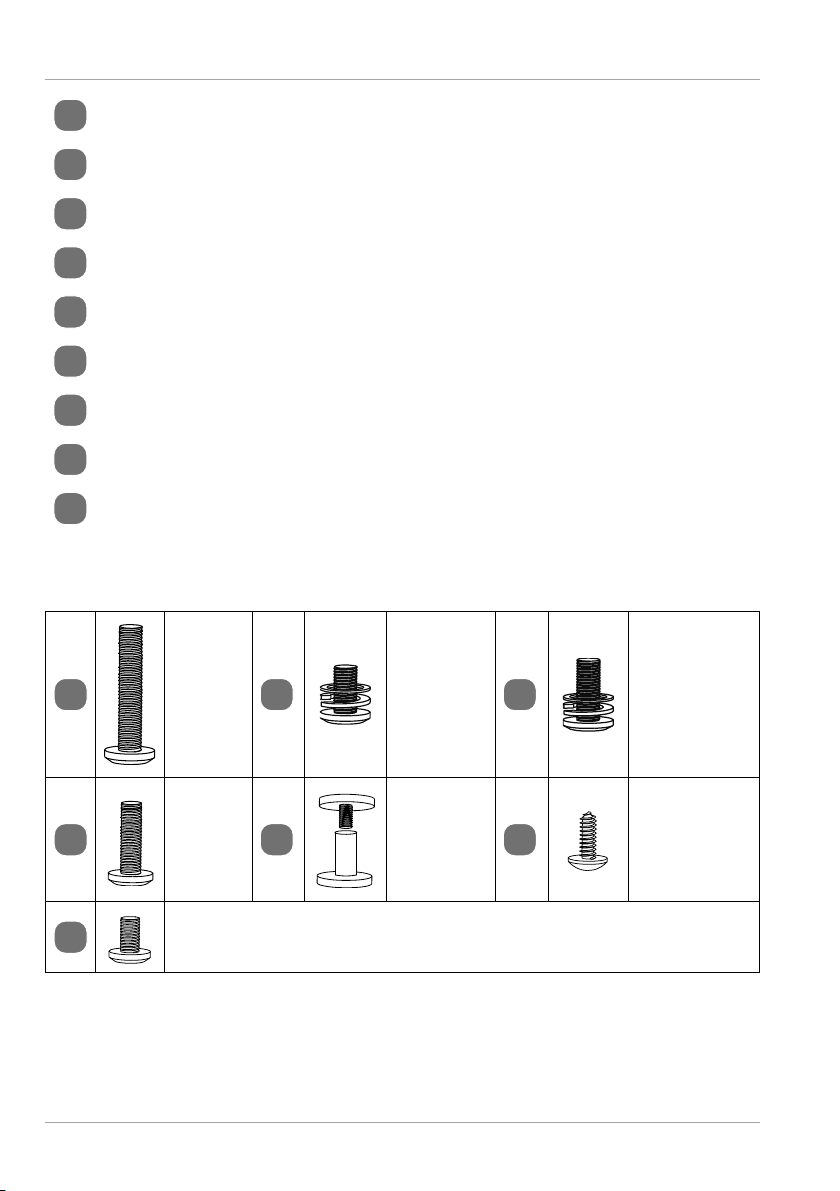
Supplied screws.............................................................................................. 12
Exploded view................................................................................................13
Assembly ........................................................................................................14
Supplied tools .....................................................................................................14
Step 1 ....................................................................................................................15
Step 2................................................................................................................... 16
Step 3....................................................................................................................17
Step 4 .................................................................................................................. 18
Step 5................................................................................................................... 19
Step 6 ..................................................................................................................20
Level out uneven floors ................................................................................ 20
LED lighting..................................................................................................... 21
Cleaning and care...........................................................................................22
Technical specifications..................................................................................22
Declaration of conformity ..............................................................................22
Trademark information .................................................................................... 22
Disposal ..........................................................................................................23
Service information........................................................................................23
Privacy statement ......................................................................................... 24
Legal Notice ................................................................................................... 24
Warranty Details .............................................................................................25
Repair and Refurbished Goods or Parts Notice............................................ 26
IMA MD89100 Content V3.0.indd 3IMA MD89100 Content V3.0.indd 3 11.08.2021 14:14:1711.08.2021 14:14:17

4
IMA MD89100 Content V3.0.indd 4IMA MD89100 Content V3.0.indd 4 11.08.2021 14:14:5111.08.2021 14:14:51

About these operating instructions
5
About these operating instructions
Thank you for choosing our product. We hope you enjoy using it.
Read the safety instructions carefully before using the device for the first
time. Note the warnings on the device and in the operating instructions.
Always keep the operating instructions close to hand. If you sell the device
or give it away, please ensure that you also pass on these operating instructions. They
are an essential component of the product.
Explanation of symbols
If a block of text is marked with one of the warning symbols listed below, the hazard
described in that text must be avoided to prevent the potential consequences de-
scribed there from occurring.
DANGER!
This signal word indicates a hazard with a high level of risk which, if not avoided, will
result in death or serious injury.
WARNING!
This signal word indicates a hazard with a medium level of risk which, if not avoided,
could result in death or serious injury.
CAUTION!
This signal word indicates a hazard with a low level of risk which, if not avoided, could
result in minor or moderate injury.
NOTICE!
This signal word warns of possible damage to property.
This symbol gives you useful additional information on assembly or
operation.
IMA MD89100 Content V3.0.indd 5IMA MD89100 Content V3.0.indd 5 11.08.2021 14:14:5111.08.2021 14:14:51

About these operating instructions
6
Products that feature this symbol meet the requirements of the EC
directives (see section ‘Declaration of conformity’)
Take note of the information in the user manual.
The Australian Regulatory Compliance Mark (RCM) is a single
compliance mark used by suppliers after establishing compliance
with all applicable regulations, including EMC, telecoms, radiocoms,
electromagnetic radiation (EMR) and electrical safety.
Indoor use
Devices with this symbol are only suitable for use indoors.
Protection class III
Electrical appliances in protection class III are electrical appliances built
for operation with safety extra-low voltage that have neither internal
nor external electricity circuits which work with a different voltage
other than safety extra-low voltage. The maximum rated voltage for
the safety extra-low voltage between the conductors and between the
conductors and the earth is 42 V. In the case of three-phase alternating
current, the maximum rated voltage between the conductors and
the neutral conductor is 24 V. The maximum off-load voltage must not
exceed 50 V. The safety extra-low voltage may only be supplied via a
safety transformer or a transformer with separate windings.
• List item / information about events during use
− Instruction to be carried out
− Safety information to be adhered to
IMA MD89100 Content V3.0.indd 6IMA MD89100 Content V3.0.indd 6 11.08.2021 14:15:1311.08.2021 14:15:13

Safety information
7
Proper use
The device is only intended for private use and not for industrial/
commercial use.
Please note that no liability will be accepted if the device is used for
an improper purpose:
• The gaming desk is designed for a maximum load of 80 kg.
• The device is only suitable for use indoors.
− Do not modify the device without our consent.
− Only use replacement parts and accessories supplied or ap-
proved by us.
− Observe all the information in this user manual, especially the
safety information. Any other use is deemed improper and may
cause personal injury or damage to property.
Safety information
CAUTION!
Risk of injury!
Improper replacement or work close to the screw fittings could re-
sult in injury.
− Plastic and metal react to loads and the effects of temperature
by expanding and contracting. Check all screw connections
regularly and tighten them if necessary.
− Do not use the gaming desk if screw connections have become
loose or parts of the desk are damaged or missing.
− Do not use the LED lighting if it shows signs of damage or if you
see smoke or hear abnormal noises during operation.
− Stop using the LED lighting immediately and unplug the LED
lighting immediately from the USB cable if connected:
• if the LED lighting makes unusual noises or emits smoke,
• if the LED is damaged by liquid or extreme damp.
IMA MD89100 Content V3.0.indd 7IMA MD89100 Content V3.0.indd 7 11.08.2021 14:15:3211.08.2021 14:15:32

Safety information
8
− In order to ensure sufficient leg room, do not place the gaming
desk directly against a wall.
− The rear side of the gaming desk with the straight tabletop is
not suitable for sitting at, as there is no leg room. Only sit at the
side of the tabletop with the concave curve.
DANGER!
Choking and suffocation hazard!
Risk of choking and suffocation through swallowing or inhaling
small parts or plastic wrap.
− Keep the plastic packaging away from children.
− Do not allow children to play with the packaging material.
− Do not modify the device without our express agreement and
do not use any accessories that have not been supplied or ap-
proved by us.
− Only use replacement parts and accessories supplied or ap-
proved by us.
− The LED lighting is not suitable for room lighting.
− The LED lighting in this product cannot be changed. At the end
of its life, the whole light fitting must be replaced. The LED light-
ing cannot be replaced by the user.
− The external flexible cable or cord of this LED lighting cannot
be replaced; if the cord is damaged, the LED lighting shall be
destroyed.
− Do not use the device in areas where there is a risk of explo-
sion. This includes, for example, fuel pumps, fuel storage areas
or areas in which corrosive agents are processed. This device
should also not be used in areas where the air is contaminated
with particles (e.g. flour or sawdust).
− Do not expose the device to extreme conditions. Avoid:
–extremely high or low temperatures,
–naked flame.
IMA MD89100 Content V3.0.indd 8IMA MD89100 Content V3.0.indd 8 11.08.2021 14:15:3511.08.2021 14:15:35

Package contents
9
− It may overload the USB output, please check the USB output of
your PC or notebook before connecting the USB lighting.
Never carry out repairs yourself.
− Never under any circumstances try to open or repair the LED
lighting yourself. There is a risk of electric shock. Inspection of
internal components, modifications and repairs may only be
performed by qualified technicians.
Package contents
DANGER!
Choking and suffocation hazard!
Risk of choking and suffocation through swallowing or inhaling
small parts or plastic wrap.
− Please check your purchase to ensure that all items are included. If anything is
missing, please contact our Service Centre.
− The gaming desk must be checked for damage before each use.
− If there is any damage, please contact our Service Centre.
The following items are supplied with your product:
• Gaming Desk
• Assembly tools
• User manual and warranty documents
IMA MD89100 Content V3.0.indd 9IMA MD89100 Content V3.0.indd 9 11.08.2021 14:15:3911.08.2021 14:15:39

Device parts
10
Device parts
A
2
3
4
5
6
7
1
11x tabletop
21x left table leg
31x right table leg
41x cross member for table legs
51x cross member for tabletop (front)
61x cross member for tabletop (rear)
71x banner bracket
IMA MD89100 Content V3.0.indd 10IMA MD89100 Content V3.0.indd 10 11.08.2021 14:15:4211.08.2021 14:15:42

Device parts
11
B
10
12
13
14 15 16
17 18
19
/
20 21 22
89
11
82x cover for lower table leg (inside, pre-assembled)
92x cover for lower table leg (outside, pre-assembled)
10 1x left metal connector
11 1x right metal connector
12 2x cover for lower table leg (inside, pre-assembled)
13 2x cover for lower table leg (outside, pre-assembled)
IMA MD89100 Content V3.0.indd 11IMA MD89100 Content V3.0.indd 11 11.08.2021 14:16:0011.08.2021 14:16:00

Supplied screws
12
14 1x storage tray
15 2x storage tray brackets
16 1x headphone holder
17 1x LED lighting left
18 1x LED lighting right
19 1x banner
20 4x cable clips
21 4x cable duct covers
22 2x cable grommets
Supplied screws
23 M 6 × 50
(5x) 24 M 6 × 14
(5x) 25 M 6 × 20
(5x)
26 M 6 × 35
(7x) 27 Interscrews
(5x) 28 ST 4 × 20
(7x)
29 M 6 × 14
(5x)
IMA MD89100 Content V3.0.indd 12IMA MD89100 Content V3.0.indd 12 11.08.2021 14:16:1911.08.2021 14:16:19

Exploded view
13
Exploded view
C
10 11
15
14
16
17
15
18
22
22
1
6 5 3
30
74
2
30
30 Cable ducts for LED lighting on (1x on left table leg and 1x on right table leg)
IMA MD89100 Content V3.0.indd 13IMA MD89100 Content V3.0.indd 13 11.08.2021 14:18:1611.08.2021 14:18:16

Assembly
14
Assembly
The gaming desk should be assembled by at least two people, following the steps
listed below.
− Ensure you have sufficient space to assemble the gaming desk.
− Put a blanket or other covering on the floor during assembly to avoid scratching
the gaming desk.
− As a rule, do not fully tighten the screws initially. Wait until Step 4 to finish tight-
ening the screws.
Supplied tools
The supplied screwdriver comprises a handle
and an interchangeable bit (see fig. 1).
− Pull the bit out of the handle and then put
it back in the other way around to change
between the Phillips head and flat head
screwdriver tool.
1
IMA MD89100 Content V3.0.indd 14IMA MD89100 Content V3.0.indd 14 11.08.2021 14:18:3511.08.2021 14:18:35

Assembly
15
Step 1
− Screw the table legs 2/3to the cross members for the tabletop 5/6as
shown. Use the M 6 × 50 23 screws for this.
− Now screw the cross member 4to the table legs as shown.
Use the M 6 × 20 25 screws for this.
2
6
5
2
3
4
23
25
4 x
23
4 x
25
23
25
IMA MD89100 Content V3.0.indd 15IMA MD89100 Content V3.0.indd 15 11.08.2021 14:18:5111.08.2021 14:18:51

Assembly
16
Step 2
− Lay the tabletop 1face down on the floor and screw the legs that were assem-
bled in Step 1 to the tabletop. Use the M 6 × 35 26 screws for this.
− Use the M 6 × 14 29 screws to screw the tray brackets 15 into the two pre-
drilled holes on the underside of the tabletop.
− Screw the storage tray 14 to the mounted storage tray brackets.
Use the interscrews 27 for this as shown in fig. 3.
− Now mount the headphone holder 16 . Use the M 6 × 14 29 screws for this.
The headphone holder can be mounted either right or left as preferred.
3
4 x
27
6 x
26
14
15
16
15
1
29
27
29
4 x
29
6
27
29
26
IMA MD89100 Content V3.0.indd 16IMA MD89100 Content V3.0.indd 16 11.08.2021 14:19:1611.08.2021 14:19:16

Assembly
17
Step 3
− Now mount the metal connectors 10 /11 so that the opening for the banner
bracket 7points towards the back of the table. Use the M 6 × 14 24 screws for
this.
− Route the cable for the LED lighting through the corresponding openings on
both table legs (fig. 4; A).
4
10
11
4 x
24
24
A
IMA MD89100 Content V3.0.indd 17IMA MD89100 Content V3.0.indd 17 11.08.2021 14:19:5511.08.2021 14:19:55

Assembly
18
Step 4
− Place the table carefully onto the table legs.
− Route the cable for the LED lighting through the openings on both sides of the
table (fig. 5; B).
− Fasten the cable to the cable clip 20 (fig. 5; C).
− Screw the LED lightings 17 /18 to the recesses designed for that purpose on
the sides of the table. Use the ST 4 × 20 28 screws for this.
5
28
18
B
C
17
6 x
28
28
IMA MD89100 Content V3.0.indd 18IMA MD89100 Content V3.0.indd 18 11.08.2021 14:20:0711.08.2021 14:20:07

Assembly
19
Step 5
− Route the cable for the LED lighting through the cable ducts 30 on both sides of
the table and place the cable duct covers 21 onto the recesses.
− Connect the L1 – L4 plugs to each other (fig. 6; D).
− Connect the USB cable to the USB port of your PC or notebook (fig. 6; E).
6
DE
21
21
21
2
2
2
2
4 x
21
21
IMA MD89100 Content V3.0.indd 19IMA MD89100 Content V3.0.indd 19 11.08.2021 14:20:2011.08.2021 14:20:20

Level out uneven floors
20
Step 6
− Place the 2 cable grommets 22 on the corresponding holes in the tabletop 1
as shown in fig. 7.
− Insert the banner bracket 7into the openings provided on the metal connec-
tors 10 /11 .
− Wrap the lower edge of the banner 19 around the cross-bracing of the table
and close the hook and loop fastener.
7
22 22
19
7
Level out uneven floors
You can level out uneven floors by using the 4 adjustable feet.
− Unscrew one or more feet up to 1 cm to level out any unevenness.
IMA MD89100 Content V3.0.indd 20IMA MD89100 Content V3.0.indd 20 11.08.2021 14:20:3411.08.2021 14:20:34

LED lighting
21
LED lighting
− Press the button on the right LED lighting 18 to turn on the LED lighting (see
fig. 8).
− Select a light setting according to the following table by pressing the button
repeatedly:
Number of presses Light mode
Press once Solid white light
Press twice Solid red light
Press 3 times Solid yellow light
Press 4 times Solid light green light
Press 5 times Solid dark green light
Press 6 times Solid light blue light
Press 7 times Solid dark blue light
Press 8 times Solid purple light
Press 9 times Colour changing flashing mode (strobe)
Press 10 times Slow colour changing (fade out)
− Hold down the button to turn off the LED lighting.
8
IMA MD89100 Content V3.0.indd 21IMA MD89100 Content V3.0.indd 21 11.08.2021 14:20:4511.08.2021 14:20:45

Cleaning and care
22
Cleaning and care
− Remove dust and dirt with a soft, dry or slightly damp cloth. Never under any
circumstances use abrasive cleaning agents containing solvents or hard cleaning
brushes. For very stubborn dirt, use mild detergent if necessary.
Technical specifications
General data
Dimensions (W×H×D) in mm: 1240 × 775 × 700
Weight: 22.5 kg
Max. load in use: 80 kg
LED lighting
Max. USB input voltage: 5V 700 mA
Power consumption: 3.5 W
Protection class:
Ambient temperature (ta): 25 °C
Protection standard: IP20
Declaration of conformity
MEDION AG hereby declares that the product MD 89100 conforms to all rel-
evant Australian requirements.
Trademark information
The USB™ word mark and logos are registered trademarks of USB Implementers Fo-
rum, Inc. and are used by the manufacturer under licence.
Other trademarks are the property of their respective owners.
IMA MD89100 Content V3.0.indd 22IMA MD89100 Content V3.0.indd 22 11.08.2021 14:21:5211.08.2021 14:21:52
Table of contents
Other Medion Indoor Furnishing manuals
Popular Indoor Furnishing manuals by other brands

Acme Furniture
Acme Furniture Vidalia 27317 EK-HF-EK Assembly instructions

DURAVIT
DURAVIT XViu XV 7133 Mounting instructions

Master equipment
Master equipment TP0129 quick guide

Winners Only
Winners Only DC350SR Assembly instructions

Furniture of America
Furniture of America CM3024SC-2PK Assembly instructions

Mayline
Mayline CSII BRIDGE Assembly instructions