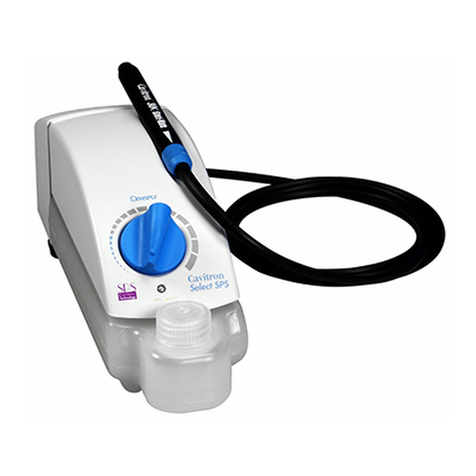
MEDIPIA Endoclean Series User manual

AUTOMATICAUTOMATIC
ENDOSCOPE CLEANERENDOSCOPE CLEANER
ENDOCLEAN
USER MANUAL
Manufacturer : MEDIPIA Co., Ltd.
Address: #101-1213, Ssangyong3, Bucheontechnopark, 36-1, Sanmjungdong,
O-junggu, Bucheonsi, Kyunggido, Korea
Tel: 82-2-3436-1693 | Fax: 82-2-3436-1694
MEDIPIA Co.,Ltd

1. MEANING of SIGNS --------------------------------------------------------------- 3
2. SAFETY PRECAUTIONS ------------------------------------------------------------ 4
1) Power Supply Caution
2) Installation Caution
3) Cleaning Caution
4) Others Caution
3. PRODUCT DESCRIPTION ---------------------------------------------------------- 7
1) Product Name and Class
2) Appearance of Structure and Composition
4. PREPARATION BEFORE USE ------------------------------------------------------ 17
5. HOW TO INSTALLATION --------------------------------------------------------- 17
6. SPECIFICATION -------------------------------------------------------------------- 19
7. SERVICE INFORMATION & OTHERS --------------------------------------------- 20
CONTENTS

1. MEANING of SIGNS
Prohibition
Keep allowed
No disassembly
Be sure to disconnect the power plug from the outlet
Don't touch
Ground connection to avoid an electric shock
-3-

2. SAFETY PRECAUTION
1) Power Supply
When not use the appliance for a long time, always disconnect the power cord.
Don’t connect the power plug when not using for a long time, including in thunder & lightning
weather.
♧ an electric shock or fire may occur.
Don't use a faulty power cord or plug, and a loose wall socket.
♧ an electric shock or fire may occur.
Never pull out the power cord or touch the plug with moistened hands.
♧an electric shock or fire may occur.
Always connect the power plug to the earthed outlet.
♧an electric shock and injury may occur.
Don't connect several extension outlets or power plugs to an outlet.
♧ A fire may occur.
2) Installation Caution
!Don't install the cleaner in the dusty place.
♧ If dusts enter in the inside, an electric shock or fire may occur.
! Don't install the cleaner on the damp or oily floor.
♧ an electric shock or fire may occur.
!Don’t install cleaner in the place containing an explosive gas.
♧(Ex.: Propane(C3H8), Butane(C4H10), Propylene(C3H6) etc
-4-

3) Cleaning Caution
!Don't install the cleaner in the highly saline air.
♧It may quicken corrosion of the machine.
! Don't install the cleaner by near inflammables.
♧Ex: Gasoline, Benzene. etc
!Don't install the cleaner in the place getting a heavy shock or vibration.
!Keep the connecting hose and water pipe warm to avoid winter-sowing, when using at sub-zero
temperature.
!Don't install the cleaner under direct sunlight.
!Don't install the cleaner near a heater or radiator.
!Don't sprinkle directly a detergent on the surface.
!If the connection with the pin of the power plug is dusty,
Wipe gently it with dry cloth.
♧an electric shock or fire may occur.
!Don't put a vessel containing water, medicines or small metals on the cleaner.
!If there is a foreign substance inside the cleaner, immediately disconnect the power
plug from the outlet and contact the service center.
4) Other Caution
!Never disassemble, repair or rebuild the cleaner at the user's discretion.
♧ An electric shock or fire may occur.
♧If repair is required, contact the service center.
!If the cleaner makes abnormal noise or smoke, immediately disconnect the power plug
and contact the service center.
♧ An electric shock or fire may occur.
!Don't place a heavy object on the cleaner.
♧It may cause malfunction or injury.
!The cleaner must be used by an experienced or trained operator.
♧It may cause malfunction or injury.
!Always keep the workplace clean.
-5-

♧It may cause malfunction or injury.
!Pay careful attention to ventilation
!When not use the cleaner for a long time, keep it in the dry and clean room.
♧It may cause malfunction or injury
!Don't use any component other than the original accessories.
♧It may cause malfunction or injury.
♧If the accessories are damaged, contact the service center.
-6-

3. PRODUCT DESCRIPTION
1) Products Name and Class
2) Appearance and Structure and Composition
A. Products Name: Automatic Endoscope Cleaner (Model: Endoclean-2000)
A. Overview
Put in water, disinfection solution and remove foreign substances inside
& outside Endoscope by rotated.
B. Composition
This product consists of control part and main body.
The main body is composed of valve, cleaner tank, disinfection tank, motor etc
C. Appearance and Structure
Leakage
Air Emit
Button Power
Switch
Air Gun
-7-
Door
Push Button
Printer

!Air Emit Button : After Leakage test, Push this button for 1~2 seconds.
It make to pull out the air to be left air in the scope.
(See Leakage test Process of page 16 )
!Detergent : Detergent Tank.
!Alcohol : Alcohol Tank.
!Air Shower : Air blows endoscope outside water.
!Water Inlet : the Pipe that water come out.
!Disinfectant Inlet : On disinfection process, the Pipe that disinfectant come out.
!Level Sensor : Floating Level sensor
!Chanel 1~6 : Air and Water Chanel. All of chanels are common.
!Nozzle and Rotary/Nozzle : Water Inlet nozzle on washing process.
It may clean Outside of scope.
Level Sensor
Chanel 1~6
Air Shower
Rotary/Nozzle
Detergent
Basin/
Drain
Water
Inlet
Disinfectant
Inlet
-8-
Air Shower
Air
Vent
Alcohol

!Control Panel
-9-
AUTOMATIC
MANUAL
SERVICE
TANK LEVEL
12L
8L
4L
DISINF DETERALCOHOL
BACK
(HOME)
ENTER
(SAVE)
START
STOP
POGRAM PROCESS SELECT
: Return to Main Program Screen
: Up
: Down
: Choosing & Save
: Process Start
: Process Stop

* AUTOMATIC MODE
-10-
AUTOMATIC
MANUAL
SERVICE
TANK LEVEL
12L
8L
4L
DISINF
DETER
ALCOHOL
BACK
(HOME)
ENTER
(SAVE)
START
STOP
POGRAM PROCESS
SELECT
AUTOMATIC ENTER
(SAVE)
A-TYPE
POGRAM PROCESS
B-TYPE
C-TYPE D-TYPE
AUTOMATIC SELECTION
: Choosing Automatic Mode using UP or Down button and then Push Enter button
* Automatic Selection Main Screen
: There are four kinds of Automatic types.
: The user can change and save time and process to four type A,B,C and D
: All menu of type is same.

-11-
POGRAM PROCESS
AUTO -A
* A-TYPE Screen
: Choosing A – TYPE UP or Down button and then Push Enter button
: There are 10 kinds Processes.
: The user can change and save time
: When the user set 000 sec among the process, the process is omitted and doing
the next process
Time- 0 Hou 00 Min 00 Sec
WASH 1
DETERGENT
AIR 1
WASH 2
AIR SHOWER
000 sec
000 sec
000 sec
000 sec
000 sec
DISINFECT
AIR 2
WASH 3
AIR 3
ALCOHOL
000 min
000 sec
000 sec
000 sec
000 sec
A - TYPE ENTER
(SAVE)
WASH 1 DETERGENT AIR 1 WASH 2 AIR SHOWER
DISINFECTAIR 2WASH 3AIR 3ALCOHOL
* Procedure

000 sec
000 min
000 sec
* MANUAL
-12-
AUTOMATIC
MANUAL
SERVICE
TANK LEVEL
12L
8L
4L
DISINF
DETER
ALCOHOL
BACK
(HOME)
ENTER
(SAVE)
START
STOP
POGRAM PROCESS
SELECT
ENTER
(SAVE)
POGRAM PROCESS
MANUAL SELECTION
: Choosing Manual Mode using UP or Down button and then Push Enter button
* Manual Selection Main Screen
: There are Eight kinds of Manual Process.
: The user can choose and do the procedure separately.
: The time is following Automatic A-TYPE.
MANUAL
000 sec
LEAKAGE
WASH
AIR
DISINFECT
DISCHARGE
RETANK
ALCOHOL
DRAIN

-13-
LEAKAGE
WASH
AIR
DISINFECT
: Leakage test
: Washing
: Air blowing
: Disinfection
DISCHARGE
RETANK
ALCOHOL
DRAIN
: Disinfectant Drain
: Disinfectant into the tank
: Alcohol
: Water Drain

* SERVICE
-14-
AUTOMATIC
MANUAL
SERVICE
TANK LEVEL
12L
8L
4L
DISINF
DETER
ALCOHOL
BACK
(HOME)
ENTER
(SAVE)
START
STOP
POGRAM PROCESS
SELECT
ENTER
(SAVE)
POGRAM PROCESS
SERVICE SELECTION
: Choosing Service Mode using UP or Down button and then Push Enter button
SERVICE
TEMP
TEMP TYPE
PRINTING
DIS ALRAM
COUNT
25
Celsius
ON
Count
000
DET- TIME
DOOR
DISINF_LOW
DET_LOW
ALCHOL-LOW
DET TYPE General LKG
YEA MON DAT HOU MIN SEC
sec
ON
ON
ON
ON
ON
00 00 00 00 00 00
* Service Selection Main Screen
: There are Eighteen kinds of Service Menu.
: The user can choose and adjust the functions

-15-
TEMP
TEMP TYPE
PRINTING
DIS ALRAM
COUNT
DET-Time
DOOR
DISINF_LOW
DET_LOW
ALCHOL-LOW
DET TYPE
LKG
YEA
MON
DAT
HOU
MIN
SEC
: Year
: Month
: Date
: Hour
: Minute
: Second
: Temperature
: Choose Celsius or Fahrenheit
: Choose Printing O or Off
: Choose Disinfection Using Expiration Count or Days
: Set Count No. or Day No.
: Choose Detergent Method General or Dipping(Deposit)
: Choose Detergent quantity (10 sec = 9cc)
: Choose Door Open Alarm On or Off
: Choose Disinfection Shortage Alarm On or Off
: Choose Detergent Shortage Alarm On or Off
: Choose Alcohol Shortage Alarm On or Off
: Choose Leakage Alarm On or Off

Leakage Test ProcessLeakage Test Process
Put the testing SCOPE inside of Basin.
Remove ETO cap and Connect
Leakage Tube with adapter.
Set LEAKAGE and Push START button.
Leakage testing water come into Basin from Leakage water Inlet
until SCOPE is sunk under water.
Look at around the SCOPE carefully if there are bubbles.
The water drain out of Basin in 2~3 minutes.
After all the process finish, Push Air Emit Button for 1~2 second.
Olympus
Connector Pentax
Connector
-16-
000 sec
000 min
000 sec
POGRAM PROCESS
MANUAL SELECTION
000 sec
LEAKAGE
WASH
AIR
DISINFECT
DISCHARGE
RETANK
ALCOHOL
DRAIN
BACK
(HOME)
ENTER
(SAVE)
START
STOP
SELECT
LEAKAGE ENTER
(SAVE)

4. PREPARATION BEFORE USE
Exchange period of disinfection should be indicated write on the product.
♧Suitable amount of disinfection is 12. If the amount is over or low the suitable
level this product may not operate properly. <Period of used time: indicated
write on the bottle of disinfection solution>
-17-
5. HOW TO INSTALLATION
!Installation should be an additional trained personnel.
♧The “endoscope fixing arm” must be installed toward the left and right wall and avoid aisle.
!Connect WATER connector in the back of cleaner to a tap with water connector
(Do not connect over 3m from the Top)
♧In connecting water connector should be careful of water connector, leakage connector.
!Connect DRAIN connector in the back of cleaner to a drain with drain connector
(Do not connect over 3m from the drainage)
!Connect power cord to power supplier.
♧Check whether supplied power is 220V AC

!DRAIN: CONNECT TO DRAIN HOSE IN ENDOSCOPE WASHER
!WATER IN: CONNECT TO WATER IN HOSE IN ENDOSCOPE WASHER
!AC 230V: POWER IN PUT CONNECT TO POWER CORD
-18-
☞Caution
In using underground water or unidentified water instead of running water,
water have to through certified filter for cleaning.
Water INDrain
☞Caution
In case that Water Inlet is close to the Washer, we recommend to use different type of
Inlet Hose. (see the below pictures) – Please use only Water IN part.

6. SPECIFICATION
1) Weight: 90
2) Rated voltage: 220~240VAC
3) Rated frequency: 50/60Hz
4) Max Consumption power: 200W ±10%
5) Electric Shock Protection Type: Class II and B-type
6) Main body: 630mm!700mm!980mm (W!D!H)
-19-

7. SERVICE INFORMATION & OTHERS
We appreciate your full support and purchase on our MDIPIA Cleaner.
We will humbly admit customer's opinion, and manufacture better cleaner for customer
satisfaction.
We intend to consider again in a customer position and always make efforts to give the best
service based on solid technology, warm humaneness, and perfect customer system. We will
be a company to be with customers like family.
Customer Help Desk
TEL 82-2-3436-1693 | FAX 82-2-3436-1694
-20-
This manual suits for next models
1
Table of contents
