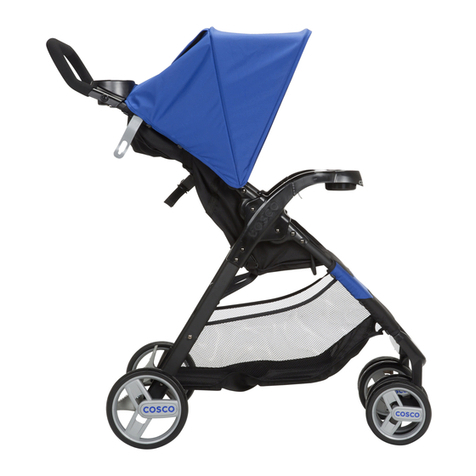
Mee-go pure User manual

Instruction Manual
Dear Customer,
Thank you for purchasing the Pure lightweight travel system.
For the safety of you child, you must read and follow these instructions
carefully.
This product has been manufactured under quality surveillance and
been tested to EN1888-2:2018 and BS EN1466:2014.
IMPORTANT- READ CAREFULLY AND KEEP FOR FUTURE REFERENCE

• Never leave your child unattended.
• Ensure that all the locking devices are engaged before use.
• To avoid injury ensure that your child is kept away when
unfolding and folding this product.
• Do not let your child play with this product.
• Always use the restraint system.
• Check that the pram body or seat unit attachment devices are
correctly engaged before use.
• This product is not suitable for running or skating.
• Lock the brake when you place your child into the travel system
and lock again when you remove your child.
• Regularly check if there's any visible damage to the handle and base unit.
• The carrycot is suitable for a baby from 0 to 6 months up to a maximum
weight of 9kg.
• The maximum loading for the storage basket is 5kg.
• This travel system is designed and tested to be used with the carrycot
or the seat unit.
• Do not use more than 1 mattress in the carrycot. Do not use
a mattress thicker than 20mm.
• Any additional load attached to the handle and/or on the back of the
backrest and/or on the sides of the travel system will aect its stability.
• Do not carry more than one child in this travel system.
• Do not use extra accessories not intended for the travel system and
only use replacement parts supplied & approved by the manufacturer.
• The carrycot is only suitable for a child who cannot sit up unaided,
cannot roll over and cannot push itself up to its hands and knees.
• Maximum weight of the child using this carrycot is 9kg.
• This travel system does not replace a cot or a bed.
• Never use this travel system on a stand or platform.
• Use only on rm, horizontal, level and dry surfaces.
• Do not let other children play unattended near the travel system.
• Do not use, if any part of the travel system is broken, torn or missing.
• Do not place the travel system near an open re or other source of
strong heat.
• In stroller mode the seat unit is suitable up to a maximum child’s weight of
22 kg or 4 years old, whichever comes rst.
WARNING:

Parts
Handle bar
Button to adjust angle
of the footrest
Rear wheels
Brake bar
Button to adjust
handle bar
Button to remove
bumper bar
Canopy
Chest pads
Safety harness
Front wheels
Bumper bar
Basket
Lever for seat
unit adjustment

Button to adjust handle bar
Chassis handle
Button to
remove front
wheel
Button to
remove rear wheel
Assembling the travel system
1
2 3
To install the front wheels, push each front wheel into the front wheel
bracket until you hear a “click”.
To remove the front wheels, press the button on the front wheel bracket
whilst pulling the wheel downwards.
To install the back wheels, push each back wheel into the back wheel
axle until you hear a “click”.
To remove the back wheels, press the button on the back wheel axle
whilst pulling the wheel outwards.
Handle bar
1. To unfold the chassis, lift up the chassis holding the chassis handle with
one hand and then pull the handle bar upwards with your second hand.
You will hear a “click” to indicate the chassis is locked open.
To adjust the height of the handle bar, press the handle bar adjustment
button and pull the handle bar upwards, it will “click” into each height
position.
2.

Button to remove bumper bar
Assembling the travel system
4
Buttons for seat
unit removal
5
4. To install the bumper bar, insert each end of the bar into the connec-
tors situated on the side of the seat unit. You will hear a “click” to
indicate the bar is locked in position.
To remove the bumper bar, press both buttons on the outer sides of the
connectors and pull the bumper bar upwards.
5. The seat unit can be installed either forward facing or parent facing.
To install the seat unit, insert the frame supports on the seat unit into
the connectors situated on the side of the chassis, ensuring the seat is
parallel to the chassis before pushing downwards. You will hear a
“click” to indicate the seat unit is locked in position.
To remove the seat unit, press the buttons on each side then lift it
upwards by holding the bumper bar.

6
6. To assemble the carrycot, rst unzip the liner to access the carrycot
structure. Push the support bars outwards until they lock into the
location points. Zip the liner back into the carrycot and insert the
mattress.
Attention:
1.The carrycot is only suitable for children who are not yet
able to sit up or stand on their own.
2.Use only on rm, horizontal, level and dry surfaces.
3.When using the carrycot, the child's head should always be higher
than his body.
4.Ensure the handle is locked in position before carrying or lifting.
5.The carrycot must be used in conjunction with the adapters supplied.

7
hood adjustment button
7. Attach the carrycot adapters onto the connectors, situated on each side
of the chassis. Then insert the frame supports on the carrycot unit into
the adapters, ensuring the carrycot is parallel to the chassis before
pushing downwards. You will hear a “click” to indicate the carrycot is
locked in position.
To remove the carrycot, press the buttons on each side then lift
upwards. To remove the adapters, press the adapter button then pull.
To adjust the hood, press the button on each side, then rotate the hood
open or closed.
To assemble the carrycot, rst unzip the liner to access the carrycot
structure. Push the support bars outwards until they lock into the
location points. Zip the liner back into the carrycot and insert the
mattress.
Attention:
1.The carrycot is only suitable for children who are not yet
able to sit up or stand on their own.
2.Use only on rm, horizontal, level and dry surfaces.
3.When using the carrycot, the child's head should always be higher
than his body.
4.Ensure the handle is locked in position before carrying or lifting.
5.The carrycot must be used in conjunction with the adapters supplied.

Instructions for use
1c1b1a
3
2
1
Top belt
End belt
1a.
1b.
1c.
To use the safety belt, insert each buckle into the buckle socket, a
“click” sound will indicate they have locked into position.
To open press the central button and the separate buckles will open
apart.
Use the plastic adjuster on the webbing straps to lengthen or shorten
the belts as required.
To attach the safety belts to the seat unit, pass the belt end tabs
through the opening in the seat cover until the tabs pass through the
back plate of the seat unit. Ensure the belt end tabs are at against the
backing board.

Brake bar
2
a b
23
Instructions for use
The front wheels can be xed or rotate freely.
To allow the front wheels to rotate, pull the button outwards, to x the
wheels push the button inwards.
To apply the rear wheel brake, step down on the brake bar in position
“1”. To release the brake step on the brake bar in position “2”.
Attention: when the stroller is stationary, always apply the brake.
2.
3.

Lever for seat unit adjustment
4
Instructions for use
4. To adjust the angle of the backrest, pull the seat adjustment lever
and move the seat back up or down.
Three dierent angles can be achieved

Instructions for use
To adjust the angle of the footrest, press the button on each side then
rotate the footrest to the desired angle.
5
6
Button to adjust handle bar
Button for footrest adjustment
To adjust the height of the handle bar, press the button and pull / push
the handle bar up or down to desired height.
5.
6.

Folding instructions
1
Button to adjust handle bar
Unlock button next
to chassis handle
1.To fold the travel system in forward facing mode, rst lower the
handle bar into the lowest position and push the footrest upwards.
While holding the chassis handle, unlock the button with your thumb
- as you lift the chassis handle upwards the chassis will fold.

Folding instructions
2
Unlock button next
to chassis handle
Button to adjust seat back
Button to adjust handle bar
2.To fold the travel system in parent facing mode, rst lower the handle
bar into the lowest position, adjust the backrest forwards and push
the footrest upwards.
While holding the chassis handle, unlock the button with your thumb
- as you lift the chassis handle upwards the chassis will fold.

Maintenance instructions:
• To ensure your baby is protected from accidental injury, please
check and maintain the travel system regularly.
• Please use a cloth or brush to clean the seat fabric and use
household soap or neutral detergent to clean other parts.
• Please do not store in direct sunlight and rain.
• Regularly check if there are loose screws, damaged parts or
broken stitches, if necessary replace the damaged parts.
• Please use the travel system carefully following the instructions
to avoid damage or accidental injury.
Attention:
• Please check all components are installed correctly and fastened in place
before each use.
• Do not let the child climb into / out of travel system or stand on the
seat or carrycot.
• Do not use the stroller on rough ground, near re and other
dangerous areas.
• Avoid using or storing the travel system in wet, cold or high temperature
environments, keeping it away from re or strong heat.
Contact Mee-go:
Mee-go Ltd
Unit 5, Victoria Mills
Mill Street, Dewsbury
West Yorkshire
United Kingdom WF12 9AQ www.mee-go.co.uk
British Design
Table of contents
Other Mee-go Stroller manuals
