Meissen Keramik GENERA Ultimate User manual

USER MANUAL
shower toilet GENERA Ultimate
meissen-keramik.com

Thank you for purchasing MEISSEN KERAMIK shower toilet.
IMPORTANT:
Read and understand this manual before installing and using this product! The illustrations in this
manual are for reference only and may differ from the actual appearance of the product.
Features and available functions of the shower
toilet GENERA Ultimate
Washing
Standard wash
Feminine wash
Oscillation wash
Pulse wash
Water spray intensity adjustment
Water temperature adjustment
Spray nozzle position adjustment
Hygiene
Nozzle self-cleaning
Replaceable nozzle tip
Antibacterial nozzle
Easy detachable lid and toilet seat
Comfort
Soft-close toilet seat
Night light
Instantaneous water heating
Drying
Ceramic pre-spraying
Odor reduction function
Descaling function
Knob control
Remote control
Smartphone remote control
Safety
EN1717
IPX4
CE
RoHS

Table of Contents
Chapter 1 Safety principles .............................1
1.1 Symbols and their meaning...................................................... 1
1.2 Safety considerations........................................................... 2
1.3 Precautions for use ............................................................ 6
Chapter 2 General product characteristics .................7
2.1 Construction of the shower toilet ................................................. 7
2.2 Remote control - front panel ..................................................... 8
2.3 Remote control - rear panel ...................................................... 9
2.4 Rear panel button functions ..................................................... 9
2.5 Rear panel display functions ................................................... 10
2.6 Night light ................................................................... 11
2.7 Odor reduction ............................................................... 11
Chapter 3 Operating instructions ........................12
3.1 Starting the shower toilet....................................................... 12
3.2 Ceramic pre-spraying function .................................................. 13
3.3 Shower system button functions ................................................ 14
3.4 Knob control ................................................................. 15
3.5 Remote control ............................................................... 16
3.6 Operation of the descaling function .............................................. 21
Chapter 4 Cleaning and maintenance ....................22
4.1 Shower toilet cleaning ......................................................... 22
4.2 Spray nozzle cleaning.......................................................... 22
4.3 Odor reduction system cleaning ................................................ 23
4.4 Descaling .................................................................... 24
4.5 Remote control cleaning ....................................................... 25
4.6 Waste disposal ............................................................... 25
4.7 Product maintenance ......................................................... 25
Chapter 5 Troubleshooting .............................26
Chapter 6 Technical data ..............................28
1
Chapter 1 Safety principles
To ensure safe and trouble-free use of the shower toilet, read the user manual and observe the
safety rules!
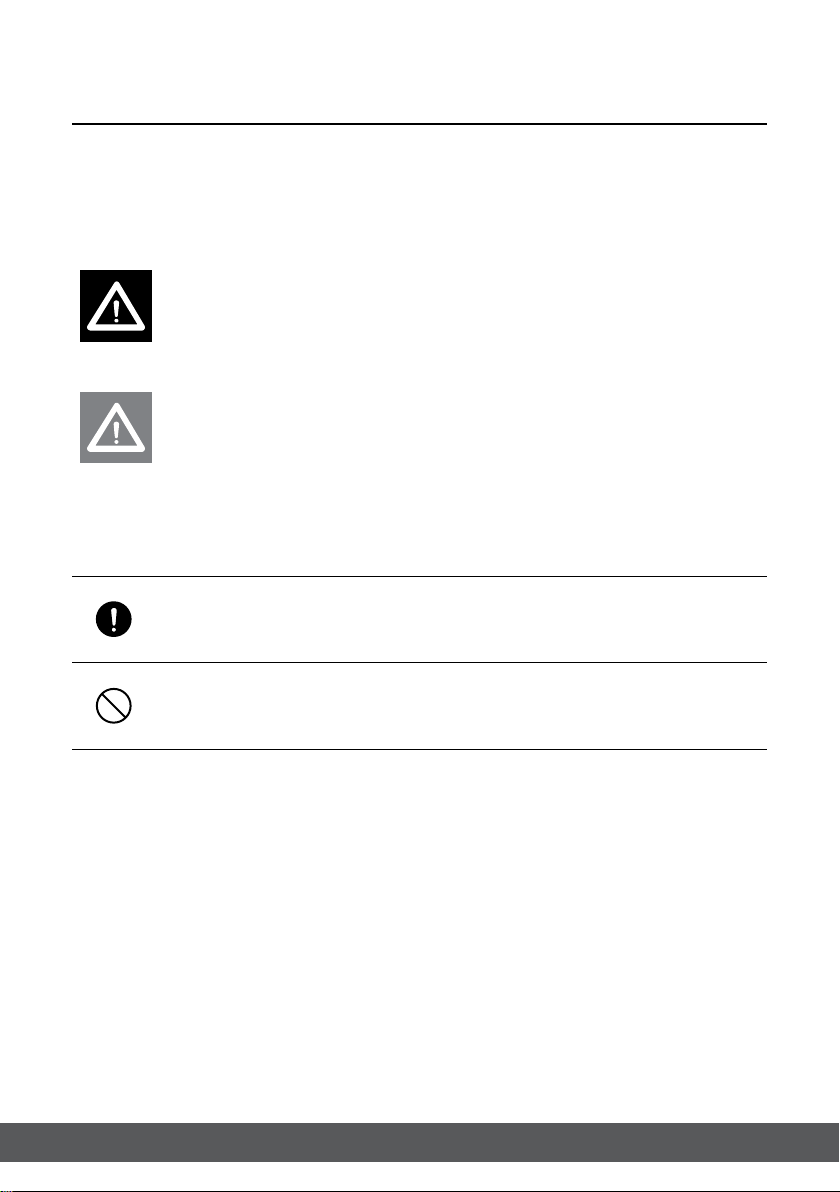
1.1 Symbols and their meaning
Warning This symbol indicates hazards that may lead to
death or injury if ignored.
Caution This symbol indicates hazards that may lead to
injury and/or damage to shower toilet or other
property if ignored
Meaning of symbols:
MANDATORY
operation
PROHIBITED
operation

2
1.2 Safety considerations
Make sure that the power cord is not damaged!
Avoid crushing or jamming the power cord!
The power cord must not come into contact with heated surfaces and sharp edges!
If you have any questions about the operation of the appliance, please contact the
customer service helpline to avoid product failure and damage caused by misuse.
Children and persons who do not understand the intended use of the product, or
who have physical, sensory, mental or other disabilities, may use the product only if
it has been explained to them how they can use it safely or under the supervision of
other people.
The shower toilet is not a toy – children must not play with the product as this can
lead to injuries or death.
Connect the appliance to the cold water supply system (temperature of about 4-35
degrees Celsius)
Do not use the shower toilet if it is not working properly.
In the event of a malfunction or failure, immediately disconnect the power supply,
close the shut-off valve to cut off the water supply and stop using the shower toilet.
Contact the customer service helpline.
Malfunctions and faults can manifest themselves as:
- a crack or damage to the product
- smoke coming out of the product
- unusual sound and smell of burning
- product heating up above normal operating temperature
- water leakage from pipes or the appliance
Using a damaged appliance may result in electric shock, re, ooding or other
damage.
Do not lift the product by gripping the lid.
When using in the bathroom, make
sure that the power supply system is
waterproof. If not, the risk of an electric
shock or re can occur.
3
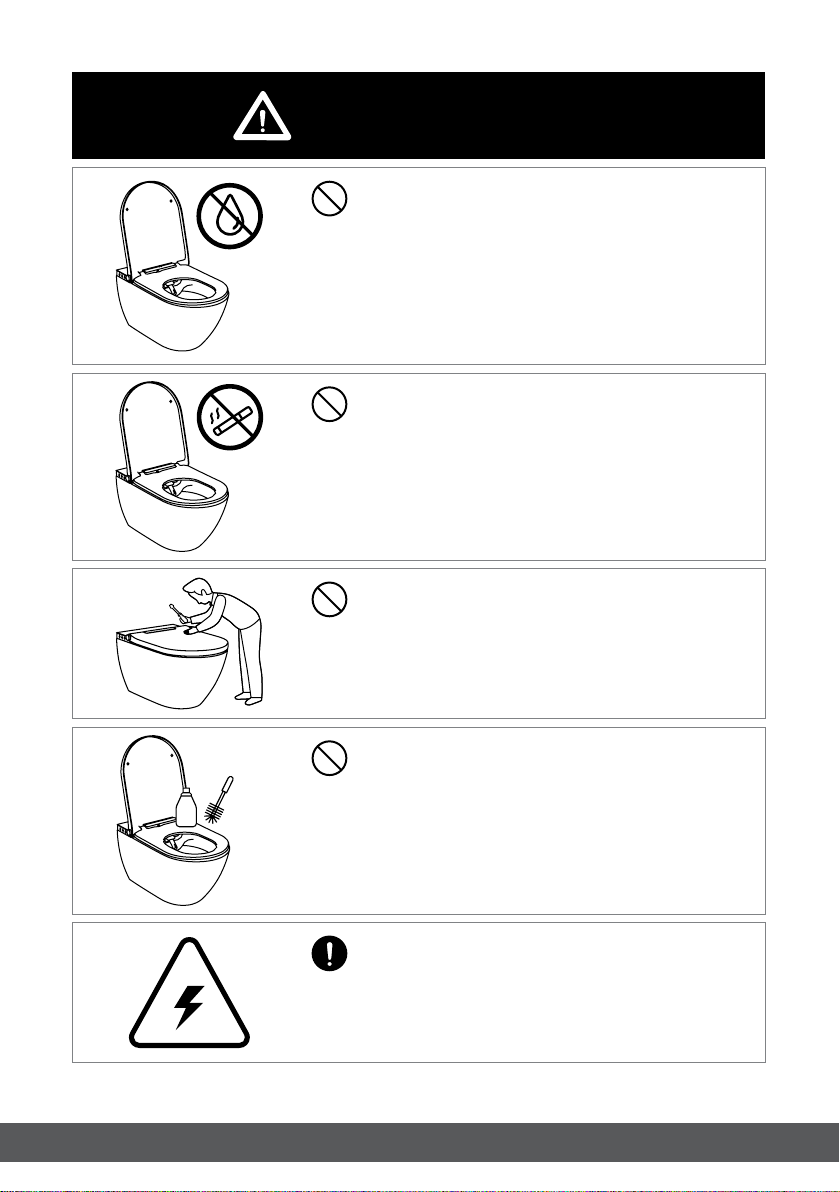
Warning
Do not immerse in or spray the appliance or electrical
system with water or other liquids.
Electric shock, damage to the appliance or re hazard.
Do not place hot objects or ammable materials near
the appliance.
Fire hazard.
Do not disassemble, modify or repair the appliance.
Electric shock, short circuit or re hazard.
Take care not to ood the appliance connected to the
power supply when cleaning.
Electric shock or re hazard.
Make sure that the electrical system and bowl are
earthed.
The appliance can only be connected to dedicated
220V-240V, 50/60Hz, 10A systems with residual-current
device.

4
If the appliance will not be used for a longer period
of time (several months), turn it off with the ON/OFF
button.
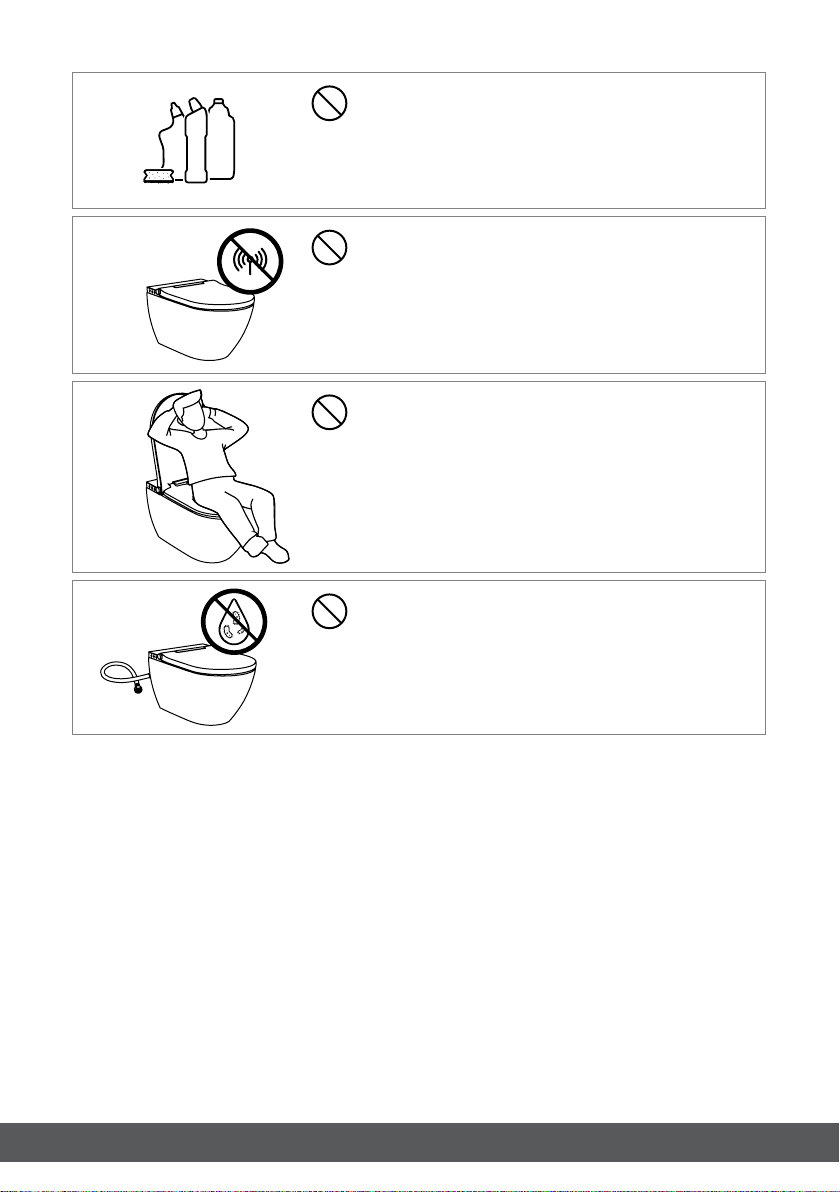
Caution
Do not allow children to play, stand or sit on the lid. Do
not place heavy objects on it.
This may lead to injuries or damage to the appliance.
Do not install the appliance in a room where the tem-
perature is below 4°C.
This can damage the appliance.
Do not force the lid or seat to close.
This may cause damage to the product.
Do not kink, bend excessively or twist the water hose.
This may cause water leakage.
5
Do not use aggressive, concentrated or abrasive clean-
ing agents.
They can damage the product.
Do not use appliances near the shower toilet that could
interfere with its operation.
Do not lean against the lid. This may cause damage or
injury.
Do not supply contaminated water, seawater or
untreated water to the appliance, as this may cause
infection, skin irritation or damage to the product.

6
1.3 Precautions for use
Connect the appliance to the cold water supply system using the new hose supplied with the
product. Use only new hoses to connect the shower toilet.
When moving the appliance from a cool to a warm room, condensation may occur on the surface of
some system components. In such a situation switch the appliance on after a few hours to let the
condensed steam evaporate.
Prevent the spray nozzle from contamination, splashing or blocking.
You can install a residual current device (RCD) as an additional protection. Do not use accessories
that are not recommended by the manufacturer.
Control knob and remote control are supplied by CR2032 batteries.
In case of acid leakage from the battery, avoid contact with skin, eyes and mucous membranes.
In case of contact with acid, rinse contaminated areas with plenty of clean water and seek medical
help immediately.
Keep batteries out of the reach of children. The battery can be life-threatening if swallowed. In case
of swallowing the battery, seek medical attention immediately.
Do not charge the battery, use other means to reactivate it, dismantle it, throw it into re or short-
circuit its poles.
Remove depleted batteries from the remote control immediately. Otherwise, acid leakage from the
battery may damage the remote control. Do not mix old and new batteries in the remote control.
Clean the contacts of the remote control before reinserting the batteries. When inserting the battery,
pay attention to the correct polarity. If the remote control will not be used for a long time, remove
the batteries.
Do not expose the battery to extreme conditions: do not place it on hot surfaces and do not expose
it to direct sunlight. Otherwise there is an increased risk of leakage.
For information on how to remove and insert the battery, see point 3.1 of the manual.
Do not mix different types or used batteries.
7
Chapter 2 Ogólna charakterystyka produktu
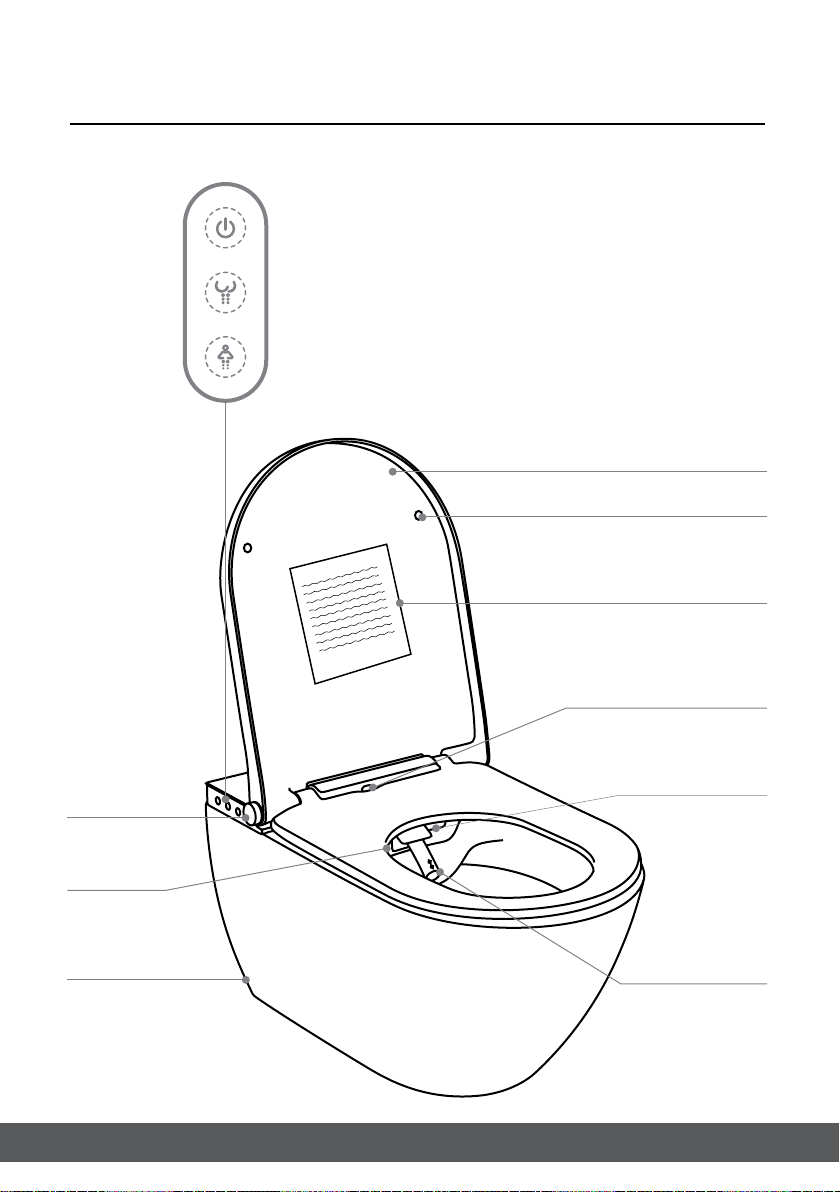
2.1 Use of the shower toilet
Power on/off
Standard wash
Feminine wash
Lid
Safety considerations
Bumper
Infrared sensor
detecting the user
Drying nozzle
Odor extractor
Control
knob
Night
light
Ceramic
bowl Spray nozzle

8
2.1 Remote control - front panel
Symbol Function
Standard wash
Feminine wash
Stop
Drying
Oscillation wash
Pulse wash
Symbol Function
Water spray intensity
adjustment
Nozzle position
adjustment
Water temperature
adjustment
(See section 3.5 for detailed information on the individual functions).

9
2.3 Remote control - rear panel
2.4 Rear panel button functions
DRYER TEMP
Battery socket
opening slider
Display
Battery socketPanel with buttons
1. Press
to start the MENU on the rear panel
MENU 1/4
1. MANUAL
CLEANING
2. AUTO
FUNCTION
2. Press
(left or right) to select a function
The selected function will be
highlighted in grey
1. MANUAL
CLEANING
1. MANUAL
CLEANING
After pressing the setting will
be applied
ENTER
MENU / RETURN
Entering the main menu, returning to the
previous menu
SELECTION / FUNCTION SETTINGS
(See sections 3.5. and 3.6. for detailed information on
button functions)

10
2.5 Rear panel display functions
MENU 1/4
1. MANUAL
CLEANING
2. AUTO
FUNCTION
3. LANGUAGE
4. RESET
MANUAL
CLEANING 1/2
1. MANUAL
CLEANING
RESET
CONFIRM
RESET
AUTO
FUNCTION 1/3
1. AUTO
DEODORIZER
2. NIGHT
LIGHT
3. DESCALING
REMINDER
AUTO
DEODOR-
IZER
1/2
1. ON
2. OFF
NIGHT
LIGHT 1/2
1. ON
2. OFF
DESCALING
REMINDER 1/4
1. 120PPM
2. 250PPM
3. 425PPM
4. OFF
LANGUAGE 1/4
1. ENGLISH
2. DEUTSCH
3. POLSKI
4. ROMÂNĂ
Level 1 Level 2 Level 3
Number
of elements
displayed
on the screen
Hint:
to return to
the previous
menu, press
11
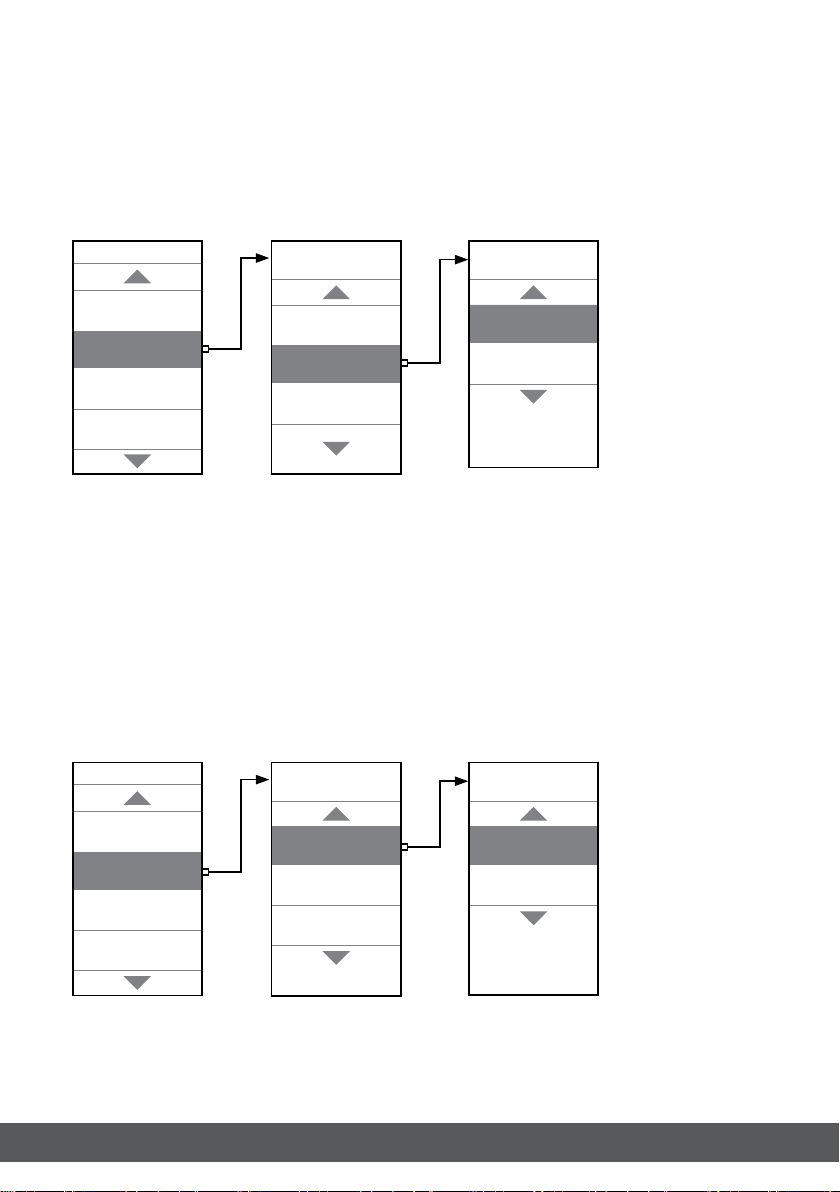
2.6. Night light
The shower toilet is equipped with an LED night light function for easy orientation at night. If this
function is activated, the light will switch on automatically when the room gets dark.
To activate this function, use the rear panel of the remote control:
MENU 2/4
1. MANUAL
CLEANING
2. AUTO
FUNCTION
3. LANGUAGE
4. RESET
MENU 2/4
1. MANUAL
CLEANING
2. AUTO
FUNCTION
3. LANGUAGE
4. RESET
AUTO
FUNCTION 2/3
1. ODOUR
REDUCTION
2. NIGHT
LIGHT
3. DESCALING
REMINDER
AUTO
FUNCTION 1/3
1. AUTO
DEODORIZER
2. NIGHT
LIGHT
3. DESCALING
REMINDER
NIGHT
LIGHT 1/2
1. ON
2. OFF
ODOUR
REDUCTION 1/2
1. ON
2. OFF
2.7. Odor reduction
The shower toilet is equipped with an odor reduction function. If this function is activated, the odor
extractor will switch on automatically when the user sits on the toilet seat. The odor extractor will
switch off automatically after 5 minutes or one minute after the user gets up from the toilet seat
(depending on what happens faster).
To activate this function, use the rear panel of the remote control:

12
Chapter 3 Operating instructions
3.1 Starting the shower toilet
1. Open the shut-off valve and check if there is water ow and that the hose connection is tight.
2. Remote control battery
A. The battery cover is located on
the back of the remote control.
To open it, push the slider to the
left, as shown in the picture.
B. Insert two AAA batteries, paying
attention to the appropriate
polarity.
C. After installing the batteries,
close the cover.
In order to check if the batteries are inserted correctly, press any button on the remote control. If
the button lights up, it means that the batteries are inserted correctly. If the remote control does not
work, check if the batteries are inserted correctly or if they are not discharged.
3. Pairing the remote control with the shower system.
A. Turn the power supply to the shower toilet off using the switch
underneath the glass rear panel, then press and hold the stop button
until the LEDs on the remote control start ashing.
B. Turn the power supply to the
appliance on and wait 15-20
seconds.
If remote control and appliance pairing has failed, try again. If the next attempt is unsuccessful,
contact the service.

13
4. Control knob battery
Remove
Cover
Battery
Box
A. Remove the control knob. B. Open the cover and insert the battery with the
positive side upwards. Use CR 2032 3V battery.
5. Pairing the control knob
Press simultaneously Press and hold
A. Press the on/off and standard wash buttons
simultaneously. There should be a long beep. If
there is no beep, try again.
B. Press and hold the control knob until you hear a
long beep that indicates that the control knob is
correctly synchronized with the appliance. If the
pairing attempt failed, try again. In the pairing is
unsuccessful, contact the service.
3.2 Ceramic pre-spray function
The shower toilet is equipped with a ceramic pre-spray function for easy rinsing of the waste. Each
time the user sits on the toilet seat, the nozzle will extend from the shower system for a moment to
spray a small amount of water inside the ceramic bowl.

14
3.3 Shower system button functions
Power
on/off
Standard
wash Feminine wash
Press and hold the on/off button
for about 5 seconds to turn the
appliance on/off.
The wash function can be activated
when the user is sitting on the toilet
seat (the infrared sensor in the
appliance is activated).
The "standard wash" button
activates the standard wash
program. The nozzle extends and
starts gentle and safe washing.
To nish the wash press again
the "standard wash" button or
the "stop" button on the remote
control. Otherwise, the washing
will automatically nish after 3
minutes.
The wash function can be activated
when the user is sitting on the toilet
seat (the infrared sensor in the
appliance is activated).
The "feminine wash" button
activates the feminine wash
program. The nozzle extends and
starts gentle and safe washing.
To nish the wash press again
the "feminine wash" button or
the "stop" button on the remote
control. Otherwise, the washing
will automatically nish after 3
minutes.

15
3.4 Knob control
Standard
wash Drying Feminine wash
Water spray
intensity Nozzle
position
Stop Air ow
temp. Stop Water pressure
Nozzle position Stop
The wash function can be activated
when the user is sitting on the toilet
seat (the infrared sensor in the
appliance is activated).
Turn the control knob backward by
about 90 degrees to activate the
standard wash.
1. A short beep indicates that the
function is on/off. Duration: 3 min.
2. You can adjust water spray
intensity during washing (5 levels).
Each change in the water spray
intensity is accompanied by a short
beep, and if the maximum level is
reached, the appliance will beep
twice.
Press the control knob to stop the
standard wash function. Otherwise,
the washing will automatically
nish after 3 minutes.
3. You can adjust the position
of the nozzle during washing by
pressing and turning the knob.
Press the knob to activate the hot
air drying function.
1. A short beep indicates that the
function is on/off. Duration: 4 min.
2. You can adjust the temperature
during drying (5 levels).
Each change in the drying
temperature is accompanied by a
short beep, and if the maximum
temperature is reached, the
appliance will beep twice. Press
the knob to stop the drying
function. Otherwise, the drying
will automatically nish after 4
minutes.
The wash function can be activated
when the user is sitting on the toilet
seat (the infrared sensor in the
appliance is activated).
Turn the control knob forward by
about 90 degrees to activate the
feminine wash.
1. A short beep indicates that the
function is on/off. Duration: 3 min.
2. You can adjust water spray
intensity during washing (5 levels).
Each change in the water spray
intensity is accompanied by a short
beep, and if the maximum level is
reached, the appliance will beep
twice.
Press the knob to stop the feminine
wash function. Otherwise, the
washing will automatically nish
after 3 minutes.
3. You can adjust the position
of the nozzle during washing by
pressing and turning the knob.

16
3.5 Remote control
The shower toilet can be operated with the buttons on the side panel (standard wash, feminine
wash), the control knob or remote control. The control knob can control the standard wash,
feminine wash and drying functions. The remaining functions are activated with the remote control
(including appliance settings). Press the appropriate button on the remote control to activate given
function. The button will be highlighted for 5 seconds. If the remote control does not work, check if
the batteries are installed correctly or if they are not discharged (see 3.1. point 2).
Stop
Press the "Stop" button to stop the current function.
Standard wash
Press the "Standard wash" button. You will hear a beep, the button will be highlighted and
the standard wash function will be activated (the user must sit on the toilet seat).
During standard wash, press “ “ in "water
spray intensity adjustment" to increase water
spray intensity; press “ " to decrease the water
pressure.
During standard wash, press “ " in "nozzle
position settings" to move the nozzle forward;
press “ “ to move the nozzle backward.
During standard wash press " "
in "water temperature settings" to increase the
water temperature; press " " to decrease the
water temperature.
Press the "Stop" button to nish standard
wash, or wait 3 minutes until the process is
automatically completed.
Table of contents
Other Meissen Keramik Toilet manuals


Popular Toilet manuals by other brands


American Standard
American Standard CONCEPT Cube TF-2704 installation manual

BIOLAN
BIOLAN ECO Instructions for installation, use and maintenance

Thetford
Thetford C260 Series user manual

KELISS
KELISS T162A Series instruction manual

Silent Venus
Silent Venus SVP600 Installation & maintenance

Kohler
Kohler K-22241K Installation and care guide