Memorex MTB061B User manual


2
Safety Instructions & Warnings
Additional Warnings and Precautions
• CAUTION: TO PREVENT ELECTRIC SHOCK, MATCH
WIDE BLADE OF PLUG TO WIDE SLOT, FULLY
INSERT.
• Mainsplugisusedasdisconnectdeviceanditshould
remainreadilyoperableduringintendeduse.Inorderto
disconnecttheapparatusfromthemainscompletely,
themainsplugshouldbedisconnectedformthemains
socketoutletcompletely.
• CAUTION:Useofcontrolsoradjustmentsor
performanceofproceduresotherthanthosespecied
mayresultinhazardousradiationexposure.
• WARNING:Changesormodicationstothisunit
notexpresslyapprovedbythepartyresponsiblefor
compliancecouldvoidtheuser’sauthoritytooperate
theequipment.
• WARNING:Donotplacethisunitdirectlyontofurniture
surfaceswithanytypeofsoft,porous,orsensitive
nish.Aswithanyrubbercompoundmadewithoils,
thefeetcouldcausemarksorstainingwherethefeet
reside.Werecommendusingaprotectivebarriersuch
asaclothorapieceofglassbetweentheunitandthe
surfacetoreducetheriskofdamageand/orstaining.
• WARNING:Useofthisunitnearuorescentlighting
maycauseinterferenceregardinguseoftheremote.If
theunitisdisplayingerraticbehaviormoveawayfrom
anyuorescentlighting,asitmaybethecause.
• WARNING:Shockhazard-DoNotOpen.
• Cautionandmarkinginformationislocatedattherear
orbottomoftheapparatus.
• WARNING:Toreducetheriskofreorelectricshock,
donotexposethisapparatustorain,moisture,
dripping,orsplashing.
• Objectslledwithliquids,suchasvases,shallnotbe
placedontheapparatus.
• CAUTION:Dangerofexplosionifbatteryisincorrectly
replaced.Replaceonlywiththesameorequivalent
type.
• WARNING:Thereisadangerofexplosionifyou
attempttochargestandardAlkalinebatteriesinthe
unit.OnlyuserechargeableNiMHbatteries.
• Batteryshallnotbeexposedtoexcessiveheatsuchas
sunshine,reorthelike.
• Keepnewandusedbatteriesawayfromchildren.If
thebatterycompartmentdoesnotclosesecurely,stop
usingtheproductandkeepitawayfromchildren.
• Ifyouthinkbatteriesmighthavebeenswallowedor
placedinsideanypartofthebody,seekimmediate
medicalattention.
• Donotmixoldandnewbatteries.
• Completelyreplacealloldbatterieswithnewones.
• Donotmixalkaline,standard(carbon-zinc),or
rechargeable(ni-cad,ni-mh,etc)batteries.
• Batteriesshouldberecycledordisposedofasper
stateandlocalguidelines.
Important Safety Instructions
• ReadtheseInstructions.
• KeeptheseInstructions.
• HeedallWarnings.
• Followallinstructions.
• Donotusethisapparatusnearwater.
• Cleanonlywithadrycloth.
• Donotblockanyventilationopenings.Installin
accordancewiththemanufacturer’sinstructions.
• Donotinstallnearanyheatsourcessuchasradiators,
heatregisters,stoves,orotherapparatus(including
ampliers)thatproduceheat.
• Donotdefeatthesafetypurposeofthepolarizedor
grounding-typeplug.Apolarizedplughastwoblades
withonewiderthantheother.Agroundingtypeplug
hastwobladesandathirdgroundingprong.Thewide
bladeorthethirdprongareprovidedforyoursafety.
Whentheprovidedplugdoesnottintoyouroutlet,
consultanelectricianforreplacementoftheobsolete
outlet.
• Protectthepowercordfrombeingwalkedonor
pinchedparticularlyatplugs,conveniencereceptacles,
andthepointwheretheyexitfromtheapparatus.
• Onlyuseattachments/accessoriesspeciedbythe
manufacturer.
• Unplugthisapparatusduringlightningstormsorwhen
unusedforlongperiodsoftime.
• Referallservicingtoqualiedservicepersonnel.
Servicingisrequiredwhentheapparatushasbeen
damagedinanyway,suchaspower-supplycordor
plugisdamaged,liquidhasbeenspilledorobjects
havefallenintotheapparatus,theapparatushasbeen
exposedtorainormoisture,doesnotoperatenormally,
orhasbeendropped.
• Useonlywithacart,stand,tripod,
bracket,ortablespeciedbythe
manufacturer,orsoldwiththe
apparatus.Whenacartisused,
usecautionwhenmovingthecart/
apparatuscombinationtoavoidinjury
fromtip-over.
FCC Warnings
Warning:Changesormodicationstothisunitnot
expresslyapprovedbythepartyresponsiblefor
compliancecouldvoidtheuser’sauthoritytooperatethe
equipment.
NOTE:Thisequipmenthasbeentestedandfound
tocomplywiththelimitsforaClassBdigitaldevice,
pursuanttoPart15oftheFCCRules.Theselimitsare
designedtoprovidereasonableprotectionagainstharmful
interferenceinaresidentialinstallation.Thisequipment
generates,uses,andcanradiateradiofrequencyenergy
and,ifnotinstalledandusedinaccordancewiththe
instructions,maycauseharmfulinterferencetoradio
communications.However,thereisnoguaranteethat
interferencewillnotoccurinaparticularinstallation.Ifthis
equipmentdoescauseharmfulinterferencetoradioor
televisionreception,whichcanbedeterminedbyturning
theequipmentoffandon,theuserisencouragedtotry
tocorrecttheinterferencebyoneormoreofthefollowing
measures:
• Reorientorrelocatethereceivingantenna.
• Increasetheseparationbetweentheequipmentand
receiver.
• Connecttheequipmentintoanoutletonacircuit
differentfromthattowhichthereceiverisconnected.
• Consultthedealeroranexperiencedradio/TV
technicianforhelp.
3
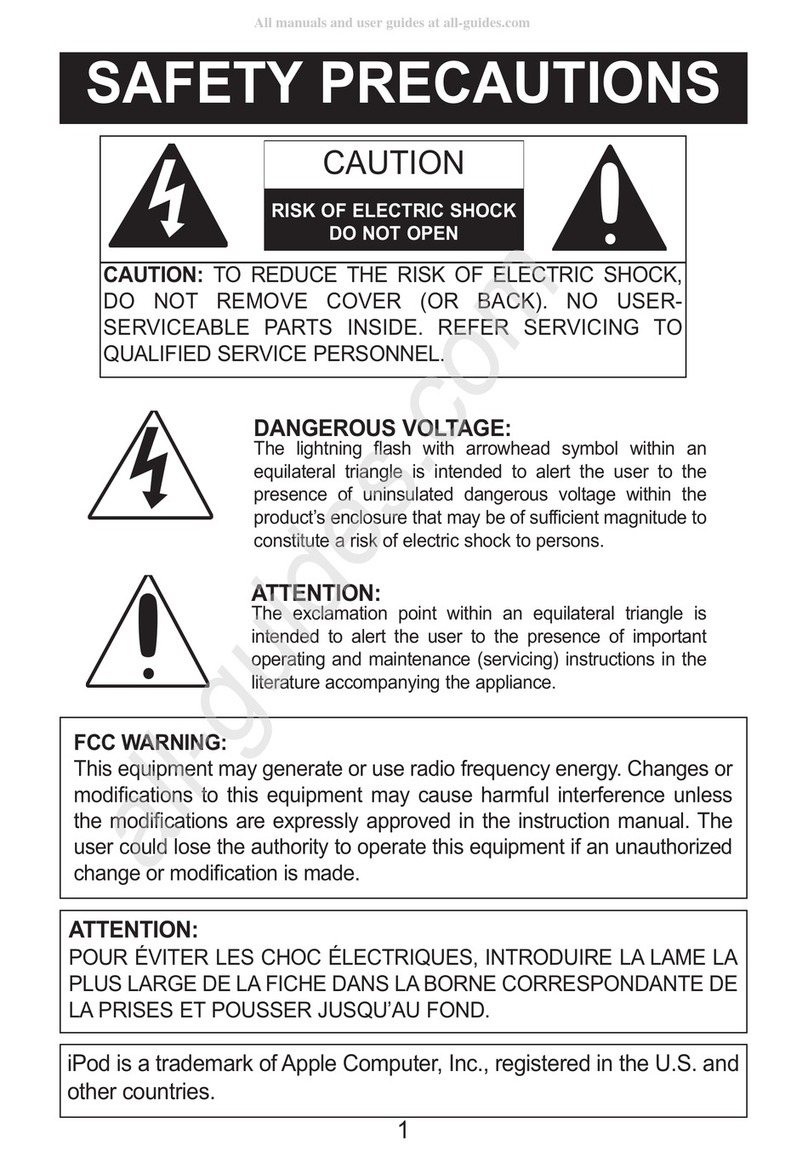
Warning:Toreducetheriskofelectric
shock,donotremovecover(orback).
Nouser-serviceablepartsinside.Refer
servicingtoqualiedservicepersonnel.
ATTENTION
RISQUE D' ÉLECTROCUTION
NE PAS OUVRIR
CAUTION
RISK OF ELECTRIC SHOCK
DO NOT OPEN
Theexclamationpointwithinan
equilateraltriangleisintendedtoalert
theusertothepresenceofimportant
operatingandmaintenance(servicing)
instructionsintheliteratureaccompanying
theappliance.
Thissymbolindicatesthatthisproduct
incorporatesdoubleinsulationbetween
hazardousmainsvoltageanduser
accessibleparts.
Thelightningashwitharrowhead
symbol,withinanequilateraltriangle,is
intendedtoalerttheusertothepresence
ofun-insulated“dangerousvoltage”
withintheproduct’senclosurethatmaybe
ofsufcientmagnitudetoconstitutearisk
ofelectricshocktopersons.
WARNING:Thisproductcanexpose
youtochemicalsincludinglead,which
isknowntotheStateofCaliforniato
causecancerandbirthdefectsorother
reproductiveharm.Formoreinformation
gotowww.P65Warnings.ca.gov.This
productmeetsandcomplieswithrequired
federalproductguidelines.

4
Table of Contents
Safety Instructions & Warnings . . . . . . . . . . . . . . . . . . . . . . . . . . . . . . . . . . . . . . . . . . . . . . . . . . . . 2
Table of Contents . . . . . . . . . . . . . . . . . . . . . . . . . . . . . . . . . . . . . . . . . . . . . . . . . . . . . . . . . . . . . . . 4
Setup. . . . . . . . . . . . . . . . . . . . . . . . . . . . . . . . . . . . . . . . . . . . . . . . . . . . . . . . . . . . . . . . . . . . . . . . . . 5
Features & Specications
Power
Remote Battery
Includes
Orientation . . . . . . . . . . . . . . . . . . . . . . . . . . . . . . . . . . . . . . . . . . . . . . . . . . . . . . . . . . . . . . . . . . . . . 6
Front View
Rear View
Speaker Inputs Detail
Speaker Controls (Right Side)
Remote . . . . . . . . . . . . . . . . . . . . . . . . . . . . . . . . . . . . . . . . . . . . . . . . . . . . . . . . . . . . . . . . . . . . . . . . 8
Bluetooth Wireless . . . . . . . . . . . . . . . . . . . . . . . . . . . . . . . . . . . . . . . . . . . . . . . . . . . . . . . . . . . . . . 9
Pairing a Bluetooth Device for the First Time
Playing Audio Wirelessly
Audio Inputs. . . . . . . . . . . . . . . . . . . . . . . . . . . . . . . . . . . . . . . . . . . . . . . . . . . . . . . . . . . . . . . . . . . 10
Optical Input
Stereo RCA Inputs (Aux In)
Line In
Optical Input - Detail
Stereo RCA Inputs (Aux In) - Detail
Line In
Line In - Detail
Company Information . . . . . . . . . . . . . . . . . . . . . . . . . . . . . . . . . . . . . . . . . . . . . . . . . . . . . . . . . . . 12
Contact Information
Warranty
International Support

5
Features & Specications
• 32" length
• Supports Bluetooth
• Wireless range: 60 ft.
• 2 channel stereo sound
• Digital volume control
• Full-function remote
• Optical digital audio input
• Line in (3.5mm audio input)
• RCA stereo audio inputs (aux in)
AUX IN RL
OPTICAL IN
DC IN
OPEN
Plug the small end of the power cord into the DC Input on the back of the speaker, and the large plug into a
standard wall outlet.
Setup
Includes
• Remote control with 1 CR2025 battery
• Optical digital audio cable
• AC/DC power adapter
• Wall-mount hardware and instructions
Remote control: requires 1 CR2025 button cell type battery (included).
Power
Remote Battery

6
Rear View
Front View
Orientation
Speaker Inputs
Wall Mount Pegs
AUXIN RL
OPTICAL IN
DC IN
STATUS INDICATOR
Power Off Red Light
Optical Mode Amber Light
RCA/Aux In Mode White Light
Line In Mode Green Light
Bluetooth Pairing Flashing Blue Light
Bluetooth Connected Blue Light
Remote Receiver
Function/Source Indicators: Power | Bluetooth | Line In | Optical | RCA | Aux In

7
AUX IN RL
OPTICAL IN
DC IN
Speaker Controls (Right Side)
Speaker Inputs Detail
Stereo RCA Audio Inputs (AUX IN)
Optical Input
DC Power Input
LINE IN
SOURCE
PAIR
VOL +
VOL –
Source/Power
Press to power the unit ON.
Press and hold to power
the unit OFF.
Press to switch between
Optical, RCA/Aux In, Line In,
and Bluetooth modes.
Volume +/-
Press to adjust volume
up or down.
Pair
Press to enter pairing mode
manually.
Line In
Connect the soundbar to an
audio device using a 3.5mm
audio cable.

8
Remote
Power
Press to turn
the unit on or off.
Mute
Press to mute
the volume.
Press to switch
to Bluetooth Mode.
Line In
Press to switch
to Line In mode.
Optical
Press to switch
to Optical mode.
AUX
Press to switch
to RCA/Aux mode.
Music
Press to switch to
the EQ optimized
for music. Press and
hold for 5 seconds to
turn voice prompts
ON OFF.
Movie
Press to switch to
the EQ optimized
for movie sound.
Dialog
Press to switch to
the EQ optimized
for dialog.
Treble
Press to adjust the
treble up or down.
Bass
Press to adjust the
bass up or down
Volume
Press to adjust
the volume.
Skip Back/Fwd
In Bluetooth mode,
press to skip the
selected track.
Play/Pause
In Bluetooth mode,
press to play or
pause the selected
track. Press and hold
to enter pairing
mode manually.

9
Pairing a Bluetooth Device for the First Time
1. When first powered on the sound bar defaults to Bluetooth mode. A voice will say, "Bluetooth", and the LED
indicator will slowly flash blue. When pairing, remain within 3 feet of the Bluetooth device.
2. Using the controls on your Bluetooth device, select MTB061 in the Bluetooth Settings to pair. If need be, refer to
the user's manual for your specific device for more information.
3. When successfully paired, a voice will announce, "Bluetooth is connected", and the LED indicator will turn solid
blue. Audio from the connected Bluetooth device will now be heard through the speaker.
4. Use the controls on the connected Bluetooth device to select and play audio. Use the speaker controls or the
connected Bluetooth device to play, pause, and adjust the volume level.
5. After initial pairing, whenever the sound bar is powered on, the sound bar will automatically connect to the last
Bluetooth device used. Note: If your device should become unpaired or you find it is unable to connect, press
& hold the Pair button on remote or press the Pair button on the soundbar to enter pairing mode. A voice will
announce, "Bluetooth is connecting", and you can connect to the speaker manually.
Playing Audio Wirelessly
1. After pairing to a Bluetooth device, use the controls on the connected Bluetooth Device to select a track.
2. Play, pause or skip a selected track using the controls on the connected Bluetooth Device or the
soundbar's remote.
3. Audio played through the connected Bluetooth device will now be heard through the speakers.
Bluetooth Wireless

10
Audio Inputs
Optical Input
You will need: An audio source with an Optical Audio Output and a Digital Optical Audio Cable (included). Please
remove the protective plastic cap over the end of the optical cable before attempting to connect it.
1. Connect the Digital Optical Audio Cable (included) to the optical output on the audio source and to the
Optical Input on the speaker bar.
2. Press the Power button to power the unit on.
3. Press the Source button repeatedly to switch to SPDIF Mode, indicated by a amber light.
4. Using the native controls on your connected device, make sure the audio settings are set to PCM or Optical
Audio and are turned On.
5. Audio from the connected audio source will now be played through the speakers.
Important tips for optical audio:
Use the correct toslink cable and make sure that it is firmly seated in both source and sound bar sockets.
Optical output is activated on the source (they should see a red light emitting from the toslink socket).
It may be labeled SPDIF in the setting menu of the source.
The optical output is set to output PCM and not Dolby Digital.
Stereo RCA Inputs (Aux In)
When connecting two products using an RCA cable (not included), match the colored ports to their corresponding plugs.
1. Connect the RCA cables (not included) to the RCA Stereo Inputs located on the back of the unit, and to the audio
outputs on a television or other audio source.
2. Press the Power button to power on the unit.
3. Press the Source button to select Aux In, indicated by a white light.
4. Audio played through the television will now be heard through the speakers.
Line In
3.5 mm audio input cable not included.
1. Plug one end of a 3.5 mm audio input cable into the Line In on the unit and plug the other end of the cable into
the audio output/headphone output on an MP3 Player or other audio source.
2. Press the Power button to power the unit on.
3. Press the Source button to select Line In, indicated by a green light.
4. Audio played through the connected device will now be heard through the speakers. Use the controls on the
connected device to play, pause, or skip selected tracks.

11
AUX IN RL
OPTICAL IN
DC IN
Please remove the protective plastic cap
over the end of the optical cable before
attempting to connect it.
Stereo RCA Inputs (Aux In) - Detail
Optical Input - Detail
Line In Line In - Detail
AUX IN RL
OPTICAL IN
DC IN
LINE IN
SOURCE
PAIR
VOL +
VOL –
LINE IN
SOURCE
PAIR
VOL +
VOL –

12
Copyright © 2021 Digital Products International (DPI, Inc.) All other trademarks appearing herein are the property
of their respective owners. Specifications are subject to change without notice.
International Support
TodownloadthisUser’sGuideinEnglish,Spanish,andFrench,ortogetanswerstofrequently
askedquestions,visitthesupportsectionat:www.memorex.com
ParadescargaresteManualdelUsuarioeninglés,españolyfrancés,oparaobtenerrespuestasa
preguntasfrecuentes,visitelaseccióndeapoyoen:www.memorex.com
Pourtéléchargerceguidedel’utilisateurenanglais,espagnoloufrançais,oupourobtenirdes
réponsesàdesquestionsfréquemmentposées,consultezlarubriqued’assistancesur:
www.memorex.com
Contact Information
Website:www.memorex.com
Email Support:[email protected]
Email Parts:[email protected]
Phone Support:1-888-999-4215
Warranty
ForWarrantyInformationandthemostup-to-
dateversionofthisUser’sGuide,goto:
www.memorex.com
Protect for Today
Sustain for Tomorrow
Made
Green
Customer Support
Table of contents
Other Memorex Speakers System manuals

Memorex
Memorex M12001 User manual

Memorex
Memorex MA9310 User manual

Memorex
Memorex MiHTS3202 - 32" Front Sound Speaker System User manual

Memorex
Memorex MiHTS3202 - 32" Front Sound Speaker System User manual

Memorex
Memorex MP3109 User manual

Memorex
Memorex MSS4001 - LuxLAB Customizable + Portable... User manual

Memorex
Memorex MiHTS3202 - 32" Front Sound Speaker System User manual

Memorex
Memorex Mi1006 - iListen Speaker Sys User manual

Memorex
Memorex Mi2031 User manual

Memorex
Memorex Mi2032-BLK Operation manual