manuals.online logo
Brands
  1. Home
  2. •
  3. Brands
  4. •
  5. Mercury
  6. •
  7. Heater
  8. •
  9. Mercury 450.018UK User manual

Mercury 450.018UK User manual

www.avsl.com 450.018UK User Manual
2KW Oil Filled, 9 Fin Radiator
Order ref: 450.018UK
User Manual
A handy oil filled radiator with 3 heat settings, 9 fins and overheat protection. The room thermostat is adjustable,
allowing for temperature to be easily controlled. Ideal for home and individual use when additional heat is required, the
floor castors allow for effortless movement.
Specification:
Power: max
2000W
No. of elements
9
Dimensions
435 x 135 x 580mm
Weight
7.2Kg
Features:
•3 Heat settings: 800W, 1200W and 2000W
•Adjustable room thermostat
•Overheat protection
•LED power indicator
•Floor castors for easy positioning around the home or office
•Cord storage handle
Controls diagram:
1. Thermostat knob
2. Power switch
3. Cord storage
4. Radiant fins
5. Castors
1
2
4
6
5
7
3
5
www.avsl.com 450.018UK User Manual
Fitting the castors:
NB: The heater comes shipped with castors removed and must not be used without them or in any other
position other than upright with the controls facing upwards.
1. Place the radiator body upside down on a flat, stable surface ensuring it cannot be scratched or damaged.
2. Unscrew the wing nuts from the U-shaped bolts provided and attach the U-shaped bolt to the U-facing flange
between the first and second fins (near the front cover).
3. To attach the castor mounting plate to the radiator body, insert the threaded ends of the U bolt into the centre
holes on the castor mounting plate. Ensure the mounting plate is the correct way up with the chamfered edges
facing upwards towards the radiator.
4. Screw the wing nuts back onto the U bolt and fasten properly making sure not to overtighten which can cause
damage to the radiator flange.
5. Unscrew the spherical nuts from the castors, align the shaft with the outer holes of the castor mounting plate and
screw on the spherical nut.
6. Repeat points 2, 3, 4 and 5 for mounting of the rear castors to the rear of the radiator, ensuring you fit them
between the end two fins.
Before first use:
1. Check if the electrical voltage of the main supply and the load of the socket match the rated voltage and power
marked on the rating label of the appliance.
2. Check that the socket and the plug are undamaged, and that you insert the plug correctly in the wall socket.
3. Stand the appliance on a stable and flat surface, do not stand on long pile carpets or rugs for risk of fire.
4. Be sure that there is enough space for the heater while operating, at least 50cm around the appliance. Never
position directly under a mains socket.
Using the appliance:
1. On first use turn the thermostat switch to the minimal value, at the same time turn the heat select switches to the
off position.
2. Plug in the appliance and turn the thermostat switch to the maximum position.
a) Turn the 800W heat select switch to the on position, the heater starts working at 800W.
b) Turn the 1200W heat select switch to the on position, the heater starts working at 1200W.
c) Turn both the 800W and 1200W heat select switches to the on position, the heater starts working at its
maximum heat output of 2000W.
3. To adjust the thermostat to the desired room temperature, first set the thermostat switch to the maximum position
and select your required heat setting…800W, 1200W or 2000W.
a) When you feel the room temperature is comfortable, turn the thermostat switch anti-clockwise slowly until the
appliance stops working. Then the thermostat switch will keep the room temperature at the current desired
temperature automatically.
b) You can also turn the thermostat switch anti-clockwise to the minimum position or turn the thermostat switch
clockwise to maximum position to adjust the room temperature lower or higher.
Safety warnings:
•For reasons of electrical safety this device must never be immersed in water, exposed to damp conditions or
excessive force. Never use this heater in a bathroom or in the immediate surroundings of a swimming pool, shower,
hot tub or where splashing water is present.
•Do not use this device if you find that it is damaged in any way.
•Do not attempt to repair this device or take apart under any circumstances, as this will invalidate your warranty.
•Never cover the heater or place anything on the radiant fins, as this may result in overheating or fire.
www.avsl.com 450.018UK User Manual
•For reasons of electrical safety this device is fitted with a thermal cutout. If the heater reaches its maximum
temperature it will stop operating, if this occurs turn the heat select switches to the off position, turn the thermostat
switch to the minimal position and remove the plug from the socket immediately. Check that there is sufficient safe
space around the unit and nothing covering its outlet grilles and then leave it for 10 minutes to cool down before
operating.
•Use only a damp cloth to clean the surface of appliance, avoid water going inside the appliance and dry the
appliance thoroughly before usage. Never attempt to clean the appliance while it is on or still hot.
•Do not use this heater with a programmer, timer or any other device that switches the heater on automatically, since
a fire risk exists if the heater is covered or positioned incorrectly.
•This appliance is not intended for use by persons (including children) with reduced physical, sensory or mental
capabilities, or lack of experience and knowledge unless they have been given supervision or instruction concerning
use of the appliance by a person responsible for their safety.
•Please ensure you have read these instructions thoroughly before first use.
This product is classed as Electrical or Electronic equipment and should not be disposed with other household or commercial waste at the end
of its useful life. The goods must be disposed of according to your local council guidelines.
Errors and omissions excepted.
Copyright© 2018. AVSL Group Ltd.

Other Mercury Heater manuals

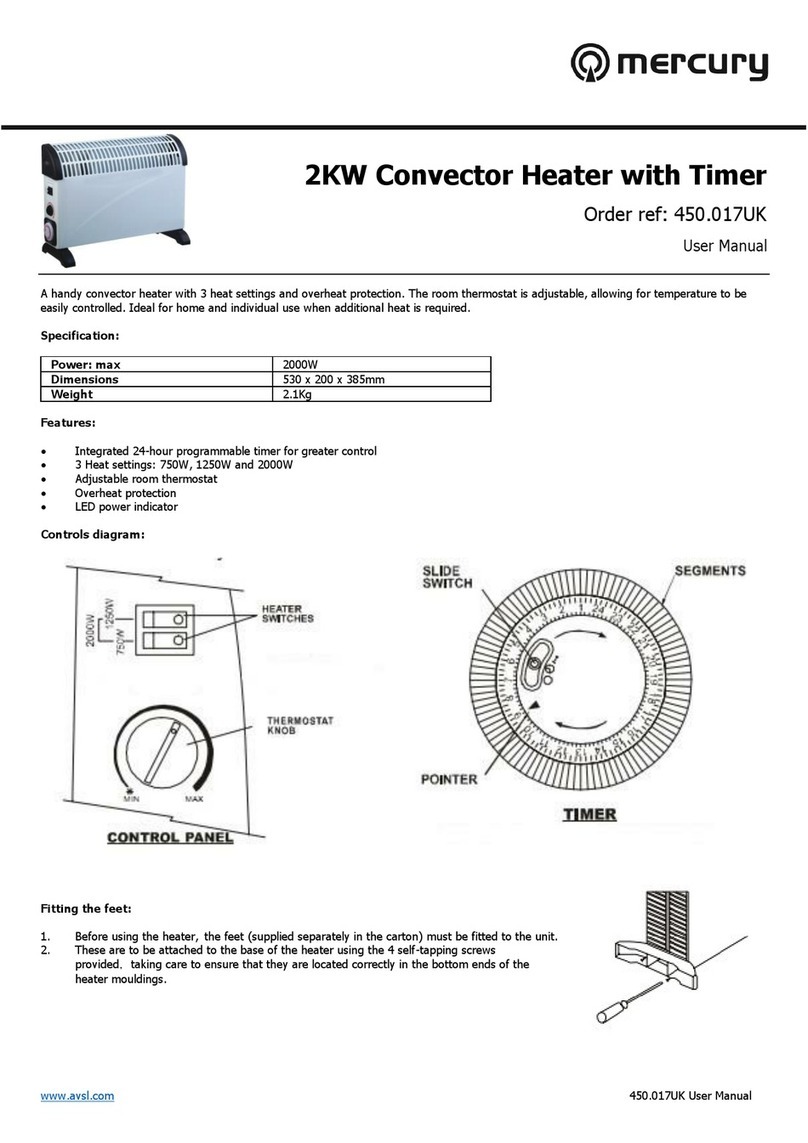
Mercury 450.017UK User manual

Mercury

Mercury 450.017UK User manual

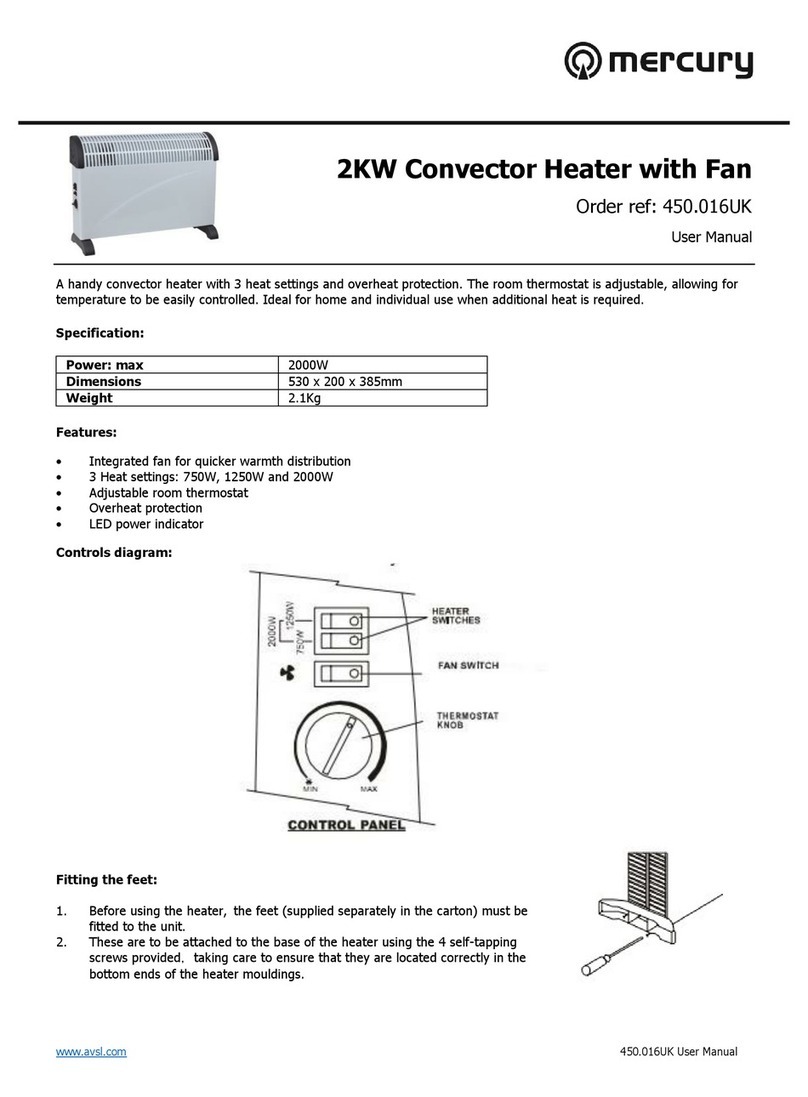
Mercury 450.016UK User manual

Mercury

Mercury 450.016UK User manual

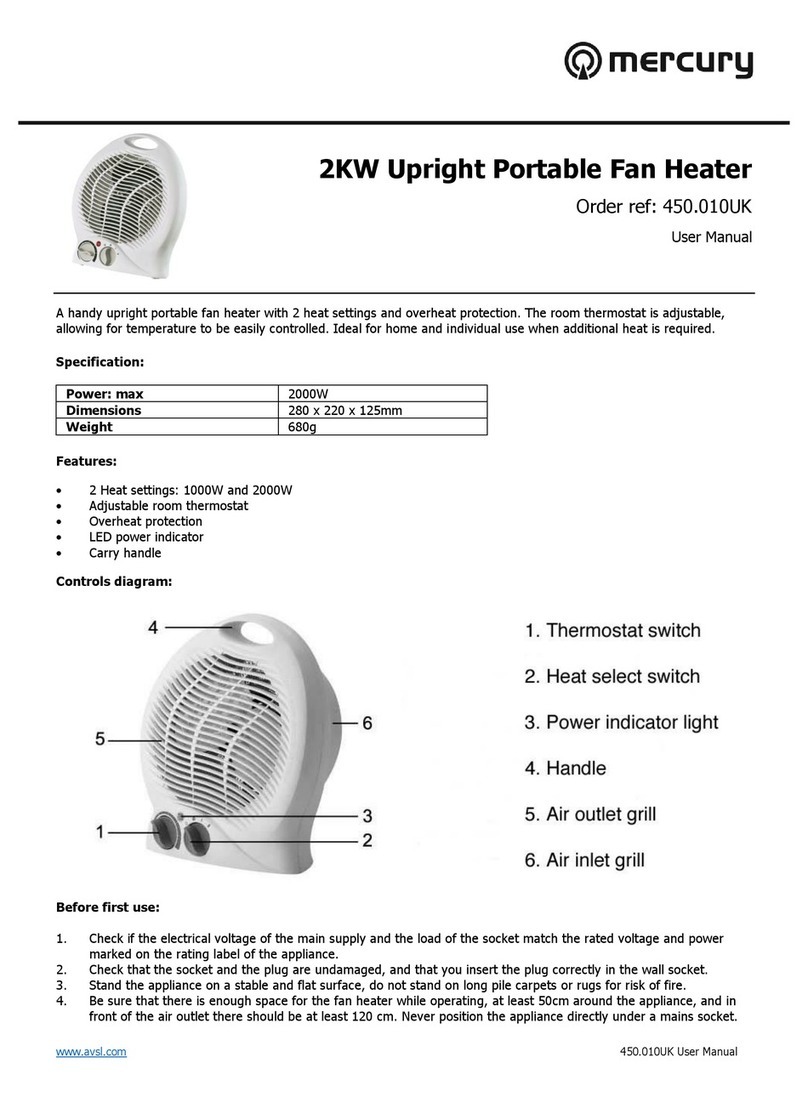
Mercury 450.010UK User manual

Mercury

Mercury 450.010UK User manual

Mercury 450.015UK User manual

Mercury

Mercury 450.015UK User manual

Popular Heater manuals by other brands

Anslut 013944 operating instructions

Anslut

Anslut 013944 operating instructions

Austria Email SH Series Installation and user manual

Austria Email

Austria Email SH Series Installation and user manual

Klarstein MOJAVE S 500 manual

Klarstein

Klarstein MOJAVE S 500 manual

Vantage Hearth TF-120 Installation, operation & service manual

Vantage Hearth

Vantage Hearth TF-120 Installation, operation & service manual

Jaga TEMPO Mounting instructions

Jaga

Jaga TEMPO Mounting instructions

Maestro MR 920 owner's manual

Maestro

Maestro MR 920 owner's manual

L.B. White Premier CS700 Owner's manual and instructions

L.B. White

L.B. White Premier CS700 Owner's manual and instructions

Claudgen RCT250 Installation, operation and maintenance instructions

Claudgen

Claudgen RCT250 Installation, operation and maintenance instructions

AM CHOICE RSL06-240-ARGB user manual

AM CHOICE

AM CHOICE RSL06-240-ARGB user manual

Chemin'Arte GH-R Series user manual

Chemin'Arte

Chemin'Arte GH-R Series user manual

Glen GL 7017 user guide

Glen

Glen GL 7017 user guide

Clarke CFI 1800 Operation & maintenance instructions

Clarke

Clarke CFI 1800 Operation & maintenance instructions

Honeywell HZ-940 Series manual

Honeywell

Honeywell HZ-940 Series manual

Zibro Kamin SRE 166 operating manual

Zibro

Zibro Kamin SRE 166 operating manual

Sonnenkonig VENTUS 250 user manual

Sonnenkonig

Sonnenkonig VENTUS 250 user manual

Quick 854D instruction manual

Quick

Quick 854D instruction manual

Mirrorstone MS-THC-12JB manual

Mirrorstone

Mirrorstone MS-THC-12JB manual

MAXPEEDINGRODS MXR-2Y manual

MAXPEEDINGRODS

MAXPEEDINGRODS MXR-2Y manual

manuals.online logo
manuals.online logoBrands
  • About & Mission
  • Contact us
  • Privacy Policy
  • Terms and Conditions

Copyright 2025 Manuals.Online. All Rights Reserved.