Merit EZ MAXX User manual
merit industries, inc. PM0235-02
OWNER’S MANUAL
FORTECHNICALASSISTANCE:
FORTECHNICALASSISTANCE:
FORTECHNICALASSISTANCE:
FORTECHNICALASSISTANCE:
FORTECHNICALASSISTANCE:
CONTACT YOUR LOCAL DISTRIBUTOR
Foralistofdistributors,visit theMerit Industries,Inc.website
www.meritind.com
www.meritind.com


QuickSetup .....................................p. 1
SitePreparartion .............................p. 2
GameDescription ...........................p. 2
CPU Section .............................p. 2
Coin Drawer Section .................p. 2
SidecarInstallation .........................p. 2
Removing an Endcap................p. 2
Attaching a Sidecar ..................p. 2
Replacing an Endcap ................p.2-3
GeneralCare
andMaintenance .............................p. 3
Screen Calibration.....................p. 3
General Circuit Board
Handling Information .................p. 3
Cleaning the Cabinet.................p. 3
Cleaning the Touchscreen
Monitor ......................................p. 3
Cleaning the Fans and
Vents .........................................p. 3
Megatouch™ EZ MAXX Software
OptionsSettings .............................p. 4
GameNameandScoreNeeded
for Initial Replay ..............................p. 5
Megatouch™EZ MAXX Game Operation
Game Setup ............................. p. 6
System Settings ....................... p.6-7
Game Menu ............................. p. 7
Coin-In Menu............................ p. 8
BooksScreen........................... p. 9
Megatouch™EZ MAXX Video Billboard
Video Billboard
Icon Functions .......................... p.10-11
Video Billboard Font
ControlsScreen ....................... p. 11
Video Billboard Clip Art
ControlsScreen ....................... p. 11
Megatouch™ EZ MAXX Hardware
Troubleshooting ............................. p.12-13
PartsListandIllustrations
Game Illustrations .................... p.14-15
Replacement Parts List............ p. 16
Table of Contents

COPYRIGHT © 1999 MERIT INDUSTRIES, INC.
UNPACKING & SETTING UP YOUR
MEGATOUCH™ EZ MAXX VIDEO GAME
1. Uponopening thecarton andremoving
the packing materials, lift the game out
of the box and remove it from the
plasticbag.Place thegameon asturdy,
levelsurface.
2. Locate and remove the vinyl pouch
containing the manual, warranty card
and keys (located on top of, or on the
back of, the cabinet). Put the manual,
warranty card and keys aside for future
use. Clean any adhesive residue that
may be left on the cabinet after
removing the vinyl pouch.
3. Plugthe power cord intoa grounded AC
outlet.
NOTE: INSIDE THE POUCH ARE TWO
KEYS: TWO SETS, EACH, UNLOCK THE
REARDOOR ANDTHE COINDRAWER.
4. Locatethepower switchonthe backof
the game and push the rocker switch
to the “ON” position.
5. Turnonthegameandwaitforthegame
to go through its boot-up sequence. At
thecompletionoftheboot-upsequence,
the game will display the main menu
screen.
CALIBRATING THE TOUCHSCREEN
1. Presstheblackcalibratebuttonlocated
ontheconnector boardinthe CPUsec-
tion of the unit (See Figures 11 and 12
on page 15 of the manual).
2. With your index finger, touch the
centerof the first circlethat appears on
the screen. NOTE: YOU MUST HOLD
YOURFINGERONTHECIRCLEFOR
APPROXIMATELY 2 SECONDS FOR
THE CALIBRATION TO BE
RECOGNIZED. Once touched a
second circle will appear on the screen.
3. With your index finger, touch the
center of the second circle that appears
onthescreen.
4. Once the second circle is touched, a
crosshairwill appearonthescreen.To
test the calibration of the screen, touch
thecrosshair with yourfinger andslowly
dragyourfingeraroundthescreen.The
crosshairshould follow yourmovement.
Touch the EXIT TEST icon.
ADJUSTING THE VOLUME AND MONITOR
CONTROLS
NOTE: THE VOLUME AND MONITOR
CONTROLS ARE PRESET AT THE
FACTORYAND, THEREFORE, MAYNOT
NEED TO BE ADJUSTED.
1. Thevolumecontrolisaccessedthrough
thesoftware;to accessthevolumecon-
trol, press the SETUP button located
ontheconnector boardinthe CPUsec-
tion of the game, then touch the
SYSTEM SETTINGS icon at the Setup
Screen, then touch the VOLUME
CONTROL icon.
2. Adjust the Monitor Controls, mounted
to the back of the LCD screen in the
CPU section of the game, as neces-
saryto achievethe desiredpicture.
MEGATOUCH™ EZ MAXX
QUICKSETUP
1 MEGATOUCH™ EZ MAXX OWNER’S MANUAL PM0235-02

COPYRIGHT © 1999 MERIT INDUSTRIES, INC.
Site Preparation
•Plug the game into a grounded
electrical outlet.
•Plug the game into a separate circuit, if
at all possible. If a separate circuit is
not available, care should be taken to
provide a clean and constant voltage.
•Place the game on a flat, level and
stablesurface.
•Place the game in a location that does
notinterfere withits properventilation.
•Make sure that all fans are operating
correctly and that airflow is
unobstructed. If any fans are not
operating, it is important that they be
replaced.
•Make sure nothing is placed on top of
thecabinet or nextto thefan vents that
wouldinhibit theflow ofair.
Game Description
The basecountertop model has 2key-locked
compartments: the rear door section and
the coin drawer section. Each individual
sidecarhasitsownkey-lockedcompartment.
CPUSection
TheCPU section is accessiblefrom the rear
of the unit in the countertop. The CPU
section houses the CRT, the monitor
controls,theCPU and I/Oboards,the power
supply,themain harness,coinmeter andthe
connector board. The Dallas key is located
on the I/O board in the countertop model.
Coin Drawer Section
The coindrawer sectionis accessible from
therearof theunit.This sectioniskey-locked
for security purposes. A sturdy metal box
located within this section holds all coins
deposited into the machine.
Sidecar Installation
Youcan install anumber of sidecaroptions
onto your EZ MAXX video game. To install
asidecar,youwillneedtoremoveanendcap,
attachthedesiredsidecarandthenre-attach
theendcap.
PM0235-02 MEGATOUCH™ EZ MAXX OWNER’S MANUAL 2
Removing an Endcap
To remove an endcap from the game:
1. Unlock and open the rear door of the
game (or the rear door of sidecar, if
already attached) to gain access to the
endcaplatches.
2. Pressfirmlyagainsttheendcap,pull the
bottomendcap latch out ofits notch and
push upward into the upper notch to
unlock (See Figure 10 on page 14).
3. Repeat the above procedure for the top
latch of the endcap (See Figure 10 on
page14).
4. Remove the endcap from the game.
Attaching aSidecar
Afteryouhaveremovedtheendcap,youcan
now attach a sidecar.
To attach a sidecar:
1. Attach the sidecar spacer to the side
of the game by lining up the holes on
the spacer with the studs on the game
chassis (See Figure 9 on page 14).
2. Next, attach the sidecar to the side of
the game by lining up the holes on the
sidecar with the studs on the game
chassis (See Figure 9 on page 14).
NOTE: BOTHTHESIDECARSPACER
ANDTHESIDECARITSELFSHOULD
BEFLUSH AGAINSTTHE FRONTOF
THEGAME.
3. UsingFigure 11asa reference,connect
the sidecar connector harness to the
connector board in the CPU section of
the game.
Replacing an Endcap
Onceyouhaveinstalledthesidecar,youwill
need to re-attach the endcap to the game.
To replace the endcap:
1. unlockand open the reardoor of game
(or the rear door of sidecar, if already
attached).
2. Line up the studs on the endcap with

COPYRIGHT © 1999 MERIT INDUSTRIES, INC.
the holes on the sidecar (See Figure 9
on page 14). NOTE: MAKE SURE
THAT THE ENDCAP IS FLUSH
AGAINSTTHE FRONTOF THEGAME
BEFORELOCKINGINTOPLACE.
2. Pressfirmlyagainsttheendcap,pull the
bottomendcaplatchoutofthetopnotch
andpushdownwardintothelowernotch
to lock the sidecar into place (See
Figure 10 on page 14).
3. Repeat the above procedure for the top
latch of the endcap.
4. Close and lock the rear door of the
game or sidecar.
General Care and Maintenance
NOTE: THIS GAME SHOULD ONLY BE
SERVICED BY QUALIFIED SERVICE
PERSONNEL.
CAUTION: THERE ARE HIGH VOLTAGE
PARTS IN THIS GAME. BE CAREFUL
WHEN SERVICING THE INSIDE OF THE
GAME. GAME SHOULD ALWAYS BE
UNPLUGGED BEFORE SERVICING.
ScreenCalibration
The machine must be in the idle mode or
game select mode to calibrate the
touchscreen.
•Locatetheblack calibrate buttononthe
connector board and press it to enter
the screen calibration mode.
•Touch the center of the first circle that
appears on the screen. Once you
release your finger, a second circle will
appear on the screen.
NOTE: YOU MUST HOLD YOUR FINGER
ON THE CIRCLE FOR APPROXIMATELY 2
SECONDS FOR THE CALIBRATION TO BE
RECOGNIZED.
•Touch the center of the second circle
thatappears on thescreen.
•Once the second circle is touched, a
crosshair willappearonthescreen.To
testthecalibrationof thescreen,touch
thecrosshair with yourfinger andslowly
dragyourfingeraroundthescreen.The
crosshairshould follow yourmovement.
•Touch the “EXIT TEST” icon.
General Circuit Board Handling
Information
Before handling any boards, observe the
followingprocedures:
•Prevent Electro-Static Discharge by:
1. Storing the boards in the anti-
staticbags inwhich theyare
shipped.
2. Removing any static charge
fromyourbodybeforehandling
theboards.
3. Usingagroundstrapwhenhan-
dling the boards.
•When plugging in connectors to the
board, make sure the connector is
inserted straight onto the header and
that the connector covers all header
pins.
•Do not connect any peripheral device
to the board, if the power is still
connected to the peripheral or if power
is already applied to the board.
Cleaning the Cabinet
•The cabinet should be cleaned with a
damp cloth and mild detergent.
CleaningtheTouchscreenMonitor
•The touchscreen glass should be
cleaned with a damp cloth and
isoprophylal alcohol or a non-ammonia
cleanser. NOTE: DO NOT USE ANY
ABRASIVE OR VINEGAR-BASED
CLEANSERS, AS THEY WILL DAM-
AGE THE TOUCHSCREEN.
CleaningtheFansandVents
•The fans and vents should be cleaned
of any dust and grime on a regular
basis to ensure proper ventilation of the
game.
NOTE: DO NOT USE ANY ABRASIVE
SOLVENTS, ACID OR VINEGAR-BASED
CLEANSERS WHEN CLEANING YOUR GAME.
OVER TIME, SUCH CLEANSERS COULD HARM
THE TOUCHSCREEN AND ERASE THE
DECALS. BE CAREFUL NOT TO USE COMMER-
CIAL CLEANERS CONTAINING ANY OF THESE
SUBSTANCES.
3 MEGATOUCH™ EZ MAXX OWNER’S MANUAL PM0235-02
COPYRIGHT © 1999 MERIT INDUSTRIES, INC.
Megatouch™ EZ MAXX
Software Instructions
OptionsSettings
Allcurrent operator-adjustable functionsare
controlledby accessingthe “OPTIONS”icon
onthe Megatouch™ EZ MAXX Setupscreen
(See Figure 1 on page 6).
Options Settings Notes
1Touching “TIMER” for the “ALLOW SEX?” setting
allows the operator to set times during which adult-
oriented categories and games are available to the
players. Using the arrows, set the time at which the adult-
oriented games and categories will be turned on and
set the time at which they’ll be turned off. The time is set
using 24 hour, “military” time. The factory default
settings are set to turn on at 22:00 (10:00 PM) and to
turn off at 6:00 (6:00 AM).
2When “ALLOW NUDITY” is set to “YES,” a small box
will appear to the right. Select from “R” or “X” rated
nudity (“X-rated” = full frontal nudity).
3These settings are only available if “ALLOW SEX?” is
set to “TIMER” or “YES.”
4“SET” is only shown if “Player Selectable Language” is
set to “YES.” When enabled, the operator can select
which of the available languages will be displayed for
the user to select. To enable the languages: at the
Language Select screen, touch the desired language
on the left, then select an open field on the right.
5When “AUTO CLEAR HIGH SCORES” is set to “YES,”
a small box will appear to the right. Touching this box
allows the time period to be set from 1 to 4 weeks (from
the time the player name is entered). The factory
default setting is two (2) weeks.
6These settings are only available if “6 STARS
ENABLED?” is set to “YES.”
7This setting is only available if “SHOW DECK CARDS”
is set to “YES.”
8Setting this to “YES” enables a bonus replay for all games,
except Trivia Whiz, Pile On, Strip Poker, Double
Solitaire and Mystery Phraze. The Game Name and
Score Needed for Initial Replay table on the next page
shows the scores needed to achieve a bonus replay
(after a replay has been earned, the next player must
beat the last replay score to earn another replay).
9Easy Mode reduces the number of points needed to
reach the bonus round for Hoop Jones (125/150 points),
Eleven-Up (68,000/80,000 points), Tri-Towers (64,000/
80,000 points), Royal Flash (180,000/200,000 points)
and Quik Match (250,000/280,000 points).
NOTE: THE OPTIONS SETTINGS DIS-
PLAYED ON YOUR GAME WILL DEPEND
ON WHICH GAMES ARE SELECTED AS
ACTIVEINTHEGAMEMENUSCREEN,AS
WELLASTHEPROGRAMVERSIONUSED
IN YOUR GAME. OPTIONS SETTINGS
CONTROLSFOR INACTIVE GAMESNOT
INCLUDEDINYOURPROGRAMWILLNOT
BE DISPLAYED.
PM0235-02 MEGATOUCH™ EZ MAXX OWNER’S MANUAL 4
TIMER
1
YES NO ALLOWSEX?
YES NO ALLOWNUDITY? 2/3
YES NO ALLOW SEX DURING ATTRACT
YES NO MYSTERYPHRASE SEXCATERGORY? 3
YES NO MATCH’EM UP BABES AND HUNKS? 3
YES NO MEMOREE BABES AND HUNKS? 3
YES NO TRIVIA/POWERQUIZSEXCATERGORY? 3
YES NO PIX MIX BABES AND HUNKS?3
YES NO PHOTO HUNT EROTIC CATERGORY? 3
SET4YES NO PLAYER SELECTABLE LANGUAGE
OTHER ENG DEFAULTLANGUAGE?
YES NO LANGUAGE BUTTONS HAVE FLAGS
YES NO SOLITAIRE FREE GAME?
YES NO TRIVIA/PWRQUIZSHOWCORRECT
ANSWER?
4/300K 5/1M TRIVIA ROUND/BONUS?
YES NO POWER SOLITAIRE SPLIT COLUMN
MOVE?
YES NO POWER SOLITAIRE FREE GAME?
$/¢ CREDS PRICE DISPLAY?
YES NO STRIPPOKER MOANSOUNDS? 3
ENG GER CHECKERZRULES?
NO YES AUTO CLEAR HIGH SCORES5
NO YES 6 STARS ENABLED?
YES NO HI-SCORE ACCESS FROM 6 STARS? 6
YES NO VBB ACCESS FROM 6 STARS? 6
YES NO VOLUME CONTROL ACCESS FROM 6
STARS6
YES NO CALIBRATION ACCESS FROM 6 STARS 6
NO YES SHOWDECKCARDS
SHORT LONG FAN TIME? 7
YES NO ALLOWGAMECONTINUATION?
YES NO ALLOW BONUS REPLAY? 8
NO YES FREE PLAY ENABLED
NO YES EASY MODE ENABLED 9
NO YES POWER QUIZ CATERGORY SAME FOR
ALL
YES NO POWER QUIZ CONSOLATION QUESTION
NO YES CONTINUOUS BONUS ROUND?
YES NO GOLF HAS WOMEN?
3/G 5/G PHOTOHUNTHINTS?
YES NO TRI TOWERS FACE-UP PLAYER
SELECTABLE?

COPYRIGHT © 1999 MERIT INDUSTRIES, INC.
Game Name and Score Needed
for Initial Replay
5 MEGATOUCH™ EZ MAXX OWNER’S MANUAL PM0235-02
Great Solitaire 45,000
Run 21 250,000
Royal Flush 300,000
Match’Em Up 200,000
Memoree 300,000
Tri-Towers 125,000
4-Play 1,500,000
Conquest 30,000
11-Up 125,000
Hoop Jones 125
Zip 21 200,000
Checkerz 28,000
Quik Match 400,000
Power Solitaire 55,000
Pix Mix 350,000
Photo Hunt 400,000
Quikcell 100,000
Tai Play 240,000
Puck Shot 3000
Take 2 110,000
Mystery Phrase 325,000
Power Quiz NO REPLAY
Pile On NO REPLAY
Strip Poker NO REPLAY
Double Solitaire NO REPLAY
Trivia Whiz NO REPLAY
MegaLink Trivia NO REPLAY
Tennis Ace NO REPLAY
Chug 21 250,000
Symbol Tri-Towers 125,000
Symbol 11-Up 125,000
Symbol Take 2 110,000
Hooter NO REPLAY
Trip Flip NO REPLAY
3 Blind Mice NO REPLAY
Route 66 45,000
Super Route 66 55,000
Fast Lane 100,000
Championship Golf NO REPLAY
Monster Madness NO REPLAY
Lookout 400,000
Snapshot NO REPLAY
Air Shot
QB Zone NO REPLAY
Wild 8’s
Pharaoh’s 9
Wild Apes
GO-O-O-AL

COPYRIGHT © 1999 MERIT INDUSTRIES, INC.
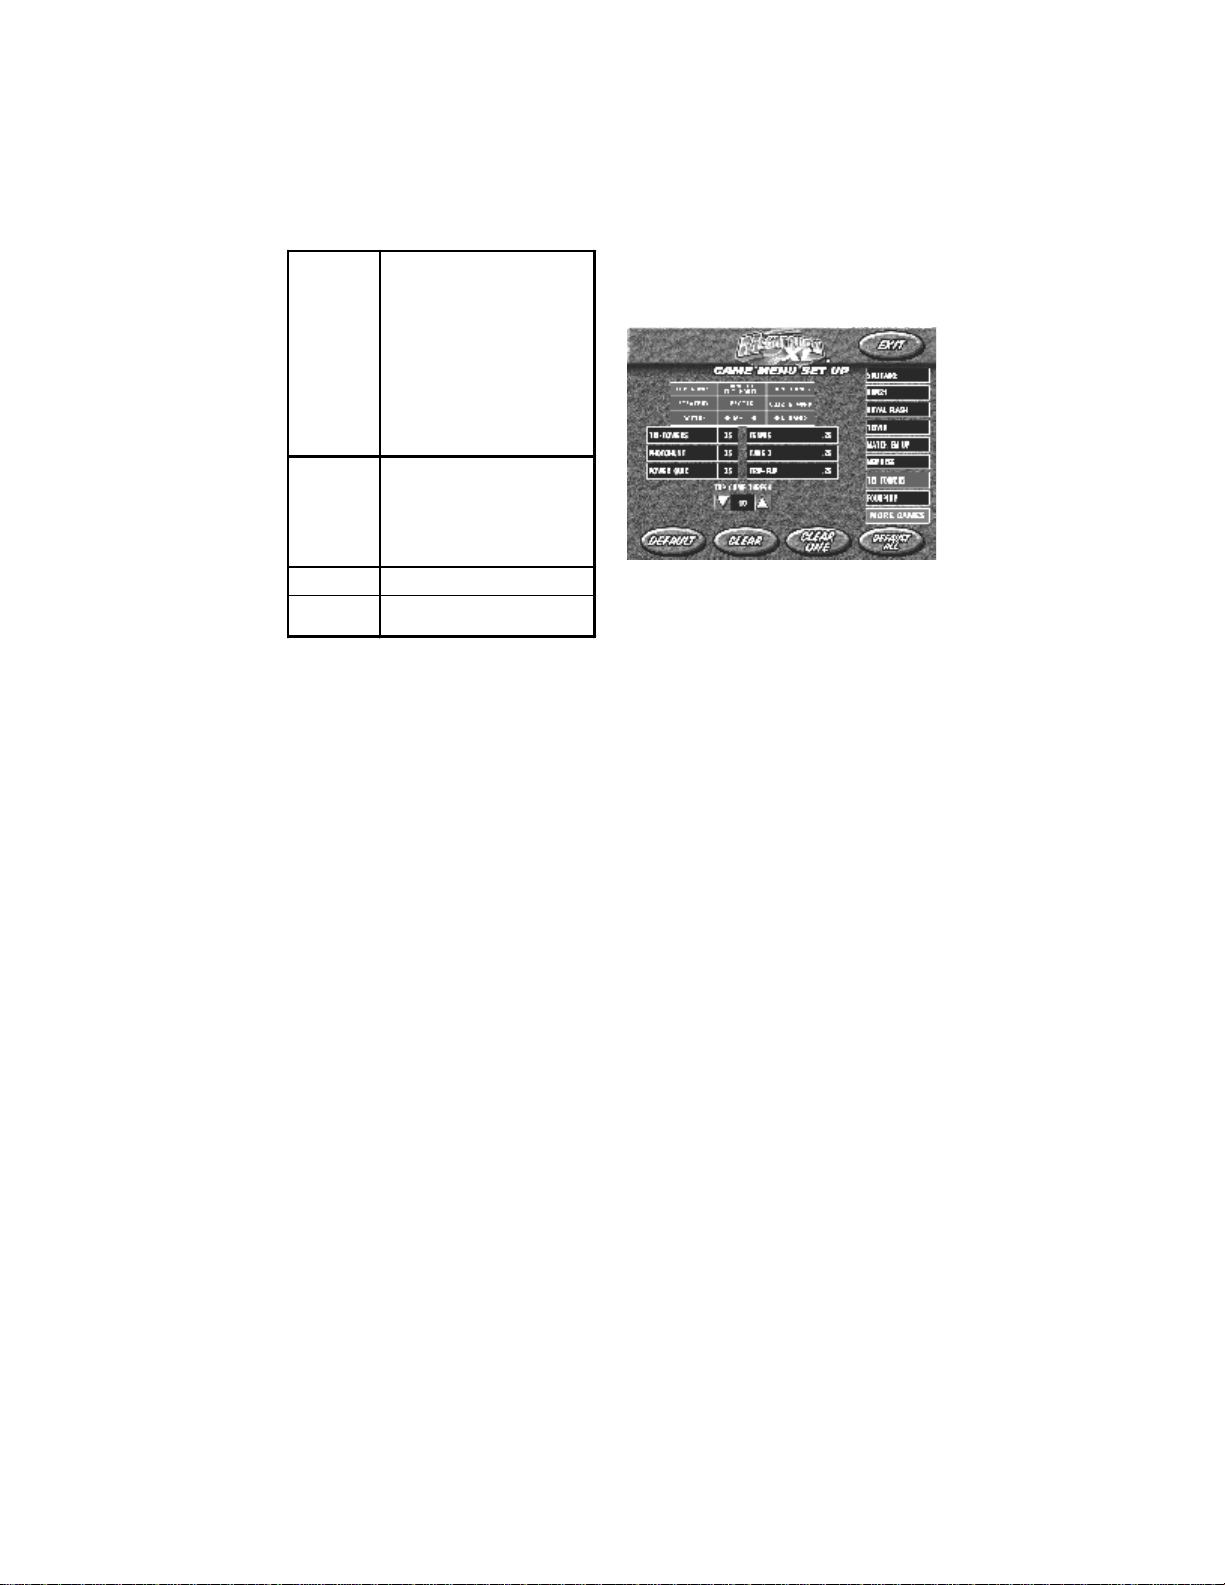
Figure 1 - Megatouch™Game
Setup Screen
To Enter This Screen, Touch
“System Settings” At The Setup
Screen
Figure 2 – System Settings Screen
System Settings
The System Settings controls allow the
operator to access the Set Time, Set Serial
Game Number, PC Dump, Set 6 Star PIN,
Security Setup, Volume Control, Video
Billboard and Mega-Link Test screens.
Coin-In Menu Enters the coin/credit setup screen.
Game Menu Enters the game menu selection
screen.
Display
Books Enters the bookkeeping statistics
screen.
Options
Displays the options settings screen.
The options settings displayed on this
page will vary depending on which
games are active (see page 4 for a list
of options settings.)
Video Test Displays video test screens. Touch the
screen to cycle through.
Touchscreen
Test Enters the touchscreen test for
checking touchscreen calibration.
High-Scores
Enters the clear high scores screen.
Touch game to select, touch “CLEAR
CURRENT” to clear the high scores for
that game. Touch “CLEAR ALL” to
clear all high scores.
Clear Credits Erases all credits on the machine.
Free Credits Adds credits without using coin switch.
Free credits are listed separately in the
books screen.
System
Settings
Enters the System Settings screen
which gives the operator access to the
Set Time, Set Game Serial Number,
PC Dump, Set 6 Star PIN, Security
Setup, Volume Control, Video Billboard
and MegaLink Test screens. See
the System Settings screen for
explanations of each option.
Exit Returns the game to the attract mode.
Set Time
Brings up the Set System Date and
Time screen. Time is shown in 24-
hour, "military" time (e.g. 5:00pm =
17:00). Use the up and down arrows
to set the time and/or the date.
Set Game
Serial Number Brings up the Set Game Serial
Number screen. Enter the game’s
serial number using the keypad.
PC Dump
PC Dump allows the books
information to be downloaded to a
PC. Software for the PC is required
for it to operate. Contact Merit
Customer Product Support and
Services for information.
Set 6 Star
PIN*
Brings up the Set 6 Star PIN screen
via the info button in the main menu
screen. Touch the stars in the
programmed order to give access to
the Video Billboard, High Scores,
Volume Control and Calibration
screens (to allow access to any of
these screens through 6 Stars, the
options settings must be set to “YES”
for each screen; see the options
settings list on page 4.)
PM0235-02 MEGATOUCH™ EZ MAXX OWNER’S MANUAL 6
To Enter This Screen, Touch The
“Setup” Button In The Coinbox
Section or CPU Section
COPYRIGHT © 1999 MERIT INDUSTRIES, INC.
*Six Stars Enabled
Thisfeature allows access tothe Clear High
Scores,Volume Control,Video Billboardand
Calibration,withouthavingtoremovethecoin
box. If the Six Stars Enabled dip switch is
setto “YES,” touching theinfo button in the
mainmenu will causesix numbered starsto
appearon the screen.Touching thesestars
in the programmed order will bring up a
screen with icons for the Video Billboard,
High Scores and Volume Control screens
(provided the appropriate options settings
havebeenset to“YES”).To setthesequence
in which the stars must be touched, go to
the“System Settings”screen,touchthe“Set
Six Star PIN” icon and set the sequence.
To Enter This Screen, Touch
“Game Menu” At The Setup
Screen
Figure 3 - Game Menu Screen
Security Setup
Brings up the Set Security PIN
screen. From this screen, the
operator can set the PIN number and
select which of the features (Coin-In
Menu, Game Menu, Display Books,
Options, High Scores, Free Credits
and Set 6 Star PIN) will be protected
by the PIN. To set the PIN, first touch
“SET” on the keypad. Then, enter
your 4-digit PIN using the keypad and
touch “ENTER.” The game will prompt
you to re-enter your PIN to confirm.
After confirming your PIN, touch the
icon for each of the features you wish
to protect with the PIN.
Volume
Control
Brings up the Volume Control screen.
Touch the volume control icon to
adjust the volume up or down. This
screen allows you to sample the
sound volume without exiting the
screen. The on-screen volume control
can also be accessed using “Six
Stars.”
Video
Billboard See page 10 for Video Billboard
operation instructions.
Mega Link
Test
Allows the operator to test the
connection between linked games. The game list and prices are programmed
using this screen. The top of the screen
shows the various game menu names. The
fields below show the game positions
available,with the price foreach game. The
list on the right shows all games available
forthat category. The lowerbuttons will clear
the selected item from the player’s game
menu(CLEAR 1), clearall ofthe games from
the player’s game menu (CLEAR), reset the
selected game menu to the default setting
(DEFAULT)and reset all ofthe game menus
to the default settings (DEFAULT ALL).
To program the player’s game lists, first
select the category in which you want the
game to appear, by touching that category’s
name at the top of the screen. Choose the
menupositionyou wantthegame tooccupy,
by touching that position. Then, touch the
desired game name, from the game list on
the right side of the screen. That game will
now appear in the menu (a game cannot
appear in a game list more than once).
Games currently in the displayed category
will appear shaded in the game list on the
right.To adjust the price, touch the price in
the game menu. Each touch will rotate the
price from 25¢ (1CR), to 50¢ (2CR), to 75¢
(3CR), to $1 (4CR) and back to 25¢ (1CR).
Touch “EXIT” when done.
7 MEGATOUCH™ EZ MAXX OWNER’S MANUAL PM0235-02
NOTE: TOP GAMES ALLOWS THE OPERATOR TO
ENTER UP TO 6 GAMES IN THAT CATEGORY. SET THE
TOP GAME THRESHOLD TO TELL THE GAME HOW
MANY PLAYS QUALIFIES A GAME FOR THE TOP GAMES
LIST. ONCE A GAME REACHES THAT NUMBER OF
PLAYS, IT WILL AUTOMATICALLY BE ADDED TO THE
TOP GAMES CATERGORY. THE DEFAULT THRESHOLD
IS “10.”

COPYRIGHT © 1999 MERIT INDUSTRIES, INC.
To Enter The Coin/Credit Setup Screen, Touch “Coin-In Menu” At The
Setup Screen
Gamecost canbe controlledtwoways: bychanging thenumber ofcredits requiredto playa
game or by changing the cost of a credit. The Coin-In Menu allows you to adjust the cost of
a credit, as well as providing a way to give players “bonus” credits for depositing a higher
amount of money.
When programming the Coin-In Menu, E1 is set for the lowest value coin, E2 for the next
highest value, etc. If all four coin inputs are not used, the unused inputs must be set “N/A.”
Adjust the coin/credit/meter pulse settings by touching the “plus” and “minus” signs on the
fieldyou want tochange.
Inthe aboveexample(UK currency),each gamecosts one(1) creditandthe costfor asingle
credit is 30p. This method is preferred if you want game cost to always be reflected as “1
credit.”
Inthe above example (UK curency),the cost of a creditis set to 10p andeach game costs 3
credits(for atotalof 30p).This methodallows gamecost tobeincreased bythe smallestunit
of currency used (e.g. increasing the cost of Solitaire to four (4) credits would increase the
game cost by 10p).
Inboth examples, notethat meterpulses are independentof credits andonly trackthe unit of
currency (10p in the examples). Players are given an incentive to deposit more money by
giving them “bonus” credits for depositing 50p or £1. Coins may be deposited in any
combinationof values and the gamewill automatically register thehighest number of credits
for the total amount of coins deposited. Once a game is played, any remaining fractional
credits are erased.
Generally, most countries have a factory default setting. This setting can be adjusted (as
describedabove), butwill return ifthe gamememory iscleared. Some programs,depending
on the key used, have a CURRENCY DEFAULT DISPLAY located to the left of the coin
inputs.It showsthecurrency valuefor eachofthe coininputs. Thisdisplay is usedas aguide
and is not used in any calculations. Touch the CURRENCY DEFAULT DISPLAY to hide/
show the display.
COIN VALUE COIN INPUT COINS =CREDITS &METER PULSES
10p 1E 3 1 3
20p 2E 3 2 6
50p 3E 1 2 player premium 25p/credit 5
1£ 4E 1 5 player premium 20p/credit 10
COIN VALUE COIN INPUT COINS =CREDITS &METER PULSES
10p 1E 1 1 1
20p 2E 1 2 2
50p 3E 161 bonus credit 5
1£ 4E 1 15 5 bonus credits 10
PM0235-02 MEGATOUCH™ EZ MAXX OWNER’S MANUAL 8

COPYRIGHT © 1999 MERIT INDUSTRIES, INC.
To Enter This Screen Touch “Display Books” At The Setup Screen
Figure 4 - Books Screen
Figure 5 - Books Screen w/ Time
Inset
The books screen displays the current and
lifetime credit totals for each game, as well
asthepercentageofcreditsplayedpergame
(the percentage for each game is the total
number of credits played on that game
dividedby the total numberof credits entered
into the machine).
Touching a game name will display the
currentand lifetimecredit totals,brokeninto
1 Player, 2 Player and Linked Games. It also
shows the “shortest,” “longest” and
“average” playing times for that game (only
“link-only” games, like Pile-On, are included
in time calculations; time calculations for
games that can be played as link or
amusement are only displayed for the
amusement version).
Touch CLEAR CURRENT to erase all cur-
rent book data.
NOTE: TOUCHING TRIVIA WHIZ OR
POWER QUIZ DISPLAYS TOTALS BY
CATERGORY.
9 MEGATOUCH™ EZ MAXX OWNER’S MANUAL PM0235-02
COPYRIGHT © 1999 MERIT INDUSTRIES, INC.
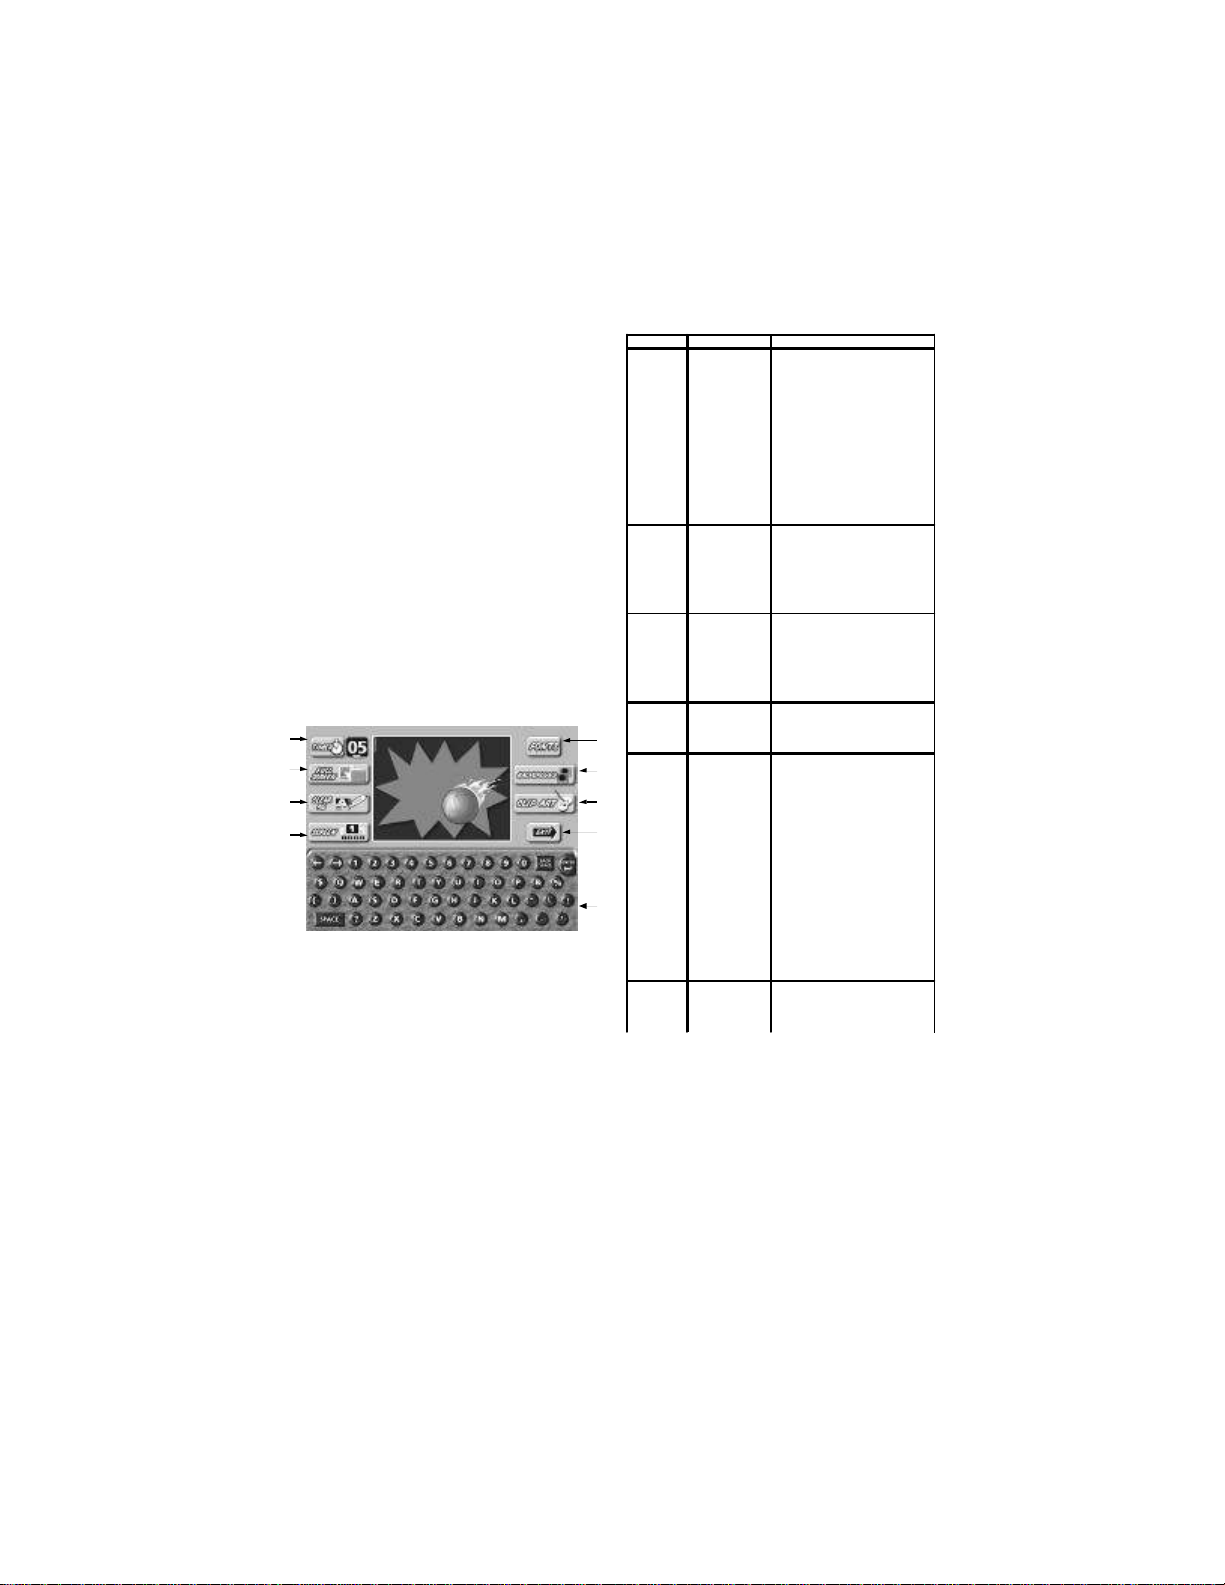
Figure 6 – Video Billboard Screen
with Keyboard
To access the Video Billboard, enter the
System Settings screen and touch the
VIDEO BILLBOARD icon to display the video
billboard keyboard screen.
Video Billboard Icon Functions:
Callout # Screen Icon Description
1Timer
Allows the user to set the
amount of time the given
screen is displayed during the
idle mode. The timer can be
set from 0 to 20 seconds, in 5
second increments. (Setting
the timer to zero (0) will
prevent the screen from being
displayed. This is helpful when
designing a screen that you do
not want to display
immediately, but do want to
store in the game's memory for
use at a later date.)
2Full Screen
Allows the user to view a full
screen preview of the
designed screen. While in "full
screen", graphics and text can
be repositioned by selecting
them and then touching the
new location.
3Clear Ad
Allows the user to erase the
entire design for the displayed
screen. This icon changes to
"DELETE" if any screen object
is selected (when an object is
selected, a box appears
around the object.)
4Screen X
Touching this icon toggles
through each of the video
billboard screens (where "X" is
the number of the screen.)
5Fonts
Touching this icon displays the
font formatting icons on the
bottom half of the screen.
These icons allow the user to
select from 4 styles of font, 3
font sizes and 8 colors. The
screen also has controls for
alignment: right, left and
centered. To format the font,
select the desired text and
then touch the font style, size,
color and/or alignment (if you
have more than one line of text
on the screen, you will need to
repeat this action for each line
of text.) Touching the
KEYBOARD icon will return
you to the keyboard screen.
6Background
This icon toggles the
background design through
each of the 20 preset
backgrounds.
PM0235-02 MEGATOUCH™ EZ MAXX OWNER’S MANUAL 10
Megatouch™ EZ MAXX Video
Billboard Operating Instructions
The Megatouch™ EZ MAXX Video
Billboardallows forsix, separateadvertising
screens. Two of the screens can only be
accessedusing “Six Stars”(and areintended
forusebythelocationowner),theotherfour
screens are accessed using the Video
Billboardicon located onthe SystemSettings
screen.
The Video Billboard provides several font
styles, sizes and colors, a choice of
backgroundcolorsanddesigns,aswellasa
variety of clip art. The basic Video Billboard
screen is shown below, followed by the
operating instructions. A maximum of 16
screen objects (a line of text or a piece of
clipart) can beplaced onany given screen.
1
2
3
48
5
6
7
9

COPYRIGHT © 1999 MERIT INDUSTRIES, INC.
Figure 7 - Video Billboard Screen
with Font Controls
Figure 8 – Video Billboard Screen
with Clip Art Controls
Callout # Screen Icon Description
7Clip Art
This icon displays the clip art
selection windows on the bottom
half of the screen. From here,
the user can select clip art to be
used on the displayed screen.
Use the scroll bar at the bottom
of the screen to move through
the clip art. The clip art size can
be adjusted by selecting the
piece of clip art and then
selcting "SMALL", "MEDIUM", or
"LARGE" at the bottom of the
screen (if you have more than
one piece of clip art on the
screen, you will need to repeat
this action for each piece of clip
art.) Once the clip art is
displayed on the screen,
touching the desired clip art and
sliding your finger to the location
where you want it placed can
move it. Touching the
KEYBOARD icon will return you
to the keyboard screen.
8Exit Exits the user to the System
Settings screen.
9Keyboard
The keyboard is used for
entering all text onto the
displayed screen. Once text is
displayed on the screen,
touching the text and sliding your
finger to the loaction whereyou
want the text can move it. The
cursor can be moved to a new
location by touching the desired
location.
Callout # Screen Icon Description of Function
10 Select Type Touch to change font type
(choose from 4 font styles.)
11 Select Size Touch to change font size
(choose from 3 size
options.)
12 Select Alignment Touch to set font alignment
(left, right or centered.)
13 Select Color Touch to change font color
(choose from 8 colors.)
14 Keyboard Displays the keyboard.
Callout # Screen Icon Description of Function
15 Clip Art Touch a clip art window to
select (choose from 33 pieces
of clip art.)
16 Select Size Touch to change clip art size
(choose from 3 sizes.)
17 Scroll Bar Touch the arrows to scroll
through clip art.
18 Keyboard Displays the keyboard.
11 MEGATOUCH™ EZ MAXX OWNER’S MANUAL PM0235-02
10
11 13
14
12
15
16
17
18

COPYRIGHT © 1999 MERIT INDUSTRIES, INC.
Merit Industries, Inc.
Troubleshooting Guide for Megatouch™MAXX Games
PM0235-02 MEGATOUCH™ EZ MAXX OWNER’S MANUAL 12
Refer to the list below if you are experiencing a problem with your Megatouch™ EZ MAXX Game…
PROBLEM CORRECTIVE ACTION COMMENT
No Power, Game
reboots/monitor seems to
power cycle
•Check that the power cord is connected
to a “live outlet.”
•Check that the power switch is turned
“ON.”
•Check that the power cord is connected
to the game power supply.
•Check that the power supply’s voltage
select switch is set to the proper voltage.
•“Live outlet” is an outlet powered
with electricity.
•The power switch is located in
the rear of the game.
•The power cord is plugged into
the power supply inside the
game.
No Video. •Check that the game is powered and
turned “ON.”
•Check that the monitor is connected to
the game motherboard.
•Check that the power is connected to
the monitor and the motherboard.
•Make sure the RAM DIMM is properly
seated.
•See “No Power” under
“PROBLEM.”
•The monitor connection is
located inside the rear
compartment of the game.
•The monitor is powered from a
connection on the game power
harness, located in the CPU
section on countertops.
Touchscreen does not work.
(Microtouch) •Verify that the touchscreen controller is
connected to power.
•Verify that the touchscreen controller is
operating.
•Verify that the touchscreen controller is
connected to the motherboard.
•Make sure the screen is not scratched.
•Make sure no metal is touching the
screen.
•Check COM1 setting during boot-up.
•Check for proper ground.
•The touchscreen controller is a
small box mounted inside the
rear compartment of the game.
On a game with a Microtouch
controller, an LED is illuminated
when power is applied. When
operating, the LED will change
intensity when the screen is
touched.
•Check for proper connection of
the touchscreen power lead with
the power harness. The
connection is made near the
controller in the CPU section of
the game.
•If the screen is scratched, it must
be replaced.
•The touchscreen is connected to
COM 1 input on the motherboard
in the CPU section of the game.
•If COM 1 is bad, the
motherboard needs to be
replaced.
Poor picture quality. •Adjust Brightness, Contrast, Horizontal,
and Vertical controls. •Monitor controls are located in
the CPU section of the game.
“NO SOUND DRIVER,”
“INVALID KEY.” •Make sure that the riser card is correctly
installed and seated. •Riser card is the printed circuit
board connecting the I/O board
to the motherboard. Riser card
must be fully inserted in the
socket.

COPYRIGHT © 1999 MERIT INDUSTRIES, INC.
Merit Industries, Inc.
Troubleshooting Guide for Megatouch™ MAXX Games
13 MEGATOUCH™ EZ MAXX OWNER’S MANUAL PM0235-02
Refer to the list below if you are experiencing a problem with your Megatouch™ EZ MAXX Game…
PROBLEM CORRECTIVE ACTION COMMENT
“ERROR - INVALID KEY” •Check the Dallas Key. Verify that it is
installed, not damaged and seated tight.
•Bad I/O riser connection.
•The Dallas Key is the button-
shaped disc with a spoon handle
located on the I/O board.
Game locks up,
Game graphics incorrect. •Perform two-button memory clear. •Two-Button Clear:
1. Turn game power off.
2. Depress and hold the Calibrate
and Set-Up buttons located on
the connector board in the
CPU section in countertops.
3. With Calibrate and Set-Up
depressed, turn game power
on.
4. Release Calibrateand Set-Up
buttons when “2-Button Clear
Detected” is displayed on
screen.
5. “2-Button Clear Complete.”
No sound,
Game volume low. •Adjust volume control.
•Make sure speaker harness is plugged
in.
•Sound harness is disconnected or
damaged.
•Speaker harness is connected at
J9 on I/O board.
•Hedaphone jack of sound
harness is connected at PL101
on the motherboard and the
other end of the sound harness
connects to J11 on the I/O
board.
Game volume loud,
Sound distorted. •Turn volume down. •The volume controls can be
accessed through the System
Settings screen in the EZ MAXX
Setup software.
Operating system not found •Ribbon cable from hard drive to
motherboard is loose. •Make sure each end of the
ribbon cable is securely in place.
Meter not advancing. •Check connection at I/O board. •Check wiring at J3 METER
connector on I/O board in the
CPU section of the game.
“COIN JAM,”
A continuous tone emits
from the game.
•Check for coin(s) jammed in coin mech.
•If the game emits the coin jam indicator
sound when powered up, the
NORMALLY CLOSED contacts of the
coin mechanism are being used. The
NORMALLY OPEN contacts must be
used.
•Unlock the rear door of the game
to gain access to the coin mech.

COPYRIGHT © 1999 MERIT INDUSTRIES, INC.
Megatouch™ EZ MAXX Countertop Parts and Images
FIGURE 9 - SIDECAR INSTALLATION
FIGURE 10 - ENDCAP LATCHES
PM0235-02 MEGATOUCH™ EZ MAXX OWNER’S MANUAL 14
TOP
ENDCAP
LATCH
BOTTOM
ENDCAP
LATCH
SIDECAR
MOUNTING
SCREW
(3 PLACES)
SIDECAR
SIDECAR
SPACER
SIDECAR
MOUNTING
STUD
(3 PLACES)
ENDCAP
LATCHES
ENDCAP

COPYRIGHT © 1999 MERIT INDUSTRIES, INC.
FIGURE 12 - EZ MAXX CPU SECTION (REAR VIEW)
J7
FROM IO BD
J1
J9
J3
J8
ELECOIN
J4
R1
LED
R2
SMLY BA
J5
SW1 SW2
J6
CALIBSETUP
J2
1
2
1
2
MECHANICAL
MECH TICKET
DISPENSER
SETUP
SWITCH CALIBRATE
SWITCH
ELECTRONIC
MECH
SMILEY
BILL
ACCEPTOR
MARS
BILLACCEPTOR
AC IN
FIGURE 11 - EZ MAXX CONNECTOR BOARD
15 MEGATOUCH™ EZ MAXX OWNER’S MANUAL PM0235-02
TOUCHSCREEN
CONTROLLER
TOUCHSCREEN
OVERLAY
LEFT
ENDCAP
LCD DISPLAY
SIDECAR
CONNECTOR
BOARD
COIN
DRAWER
HARD
DRIVE
CENTRONICS
CONNECTOR
POWER
SUPPLY
RIGHT
ENDCAP
POWER
SWITCH
MOTHERBOARD
ASSEMBLY
ETHERNET
BOARD
FAN
PC-CARD
SLOTS
METER
MONITOR
CONTROLS

COPYRIGHT © 1999 MERIT INDUSTRIES, INC.
For additional assistance, after contacting your distributor,contact:
Merit Product Support and Services
USA and Canada call toll-free:
1-800-445-9353
Outside the USA and Canada call:
(215) 639-4700
FAX: (215) 639-5346
Merit Industries, Inc. P.O. Box 5004, Bensalem, PA 19020-8529
You can also visit our website
www.meritind.com
Megatouch™ EZ MAXX Countertop Replacement Parts List
PM0235-02 MEGATOUCH™ EZ MAXX OWNER’S MANUAL 16
EZ MAXX COUNTERTOP
PART # DESCRIPTION
SA0217-01 PCB/HDD SHELF ASSEMBLY
SA0200-04 STANDARD HARD DRIVE ASSEMBLY
SA10043-02 PCA, CENTRONICS CONNECTOR BOARD
EC2191-09 RIBBON CABLE, 2X20 PIN, IDE, 12”L
EC0026-03 586 MITSUBISHI MOTHERBOARD W/AUDIO
EC0028-02 MITSUBISHI TWO-SLOT RISER BOARD
SA10051-01 I/O BOARD
SA0200-04 HARD DRIVE ASSEMBLY
SA0235-02 15” DISPLAY
EC9381-01 15” DISPLAY, LCD, XGA
EC9840-03 TOUCHSCREEN CONTROLLER, SMT3E, 26”
EC9850-01 15”, TOUCHSCREEN OVERLAY, W/12” CAB
HW8067 TAPE, FOAM, .50W, .03THK, BLACK
LOCKS
HW8733-05 COIN DRAWER LOCK
HW8721 REAR DOOR LOCK
SA10052-01 PCA CONNECTOR BOARD
SA0239-01 FAN ASSEMBLY
MP0001-01 LEFT ENDCAP
MP0001-02 RIGHT ENDCAP
GL3102-01 EZ MAXX DECALS
EC2001 USAPOWER CORD
EC2002 EUROPEANPOWER CORD
EC7529-01 POWER SUPPLY

Merit Video Machine Limited Warranty
Merit Industries, Inc. warrants it’s video
machinesto be free fromdefects in material
and workmanship for a period of one year
from the date of purchase. The warranty
covers all electrical components (except
fuses and light bulbs) and printed circuit
boards. Otheritemsare coveredbywarranty
periods offered by the original equipment
manufacturers.
Failuredue tomisuse, vandalism,excessive
or intentional abuse, operation outside
specified conditions (including, but not
limitedto, improperelectrical powersource),
fire,waterdamage, actsofGod, actsofwar
andcivilunrestarespecificallyexcluded.
Merit products are carefully inspected and
thoroughly tested prior to packing and
shipment. Any damage discovered upon
receipt of goods, whether obvious or
concealed, must be reported immediately to
the delivering carrier and claims made
directly to them. Merit assumes no
responsibilityfordamagesoncetheproduct
has left its facilities and any disputes
regarding transportation damage must be
resolvedwith the shippingcompany(s).
Merit will repair or replace, at its option, any
component, part or assembly that fails
underwarranty, providedthatthe faileditem
is returned, shipping charges prepaid, to
Merit’s repair facility and Merit is notified of
the failure within the warranty period. Merit
reserves the right to request the serial
numbersofthe itemand/orgame whichhas
failed , and copies of sales invoices, bills of
lading or other documents as required to
determine the validity of the warranty
coverage. Merit will return or replace
warrantyitems,asspecifiedabove,shipping
charges prepaid,bygroundtransportation.
Merit’s obligation shall be limited to repair or
replacement as stated above, and shall
specifically exclude any liability for
consequentialdamages orloss ofearnings.
Merit may, at its discretion, provide
replacement parts under warranty prior to
receiving defective items, without
incurring any ongoing obligation to extend
such accommodations.
In certain instances, due to geographical or
other considerations, Merit may offer PCB
warranty service on an extended time basis
asfollows:
(a) User notifies Merit in writing (or
FAX)of PCBfailure, providingdates
offailure, serial numbersand abrief
description of failure symptoms.
(b) Failed PCBs are accumulated
for a time period or quantity
accumulation,as designated byMerit
and sent in one shipment to save
shippingexpenses.
(c) Merit honors warranty as per
dates of failure notification.
The above terms and conditions constitute
thesoleobligation, writtenorimplied, ofMerit
Industriesunder its warrantycoverage.
Table of contents
Other Merit Game Console manuals


Popular Game Console manuals by other brands


Coleco
Coleco TOTAL CONTR0L 4 instructions

Nintendo
Nintendo GameCube Modem Adapter Replacement guide

Sony
Sony PlayStation2 SCPH-30003 instruction manual

LeapFrog
LeapFrog Paw Patrol: To the Rescue! instruction manual

Tiger
Tiger World Championship Wrestling 60-051 instructions

Nintendo
Nintendo 3DS XL quick start guide

DOF Reality
DOF Reality H6 Assembly instructions

Sony
Sony 80GB Playstation 3 4-117-133-41 quick reference

Sega
Sega Master System Service manual

Hyperkin
Hyperkin RetroN instruction manual

Basic Fun
Basic Fun Where in the World is Carmen Sandiego instruction manual

Gamebox
Gamebox GGDH Installation/assembly guide