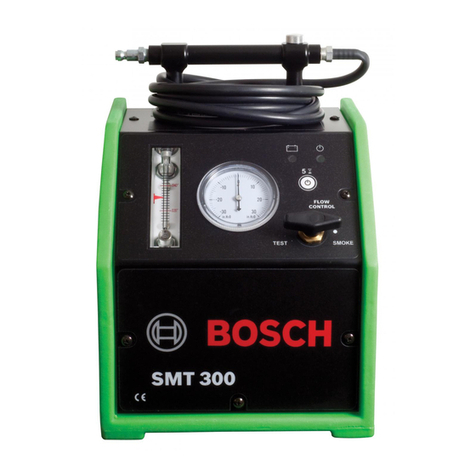
MESA LABORATORIES tetraCal User manual

1
NIST Traceable – ISO 9001:2008
tetraCal™
Flow Range: 1.2 – 30 LPM
tetraCal™ Ultra
FlowRange: 1 – 60 LPM
User Manual

2
Table of Contents
Section T
opic P
age
1.0 QuickStart 3
2.0 Introduction 3
3.0 Specifications 5
4.0 P
rincipleofOperation 1
0
5.0 InstrumentSetUp 1
0
6.0 Using the Calibrator 11
7.0 S
oftware 1
3
8.0 Maintenance 1
3
9.0 Safety 1
4
10.0 Warranty 1
4
Appendix A Qa/Qs Relationship 15
Appendix B Changing tetraCal units using OpenCal 16

3
1.0 Quick Start
Step 1: Remove the instrument from its carrying case and turn it on.
Step 2: Install the correct venturi for the flow rate range of interest.
For the tetraCal models TC5 and TC12:
#1 6 – 30 LPM
#2 1.2 – 6 LPM
For the tetracal Ultra models TC14 and TC17:
#1 20 – 60 LPM
#2 6 – 20 LPM
#3 1 – 6 LPM
Step 3: Install a tubing adapter of the appropriate diameter onto the venturi and connect it to
the instrument being audited/calibrated with elastomeric tubing. If the instrument to be audited
is not already running, start it now.
Step 4: You may now read the screen to determine volumetric flow rate, standard flow rate,
ambient temperature and barometric pressure.
For a diagram of the immediate application refer to Figure 1.
2.0 Introduction
All BGI by Mesa Labs calibrators are based on the air flow measurement principle of the venturi. BGI
calibrators are manufactured in Mesa’s ISO 9001-2008 facility. The instruments provide an LCD
indication of volumetric flow rate, standard
flow rate, barometric pressure and ambient temperature,
and filter temperature in some models operate on either
four AA alkaline batteries or a provided AC
power module.
The instrument is furnished with three auto ranging venturis. There are four different models
offering two separate flow ranges and an optional temperature probe. The models are as follows:
1.2 – 30 LPM
TC5: no filter temperature probe
TC12: filter temperature probe included
1 – 60 LPM
TC14: no filter temperature probe

4
TC17: filter temperature probe included
The new ambient temperature measuring device uses a Gill screen. The Gill screen is designed to
measure accurate temperature by protecting the sensor from heating due to solar radiation.
Figure 2 illustrates the layout of the travel case. Figure 3 shows the internal flow path of the tetraCal®,
schematically detailed in Figure 4.
Figure 5 illustrates the complete tetraCal® assembly.

5
Figure 1 – “Quick Start” Application of Calibrator
3.0 Specifications
tetraCal Flow Rate Range:
tetraCal Ultra Flow Rate Range:
Flow Accuracy:
1.2 – 30 Lpm (± 1%)
1 – 60 Lpm (± 1%)
0.75% of reading
Temp. Operational Range: -30° C to 55° C
Temp. Reading Range: -30° C to 55° C
Temp. Accuracy: 0.5° C
Barometric Pressure Range: 400 to 800 mmHg
Barometric Pressure Accuracy: 5 mmHg
Dimensions of control module: 3.25 in. high ( 8.25 cm) X 3.125 in. wide ( 7.94 cm) X
9 in. long ( 22.86 cm)
Height with venturi and hose adaptor: 6.30 in. (16.00 cm)
Weight w/ venture: 2.38 lbs (1.08 kg)
Carrying case dimensions: 15.75 in wide (40.00 cm) x 4.5 in high (11.43 cm) x
12.25 in. thick (31.20 cm)
Weight complete with contents: 4.69 lbs (2.13 kg)
Your tetraCal/tetraCal Ultra Calibrator comes with the following:
tetraCal/tetraCal Ultra Calibrator
Power Supply
4 AA batteries
Venturi No. 1 (PN B2247)
Venturi No. 2 (PN B2248)
Venturi No. 3 (PN B2249)
1/4 inch hose adapter (PN A2253)
3/8 inch hose adapter (PN A2254)
1/2 inch hose adapter (PN A2255)
Fitted carrying case (PN B2271)
Calibration Certificate
Accessories/Parts:
Part No. Description
TC9 tetraCal O-ring kit
B2271 tetraCal carrying case
A2253 tetraCal 1/4” Adapter
A2254 tetraCal 3/8” Adapter

6
A2255 tetraCal 1/2” Adapter
TCIMP tetraCal IMPROVE Adapter Kit
B2247 #1 Venturi (Calibrate with TC5 or TC12)
B2248 #2 Venturi (Calibrate with TC5 or TC12)
B2249 #3 Venturi (Calibrate with TC5 or TC12)

7
Figure 2 – tetraCal®in Travel Case

8
Figure 3 – Sectional View of Measuring Head

9
DIFF. PRESSURE
SENSOR
VENTURI
AIR FLOW
TO SAMPLER
BAROMETRIC
PRESSURE
SENSOR
MICRO PROCESSOR
LCD DISPLAY SCREEN
TEMPERATURE
PROBE
B P
T a
Q a
Q s
: 7 6 0 . 0 m m H g
: 2 2 . 8 ° C
: 1 0 . 0 2 L P M
: 1 0 . 0 L P M B A T T
100%
Figure 4 – Schematic Diagram of tetraCal®

10
Figure 5 – tetraCal®Assembly

11
4.0 Principle of Operation
The calibrator measures volumetric flow rate by utilizing a pressure transducer to assess the
pressure drop caused by air being drawn through a venturi. As the flow rate through the venturi
increases, the pressure drop increases as the square root. Twice the flow rate yields four times the
pressure drop. A desirable feature of the venturi is that most of the pressure drop created by the
instrument is recovered in the expansion section of the venturi. Therefore, measurements are made
at nearly the true operating conditions of the sampler.
The signal from the pressure transducer is sent to the microprocessor which incorporates the
barometric pressure and ambient temperature to calculate a standardized flow rate. To eliminate
fluttering of the on screen display, of volumetric flow rate, the first 20 readings are averaged and
then carried on as a rolling average. Barometric pressure and temperature are monitored and
displayed on a continuous basis. A cutaway diagram of the measuring head is shown in Figure 3 and
a schematic diagram of the system is shown in Figure 4.
5.0 Instrument Set-up
Remove the instrument from its carrying case. If the instrument is to be used in the laboratory, plug
the power supply into a power source , otherwise it will operate from its AA batteries. Switch the
instrument on and the screen will display the following message:
Please insert
Venturi 1-2-3
Select a venturi for the flow range of interest. Each venturi is marked with a number indicating the
range:
1 = 6 – 30 LPM
2 = 1.2 – 6 LPM
3 = 0.1 - 1.2 LPM
With the venturi held vertically, with the side with the o-rings facing up, insert the venturi into the
hole in the top of the socket. Be certain that there is sufficient lubricant on the o-rings within the
recess. Section 8.1 provides more information on user maintenance, including lubrication. Select an
adapter for the venturi of an appropriate size to match the tubing to connect to the sampling device
under test. Again, be certain that the o-rings are lubricated. At this point the instrument will
automatically reboot and auto range to the selected venturi. The screen will now appear as follows:
BP: XXX mm XXXXmb
Ta. XX.X C Tf. XX.X C
Qa : Under range
Qa : Under range

12
Using a short length of elastomeric tubing, connect the sampler under test to the top of the tubing
adapter and turn it on. The volumetric and standard flow rate will now appear on the screen.
Important notes about using the calibrator
A. The venturi must have no air flowing through it. Every time the instrument is switched on, it
re-zeros itself. If air is flowing, that flow rate will be set as zero.
B. The control module must be flat on the table, when switching on. The case houses the
pressure transducers, which are subject to the force of gravity. Positional changes can give
rise to minor errors. This effect applies to all devices containing pressure transducers.
C.
In order to perform the most precise measurement audit, the tetraCal must be in thermal
equilibrium with the ambient environment of the sampler to be audited. To achieve this
equilibrium, remove the tetraCal from its carrying case for at least 10 minutes prior to the
audit in the vicinity of the sampler. Additionally, if the tetraCal is subject to a temperature
change of more than five degrees during use, it should be rebooted.
When the calibrator is switched on and no external power is being utilized
XX
% battery
capacity remaining is displayed on the screen. So long as more than 10% is indicated, you
may perform your audit as at least one hour of power is available. If the provided AC
adaptor is utilized, the screen will indicate “DC In” and there is no limit to the run time.
Note: Use of an AC power supply, other than the one provided, can cause severe damage to
circuit components.
6.0 Using the calibrator
6.1 To perform an audit
One of two procedures should now be performed.
Procedure A. Turn off the sampler to be audited. Connect the calibrator to the inlet to the
sampler with, user provided tubing. Turn on the calibrator, wait for the screen to finish the
startup boot, then turn on the air sampler.
Procedure B. With the sampler to be audited running, when the calibrator screen has finished its
startup boot, connect the measuring tube to the instrument under test.
The flow resistance of the calibrator may cause momentary instability in the air samplers flow
control circuit. Once the air samplers flow rate indicator stabilizes, the reading may be taken. A

13
simple audit data format suitable for EPA type samplers is shown in Table 1. This may be taken
as a guide to formulating a form suitable for your specific needs.
6.2 To perform a calibration.
The procedures and calculations for using the instrument to calibrate a sampler are the same as
an audit, except that one should set the sampler to the exact flow rate required.
Table 1 Audit Data Format
Audited Instrument:
Make:___________________________ Model:_____________________ S/N:________________
Date:__________________ Time:________________ TCal S/N:________________________
Flow Rate – Lpm
Sampler:___________ % diff. = [(TCal-sampler)/TCal]x100
TCal:___________ Allowed diff. = 4%; Pass________ Fail_________
Ambient Temp. – C
Sampler:___________
TCal:___________ Allowed diff. = 2 C; Pass________ Fail_________
Barometric Pressure – mm of Hg
Sampler:___________
TCal:___________ Allowed diff. = 10 mm; Pass________ Fail_________

14
7.0 Software
All BGI calibrators are designed to operate with the OpenCal software. The software allows the user to
change the display units for flow, temperature, and pressure. You can also view and save a real-time
data stream. To download this data, visit our website at: http://bgi.mesalabs.com/software/. For further
information on changing the display units of your calibrator, refer to Appendix B.
8.0 Maintenance and Recalibration
8.1 User Maintenance
Beyond battery replacement, the only part of the instrument requiring attention is the flow passage
through the venturi. After long periods of use, some atmospheric dust can coat the interior flow
surfaces. The presence of such a deposit may be ascertained by viewing the interior of the venturi
under bright light; direct overhead sunlight being preferable. Glance into the interior, from either
end, seeking any discoloration of the white or silver surface. If it is determined that cleaning is
required, use the following procedure.
Rinse the entire venturi body in warm soapy water. Any external deposits, which are not floated
away, may be removed with a soft cloth. If internal deposits are not removed by soaking, the best
procedure is to immerse the unit in an ultrasonic bath containing soapy water. If an ultrasonic bath
is not available, judicious use of a pipe cleaner is recommended. Following cleaning, the venturi may
be dried utilizing compressed air, or if not available, allowed to air dry.
Inspect the two o-rings on the venturi body. If any damage is observed, replace both. Prior to
reassembly, lubricate the o-rings with a wipe of grease
There are two points which require careful lubrication. These points are the two o-rings at the top of
each venturi to which the tubing adapter is attached and the four o-rings inside the socket into
which the venturi is inserted. They should be sparingly lubricated with the tip of the finger.
General purpose automotive grease seems to be the most successful all around lubricant.
8.2 Factory Recalibration
Your tetraCal is a NIST-traceable high-precision standard with a few moving parts. The calibration
certificate you received with your unit is valid for one year from the date if certification.
Environmental factors, product wear, drift of sensors or inadvertent damage may adversely affect
your tetraCal’s measurement accuracy or general performance. For these reasons, Mesa highly

15
recommends that you return your tetraCal to our manufacturing and calibration facility in Butler, NJ
on an annual basis to ensure its measurement integrity.
Recertification at our facility includes any necessary repairs, with the exception of replacing the
electronic boards, which will incur a fee. All tetraCals returned to our facility for recertification will
receive both a pre- and post-calibration.
9.0 Safety
The four AA batteries should only be replaced with good quality alkaline energy cells and should be
promptly removed when expired, to prevent leakage and chemical damage to the electronic
components. When the instrument is placed in long term storage over two months, always remove the
batteries. Do not substitute other power supplies. Use only the unit provided, or severe electrical
problems could occur.
Even though there is no reason to disassemble the electronics box, should the need arise, always unplug
the line current power supply and remove the batteries.
Adjustable potentiometers are contained within the electronic housing, which are factory set during
calibration. If these are turned, the calibration will be lost and factory recalibration will be required.
10.0 Warranty Information
Mesa Labs warrants equipment of its manufacture and bearing its nameplate to be free from defects in
workmanship and material. We make no warranty, express or implied, except as set forth herein. Mesa's
liability under this warranty extends for a period of one (1) year from the date of product’s shipment.
Mesa Labs warrants service performed on equipment at our factory for a period of ninety (90) days and
spare parts for a period of sixty (60) days. During these periods, the warranty is expressly limited to
repairing or replacing any device or part returned to the factory and proven defective upon evaluation.
These warranty periods will not be extended under any circumstances.
Mesa assumes no liability for consequential damages of any kind. The purchaser, by acceptance of this
equipment, shall assume all liability for consequences of its misuse by the purchaser, its employees, or
others. Purchaser is responsible for all damages resulting from field repairs and installation of equipment
and parts. This warranty will be void if the equipment is not handled, transported, installed, or operated
in accordance with our instructions. If damage occurs during transportation to the purchaser, Mesa must
be notified immediately upon arrival of the equipment.
A defective part in the meaning of this warranty shall not, when such part is capable of being repaired or
replaced, constitute a reason for considering the complete equipment defective. Acknowledgment and
approval must be received from Mesa prior to returning parts or equipment for credit. To obtain a
Return Material Authorization (RMA), contact csbutler@mesalabs.com with details of the warranty or
service claim. Purchaser is responsible for return shipment of equipment to the factory for warranty and
non-warranty repairs. Mesa Labs will provide ground shipment to the purchaser for warranty repairs. All

16
shipments from Mesa Labs will be handled by FedEx, unless otherwise requested. If the purchaser elects
to use a third party freight forwarder or another shipping carrier, the purchaser is thereby responsible
for the shipment.
Mesa Labs periodically makes engineering changes and improvements on instruments of its
manufacture. We are under no obligation to retrofit these improvements and/or changes into
instruments which have already been purchased.
For refund of new products, equipment must be in a new and unused condition. A restocking fee of 30%
of the product’s value will be charged for returns after thirty (30) days. Mesa Labs will not accept any
returns after ninety (90) days.
No representative of ours has the authority to change or modify this warranty in any respect.
Appendix A. Qs/Qa Relationship
U.S. EPA uses QS, known as standard air flow rate, for reporting PM10. This means that the flow rate is
reported to Standard conditions. For the U.S. EPA, these conditions are 25° C and 1 atmosphere
pressure. (1 atmosphere = 760 mm of Hg = 29.92 in of Hg = 1013.25 millibars = 1013.25 hecto
Pascals).
The standard conditions outside of the U.S. are 0° C and 1013.25 mb.
Qs is calculated using the following equations:
Q_s=Q_a*(BP_a/760)*(298.15/(T_a+273.15)) For U.S. applications when Ts=25° C and BPs=760 mm of Hg
QS= Qa* (BPa/1013.25)*(273.15/Ta) For world applications when Ts=0° C and BPs=1013.25 mb
Your tetraCal performs this calculation to provide Qs, Qa, Ta, and BP on a continuous basis. At the same
time, the two most popular Barometric pressure units (mm of Hg and millibars or hecto Pascals) are also
provided. tetraCals with the optional filter temperature probes will also display both ambient (Ta) and
filter (Tf) temperatures. This results in the following screen:

17
BP in mm of Hg BP in hecto Pascals
(millibars)
Actual Flow Rate at Local BP and T Ambient
Power Supply
is Plugged In
Running on
Battery Power
Standard Flow Rate
(Actual Corrected to Standard Conditions)
Ambient Temp. Filter Temp. Probe
B P
T a
Q a
Q s
: 7 6 0 m m
: 2 2 . 8
: 1 0 . 0 2 L P M
: 1 0 . 1 0 L P M
1 0 1 3 m b
T f : 2 2 . 4
E x t
p w r
B P
T a
Q a
Q s
: 7 6 0 m m
: 2 2 . 8
: 1 0 . 0 2 L P M
: 1 0 . 1 0 L P M
1 0 1 3 m b
T f : 2 2 . 4
B a t t
1 0 0 %
3041
Remember
, Qs is always set to sea level conditions, but the Standard temperature is always factory set
to either 25° C (US EPA, Canada and other countries using US EPA conditions) or 0° C. If the Firmware
version contains the letter W (for world) the temperature base is 0° C.

18
Appendix B. Changing display units using OpenCal
All calibrators with the letter P in the Version number of the start-up screen are equipped with user
selectable display parameters.
All units are shipped from the factory with the following default parameters installed:
BP:760.0mmHg
Ta:22.8°C
Qa:10.02LPMBatt
Qs:10.00LPM100%
To change these measurement units, the BGI OpenCal software may be downloaded at
bgi.mesalabs.com/software.
After you have downloaded this software, connect your calibrator to your computer with either an RS-
232 serial cable or a USB-serial adapter prior to opening the software

19
If the connection is successful, a green box and the number of the com port will be displayed. You will
also see the details of your calibrator.
In the event that a com port is not automatically selected, select:

20
Click on it to go to:
If there is no com port displayed, set the cursor on the down arrow to select the correct com port. Save
this setting before exiting this screen.
In the future when the same calibrator is connected to the same computer a port connection will be
instantly established. You may now select:
Clicking on this icon will open the parameter selection area and permit a wide variety of measurement
units to be displayed. The initial display will be the factory default values.
This manual suits for next models
1
Table of contents
