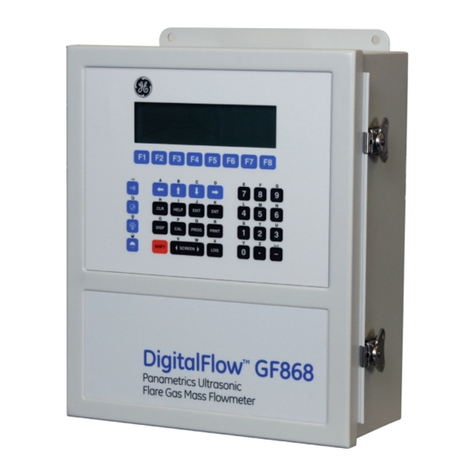
MessKonzept FTC300 User manual

FTC300
Fast Thermal Conductivity Analyzer
Operating Manual
Version 1.02 © Messkonzept GmbH
Date of issue: 04th July 2014

Operating Manual 2
Messkonzept GmbH · Niedwiesenstr. 33 · 60431 Frankfurt · Germany
Thank you for using the FTC300 from Messkonzept. It has been designed
and manufactured using highest quality standards to give you trouble free
and accurate measurements.
© Copyright Messkonzept GmbH 2014
This document is protected by copyright. Neither the whole nor any part of
it or the information contained in may be adapted or reproduced in any
form except with the prior written approval of Messkonzept.
The product described in this manual and products for use with it are
subject to continuous developments and improvement. All information of
technical nature and particulars of the product and its use (including the
information in this manual) are given by Messkonzept in good faith.
However, it is acknowledged that there may be errors or omissions in this
manual.
For the latest revisions to this manual contact Messkonzept or visit
www.Messkonzept.de
Messkonzept welcome comments and suggestions relating to the product
and this manual.
Note!
The design of this instrument is subject to continuous development and
improvement. Consequently, this instrument may incorporate minor
changes in detail from information contained in this manual.
Important!
In correspondence concerning this instrument, please specify the type
number and serial number as given on the type label on the right side of
the instrument.
All correspondence should be addressed to:
Messkonzept GmbH
Niedwiesenstr. 33
60431 Frankfurt
Germany
Tel: +49(0)69 53056444
Fax: +49(0) 69 53056445
email:
http: www.messkonzept.de
This manual applies to:
FTC300
Date of Release:
May 2014
Software Version:
1.030

Operating Manual 3
Messkonzept GmbH · Niedwiesenstr. 33 · 60431 Frankfurt · Germany
1. Operator safety .................................................................................................5
1.1 Notes on Safety Conventions and Icons ........................................................... 5
1.2 Warning Notices...........................................................................................6
1.3 Safety Instructions ........................................................................................7
2. Determining Concentrations via Thermal Conductivity............................................ 8
2.1 Principle of Measurement.............................................................................. 8
2.2 Principle of Operation ...................................................................................9
2.3 Measuring Gases and Ranges ......................................................................10
3. Assembly of the Instrument ..............................................................................11
3.1 FTC300 Detector Unit.................................................................................11
3.2 Installation of the FTC 300..........................................................................12
3.3 Gas Ports...................................................................................................12
3.4 Electrical Connectors and Earth....................................................................13
3.4.1 Requirements for electrical connectors..........................................................15
3.4.2 Ground......................................................................................................15
3.4.3 RS-232 Interface........................................................................................16
3.5 Particular Features of the FTC300................................................................... 17
4. The Front Panel .............................................................................................18
4.2 System Alarm Indicator (red) .......................................................................19
4.3 System Maintenance Indicator (yellow) ......................................................... 19
4.4 Operation Indicator (green) ..........................................................................19
4.5 RIGHT / Selection Key.................................................................................19
4.6 UP / Selection Key......................................................................................19
4.7 ENTER / Termination Key............................................................................ 19
5. Switching on the device ...................................................................................20
5.1 Warm up Screen ........................................................................................20
5.2 Operation Screen........................................................................................ 21
5.3 Top Level Main Menu ................................................................................. 21
6. Calibration......................................................................................................22
6.1 Set Offset Gas Concentration........................................................................22
6.2 Set Gain Gas Concentration ......................................................................... 23
8.3 Offset Calibration........................................................................................ 24
6.4 Gain Calibration .........................................................................................24
7. Diagnosis .......................................................................................................25
7.1 Parameter Menu......................................................................................... 25
7.2 Errors........................................................................................................ 26
8. Setup............................................................................................................. 27
8.1 Unit Setup .................................................................................................28
8.1.2 Measuring Gas Setup ...............................................................................29
8.1.3 Response Time Setup ..............................................................................30
8.1.4 Multi Gas Mode List (useful with Option MGM only)....................................31
8.2 Relays.......................................................................................................32
8.2.1 Relay 1 Mode .........................................................................................32
8.2.2 Relay 1 Threshold ...................................................................................33
8.2.3 Relay 1 Hysteresis...................................................................................33
8.2.4 Relay 1 Failsafe / Not failsafe....................................................................34
8.2.5 Relay 1 active/frozen during Calibration .....................................................34

Operating Manual 4
Messkonzept GmbH · Niedwiesenstr. 33 · 60431 Frankfurt · Germany
8.2.6 Relay 2 Mode .........................................................................................35
8.2.7 Common Relay........................................................................................ 36
8.3.1 Current Loop ........................................................................................37
8.3.2 Analog Output 1 ................................................................................... 39
8.3.4 Adjust Loop.......................................................................................... 40
10.4 Expert Setup...............................................................................................41
10.4.1 Parameter.............................................................................................41
10.4.2 Access Modes .......................................................................................42
8.4.3 Reset Functions....................................................................................... 43
8.4 .4 Test of Relays, Analog Outputs and Connections ........................................ 44
Note!............................................................................................................45
Appendix A System Errors ....................................................................................46
Appendix B Specifications .................................................................................48
B.1 Performance ..............................................................................................48
B.3 Environmental conditions ............................................................................ 50
B.4 Dimensions................................................................................................50
Appendix C EG-Konformitätserklärung ...................................................................50
Appendix D Menu Tree ........................................................................................53

Operating Manual 5
Messkonzept GmbH · Niedwiesenstr. 33 · 60431 Frankfurt · Germany
1. Operator safety
This section provides information and warnings which must be followed to
ensure safe operation and retain the instrument in safe condition. Read this
section carefully before beginning to install and use the instrument.
1.1 Notes on Safety Conventions and Icons
Warning!
“Warning” draws attention to application errors or actions that can lead to
safety risks including the injury to persons or malfunctions – possibly even
destruction of the device.
Note!
“Note” indicates an additional function or hint.

Operating Manual 6
Messkonzept GmbH · Niedwiesenstr. 33 · 60431 Frankfurt · Germany
1.2 Warning Notices
The manufacturer does not assume liability for inappropriate handling of
the device. Malfunctions caused by inappropriate handling may lead to
hazards.
This device is not suited for the operation in areas exposed to explosion
hazards!
Never lead explosive gases or gas mixtures into the device!
Dependent on the model the device flammable gases may be led in the
device. Check item “Glass ball filling” in the device protocol. Flammable
gases may be led in devices filled with glass balls.
Here, the inside space of the housing is densely filled with glass balls
(Ø 0.6mm). In the unlikely case that a leakage caused an explosive
atmosphere, the small spaces between the glass balls prevent a
coincidental ignition caused by a further malfunction of the device from
propagating.
Never open the housing of the FTC300, especially because of the loose
glass balls. When the device had been opened it may not work safely with
flammable gases.
Disconnect the device from the power supply to prevent an unintended
start of the device, if a safe operation of the device is not guaranteed.
For operation of the device in the field a rain protection is recommended.

Operating Manual 7
Messkonzept GmbH · Niedwiesenstr. 33 · 60431 Frankfurt · Germany
1.3 Safety Instructions
Caution!
For safe operation of the device please pay regard to all instructions and
warnings in this manual.
Only put the device into operation after it has been installed properly.
A competent and authorised person is required for installation, connection
and operation of the device. This person has to read the manual and follow
all instructions. Keep the manual to look up questions that can occur later on.
Make sure that the electric installation protection against accidental contact
agree to the applicable safety regulations.
The protective earth connection must be made before all other connections.
Any interruption in the protective earth can cause danger.
Pay regard to the local regulations and circumstances regarding electric
installations.
Repairs may only be done by Messkonzept.

Operating Manual 8
Messkonzept GmbH · Niedwiesenstr. 33 · 60431 Frankfurt · Germany
2. Determining Concentrations via Thermal Conductivity
2.1 Principle of Measurement
Thermal Conductivity Detectors (TCD) were used in the chemical industry
since the 1920s as the first process gas analyzer for the quantitative
composition of gas mixtures. Each gas has a typical heat conductivity
governed by its molar mass and viscosity.
The measurement is based on the principle that the thermal conductivity of
a mixture of gases is dependent on the thermal conductivity of the gas
components and their fractional amount in the gas mixture. Thus, the
fraction of the different components can be determined. It is one of the
main advantages of the TCD principle that, unlike the wide spread infrared
technique, it is not limited to gases with a permanent dipole moment. It
can identify noble gases (He, Ar, Ne, etc.) as well as homonuclear gases
like H2and N2. Furthermore, it is robust and cost effective.
The principle of thermal conductivity measurement works best, if the
different gas components have clearly different thermal conductivity and in
addition one of the following conditions is met:
1. The mixture contains only two components (binary mixture), e.g. CO2in
N2or H2in N2.
2. The mixture contains more than two components, but only the
concentration of two components vary.
3. The thermal conductivity of two or more components is similar, e.g.
when measuring H2or He in a mixture of H2and N2(quasi binary mixture).
The thermal conductivity of gases is rising with temperature and the slope
of the increase with temperature is different for different gases. On
customer request it can be checked whether the temperature of heat sink
and/or source can be changed in order to improve the sensitivity of the
measurement or to avoid cross-sensitivity effects.
Cross-sensitivity means the sensitivity of the measurement on other gases
than the measured component. Perturbation-sensitivity means the
sensitivity of the measurement on other influences than the gas-
composition, e.g. the gas pressure.

Operating Manual 9
Messkonzept GmbH · Niedwiesenstr. 33 · 60431 Frankfurt · Germany
2.2 Principle of Operation
The FTC300 sensor determines the quantitative composition of gas
mixtures by measuring the thermal conductivity between a heat source and
a heat sink through the gas mixture.
The measuring gas is conducted to the sensor through a stainless steel
block that is kept at a constant temperature of 60°C. This temperature a
stabilized using a control loop such that the block can be used as heat
sink.
A thin membrane of micro-mechanical silicon chip serves as heat source.
Two thin film resistors are integrated into the membrane, one is used for
both the membrane the other for measuring its temperature. A second
control loop stabilizes the membrane temperature at 135°C. Above and
below the membrane two small cavities are etched into the silicon, which
are filled by diffusion with the measuring gas.
The surfaces opposite to the membrane are thermally connected with the
heat sink. Dependent on the thermal conductivity of the gas more or less
energy is led off the membrane. The voltage needed to keep the
temperature of the membrane constant is a measure for the thermal
conductivity of the gas.
Both resistors on the membrane are protected by an inert coating in order
to prevent chemical reactions with the measuring gas.
Figure 3.0 Thermal Conductivity Detector (principle)
Heat sink; Tconst = 60°C
Heatsource;
T
const=135°C Transferredheat
Gas flow

Operating Manual 10
Messkonzept GmbH · Niedwiesenstr. 33 · 60431 Frankfurt · Germany
2.3 Measuring Gases and Ranges
Depending on the gas pair the measurement is possible within certain mixing
ratios.
Measur-
ing Gas
Carrier
Gas Basic range Smallest range
Smallest
suppressed zero
range
Multi Gas
Mode
H2N
2or air 0% - 100% 0% - 0.5% 98% - 100% Yes
H2Ar 0% - 100% 0% - 0.4% 99% - 100% Yes
H2He 20% - 100% 20% - 40% 85% - 100% On request
H2CH40% - 100% 0% - 0.5% 98% - 100% On request
H2CO20% - 100% 0% - 0.5% 98% - 100% On request
He N2or air 0% - 100% 0% - 0.8% 97% - 100% Yes
He Ar 0% - 100% 0% - 0.5% 98% - 100% Yes
CO2N
2or air 0% - 100% 0% - 3% 96% - 100% Yes
CO2Ar 0% - 60% 0% - 10% - Yes
Ar N2or air 0% - 100% 0% - 3% 96% - 100% Yes
Ar CO240% - 100% - 80% - 100% Yes
CH4N
2or air 0% - 100% 0% - 2% 96% - 100% Yes
CH4Ar 0% - 100% 0% - 1.5% 97% - 100% Yes
O2N
20% - 100% 0% - 15% 85% - 100% Yes
O2Ar 0% - 100% 0% - 2% 97% - 100% Yes
N2Ar 0% - 100% 0% - 3% 97% - 100% Yes
N2CO20% - 100% 0% - 4% 96% - 100% On request
NH3H
20% - 100% 0% - 5% 95% - 100% On request
NH3N
20% - 100% 0% - 10% 60% - 100% On request
CO H20% - 100% 0% - 2% 99% - 100% On request
SF6N
2or air 0% - 100% 0% - 2% 96% - 100% On request
Other gases and ranges on request
The FTC300 must not be used with explosive gases. Flammable gases as H2
and CH4may only be used in devices filled with glass balls. A gas mixture of a
flammable gas with an inert gas in a mixing ratio such, that it is still
inflammable for any amount of air added is called totally inertised. Totally
inertised gases can also be used in devices without glass balls.
“Basic range” is the largest possible measuring range and is set by default.
The linearization is performed over the basic range. The smallest measuring
ranges at the beginning and the end of the basic range can be deduced from
calibration. The smallest possible range between the basic range and the
smallest ranges at the end beginning and the end of the range can be
estimated by linear Interpolation.
Measuring ranges are set in the “Current Loop” Menu, see Chapter Analog
Out.
The Multi Gas Mode (MGM) is a configuration that allows for the consecutive
measurement of different gas pairs. The gas pair can be switched at via the
control panel or via the RS232-interface. Gas pairs labeled “Yes” in the table
above are commonly used. Gas mixtures labelled “On request” can also be
implemented with little effort.

Operating Manual 11
Messkonzept GmbH · Niedwiesenstr. 33 · 60431 Frankfurt · Germany
3. Assembly of the Instrument
3.1 FTC300 Detector Unit
The FTC300 detector unit consists of a hermetically sealed pressure
proofed stainless steel block with a gas duct, which is suited for pressures
up to 20 bar. Sample gas entering through the gas inlet is guided to the
micromechanical thermal conductivity sensor and further downstream to
the outlet port. In particular the pneumatics is designed to minimize the
influence of a changing gas flow. The operating temperature of 60°C is
stabilized by a highly accurate PI control loop. In order to avoid electrical
interference on the measuring output the high performance analog adaption
circuit is directly mounted on top of the stainless steel block. The
piggyback-mounted processor board digitizes the signal in a 24bit A/D
converter. The μ-controller performs all calculations, as linearization,
calibrations and cross sensitivity compensation directly on the detector unit.
Figure 3.0 FTC300 Detector Unit

Operating Manual 12
Messkonzept GmbH · Niedwiesenstr. 33 · 60431 Frankfurt · Germany
3.2 Installation of the FTC 300
132 mm
4,5mm
Mountingholes
Figure 3.1 Mounting holes shown from the reverse side of the housing
The FTC300 is designed for wall fastening. The four mounting holes are
shown in the picture above. M4 cylinder head bolts are suitable.
3.3 Gas Ports
On the bottom of the FTC300 housing two tubes with 6mm outer diameter
for gas connection are located. They are labeled with “GAS IN” and “GAS
OUT”. For low requirements regarding gas tightness and resistance to
pressure the tubes can be used as hose connector. For permanent gas and
pressure tightness compression fittings are recommended (e.g. by
“Swagelok”©).
A leakage test after connecting the gas ports is recommended.

Operating Manual 13
Messkonzept GmbH · Niedwiesenstr. 33 · 60431 Frankfurt · Germany
3.4 Electrical Connectors and Earth
ABC
Top View
1: Analog Input 1
2: Analog Output 2
3: Analog Reference
4: Digital Input (24V)
5: Ground
6: Analog Output 1
7: Analog Input 2 1: Relay 1 - A
2: Power Supply-GND
3: Relay 1 - B
4: Power Supply +24V
5: Relay 2 - A
6: Relay 2 - B
7: Relay 3 - A
8: Relay 3 - B
1: 0 (4) - 20mA, isolated +
2: 0 (4) - 20mA, isolated -
3: Ground
4: TxD
5: RxD
Figure 3.2 Electrical Connectors, view from top on the device
The electric contacts are joined in three plug connectors, see Figure above.
For details on the function of each contact, see Table below. The cables
(712, IP67) with an extruded connector plug and a length of two meters
(five meters available on request) are part of the purchased parts package.
The cables have open ends the cross-section of the conductors in cable A
and C is 0,14mm2, for cable B 0,25mm2.
The protection class of the device is only effective with all cables attached. In
case cable A is not used, connector plug A has to be closed with an end
fitting.

Operating Manual 14
Messkonzept GmbH · Niedwiesenstr. 33 · 60431 Frankfurt · Germany
Connector A (7-pins)
Pin
No.
Conductor
colouring
Function Description
1 white Analog Input 1 0 to 10V, 24 bit resolution
2 brown Analog Output 2 0 to 10V, 16 bit resolution
3 green GND GND for pins 1, 2, 6, 7
4 yellow Digital Input (DIN)
low:<4.6V; high;11.4V
5 grey GND GND for pin 4
6 pink Analog Output 1 0 to 10V, 16 bit resolution
7 blue Analog Input 2 0 to 10V, 24 bit resolution
Connector B (5-pins)
Pin
No.
Conductor
colouring
Function Description
1 white Current Loop send
2 brown Current Loop
return
0 (4) to 20mA, floating, isolated
±500V to ground, max. 800 Ohm
burden, 16 bit resolution
3 black Serial Interface
RS232
GND for pin4, 5
4 blue Serial Interface
RS232
TxD (transmit)
5 grey Serial Interface
RS232
RxD (receive)
Connector C (8-pins)
Pin
No.
Conductor
colouring
Function Description
1 white Relay 1 isolated contact; 36V, max.1A
2 brown Power Supply - GND
3 green Relay 1 isolated contact; 36V, max.1A
4 yellow Power Supply + + 24V (18V to 36V), max. 700mA
5 grey Relay 2 isolated contact; 36V, max.1A
6 pink Relay 2 isolated contact; 36V, max.1A
7 blue Common Relay 3 isolated contact; 36V, max.1A
8 red Common Relay 3 isolated contact; 36V, max.1A

Operating Manual 15
Messkonzept GmbH · Niedwiesenstr. 33 · 60431 Frankfurt · Germany
3.4.1 Requirements for electrical connectors
Before using the device make sure that the power supply is in accordance
with the specifications of the device and that all electric connections
correspond to the information given in this manual.
The FTC300 is a device with protection class III. Relay contacts and inputs
should only be operated with safety extra low voltage (SELV;4kV).
The power supply has to comply with the PELV specification (protective extra
low voltage) according to EN 60204-1.
Unlike SELV, PELV may be grounded at the output side.
3.4.2 Ground
Figure 3.3 Connection to ground
To comply with EN 60204-1, the device has to be installed such that the
power supply (PELV) is connected to ground with only its ground conductor,
see Figure above.
The shielding of cable A, B and C has to be connected to the functional
ground. Dependent on the circumstances gas inlet and gas outlet can be
grounded in addition.
Connections to ground should be made with low-resistant, large diameter,
short cables to one neutral point.

Operating Manual 16
Messkonzept GmbH · Niedwiesenstr. 33 · 60431 Frankfurt · Germany
3.4.3 RS-232 Interface
For setting up the RS-232 interface the wires ends for RxD, TxD and GND
from cable B have to be connected to the appropriate pins of a D-sub plug.
The D-sub plug can directly be connected to the plug socket of the PC or via
an USB-serial adapter to an USB port.
Typically the connected PC adopts to the requires settings of the RS232
interface. If this is not the case, see Appendix B2-Interface and insert the
parameters by hand.
Finding the COM port the device is connected to require trial and error.
The RS232 interface allows to operate the device via SetApp, see
www.messkonzept.de for more information.

Operating Manual 17
Messkonzept GmbH · Niedwiesenstr. 33 · 60431 Frankfurt · Germany
3.5 Particular Features of the FTC300
* Accurate and long term stable thermal conductivity measurement
* High sensitivity (e.g. measuring range 0 Vol.% to 0.5Vol.% H2in N2)
* Fast response with a T90 time of less than 1 sec (dependent on flow rate)
* Low noise (<10ppm H2in N2)
* Precise linearization for binary gas mixtures of H2, He, CO2, CH4in N2or Ar
and N2in Ar are preset
* Additional customized linearization with polynomial up to sixth order
available
* Isolated 0/4-20mA output, start and end point can be set to any
concentration
* Conventional 2-point calibration or simple one-gas calibration
* Display indication in ppm or Vol.%
* Pressure proof and vacuum leak tight stainless steel 1.4571) gas duct
* Three isolated relays for indication of alarms and instrument status
* Small and robust transmitter in powder-coated aluminum housing for field
use (IP65)
* Access to all values and parameters via RS 232 interface
* Digital output with 1ppm resolution over the whole 100Vol.% range
*
PC-based service program SetApp offers easy to operate calibration
routines, diagram of measured concentration vs. time and possibility to
write data to a log file.
* Compensation for cross sensitivity and interfering components
* Multi Gas Mode allows sequential measurement of up to 16 binary gas
mixtures
* Dimensions: Width 145mm, Height 80mm plus connectors, Depth 85mm
* Power supply 18V to 36V DC / 700mA

Operating Manual 18
Messkonzept GmbH · Niedwiesenstr. 33 · 60431 Frankfurt · Germany
4.1 Alarms and System Error Indicators
The alarms “A1” and “A2” indicate the status of relay 1 and relay 2. The
description how to set the conditions upon which these relays triggers can
be found in Chapter 8.2. The System Error “Er” is indicated by the flashing
red LED “System Alarm Indicator”. Setting of the conditions to trigger this
relay is described in chapter 8.2.7. It is recommended to configure the
“Error matrix” such that system errors of the device, see Appendix A, trigger
the Status Alarm.
4. The Front Panel
A1 A2 Er
0.30
[%] H2/N2
ERROR
POWER
MESSKONZEPT
ANALYTICAL TECHNOLOGY
MAINT
RIGHT / Selection Key
(Toggle MGM-Mode) ENTER / Terminate Key
(GasSelectioninMGM-Mode)
UP / Selection Key
System Alarm Indicator
System Maintenance Indicator
Operation Indicator
Process Alarm 1 Indicator
Process Alarm 2 Indicator
System Error Indicator
Measurement Unit
[Vol%] or [ppm] Gas Selection
Currently measured
Gas concentration
Figure 4.0 Front Panel

Operating Manual 19
Messkonzept GmbH · Niedwiesenstr. 33 · 60431 Frankfurt · Germany
4.5 RIGHT / Selection Key
The <RIGHT> key enables the operator to scroll through the various menu
items of menus and submenus. The currently selected menu item is
marked by black background and is called with the <ENTER> key.
In submenus requiring numerical inputs, the <RIGHT> key scrolls to the
next digit and to “ESC / OK” at the end.
4.6 UP / Selection Key
In menus or submenus the <UP> key quits the recent menu and changes
to the superior menu and ultimately to the main menu.
To quit menus with an “ESC”/”OK” option, select one of these fields with
the <RIGHT> key and confirm with <ENTER>.
In submenus requiring numerical inputs, the <UP> key changes the
selected digit.
4.7 ENTER / Termination Key
The <ENTER> calls the item, that is marked as selected by the black
background. Menu items are selected by the <RIGHT> key. In submenus
with an “ESC”/”OK” option the <ENTER> key confirms the selection of
“ESC” or “OK”.
4.2 System Alarm Indicator (red)
The flashing red LED indicates a system. Dependent on the configuration of
the “Alarm matrix”, see chapter 8.2.7 Common Relay, also other errors can
be shown.
4.3 System Maintenance Indicator (yellow)
The flashing yellow LED indicates that the instrument demands
maintenance. It still works but the specifications given in Appendix B1
“Performance” may not me met anymore.
4.4 Operation Indicator (green)
The flashing green LED indicates that power is supplied and the internal
processor works properly.

Operating Manual 20
Messkonzept GmbH · Niedwiesenstr. 33 · 60431 Frankfurt · Germany
Optional: Devices with Multi Gas Mode (MGM)
The <ENTER> gives fast access from the measured value display to
changing the gas mixture. This mode is indicated by highlighting the
currently selected gas pair. Pressing <ENTER> selects the next entry of
the MGM list. Pressing <RIGHT> again deactivates fast access mode of
the mixture selection. See chapter “Multi Gas Mode List” for a description
how to modify the MGM list.
5. Switching on the device
This chapter describes switching on the device. The warm up screen, see
Figure 5.0, shows the block temperature while the block warms up. After
the warm up, the device switches to the operation screen, see Figure 5.1,
from here the operation screen the main menu is opened.
The device can be run in two different modes, the safety mode and the
normal mode. In the safety mode every action has to be confirmed by the
operator code (default: 111.000). In both modes some actions require an
expert code, for example changing the operator code and changing between
normal and safety mode. This manual refers to the device operated in
normal mode.
5.1 Warm up Screen
Warm Up
58.3
Set: 60.0 °C
Figure 5.0 Warm up Screen
The warm up screen shows the current block temperature during warm up
in the center of the screen, see Figure above. The target value of the block
temperature, here 60°C, are shown in the bottom line of the screen.
The current loop, relays and analog outputs are deactivated during warm
up. When the difference between the measured temperature and the target
value is smaller than 0.3 °C, the device switches to the operation screen.
Pressing the <UP> key during warm up switches directly to operation
screen and activates the current loop. The displayed concentration value is
not precise until the block is warmed up.
Other manuals for FTC300
1
Table of contents
Other MessKonzept Measuring Instrument manuals
