manuals.online logo
Brands
  1. Home
  2. •
  3. Brands
  4. •
  5. Metabo
  6. •
  7. Vacuum Cleaner
  8. •
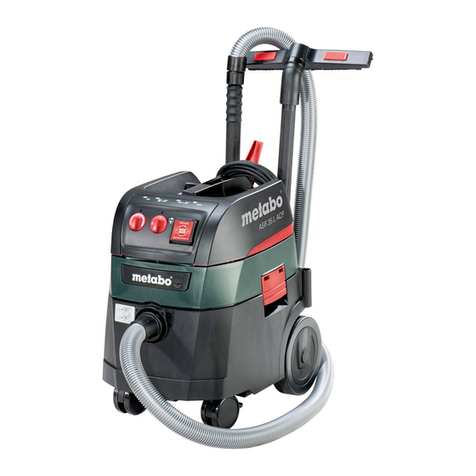
  9. Metabo ASR 36-18 BL 25 M SC User manual

Metabo ASR 36-18 BL 25 M SC User manual

www.metabo.com Made in Germany
de Originalbetriebsanleitung 5
en Original instructions 14
fr Notice originale 23
nl Oorspronkelijke gebruiksaanwijzing 32
it Istruzioni originali 41
es Manual original 51
pt Manual original 60
sv Bruksanvisning i original 70
fi Alkuperäiset ohjeet 78
no Original bruksanvisning 86
da Original brugsanvisning 94
pl Instrukcja oryginalna 102
el Πρωτότυπο οδηγιώνχρήσης 112
hu Eredeti használati utasítás 123
ru Оригинальное руководство по
эксплуатации 132
de Оригінальна інструкція з
експлуатації 143
ASR 36-18 BL 25 M SC
43
12
56
14
13
10
15
16
18
17
19
20
1 x 36 V2 x 18 V
9
7
7
8
8
11 12
21
22
2
ENGLISHen
14
Original instructions
On our own responsibility, we hereby declare that
these dust extractors, identified by type and serial
number *1), meet all relevant requirements of
directives *2) and standards *3). Technical
documents for *4) - see page 3.
For UK only:
We as manufacturer and authorized person to
compile the technical file, see *4) on page 3,
hereby declare under sole responsibility that these
dust extractors, identified by type and serial number
*1) on page 3, fulfill all relevant provisions of
following UK Regulations S.I. 2016/1091, S.I. 2008/
1597, S.I. 2012/3032 and Designated Standards
EN 60335-1:2012+A11: 2014+A13: 2017,
EN 60335-2-69:2012, EN IEC 63000:2018
The vacuum cleaner is suitable for vacuuming
dust that is harmful to health (dust class M), in
accordance with EN 60335-2-69.
The vacuum cleaner is suited for the separation of
dry, non-flammable dust, non-flammable liquids,
wood dust and dangerous dust with workplace limit
values ≥ 0.1 mg/m³.
For occupational exposure limits and carcinogenic
materials, see the list of occupational exposure
limits or contact your local professional and
accident prevention associations for information.
The results of the dust test only refer to the
extraction or vacuuming of dry dust.
The vacuum cleaner is suitable for use as:
a) Industrial vacuum cleaner (IS) for vacuuming
deposited dust.
b) Dust extractor (ENT) for extracting airborne dusts
from material processing machines.
The vacuum cleaner is suitable for the demanding
requirements of industrial and commercial
applications e.g. in the areas of craft and trade,
installation work, construction, industry, workshops,
painting and plastering, joinery, woodworking. As
per EN 60335-2-69.
The vacuum cleaner is suitable for the vacuuming of
dust, solid materials (broken glass, nails etc.),
liquids of any kind with the exception of highly
inflammable, combustible liquids and material that
is hotter than 60 °C.
This device is not designed for use by persons
(including children) with physical, sensory or mental
disabilities, or with insufficient experience and/or
knowledge, unless they are supervised by a person
responsible for their safety, or have received
instructions on how to use the device by this person.
Pay attention to the country-specific regulations, as
well as the specifications of the material producer.
The product is intended for commercial use.
Dust containing asbestos must not be vacuumed.
Inflammable dust must not be vacuumed.
No inflammable or explosive solvents, material
saturated with solvent, dust that represents an
explosion hazard, liquids such as petrol, oil,
alcohol, thinner or material that is hotter than 60 °C
are allowed to be vacuumed. This would cause an
explosion and fire hazard! You are not allowed to
use the device in the vicinity of inflammable gases
or substances.
The user bears sole responsibility for any damage
caused by inappropriate use.
Generally accepted accident prevention
regulations and the enclosed safety information
must be observed.
Before using the device,
carefully read through and
familiarise yourself with all the
enclosed safety information and
the Operating Instructions. Keep all
enclosed documentation for future
reference, and ensure that you only
pass on your vacuum clean
together with this documentation.
Before using the device, the
user must receive information,
instructions and training material
on using the device and the
materials for which it is to be used
(including details on safe disposal
of the extracted material).
For your own protection and
for the protection of your
vacuum cleaner, pay
attention to all parts of the text that
are marked with this symbol!
Never allow children to use the
device.
Children should be supervised to
ensure that they do not play with
the tool.
1. Declaration of Conformity
2. Specified Conditions of Use
3. General Safety Information
4. Safety instructions for mitre
saws
ENGLISH en
15
Caution! Only use accessories that
are included with the device or
specified operating Instructions.
The use of other accessories may
impair safety. Use only the
supplied hose and the supplied
suction vessel.
You must not perform any work
other than that described here.
In the event of misuse, improper
operation or unprofessional repair
work no liability shall be assumed
by us for any damage incurred.
When the device is not in use,
leave the hose on the device to
prevent dust accidentally
escaping. Seal the suction opening
(17) with a sealing plug (18) , and
join the hose ends to prevent dust
from escaping.
Do not operate devices or
accessories under the following
conditions:
- If the device has recognisable
damage (cracks/breaks),
- If there is a suspected non-visible
defect (after a fall).
Do not point the nozzle, hose or
tube at people or animals.
WARNING - If any foam or
water egresses, switch off
immediately. Empty the container
and, if need be, the pleated filter.
Never sit or stand on the device.
Always set up the hose so there is
no danger of tripping.
Do not leave the device
unattended. If there is a long work
interruption, remove the battery
packs.
The vacuum cleaner should not be
used or stored outside in wet
conditions.
IMPORTANT - This machine must
only be stored indoors.
Acids, acetone and solvents can
corrode the device components.
Prior to any servicing work,
cleaning of the and after each
use, switch off the device and
remove the battery packs.
Steam cleaners and high-pressure
cleaners must not be used to clean
the vacuum cleaner.
The inside of the cover must
always be kept dry.
Mould contamination can result if
the appliance is not cleaned for an
extended period, especially if used
in areas where foodstuffs are
processed: Always clean and
disinfect the vacuum cleaner
immediately after use.
Never open the device outdoors
during rain or storms.
The device must not be operated in
areas with an explosion hazard.
Ensure that the vacuum cleaner is
steady.
If the extracted air is discharged
into the room, ensure there is an
adequate air change rate (L) in the
room. Observe the regulations that
apply in your country.
Caution! This device contains
dust that is harmful to health.
Discharge and maintenance
operations (including disposal of
the dust collection containers)
must only be carried out by
qualified specialists wearing
ENGLISHen
16
appropriate protective clothing and
equipment.
Warning - general danger!
Caution! Do not use the
device until you have read the
operating Instructions.
WARNING - Operating personnel
must receive adequate instruction
in the use of this vacuum cleaner
and in the materials for which it is
used.
Warning sign for machines with
dust class M:
During discharge and maintenance
operations, note the following:
Clean the device before opening it.
Wear a dust mask. Avoid exposing
third parties to dust. Provide local
filtered forced ventilation. Then
clean the maintenance area.
Do not operate the device without
the complete filtration system.
(Filter cassettes and PE disposal
bags or alternatively fleece filter
bags).
According to tests carried out as
per EN 60335 section 1 and 69, the
device also meets electrical safety
requirements relating to the
extraction of a water-air mixture.
4.1 Use and handling cordless tools
•Only recharge with the charger specified by
the manufacturer. A charger that is suitable for
one type of battery pack may create a risk of fire
when used with another battery pack.
•Use power tools only with specifically
designated battery packs. Use of any other
battery packs may create a risk of injury and fire.
•When not in use, keep batteries away from
paper clips, coins, keys, nails, screws or
other small metal objects that could bridge
the contacts. Shorting the battery terminals
together may cause burns or a fire.
•Under abusive conditions, liquid may be
ejected from the battery. Avoid contact. If
contact accidentally occurs, flush with
water. If liquid contacts eyes, additionally
seek medical help. Liquid ejected from the
battery may cause irritation or burns.
•Do not use a battery pack or tool that is
damaged or modified. Damaged or modified
batteries may exhibit unpredictable behaviour
resulting in fire, explosion or risk of injury.
•Do not expose a battery pack or tool to fire or
excessive temperature. Exposure to fire or
temperature above 130 °C (265 °F) may cause
explosion.
•Follow all charging instructions and do not
charge the battery pack or tool outside the
temperature range specified in the
instructions. Charging improperly or at
temperatures outside the specified range may
damage the battery and increase the risk of fire.
• Remove the battery packs from the machine
before making any conversion, maintaining or
cleaning.
Protect battery packs from water and
moisture!
Do not expose battery packs to fire!
• Do not use faulty or deformed battery packs!
• Do not open battery packs!
• Do not touch or short circuit battery pack
contacts!
A slightly acidic, flammable fluid may leak
from defective Li-ion battery packs!
If battery fluid leaks out and comes into
contact with your skin, rinse immediately
with plenty of water. If battery fluid leaks out
and comes into contact with your eyes, wash them
with clean water and seek medical attention
immediately!
• If the machine is defective, remove the battery
pack from the machine.
Transport of li-ion battery packs:
• The shipping of li-ion battery pack is subject to
laws related to the carriage of hazardous goods
(UN 3480 and UN 3481). Inform yourself of the
currently valid specifications when shipping li-ion
battery packs. If necessary, consult your freight
forwarder. Certified packaging is available from
Metabo.
• Only send the battery pack if the housing is intact
and no fluid is leaking. Remove the battery pack
from the machine for sending. Prevent the
contacts from short-circuiting (e.g. by protecting
them with adhesive tape).
See page 2.
5. Overview
ENGLISH en
17
1 Main switch
2 Vibrator switch
3 Capacity and signal indicator
4 Capacity indicator button
5 Rotary switch for selecting the extraction hose
diameter
6 Volume flow control display
7 Battery pack release button*
8 Battery pack(s) *
9 Protective cover (battery packs)
10 Lock (to lock the protective cover)
11 PE disposal bag *
12 Fleece filter bag*
13 Hose hooks
14 Upper part
15 Snap lock
16 Bottom part
17 Suction opening
18 Sealing plug
19 Locking knob
20 Locking bar (for opening the hood to change
filter cassettes)
21 Motor protection filter
22 Filter cassette (according to IFA C)
* depending on equipment/not included in scope of
delivery
6.1 Inserting a Fleece Filter Bag
We recommend using fleece filter bags for:
- Applications, where small amounts of fine dust are
created (e.g. spot-grinding and grinding of paint
and lacquer coatings, extraction of drilling
applications with small diameters < 10 mm of
short duration, etc.).
- Use of machines, such as: routers, planers, small
grinding machines, etc.
Switch off device on the mains switch (1), remove
battery packs (8), open snap locks (15) . Remove
the upper part (14) of the device from the container
(16).
Turn the red rotary switch (on
the inside of the suction
opening) until the stop: the text
"CLOSE" shows upwards to
the marking ▲.
Hold a new fleece filter bag on the flange and, with
its opening, guide it first over the latch at the bottom
part of the suction opening, then fit up to the stop on
the suction opening. Replace the upper part (14) on
the container (16) and close the snap locks (15).
6.2 Inserting a PE Disposal Bag
PE filter bags (11) are suitable for both wet and dry
vacuuming.
We recommend the use of PE-disposal bags for:
- Applications, where larger amounts of dust are
created (e.g. removal of plaster surfaces, spot-
grinding and grinding of screeds, etc.).
- Use of machines, such as e.g.: renovation milling
machines, renovation grinders, drywall grinders,
wall grinders etc.
Turn the vibrator switch (2) to the LEFT in “AUTO”
position.
Switch off device, remove battery packs (8), open
snap locks (15) . Remove the upper part (14) of the
device from the container (16).
Turn the red rotary switch (on
the inside o the suction
opening) to the stop: the text
"OPEN" shows upwards to the
marking ▲.
Hold the PE disposal bag (11) on the flange and,
with its opening, guide it first over the latch at the
bottom part of the suction opening, then fit up to the
stop on the suction opening.
Spread out the PE disposal bag (11) evenly across
the container floor. Arrange the edges of the PE
disposal bag around the container rim so that the
bag is firmly clamped on all sides by the upper part
(14) once replaced.
Replace the upper part (14) on the container (16)
and close the snap locks (15).
6.3 Battery pack
Charge the battery packs before use.
Recharge the battery packs if performance
diminishes.
Instructions on charging the battery packs can be
found in the operating instructions of the Metabo
charger.
In case of Li-Ion battery packs with capacity and
signal display (3) (equipment-specific):
- Press the button (4), the LEDs indicate the charge
level.
- The battery pack(s) is(are) almost flat and must be
recharged if one LED is flashing.
Inserting and removing the battery pack
Use either one 36 V battery pack or two 18 V battery
packs.
- recommended capacity 8.0 and greater. The use
of battery packs with a smaller capacity (Ah)
reduces the service life but not the suction power.
- We recommend the use of battery packs with
identical item number.
- The use of battery packs with different capacity
(Ah) is permitted. In this case, the battery pack with
the smaller capacity (Ah) determines the useful life.
Insertion: Push the lock (10) downwards and fold
down the protective cover (9) . Slide in the battery
pack(s) (8) until it engages. Close the protective
cover (9) .
Removal: Push the lock downwards (10) and fold
the protective cover (9) downwards. Press the
6. Initial Operation
ENGLISHen
18
battery pack release (7) button and remove the
battery pack(s) (8). Close the protective cover (9) .
7.1 Switching the unit on /off, automatic
switch-on
Switching off: Turn main switch (1) in “OFF”
position. (Capacity display is off. The device does
not use any power!)
Automatic: Turn main switch (1) to the LEFT
(suction power level 1 - 3). The device is switched
on and off by means of “CORDLESS CONTROL “.
(Capacity display (3) shows the battery pack
capacity).
Information on “automatic”: If the switch is turned to
the left to “automatic”, the vacuum cleaner will be
ready for operation for 10 hours (standby, capacity
display (3) shows the battery capacity). Without
vacuuming, the device will switch off automatically
10 hours after the last operation (sleep mode,
capacity display off, the device does not use any
power!).
To wake up the device (restore standby), turn main
switch (1) to “OFF” and then again to the LEFT or
press the capacity indicator button (4) .
Information on “CordlessControl“: The device
starts/stops automatically when switching on/off the
power tool equipped with a CordlessControl
transmitter (suction hose). Manual start/stop of the
vacuum cleaner is also possible by pressing a
button on the CordlessControl transmitter. Follow
the operating instructions of the CordlessControl
transmitter.
Manual: Turn main switch (1) to the RIGHT (suction
power level 1 - 3). The device runs continuously.
(Capacity display (3) shows the battery pack
capacity).
7.2 Switching the vibrator on /off, vibrator
automatic
The vibrator cleans the filter cassettes by shaking
off dust.
Switching off: Turn vibrator switch (2) in “OFF”
position.
Automatic: Turn vibrator switch (2) to the LEFT in
“AUTO” position.
- If the air flow rate prescribed for a class M vacuum
cleaner is too low, the volume flow control display
(6) lights up and there is an acoustic signal. During
the next work break, the vibrator cleans the filter
cassettes automatically for about 10 sec.
Manual (e.g. when the suction power decreases):
During a work break or before starting work, turn the
vibrator switch (2) to the RIGHT in “MAN” position
and release again. The vibrator cleans the filter
cassettes for about 10 sec.
7.3 Volume flow control display
If the air flow rate is too low, the volume flow control
display (6) lights up and there is an acoustic signal.
Possible causes:
- Filter cassettes dirty -> Turn vibrato switch (2) in
“MAN” or “AUTO” position. (If needed, wash filter
cassettes (22) or replace, see chapter 10.2)
- Container full-> empty container
- Blockages in the suction hose-> clean
- The diameter of the suction ducts of the extracting
machine is too small.
7.4 Rotary switch for selecting the suction hose
diameter
Adjust the rotary switch (5) to the hose diameter of
the suction hose fitted (suction hose supplied: 35
mm).
The volume flow is being monitored if the main
switch (1) is in the "AUTO" or "MAN" position.
If the volume flow value falls below a certain limit,
the volume flow control display (6) lights up. The
filter cassettes are automatically shaken during the
work breaks if the vibrator switch (2) is in “AUTO”
position.
If the volume flow rate value still remains too low, the
volume flow control display (6) lights up and with
vibrator switch (2) in “AUTO” position, there will be
an additional acoustic signal (1 sec. on, 1 sec. off)
to signal that the container must be emptied, or that
the fleece filter bag (12) or the PE disposal bag (11)
must be changed.
Note: If the suction hose diameter is 19 mm or less,
and if the flow conditions in the suction hose are
unfavourable, the volume flow control display (6)
may occasionally light up and the acoustic signal
may sound, even though the fleece filter bag or the
PE disposal bag does not yet need to be emptied. In
this case, lay out the hose straight and clean it.
Note: If you need to turn the rotary switch to a lower
value because of a machine generating dust (e.g.
small diameter of suction canal in the machine
generating dust, compared to large suction hose
diameter) (5), there is no guarantee that dust will be
conveyed adequately in the suction hose. The
suction hose must be removed from the machine
generating dust after every operating sequence, so
it can be vacuumed clear.
Note: The suction hose included in the scope of
delivery has a diameter of 35 mm.
8.1 Dry Vacuuming
Vacuum using a dry filter, device and accessories
only. If the cartridge is damp, dust may stick and
form a crust.
Always use fleece filter bag (12) or PE disposal bag
(11) together with pleated filter (22).
7. The device
8. Use
73
ENGLISH en
19
8.2 Wet vacuuming
Never operate the machine without inserting a
filter cassette (22) first. The machine may be
destroyed and water may also escape.
You can use PE disposal bags (11). The filter
cartridges (22) are suitable for wet vacuuming.
Before carrying out any wet vacuuming, remove the
dry vacuumed material. This process will prevent
severe soiling and encrustation.
The integrated water sensor switches off the motor
when the container is full. Empty the device. If the
device is not switched off, the restart protection
device remains effective. The device is not
operable again until it has been switched off and
switched back on again.
After switching off, some water may run back out of
the hose.
Before emptying, first of all take the suction hose out
of the liquid.
If you are then going to dry vacuum, insert a dry filter
cassette. (If you are frequently switching between
dry and wet vacuuming, we recommend the use of
a second set of filter cassettes.) Allow the filter
cassettes, container and accessories to dry:
otherwise dust may adhere to damp components.
8.3 Use as industrial vacuum cleaner (IS):
Turn main switch (1) to the RIGHT (position “MAN”).
Adjust the rotary switch (5) to the hose diameter of
the suction hose fitted.
If the volume flow falls below the set value, the
volume flow control display (6) lights up to signal
that the container must be emptied, or that the
fleece filter bag (12) or the PE disposal bag (11)
must be changed or the filter must be cleaned.
8.4 Use as a dust extractor (ENT):
The dust extractor must not be connected to more
than one dust source.
Turn the main switch (1) and vibrator switch (2) to
“AUTO” position.
Adjust the rotary switch (5) to the hose diameter of
the suction hose fitted. For more detailed
information, see section 7.4.
8.5 Transport
Close the suction opening (17) with sealing plugs
(18). Join the hose ends to prevent dust from
escaping.
Wrap the suction hose about the vacuum cleaner.
Place the accessories in a suitable plastic bag and
seal the bag.
The upper part (14) must be securely sealed to the
container (16) - check that the snap locks (15) are
closed.
9.1 General Cleaning Instructions
Clean the container and accessories with water.
Wipe the upper part (14) with a damp cloth.
Caution! This device contains dust that is harmful to
health. Discharge and maintenance operations
(including disposal of the dust collection containers)
must only be carried out by qualified specialists
wearing appropriate protective clothing and
equipment.
Emptying the Container
Only permitted for dusts with
occupational exposure limits > 1mg/m3.
- Remove the battery packs .
- Remove the suction hose, close the suction
opening (17) with the sealing plug (18).
- Open the snap locks (15). Remove the upper part
(14) of the device from the container (16).
Disposing of the Fleece Filter Bag
- Remove the battery packs .
- Put on a dust mask.
- Remove the suction hose, close the suction
opening (17) with the sealing plug (18).
- Open the snap locks (15). Remove the upper part
(14) of the device from the container (16).
- Carefully pull back the fleece filter bag (12) from
the suction opening (18) . Seal the flange of the
fleece filter bag by folding over the cover.
- Dispose of the vacuumed material in accordance
with legal regulations.
Disposal of a PE Disposal Bag
- Switch on the vacuum cleaner and shake the filter
cassettes: Turn vibrator switch (2) to the RIGHT in
“MAN” position and release again. The vibrator
cleans the filter cassettes (22) for about 10 sec.
- Switch off the vacuum cleaner: turn the switch (1)
to the "OFF" position.
- Put on a dust mask.
- Remove the suction hose, close the suction
opening (17) with the sealing plug (18).
- Open the snap locks (15). Remove the upper part
(14) of the device from the container (16). Before
setting down the upper part, turn switch (1) to the
"ON/MAX" position so that any falling dust is
vacuumed.
- Carefully pull back the PE disposal bag (11) from
the suction opening (17). Seal the flange of the PE
disposal bag by folding over the cover.
- Dispose of the vacuumed material in accordance
with legal regulations.
9.2 Safety instructions for mitre saws
In the case of class M machines, the outside of the
machine should be cleaned (vacuumed and wiped
down), or treated with sealants before being
removed from the hazardous area. All machine
parts must be considered to be contaminated when
removed from the hazardous area: suitable
measures must be taken to prevent any dispersal of
the dust. When carrying out maintenance or repairs,
it is essential to dispose of any contaminated
objects that cannot be adequately cleaned. These
objects must be disposed of using impermeable
9. Cleaning
ENGLISHen
20
bags and in accordance with the applicable
regulations for removing such waste.
10.1 General instructions
Before performing any maintenance, always
switch off the device and remove the battery
packs.
Clean the device (see chapter 9.).
Never service damaged battery packs. Service
of battery packs should only be performed by the
manufacturer or authorized service providers.
For maintenance by the user, the vacuum cleaner
must be taken apart, cleaned and maintained, to the
extent possible, without endangering maintenance
staff or other people.
Preventive measures
Appropriate preventive measures include: cleaning
the device before disassembly; providing local
filtered forced ventilation where the vacuum cleaner
is disassembled; cleaning of the maintenance area
and providing suitable personal protective clothing
and equipment.
10.2 Reduction in suction power
If the suction power decreases, carry out the
following steps:
1. Turn the vibrator switch (2) to the RIGHT in
“MAN” position and release again. The vibrator
cleans the filter cassettes (22) for about 10 sec.
2. Empty the container or replace the fleece filter
bag (12) or PE disposal bag (11).
3. Replace the filter cassettes (22), or rinse them
under running water, dry them and then replace.
10.3 Renew the filter cartridges (22)
Turn the vibrator switch (2) to the RIGHT in “MAN”
position and release again. The vibrator cleans the
filter cassettes (22) for about 10 sec.
Use a coin or a similar object to turn the locking
knob (19) on the locking bar (20) counter-clockwise
through 90° and push the bar (20) to the rear. Swing
up the hood and pull up the filter cartridges (22) to
remove them. Seal the removed filter cassettes
immediately in a dust-tight plastic bag and dispose
of them in accordance with regulations. Insert new
filter cassettes, ensuring they are correctly and
securely in place.
10.4 Motor protection filter
Regularly check the motor protection filter. If the
motor protection filter (21) is contaminated, this
indicates that the filter cassettes (22) may be
defective:
- Replace the filter cartridges (22).
- Replace the motor protection filter (21), or rinse it
under running water, dry it completely and then
replace.
10.5 Water sensor
IMPORTANT - Clean the water
sensor regularly and check it for
signs of damage.
10.6 Technical inspection
At least once a year, the manufacturer or a suitably
qualified and trained person must carry out a dust
test, e.g. to check for damage to the filter cassettes,
verify that the device is air-tight and that the control
unit is functioning correctly.
For maintenance by the user, the vacuum cleaner
must be taken apart, cleaned and maintained, to the
extent possible, without endangering maintenance
staff or other people.
Preventive measures
Appropriate preventive measures include: cleaning
the device before disassembly; providing local
filtered forced ventilation where the vacuum cleaner
is disassembled; cleaning of the maintenance area
and providing suitable personal protective clothing
and equipment.
When carrying out maintenance or repairs, it is
essential to dispose of any contaminated objects
that cannot be adequately cleaned. These objects
must be disposed of using impermeable bags and
in accordance with the applicable regulations for
removing such waste.
If the volume flow control display (6) lights up or if an
acoustic signal is sounded, this indicates that the
fleece filter bag must be emptied.
All LEDs of the capacity and signal display (3)
flash
• Error - remove both battery packs and insert
again
• Only one 18 V battery pack inserted? -
Insert 2 battery packs.
• Turbine jammed? - see the chapter on Repairs.
1 LED of the capacity and signal display (3)
flashes
• Battery pack(s) empty? Charge battery pack(s).
Acoustic signal
• Fast honking (1/10 sec. on, 1 sec. off): battery
pack is empty in about 20 sec.
• Continuous honking: as a pre-warning shortly
before switching off.
• 3 sec.continuous honking: Waster level sensor
was triggered. Empty the container.
Volume flow control display
• (1 sec. on, 1 sec. off: volume flow is too low in the
hose or container is full
Continuously on: high water level / dust container
full
Reduction in suction power:
See the instructions in the section on Cleaning.
• Filter cassettes (22) soiled? - clean.
10. Maintenance
11. Troubleshooting
ENGLISH en
21
• Fleece filter bag (12) full? - replace.
• PE disposal bag (11) full? - replace.
• Container (15) full? - empty.
• Motor protection filter (21) clogged? - See
chapter 10.
• Nozzle, tubes or hose blocked?- clean.
Device will not start:
• Is the battery pack empty? - charge.
• Are the battery packs inserted? - insert.
• Is the upper part (14) closed properly? - Close
• Has the water sensor cut off? - Empty the
container; then switch on and off again.
• Is the main switch (1) in “AUTO” position? - Turn
main switch (1) to the RIGHT. See chapter 7.1.
• The vacuum cleaner is not switched on or off by
means of a power tool, even though switch is
turned o the left to “AUTO”. - check Cordless
Control transmitter (press button). Is the radio
connection ok? Subsequently mount the
transmitter directly on the power tool.
• Is the battery pack defective? See the chapter on
Repairs.
Dust in the container when fleece filter bag is
fitted:
• The position of the rotary slide is incorrect. See
chapter 6.1.
PE disposal bag is sucked to the filter
cassettes (22):
• The position of the rotary slide is incorrect. See
chapter 6.2.
Do not interfere with the device. Contact
an authorized workshop or Metabo's after-
sales service department (see chapter 13. on
Repairs).
f
Use only genuine Metabo accessories.
If you need any accessories, check with your
dealer.
See page 4.
A Fleece filter bag
5 pieces = 1 set
B PE disposal bag M
5 pieces = 1 set
C Filter cassette M, polyester, nano-coated
2 pieces = 1 set
D Filter cassette M, polyester
2 pieces = 1 set
E Motor protection filter (1 filter) You must order 2
items.
F Suction hose (conducts electricity)
G Suction tubes (2 pieces), plastic
H Suction tubes (2 pieces), chrome-plated
I Intermediate piece of handle
J Connecting sleeve
K Connecting sleeve
L Floor nozzle
M Floor nozzle set (with floor piece and wet
vacuuming piece)
N Battery packs
O Chargers
Repairs to devices must be carried out by qualified
electricians only!
Use only original Metabo spare parts.
Contact your local Metabo representative if you
have Metabo power tools requiring repairs. For
addresses see www.metabo.com.
You can download a list of spare parts from
www.metabo.com.
Observe national regulations on environmentally
compatible disposal and on the recycling of disused
machines, packaging and accessories.
Packaging materials must be disposed of according
to their labelling in accordance with municipal
guidelines. Further information can be found at
www.metabo.com in the “Service” section.
Battery packs may not be disposed of with regular
waste. Return faulty or used battery packs to your
Metabo dealer!
Do not allow battery packs to come into contact with
water!
For EU countries only: Never dispose of
appliances in your household waste!
According to European directive 2012/19/EU
on Waste Electrical and Electronic Equipment and
its implementation in national law, used devices
must be collected separately and delivered for
environmentally-friendly recycling.
Discharge the battery pack in the power tool before
disposal. Prevent the contacts from short-circuiting
(e.g. by protecting them with adhesive tape).
Explanatory notes on the specifications on page 2.
Changes due to technological progress reserved.
K =dust class. As per EN 60335-2-69.
LxWxH =external dimensions
IP =protection class
U =mains voltage
F =main frequency
A =power consumption
N =mains connection lead
P1=rated input power
pU1 =max. vacuum (at the hose)
pU2=Max. vacuum (at blower)
Vl/s1=Max. volume flow (at hose)
Vl/s2=Max. volume flow (at blower)
Dmax1=Max. flow rate (at hose)
Dmax2 =max. flow rate (at the blower)
V =max. container volume
m =weight (without mains cable)
Permitted ambient temperature during operation:
-20 °C to 50 °C (limited performance with
12. Accessories
13. Repairs
14. Environmental Protection
15. Technical Data
ENGLISHen
22
temperatures below 0 °C). Permitted ambient
temperature for storage: 0 °C to 30 °C
direct current
Typical A-effective perceived sound levels
(IEC 60335-2-69):
Lpa =sound-pressure level
LWA =acoustic power level
During operation the noise level can exceed
80 dB(A).
Wear ear protectors!
Measured values determined in conformity with EN
60704.
~AC Power
The technical specifications quoted are subject to
tolerances (in compliance with the relevant valid
standards).

Other manuals for ASR 36-18 BL 25 M SC

1

Other Metabo Vacuum Cleaner manuals

Metabo ASR 25 L SC User manual

Metabo

Metabo ASR 25 L SC User manual

Metabo ASR 35 ACP User manual

Metabo

Metabo ASR 35 ACP User manual

Metabo AS 18 L PC User manual

Metabo

Metabo AS 18 L PC User manual

Metabo AS 20 L User manual

Metabo

Metabo AS 20 L User manual

Metabo AS 1200 Manual

Metabo

Metabo AS 1200 Manual

Metabo AS 20 L User manual

Metabo

Metabo AS 20 L User manual

Metabo ASR 35 AutoClean User manual

Metabo

Metabo ASR 35 AutoClean User manual

Metabo IDR User manual

Metabo

Metabo IDR User manual

Metabo AS 20 L User manual

Metabo

Metabo AS 20 L User manual

Metabo ASA 1202 User manual

Metabo

Metabo ASA 1202 User manual

Metabo ASR 35 L ACP User manual

Metabo

Metabo ASR 35 L ACP User manual

Metabo ASR 25 L SC User manual

Metabo

Metabo ASR 25 L SC User manual

Metabo ASR 35 L ACP User manual

Metabo

Metabo ASR 35 L ACP User manual

Metabo ASR 35 M AutoClean User manual

Metabo

Metabo ASR 35 M AutoClean User manual

Metabo ASR 2050 User manual

Metabo

Metabo ASR 2050 User manual

Metabo ASR 36-18 BL 25 M SC User manual

Metabo

Metabo ASR 36-18 BL 25 M SC User manual

Metabo AS 36-18 L 20 PC User manual

Metabo

Metabo AS 36-18 L 20 PC User manual

Metabo AS 18 L PC User manual

Metabo

Metabo AS 18 L PC User manual

Metabo AS 20 L User manual

Metabo

Metabo AS 20 L User manual

Metabo SHR 2050 M User manual

Metabo

Metabo SHR 2050 M User manual

Metabo AS 18 L PC User manual

Metabo

Metabo AS 18 L PC User manual

Metabo ASR 25 L SC User manual

Metabo

Metabo ASR 25 L SC User manual

Metabo SPA 1702 W User manual

Metabo

Metabo SPA 1702 W User manual

Metabo ASA 30 L PC Inox User manual

Metabo

Metabo ASA 30 L PC Inox User manual

Popular Vacuum Cleaner manuals by other brands

Triple S SV-12 Operating & maintenance instructions

Triple S

Triple S SV-12 Operating & maintenance instructions

KleenRite 70000 -XVAC Pile Lifter Operator and parts manual

KleenRite

KleenRite 70000 -XVAC Pile Lifter Operator and parts manual

Fagor VCE-150 Instructions for use

Fagor

Fagor VCE-150 Instructions for use

Yujin Robot iCLEBO O5 user manual

Yujin Robot

Yujin Robot iCLEBO O5 user manual

BLACK DECKER VPX2102 manual

BLACK DECKER

BLACK DECKER VPX2102 manual

Dirt Devil Hand Vac owner's manual

Dirt Devil

Dirt Devil Hand Vac owner's manual

Dirt Devil CENTEC M2828-0 operating manual

Dirt Devil

Dirt Devil CENTEC M2828-0 operating manual

Dirt Devil M082660 instruction manual

Dirt Devil

Dirt Devil M082660 instruction manual

Concept2 CW1010 quick guide

Concept2

Concept2 CW1010 quick guide

Dirt Devil Breeze manual

Dirt Devil

Dirt Devil Breeze manual

Silvercrest SAS 7.2 A26 operating instructions

Silvercrest

Silvercrest SAS 7.2 A26 operating instructions

Silvercrest SHS 12.0 A2 translation of original operation manual

Silvercrest

Silvercrest SHS 12.0 A2 translation of original operation manual

Concept2 VP9151 instructions

Concept2

Concept2 VP9151 instructions

Concept2 VA0030 manual

Concept2

Concept2 VA0030 manual

EUROPRO SHARK EP79 owner's manual

EUROPRO

EUROPRO SHARK EP79 owner's manual

BLACK DECKER HFEK520J instruction manual

BLACK DECKER

BLACK DECKER HFEK520J instruction manual

Good Way VAC-2-HEPA Operating and maintenance instructions

Good Way

Good Way VAC-2-HEPA Operating and maintenance instructions

Gtech AirRAM operating manual

Gtech

Gtech AirRAM operating manual

manuals.online logo
manuals.online logoBrands
  • About & Mission
  • Contact us
  • Privacy Policy
  • Terms and Conditions

Copyright 2025 Manuals.Online. All Rights Reserved.