4
Metcalfe GU4 & GU8 Potato Peeling Machines
The Metcalfe 14lb (6.3kg) & 28lb (12.6kg) potato peeling machines are constructed from food grade,
non-corrosive aluminium alloy castings, with the spindle housing and chute cast integrally, eliminating
joints and possible leakage.
Features
•Powerful direct gear drive motors. The GU4 6.3kg and GU8 12.6kg models have 0.5hp geared units
•Low and high (sink height) pedestal models available
•Designed to enable the user to operate, clean and maintain with the minimum of effort
•Motor and gearbox units are housed inside the pedestal therefore no external projections
•The drive between the output shaft of the unit and the drive shaft of the peeler is by means of
a flexible coupling which will prevent damage to the motor or gearbox if the machine is
accidentally jammed or overloaded
•Top casting removeable without tools so that the rotor plate can be lifted out. Turn on water
and whole machine is flushed clean. Cleaning should be carried out daily
•Rotor plate bonding is abrasive grit. Inside wall of peeling chamber has patented cast-in
abrasive serrations which dispenses with the need for abrasive coating. Consequently, there is
less potato loss during both peeling and boiling and the efficiency of the serrations will last the
life of the machine
•All Metcalfe pedestal peelers are available with either single or three phase motors
•All single-phase peelers are supplied with a wall mounted starter which incorporate the ‘on’
switch, emergency stop, no-volt release, overload protection features and are fitted with a
13amp plug
•All three phase peelers are supplied with cord only
•Machines fitted with a water inlet and hose connection incorporating an air-break. Stop tap
can be fitted if required. Provision for fitting water inlet on either side of machine
•Waste outlet screwed 2” BSP female
•Hammer grey painted finish
•CE Approved
Specifications
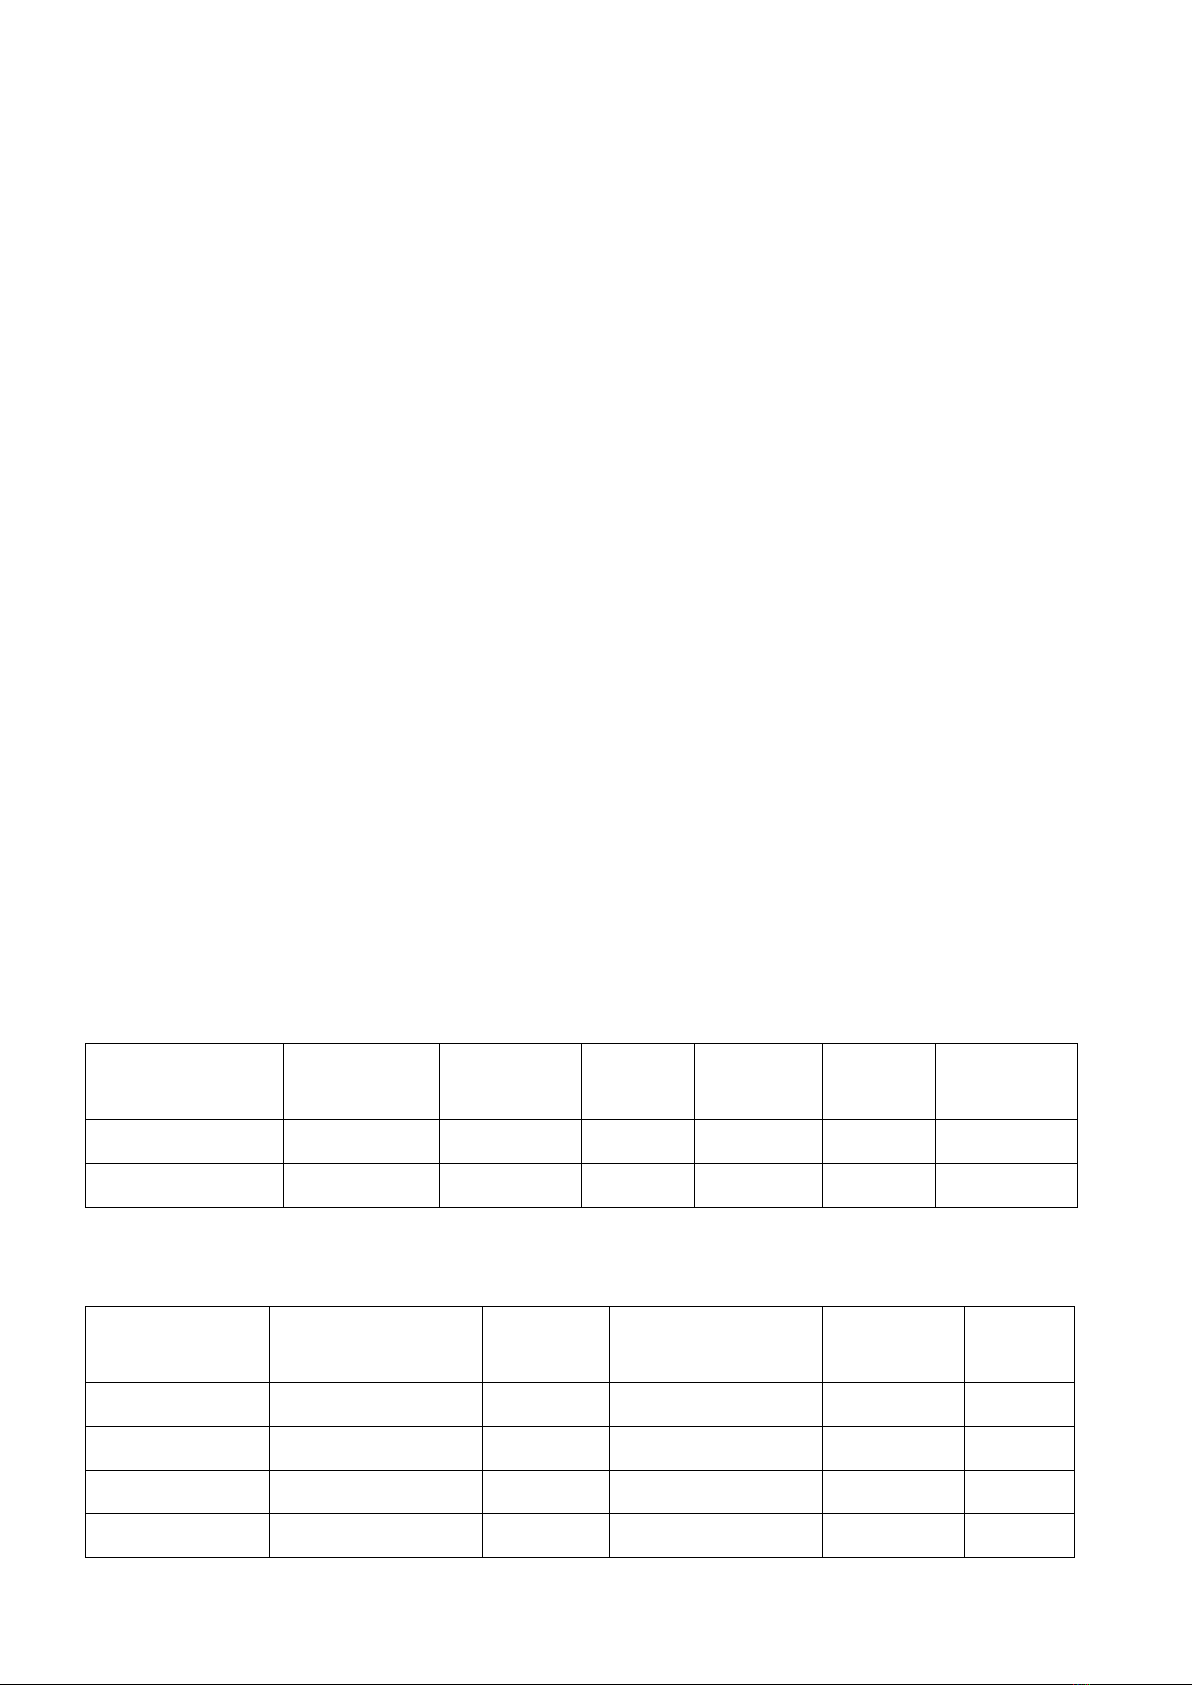
Model Capacity
(Kg)
Phase
(Ø)
Motor
(Volt)
Frequency
(Hz)
AMP
(A)
Power
(kW) / (hp)
GU4 & GU8 6.3 / 12.6 1 230 50 1.89 0.37 / 0.5
GU4 & GU8 6.3 / 12.6 3 440 50 1.09 0.37 / 0.5
Dimensions | Shipping Information
Model Overall Dimensions
(D x W x H)
Net Weight
(Kg)
Packed Dimensions
(D x W x H)
Packed
Weight (Kg)
Volume
(m3)
GU4 (Low Ped) 491 x 476 x 975 60 520 x 610 x 1290 66 0.4
GU4 (High Ped) 491 x 476 x 1204 64 520 x 610 x 1290 70 0.4
GU8 (Low Ped) 573 x 533 x 1018 67 520 x 610 x 1290 73 0.4
GU8 (High Ped) 573 x 533 x 1247 71 520 x 610 x 1290 77 0.4