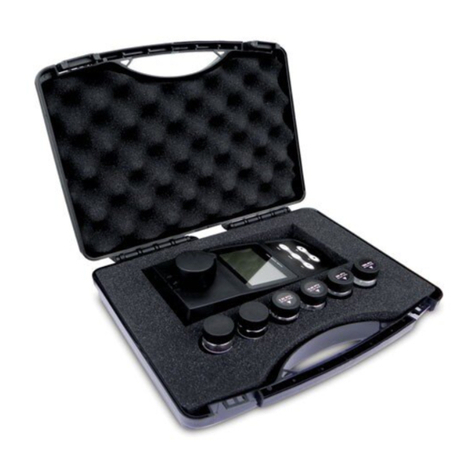
Metria M21 User manual

METRIA M21 Benchtop pH Meter
Instruction Manual

1
Contents
Table of Contents
Introduction ……………………………………………………………………………………………………………………………………..…… 2
Meter overview ……………………………………………………………………………………………………………………………………… 3
Display …………………………………………………………………………………………………………………………….…………………… 3
Keypad …………………………………………………………………………………………………………………………….………………… 3
Connector ………………………………………………………………………………………………………………………….………………… 4
Installing the electrode holder ………………………………………………………………………………………………………………….. 4
Connecting the electrode ………………………………………………………………………………………………………………………... 5
Connecting the temperature probe …………………………………………………………………………………………………………….. 5
Switching the meter on and off ………………………………………………………………………………………………………………… 5
Setup menu ……………………………………………………………………………………………………………………………….…………. 6
Setting the default option …………………………………………………………………………………………………………………………. 6
Restore factory settings …………………………………………………………………………………………………………………………… 6
Temperature compensation ……………………………………………………………………………………………………………………… 7
pH calibration …………………………………………………………………………………………………………………………………….… 8
Setting the number of calibration points ………………………………………………………………………………………………..…….. 8
Single point calibration …………………………………………………………………………………………………………………………. 8
2 points calibration ………………………………………………………………………………………………………………………………… 8
3 points calibration ………………………………………………………………………………………………………………………………… 9
Temperature calibration …………………….………………………………………………………………………………………………….… 9
Measurements …………………….……………………………………………………………………………………………………………….. 10
Electrode care and maintenance ………………………..………………………………………………………….…………………..……... 10
Appendix …………………………………………………………………………………………………….………………………………..……... 11
Troubleshooting ………………………………………………………………………………………………………….………………………… 11
Specifications …………………………………………………………………………………………………………….…………………………… 11
Optional accessories ……………………………………………………………………………………………………………………….……… 11
Electrode selection guide ………………….………….…….……………………………………………………….…….……………………… 12

2
Overview
Introduction
Thank you for selecting the METRIA M21 benchtop pH meter. This manual provides a step-by-step guide to help you operate the
meter, please
carefully read the following instructions before use.
Unpacking
Before unpacking, ensure that the current work environment meets the following conditions.
•Relative humidity is less than 80%.
•Ambient temperature is greater than 0°C/32°F and less than 50°C/122°F.
•No potential electromagnetic interference.
The following list describes the standard components of meter. After the unpacking, please check all components are complete.
If any are
damaged or missing, please contact the supplier.
• 210 pH meter • Electrode arm • pH electrode • Temperature probe
• pH buffer sachets • DC9V power adapter

3
Overview
Meter Overview
Display
Measurement mode icon:
Indicates the meter is in the measurement
mode.
Electrode slope icon:
Indicates the average slope of the pH
electrode.
Calibration mode icon:
Indicates the meter is in the calibration mode.
Hold icon:
Indicates the measured value has been locked.
Setting mode icon:
Indicates the meter is in the setting mode.
ATC
Automatic temperature compensation icon:
Indicates the temperature compensation is
enabled.
Keypad
Name and Icon
Function
• Switch the meter On/Off.
• Lock the measured value, press the key again to resume measuring.
• Exit the calibration or setting and return to the measurement screen.
• Select the measurement mode (pH/mV).
• Start calibration.
• Enter the setup menu (Press and hold the key for 3 seconds).
• Set the temperature.
• Increase value or scroll up through the menu option.

• Decrease value or scroll down through the menu option.
• Confirm the calibration, setting or displayed option.
4
Overview
Connector
No.
Name and Icon
Description
1
pH/ISE
Use for pH or ORP electrode
2
REF
Use for reference electrode
3
ATC
Use for temperature probe
4
Use for power adapter
Installing the Electrode Holder
Take out the electrode arm from the accessory box. The base plate of the electrode holder has a circular hole, the electrode arm
has a connecting rod. Insert the connecting rod into the circular hole and swivel the electrode arm 90°. Electrode holder is now
ready to swing into desired position.
Adjusting the electrode arm
After installation, if the electrode arm automatically rises or falls, you need to adjust the screw until arm locate at any position.
1. Remove the plastic cover from the right side of the electrode arm.
2. Use the screwdriver to tighten the screw moderately.
3. Insert the plastic cover to previous position.

5
Overview
Connection
Connecting the electrode
1.1 Take out the pH electrode from the packaging. Follow the steps below to place the electrode into left or right side of the
electrode arm.
1.2 Insert the BNC connector into the connector socket labeled pH/ISE. Rotate and push the connector clockwise until it locks.
After the
connection is completed, DO NOT pull on the cable. Always make sure that the connector is clean and dry.
Connecting the temperature probe
2.1 Place the temperature probe into the circular hole located at the center of the electrode arm.
2.2 Insert the jack plug to the connector socket labeled ATC. Ensure the connector is fully seated.
Switching the Meter On and Off
1. Insert the connector of power adapter to the power socket.
2. Press and release the Meas key to switch on the meter. Press and hold the Meas key for 3 seconds to switch off the meter.
1. Insert the electrode
2. Hook up the cable
1. Insert the probe
2. Hook up the cable

6
Setup Menu
Setup Menu
The METRIA M21 pH meter contains an integrated setup menu that is used to customize the displayed option to meet
measurement requirement. The following table describes the functions of each menu item.
Menu
Description
Options
Description
Default
Set the pH buffer group for calibration and auto-
recognition.
USA
(pH4.01/7.00/10.01)
USA
NIST
(pH4.01/6.86/9.18)
Set the number of calibration points.
1 point
3 points
2 points
3 points
Set the default temperature unit.
Degrees Celsius
°C
Degrees Fahrenheit
When the option is enabled, the meter will
automatically
sense a stable reading and lock the measurement.
Enable
Disable
Disable
When the option is enabled, the meter will
automatically
switch off if no key is pressed within 3 hours.
Enable
Disable
Disable
Reset the meter to factory default settings.
Enable
Disable
Disable
Setting the default option
1. Press and hold the key for 3 seconds to enter the setup menu.
2. Press the / key to select an option, press the Enter key to confirm and switch to the next menu item.
3. Repeat the steps above until the meter returns to the measurement mode.
Menu item
Option

Restore factory settings
The (Reset) option is used to restore the meter back to default settings. If enabled, all of the calibration data and selected
options will be deleted or reset, the meter must be recalibrated.
1. Press and hold the key for 3 seconds to enter the setup menu.
2. Press the Enter key until the display shows /.
3. Press the / key to select the /, press the Enter key to confirm.
To exit the setup menu without saving changes, press the Meas key.
7
Temperature Compensation
Temperature Compensation
For better accuracy, we recommend the use of either a sensor with a built-in or a separate temperature probe for the calibration
and measurement.
Automatic temperature compensation:
Connect the temperature probe to the meter (Refer to page 5 “Connection”). The ATC icon immediately appears on the display,
the meter is now switched to the automatic temperature compensation mode.
Manual temperature compensation:
If the meter does not detect a temperature probe, the °C icon will show on the display indicating that the meter is switched to
the manual
temperature compensation mode. To set the temperature value, follow the steps below.
1. Press the °C key to enter the temperature setting.
2. Press the / key to set the temperature value, press the Enter key to confirm.
Press the / key once, the setting value will increase or decrease by 0.1. Press and hold the key, the setting value will
increase or
decrease by 1.
Prior to Use
Remove the protective cap from the bottom of the pH electrode. If the glass sensitive membrane has dried out, soak the electrode
in 3M KCL
solution for at least 30 minutes.
ATC
°C

Preparing the pH buffer solution
1. Open the pH7.00 buffer sachet, place the reagent into a 250ml volumetric flask.
2. Fill the volumetric flask to the mark with distilled water, mix the solution until the reagent is completely dissolved.
3. Preparation of pH4.01 and 10.01 buffer solutions are the same as above. Prepared standard buffer solutions should be
stored in hermetically sealed glass containers.
8
Calibration
pH Calibration
The METRIA M21 pH meter allows 1 to 3 points calibration in the pH mode. We recommend that you perform at least 2 points
calibration for high accuracy measurement. The meter will automatically recognize and calibrate to following standard buffer
values.
USA Standard Buffers
pH4.01, 7.00, 10.01
NIST Standard Buffers
pH4.01, 6.86, 9.18
Single point calibration should only be carried out with pH7.00 or 6.86, otherwise calibration will not be accepted.
Make sure to calibrate the meter when attaching a new electrode. Do not reuse the calibration solution after calibration,
contaminants in solution will affect the calibration and eventually the accuracy of the measurement.
In order to get accurate measuring results, we recommend using a stirrer to create the homogeneous buffer solutions and sample.
Setting the number of calibration points
1. Press and hold the key for 3 seconds to enter the setup menu.
2. Press the Enter key, the display shows .
3. Press the / key to select 1 or 2 or 3 points calibration, press the Enter key until the meter returns to the measurement
mode.
Glass sensitive
membrane
3M KCL solution

Single point calibration
1.1 Ensure that the meter is in the pH measurement mode and you have selected 1 point calibration in the setup menu.
1.2 Press the Cal key, the display shows /or /, depending on the pH buffer group you selected.
1.3 Rinse the pH electrode with distilled water, place the electrode (and temperature probe) into the pH7.00 (or 6.86) buffer
solution and stir gently.
1.4 Press the Enter key, the meter begins the calibration, the Calibration icon continuously flashing.
1.5 Wait for the reading to stabilize, the meter will automatically show and returns to the measurement mode.
2 points calibration
2.1 Ensure that you have selected 2 points calibration in the setup menu.
2.2 Repeat steps 1.2 through 1.4 above. When the first calibration point is completed, the display will show . The meter
prompts you to continue with second point calibration.
2.3 Rinse the pH electrode with distilled water, place the electrode (and temperature probe) into the next buffer solution and
stir gently (E.g., pH4.01).
9
Calibration
2.4 Press the Enter key, the meter automatically recognizes the pH buffer solution and begins the calibration.
2.5 Wait for the reading to stabilize, the display will show electrode slope and . Calibration is completed.
3 points calibration
3.1 Ensure that you have selected 3 points calibration in the setup menu.
3.2 Repeat steps 1.2 through 1.4 above. When the first calibration point is completed, the display will show /. The
meter prompts you to continue with second point calibration.
3.3 Rinse the pH electrode with distilled water, place the electrode (and temperature probe) into the pH4.01 buffer solution
and stir gently.
3.4 Press the Enter key, the meter begins the calibration, the Calibration icon continuously flashing.

3.5 Wait for the reading to stabilize, the display will show electrode slope and /( or /).
3.6 Rinse the pH electrode with distilled water, place the electrode (and temperature probe) into the pH10.01 (or 9.18) buffer
solution and stir gently.
3.7 Press the Enter key, the meter begins the calibration.
3.8 Wait for the reading to stabilize, the display will show electrode slope and . Calibration is completed.
•During the calibration, if the meter shows , please check the pH electrode and ensure the pH buffers are fresh and
uncontaminated.
•If the electrode slope is not within the normal range, the icon will disappear on the display.
•To exit the calibration mode without saving the calibration, press the Meas key.
Temperature Calibration
During the measurement, if the temperature reading displayed differs from that of an accurate thermometer, the temperature
probe needs to be calibrated.
1. Connect the temperature probe to the meter and place into a solution with a known accurate temperature.
2. Press the °C key to enter the temperature setting.
3. Press the / key to set the temperature value, press the Enter key to confirm.
10
Measurement
Measurements
pH
1. Press the Mode key until the meter shows the measurement unit pH.
2. Rinse the pH electrode with distilled water. Place the electrode (and temperature probe) into the sample solution and stir
gently.
3. Wait for the measurement to stabilize and record the pH and temperature values.
4. When all of the samples have been measured, rinse the electrode with distilled water, store the electrode into the 3M KCL
solution.
mV
1. Press the Mode key until the meter shows the measurement unit mV.
2. Rinse the electrode with distilled water. Place the electrode into the sample solution and stir gently.
3. Wait for the measurement to stabilize and record the mV value.
4. When all of the samples have been measured, rinse the electrode with distilled water, store the electrode according to the
instructions in the electrode user guides.
If the option is enabled in the setup menu, the meter will automatically lock a measurement endpoint and show
icon. Press the Meas key to resume measuring.
Electrode Care and Maintenance
pH electrode
Since pH electrode is susceptible to dirt and contamination, clean as necessary depending on the extent and condition of use.
•General deposits: Rinse the electrode with distilled water, store the electrode into the 3M KCL solution.

•Salt deposits: Soak the electrode in warm tap water to dissolve deposits, then thoroughly rinse with distilled water.
•Oil or grease: Wash the glass sensitive membrane of electrode in some detergents and water. If necessary, use the alcohol
to clean, then rinse with distilled water. Place the electrode in the 3M KCL solution for at least 30 minutes.
•Protein deposits: Prepare a 1% pepsin solution in 0.1M of HCL. Place the electrode in the solution for 10 minutes. Rinse the
electrode with distilled water.
•Clogged reference junction: Heat a diluted KCl solution to 60°C to 80°C. Place the electrode into the heated solution for
about 10 minutes. Allow the electrode to cool in some unheated KCl solution.
If stored and cleaned properly, the electrode should be ready for immediate use. However, a dehydrated glass sensitive membrane
may cause sluggish response. To rehydrate the sensitive membrane, immerse the electrode in a pH4.01 buffer solution for 10 to
30 minutes. If this fails, the electrode requires activation.
1. Soak the electrode in 0.1M HCl for 5 minutes.
2. Remove and rinse with distilled water, then place in 0.1M NaOH for 5 minutes.
3. Remove and rinse again, and soak in 3M KCL solution for at least 30 minutes.
ORP electrode
•General deposits: Rinse the electrode with distilled water, store the electrode into the 4M KCL solution.
•Inorganic deposits: Soak the electrode in 0.1M HCl for 10 minutes. Remove and rinse with distilled water, then place in
alcohol for 5
minutes. Remove and rinse again, soak the electrode in pH4.01 buffer solution for 30 minutes.
•Oil or grease: Wash the electrode in some detergents and water. Place the electrode in the 4M KCL solution for at least 30
minutes.
11
Appendix
Appendix
Troubleshooting
Fault
Possible Cause
Corrective Action
Electrode dried out
Soak the pH electrode in 3M KCL solution at least 30
minutes
Measured value exceeded the allowed
range
Check the electrode and sample
Drifting erratic
readings
Electrode fault
Check the electrode whether clogged, contaminated or
broken
Buffer problem
Use freshly prepared pH buffers to calibrate meter
Electrode has expired
Replace pH electrode
Specifications
pH
Model
METRIA M21
Range
-1.00 ~15.00pH

Accuracy
±0.01pH
Resolution
0.01pH
Calibration Points
1 to 3 points
pH Buffer Options
USA (pH4.01, 7.00, 10.01) or NIST (pH4.01, 6.86, 9.18)
Temperature Compensation
0~100°C, 32 ~212°F, manual or automatic
mV
Range
-1999~1999mV
Accuracy
±1mV
Resolution
1mV
Temperature
Range
0~105°C, 32 ~221°F
Accuracy
±1°C
Resolution
0.1°C
General Specification
Connector
BNC
Display
Segmented LCD, 135 (L) ×75 (W) mm
Power Requirements
DC9V/400mA, using AC adapter, 220V/50Hz
Dimensions
210(L) ×205(W) ×75(H) mm
Weight
1.5kg
Optional accessories
Order Code
Description
TP-10K
Temperature probe, 3.5mm jack plug, 1 meter cable
PHR-USA
pH4.01, 7.00, 10.01 buffer sachets. For preparing the 250ml buffer solutions.
PHR-NIST
pH4.01, 6.86, 9.18 buffer sachets. For preparing the 250ml buffer solutions.
DCPA-9V
DC9V power adapter, european standard plug, 1 meter cable
12
Electrode Selection Guide
Electrode Selection Guide
pH electrode
Sample /Order
Code
P11
P12
P13
P15
P16
P18
P19
P21
E201
E202
Agar
•
Beer
•
•
•
•
•
•
Blood Products
•
•
•
•
•
Bread, Dough
•
•
Cement
•
Cosmetics
•
•
•
•
•
•
Dairy Products
•
•
•
•
•
Education
•
•
•

Fats/Cream
•
Field Use
•
•
•
Fish Products
•
•
Lab Flasks
•
Low Ionic
•
•
•
Meat, Cheese
•
•
Micro Samples
•
Paint
•
•
•
Photographic
Soil
•
•
Surface
•
Test Tubes
•
•
Tris Buffer
•
Viscose Samples
•
ORP electrode
Order Code
Application
501
Use for the sample with strong redox potential, plastic body, temperature range: 0 ~80°C
502
Use for the sample with weak redox potential, plastic body, temperature range: 0 ~80°C
504
Use for the high temperature samples, glass body, temperature range: 0 ~100°C
Hazardous Substance Statement
Labbox Labware, S.L. is committed to the reduction and eventual elimination of all hazardous substances in both the
manufacturing process and finished products we supply. We have an active manufacturing and procurement program to minimize
and eliminate the use of harmful heavy metals such as cadmium, lead, mercury and the like. New technologies and design
parameters are also promoting these efforts and we expect to have little or no such materials in our product in the coming years.
We welcome our customer suggestions on how to speed up these efforts.
Warranty
The warranty period for meter is two years from the date of shipment. Above warranty does not cover the electrode and
calibration solutions. Out of warranty products will be repaired on a charged basis. The warranty on your meter shall not apply to
defects resulting from:
• Improper or inadequate maintenance by customer.
• Unauthorized modification or misuse.
• Operation outside of the environment specifications of the products.
For more information, please contact the supplier.

pHmetro de sobremesa METRIA M21
Manual de instrucciones

1
Contenidos
Tabla de contenidos
Introducción …………………………………………………………………………………………………………………………………..…… 2
Descripción general………………………………………………………………………………………………………………………………… 3
Pantalla ……………………………………………………………………………………………………………………….…………………… 3
Botones …………………………………………………………………………………………………………………………….……………… 3
Conector ………………………………………………………………………………………………………………………….………………… 4
Instalación del soporte del electrodo………………………………………………………………………………………………………….. 4
Conectar el electrodo………………………………………………………………………………………………………………………... 5
Conectar el sensor de temperatura ……………………………………………………………………………………………………….. 5
Encender y apagar el medidor……………………………………………………………………………………………………………… 5
Menú de ajuste………………………………………………………………………………………………………………………….…………. 6
Configurar las opciones de fábrica……………………………………………………………………………………………………………. 6
Restaurar la configuración de fábrica………………………………………………………………………………………………………… 6
Compensación de la temperatura………………………………………………………………………………………………………… 7
Calibración del pH …………………………………………………………………………………………………………………………….… 8
Configurar el número de puntos de calibración …………………………………………………………………………………..…….. 8
Calibración de 1 punto…………………………………………………………………………………………………………………………. 8
Calibración de 2 puntos………………………………………………………………………………………………………………………… 8
Calibración de 3 puntos………………………………………………………………………………………………………………………… 9
Calibración de la temperatura …………….…………………………………………………………………………………………….… 9
Mediciones …………………….…………………………………………………………………………………………………………………… 10
Mantenimiento del electrodo………………………..……………………………………………………………….………………….. 10
Apéndice …………………………………………………………………………………………………….………………………………..…... 11
Diagnóstico de errores ………………………………………………………………………………………………….……………………… 11
Especificaciones ……………………………………………………………………………………………………….………………………… 11
Accesorios opcionales ………………………………………………………………………………………………………………….……… 11
Guía para la selección del electrodo……………….…….………………………………………………………….……………………… 12

2
Descripción general
Introducción
Gracias por elegir nuestro producto. Este manual es una guía paso por paso para ayudarle a operar el medidor de pH.
Por favor, lea las instrucciones atentamente antes de usarlo.
Desembalaje
Antes de desempaquetar el producto, asegúrese de que el ambiente de trabajo cumple con las siguientes condiciones:
•Humedad relativa inferior al 80%.
•Temperatura ambiente superior a 0°C/32°F e inferior a 50°C/122°F.
•Ninguna posible interferencia electromagnética.
La siguiente lista muestra los componentes estándar del medidor. Después del desembalaje, compruebe que todos
los componentes están. Si alguno de ellos está dañado o no le ha llegado, contacte con su proveedor.
• 210 medidor de pH • Brazo del electrodo • Electrodo de pH • Sensor de temperatura
• Bolsas de tampón • Adaptador eléctrico DC9V

3
Descripción general
Descripción general
Pantalla
Icono del modo de medición:
Indica que el medidor está en modo de
medición.
Icono de la pendiente del electrodo de
pH:
Muestra la pendiente media del electrodo
de pH.
Icono del modo de calibración:
Indica que el medidor está en modo de
calibración.
Icono Hold:
Indica que el valor de medición ha sido
bloqueado.
Icono del modo de ajuste:
Indica que el medidor está en modo de
ajuste.
ATC
Icono de la compensación de temperatura
automática:
Indica que la compensación de
temperatura está activada.
Botones
NOMBRE E ICONO
FUNCIÓN
• Encender/apagar el medidor.
• Bloquear el valor de medición. Vuelva a presionar para seguir midiendo.
• Salir del modo de calibración o ajuste y volver al modo de medición.
• Seleccionar el modo de medición (pH o mV).
• Empezar la calibración.
• Acceder al menú de ajuste (mantenga presionado durante 3 segundos).
• Ajustar la temperatura.
• Aumentar el valor o desplazarse hacia arriba en el menú.
• Reducir el valor o desplazarse hacia abajo en el menú.
• Confirmar la calibración, el ajuste, o la opción mostrada en la pantalla.

4
Descripción general
Conector
NO.
NOMBRE E ICONO
DESCRIPCIÓN
1
pH/ISE
Usar para el electrodo de pH u ORP.
2
REF
Usar para el electrodo de referencia.
3
ATC
Usar para el sensor de temperatura.
4
Usar para el adaptador eléctrico.
Instalación del soporte del electrodo
La base del soporte del electrodo tiene un agujero circular y el brazo del electrodo tiene una barra conectora. Inserte
la barra en el agujero y rote el brazo del electrodo 90°. Una vez hecho esto, el soporte estará listo para rotar a cualquier
posición.
Ajustar el brazo del electrodo
Después de la instalación, si el brazo se levanta solo o se cae, debe ajustar el tornillo hasta que el brazo se quede fijo
en cualquier posición.
1. Saque la tapa de plástico a la derecha del brazo.
2. Use el destornillador para apretar el tornillo moderadamente.
3. Vuelva a poner la tapa de plástico en su sitio.

5
Descripción general
Conexión
Conectar el electrodo
1.1Saque el electrodo de pH de la caja. Siga los pasos a continuación para colocar el electrodo en uno de los lados
del brazo.
1.2 Inserte el conector BNC en el conector pH/ISE. Rótelo y presiónalo hasta que quede bloqueado. Una vez se
haya completado la conexión, NO tire del cable. Asegúrese siempre de que el conector esta limpio y seco.
Conectar el sensor de temperatura
2.1 Coloque el sensor de temperatura.
2.2Inserte la clavija en el conector ATC. Asegúrese de que está bien conectado.
Encender y apagar el medidor
1. Inserte la clavija del adaptador eléctrico al conector de la alimentación.
2. Presione el botón Meas para encender el medidor. Mantenga presionado el botón Meas durante 3 segundos
para apagar el medidor.
1. Inserte el electrodo
2. Conecte el cable
1. Inserte el electrodo
2. Conecte el cable
Table of contents
Languages:
Other Metria Measuring Instrument manuals
Popular Measuring Instrument manuals by other brands
Nibe
Nibe EME 10 Installer manual

Landis+Gyr
Landis+Gyr Ultracold T550 operating instructions

Emerson
Emerson Rosemount Analytical 400A instruction manual
palintest
palintest ChloroSense HR Quick test guide
Brooks Instrument
Brooks Instrument 0154 Installation and operation manual
PCE Instruments
PCE Instruments PCE-432-ICA user manual
Campbell
Campbell SI-111 product manual
raditeq
raditeq Pro Series product manual
OBD2
OBD2 Tyre Watcher X operating instructions
Knick
Knick Stratos Pro A2 CC Series user manual
Keysight Technologies
Keysight Technologies P939 A Series user guide
CARLO GAVAZZI
CARLO GAVAZZI WM30-96 - PROGRAMMING instruction manual
