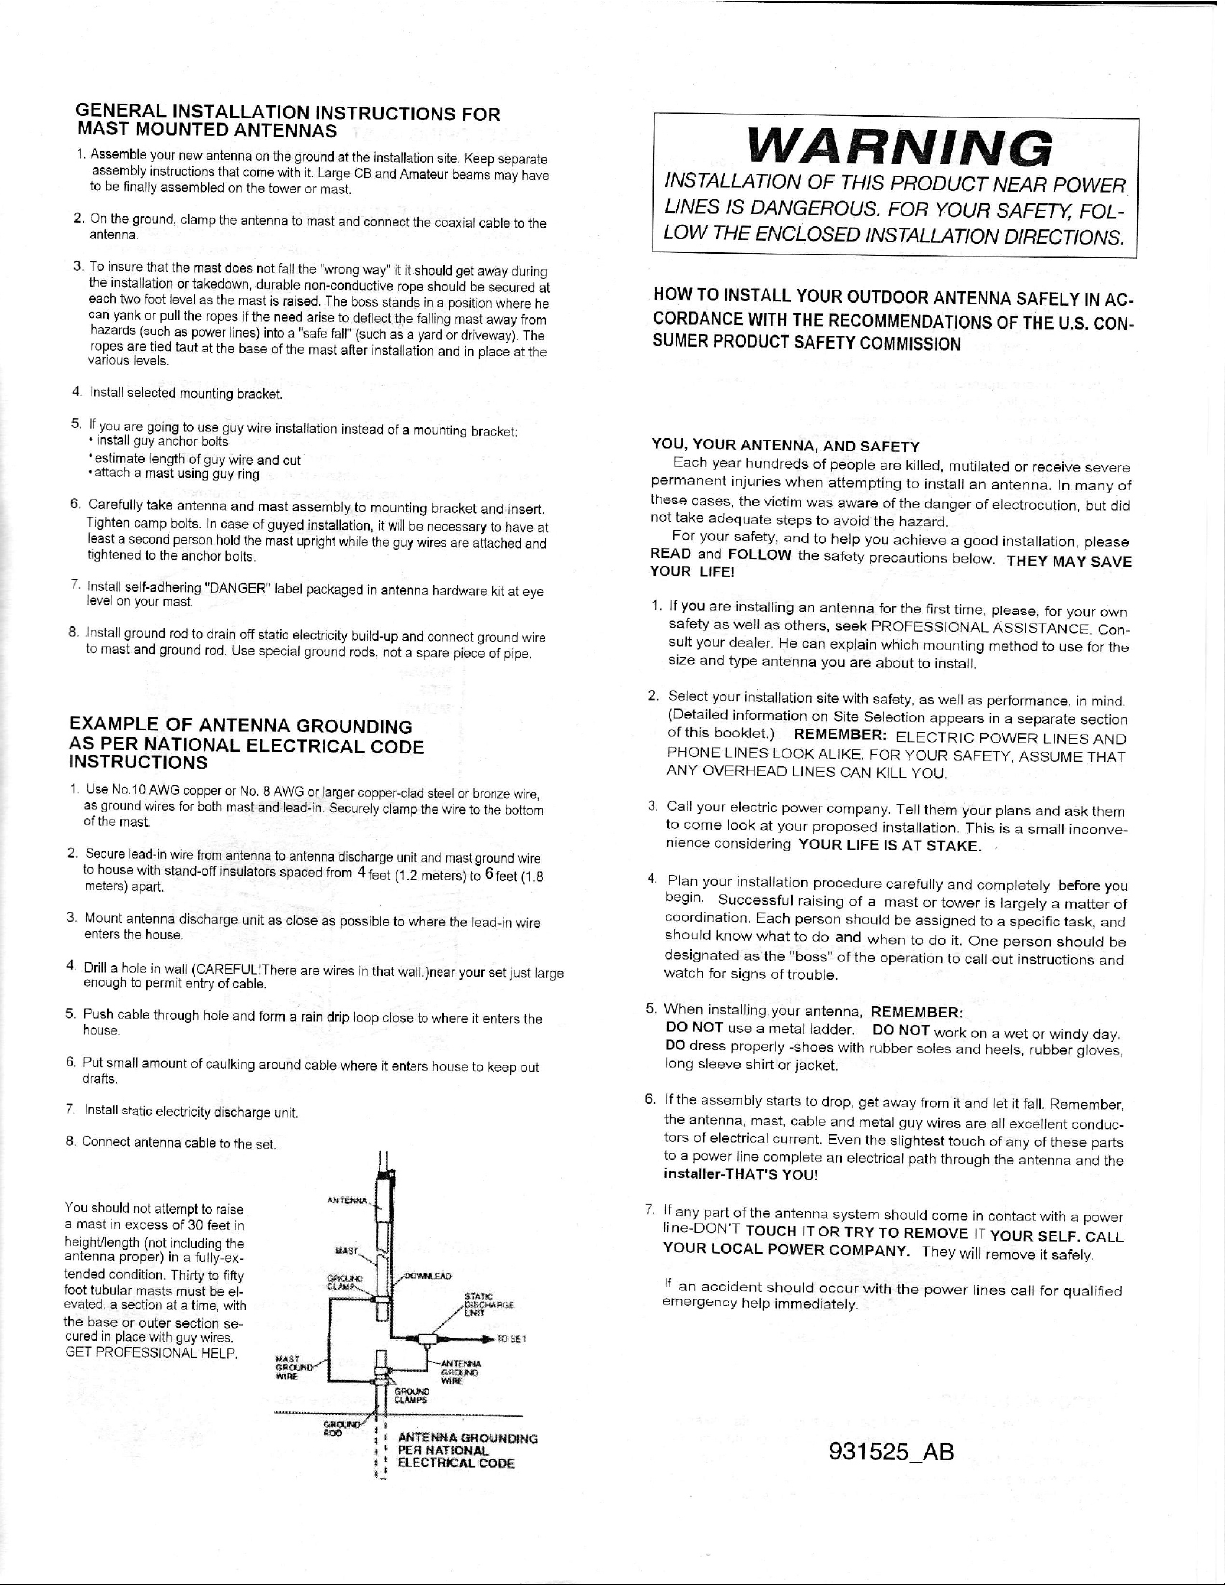
8
PARTS LIST
1
2
3
4
5
6
7
8
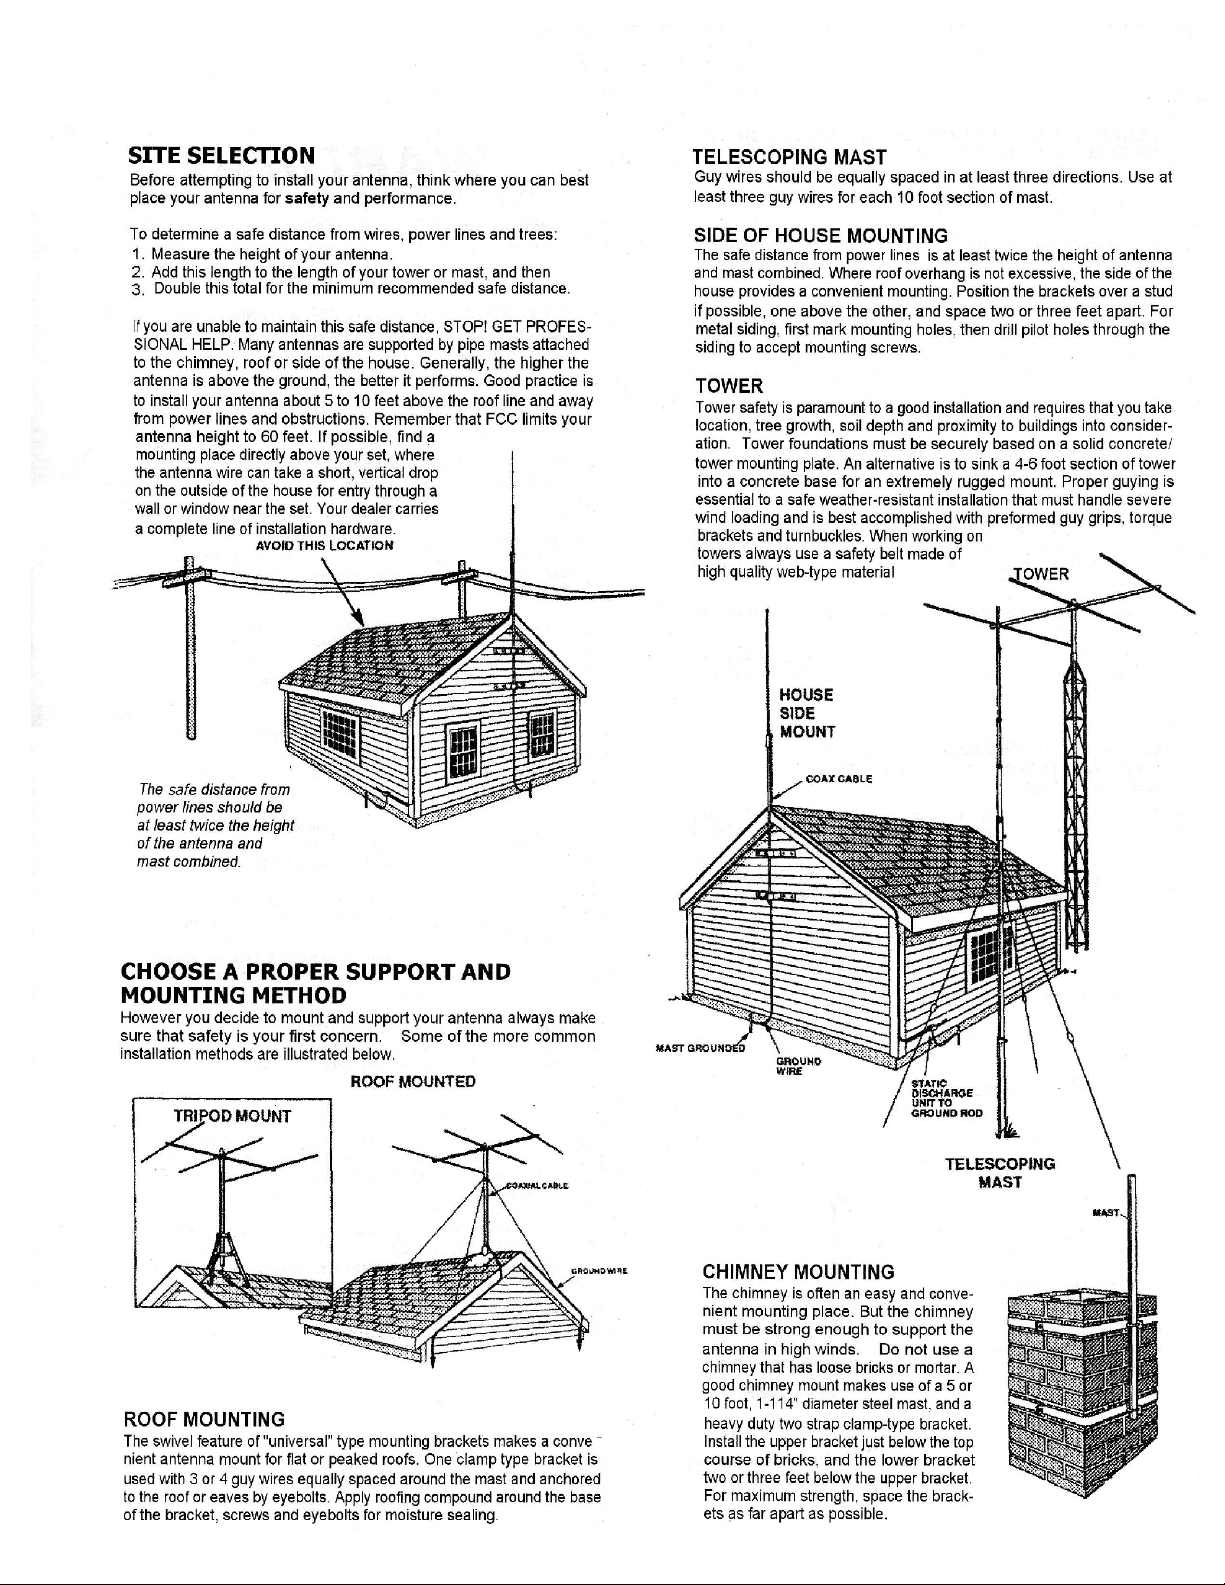
19
20
9
10
11
12
13
14
15
16
17
18
21
22
23
24
25
173273
20-1890-1
20-1890-3
20-1890-4
20-1896-5
20-1890-6
13-1890-1
161422
165138
17-1890-1
745-3104S
461057
171329
455630
758-9199
505266
500156
554099
711-1037S
554071
551367
555362
504069
500158
562961
Tube 5/8 x 53-1/4 swaged ----------------------------------------
Tube, Boom, 1-1/4 .058 x 61-1/4” Drilled --------------------
Tube, 7/16 x .028 x 26” slotted ----------------------------------
Tube, 7/16 x .028 x 18” slotted ---------------------------------
Tube, 3/8 corner ---------------------------------------------------
Rod, Fiberglass 3/8 x 9” -------------------------------------------
Balun Assembly ------------------------------------------------------
Bracket, # 11 ---------------------------------------------------------
Bracket, # 1 ----------------------------------------------------------
Parts Pack MFJ-1890
Hose Clamp #4 ------------------------------------------------------
Insulator 1-1/4- 5/8 ------------------------------------------------
Clamp, 5/8 ------------------------------------------------------------
Caplug, 1-1/4 ABS ------------------------------------------------
U-bolt 1-3/4 ----------------------------------------------------------
Bolt, 1/4-20 x 3/4 ---------------------------------------------------
Bolt, 1/4-20 x 3/8 ---------------------------------------------------
Nut, 1/4-20 Hex -----------------------------------------------------
Washer, #10 Internal lock -----------------------------------------
Nut, 10-24 Hex ------------------------------------------------------
Nut, square 1/4-20 -------------------------------------------------
Nut, square 10-24 --------------------------------------------------
Bolt, 10-24 x 1 ------------------------------------------------------
Bolt, 10-24 x ½ -----------------------------------------------------
Washer, 1/4 Internal lock ----------------------------------------
4
1
6
2
4
2
1
2
2
16
2
2
2
1
16
2
16
4
4
2
2
2
2
16