Functions and Limitations of Use
MICROLIT E-BURETTE is designed for dispensing liquids directly from
the reservoir bottle. It is calibrated in accordance with the guidelines of the
DIN EN ISO 8655 – 3. When the instrument is correctly used, the dispensed
liquid comes into contact with only the following chemically resistant materials:
PTFE, FEP and Borosilicate glass.
CE Marking
This sign certifies that the product meets the requirements of the EC directive
and has been tested according to the specified test methods.
Physical Limits
MICROLIT E-BURETTE is designed for titrating liquids,
observing the following physical limits:
Maintain instrument and reagent between +10 °C to +40 °C (from 50 °F to 104 °F).
Maintain reagent vapor pressure up to 600 mbar (maximum).
Aspirate slowly above 300 mbar in order to prevent the liquid from boiling.
Kinematic viscosity upto 500 mm2/s.
(dynamic viscosity [mPas] = kinematic viscosity [mm2 /s] x density [g/cm³])
4.
A.
B.
•
•
•
Use only original accessories and spare parts.
Do not attempt to make any technical alterations. Do not dismantle
the instrument any further than is described in the Operation Manual.
Always check the instrument for visual damage before use.
If there is any sign of a potential malfunction (e.g. piston difficult to move,
stuck valve or leakage), immediately stop dispensing.
Consult the 'Troubleshooting' section of this Operation Manual and contact the
manufacturer if needed. (Refer to section 18)
•
•
•
•
43
Relative air humidity between 20% and 90%.
Use fluids with density upto 2.2 g/cm³.
Operating Limitations
Chlorinated and fluorinated hydrocarbons or chemical combinations which
form deposits may make it difficult for the piston to move or jam it.
If the piston becomes too difficult to move, immediately clean the instrument.
(Refer to section 17)
While dispensing inflammable fluids, avoid the built up of static charge.
Make sure that you do not dispense into plastic vessels and do not wipe
instruments with a dry cloth.
MICROLIT E-BURETTE is designed for general laboratory applications and
complies with relevant standards, like DIN EN ISO 8655-3.
Please check the compatibility of the instrument for a specific application
(e.g. trace material analysis, food sector etc.).
Approvals for specific applications, like production and administration of food,
pharmaceuticals and cosmetics are not available.
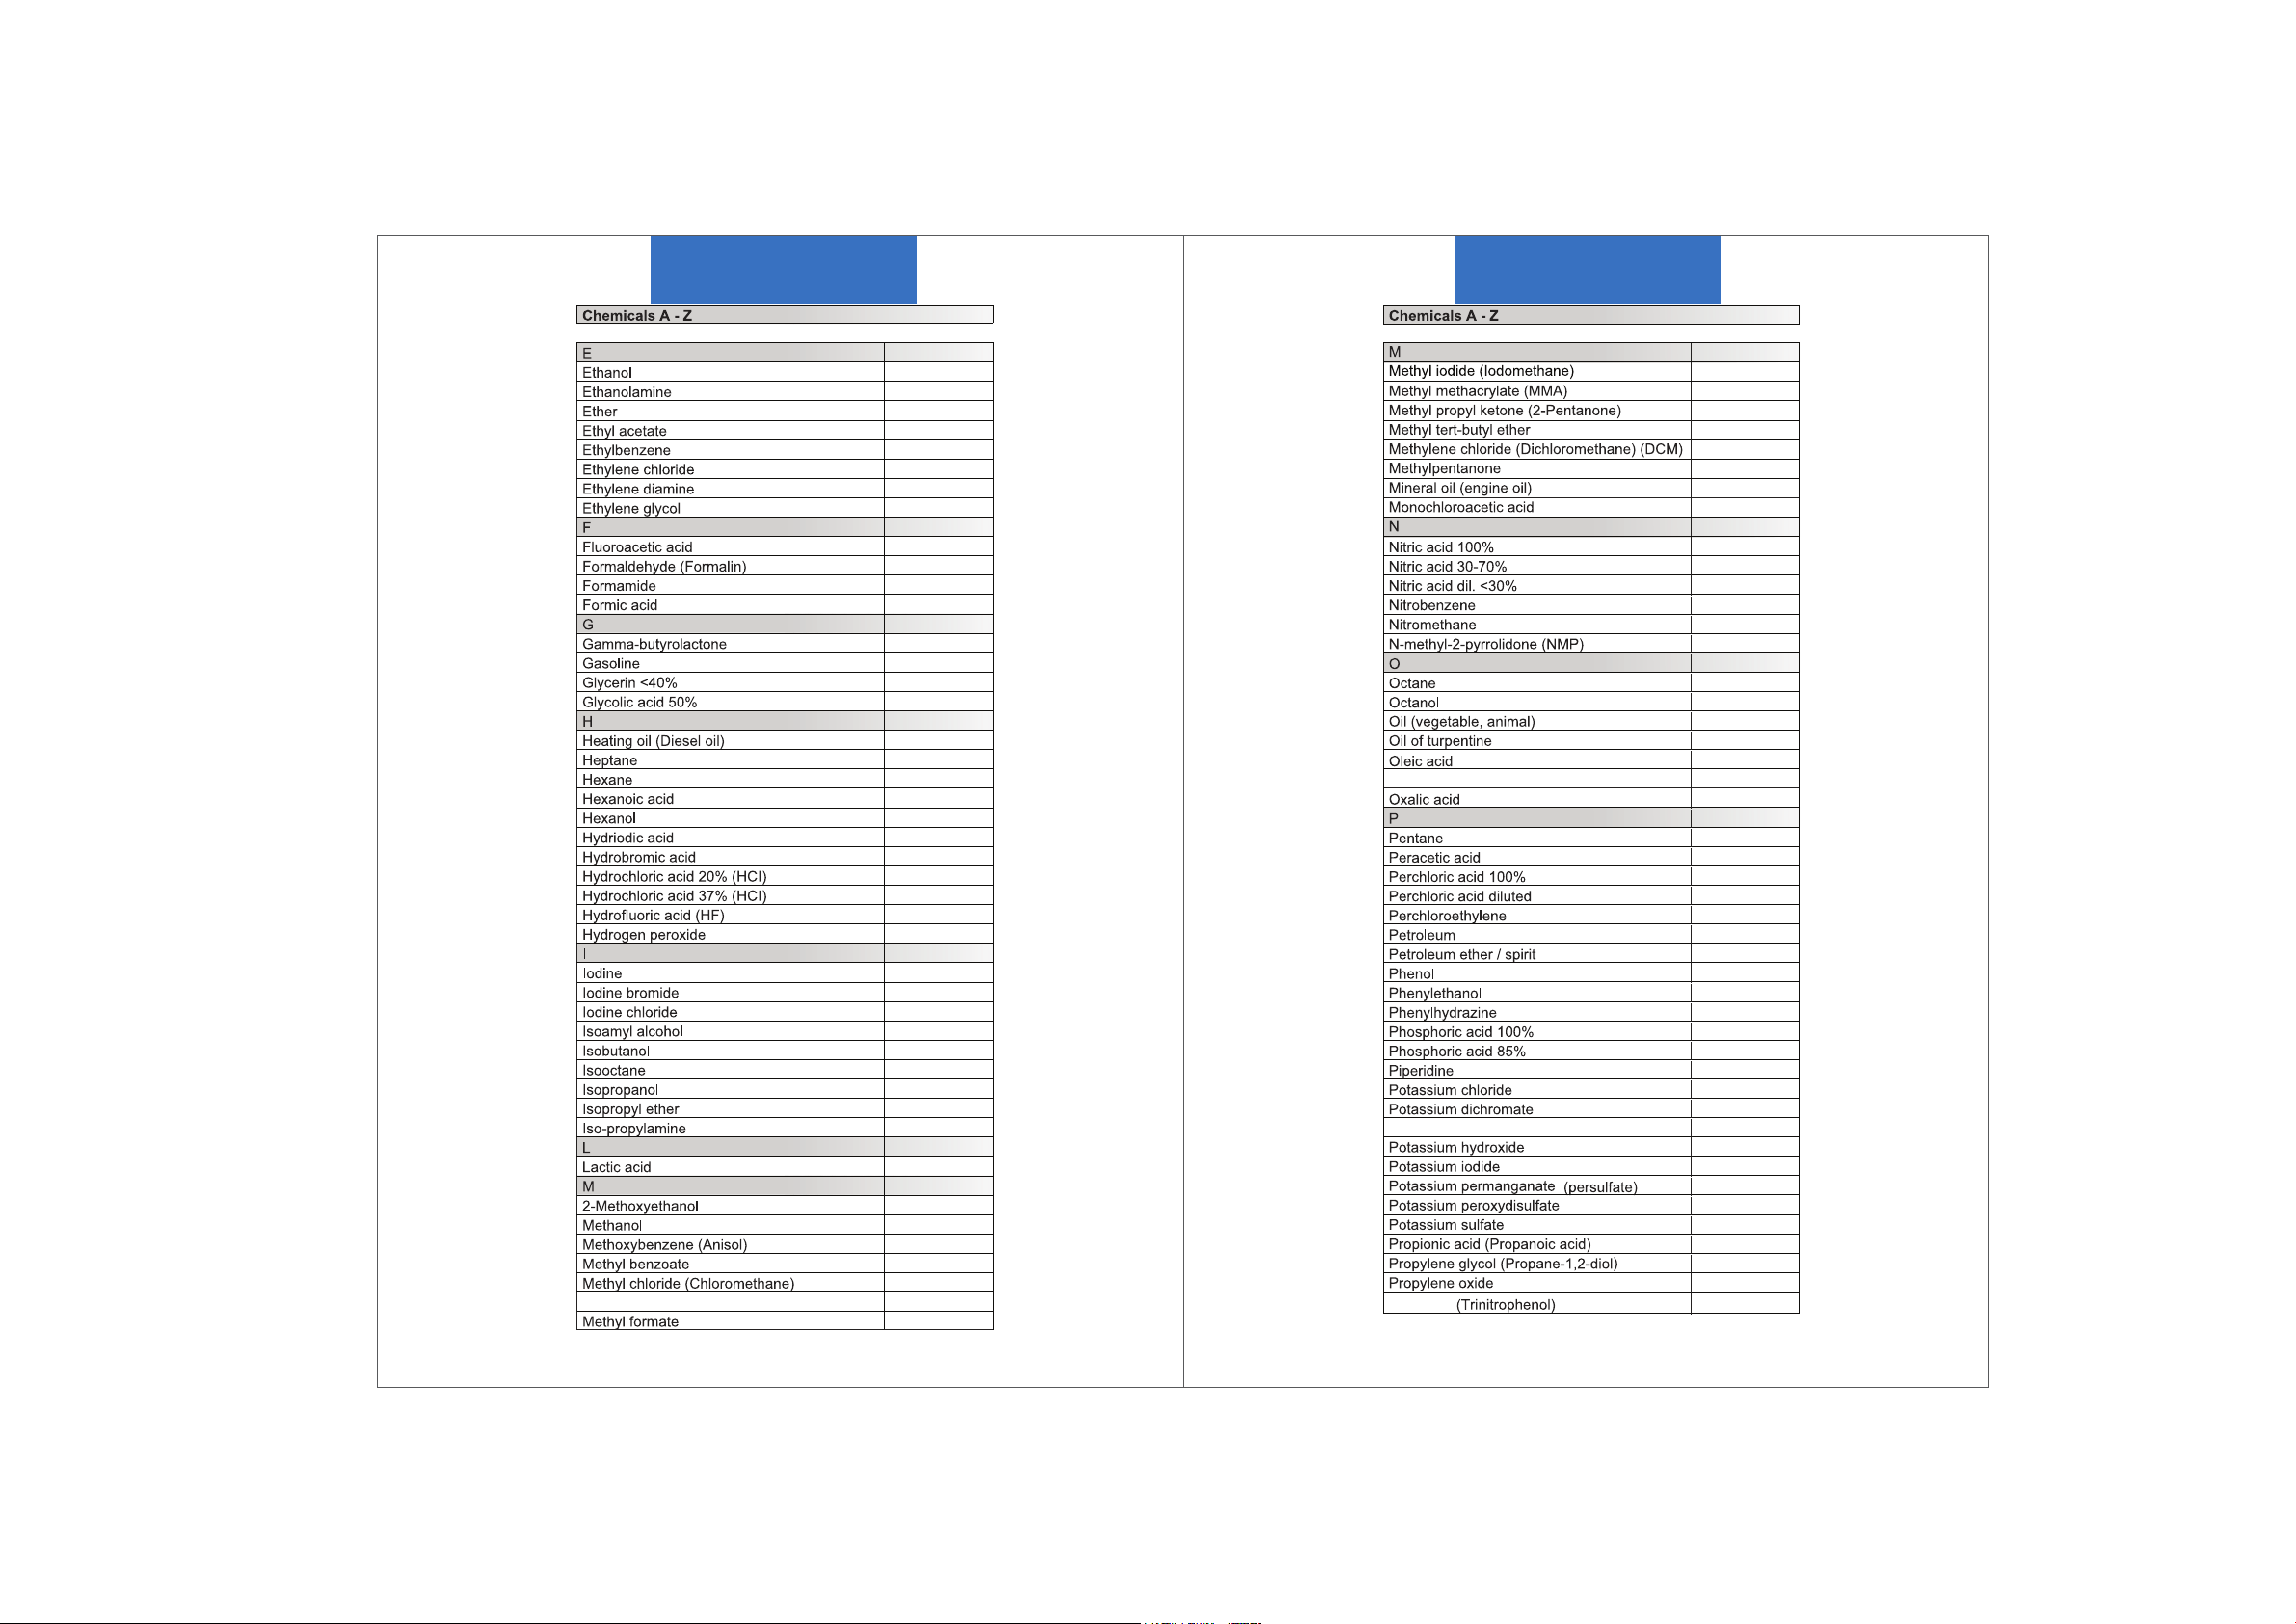
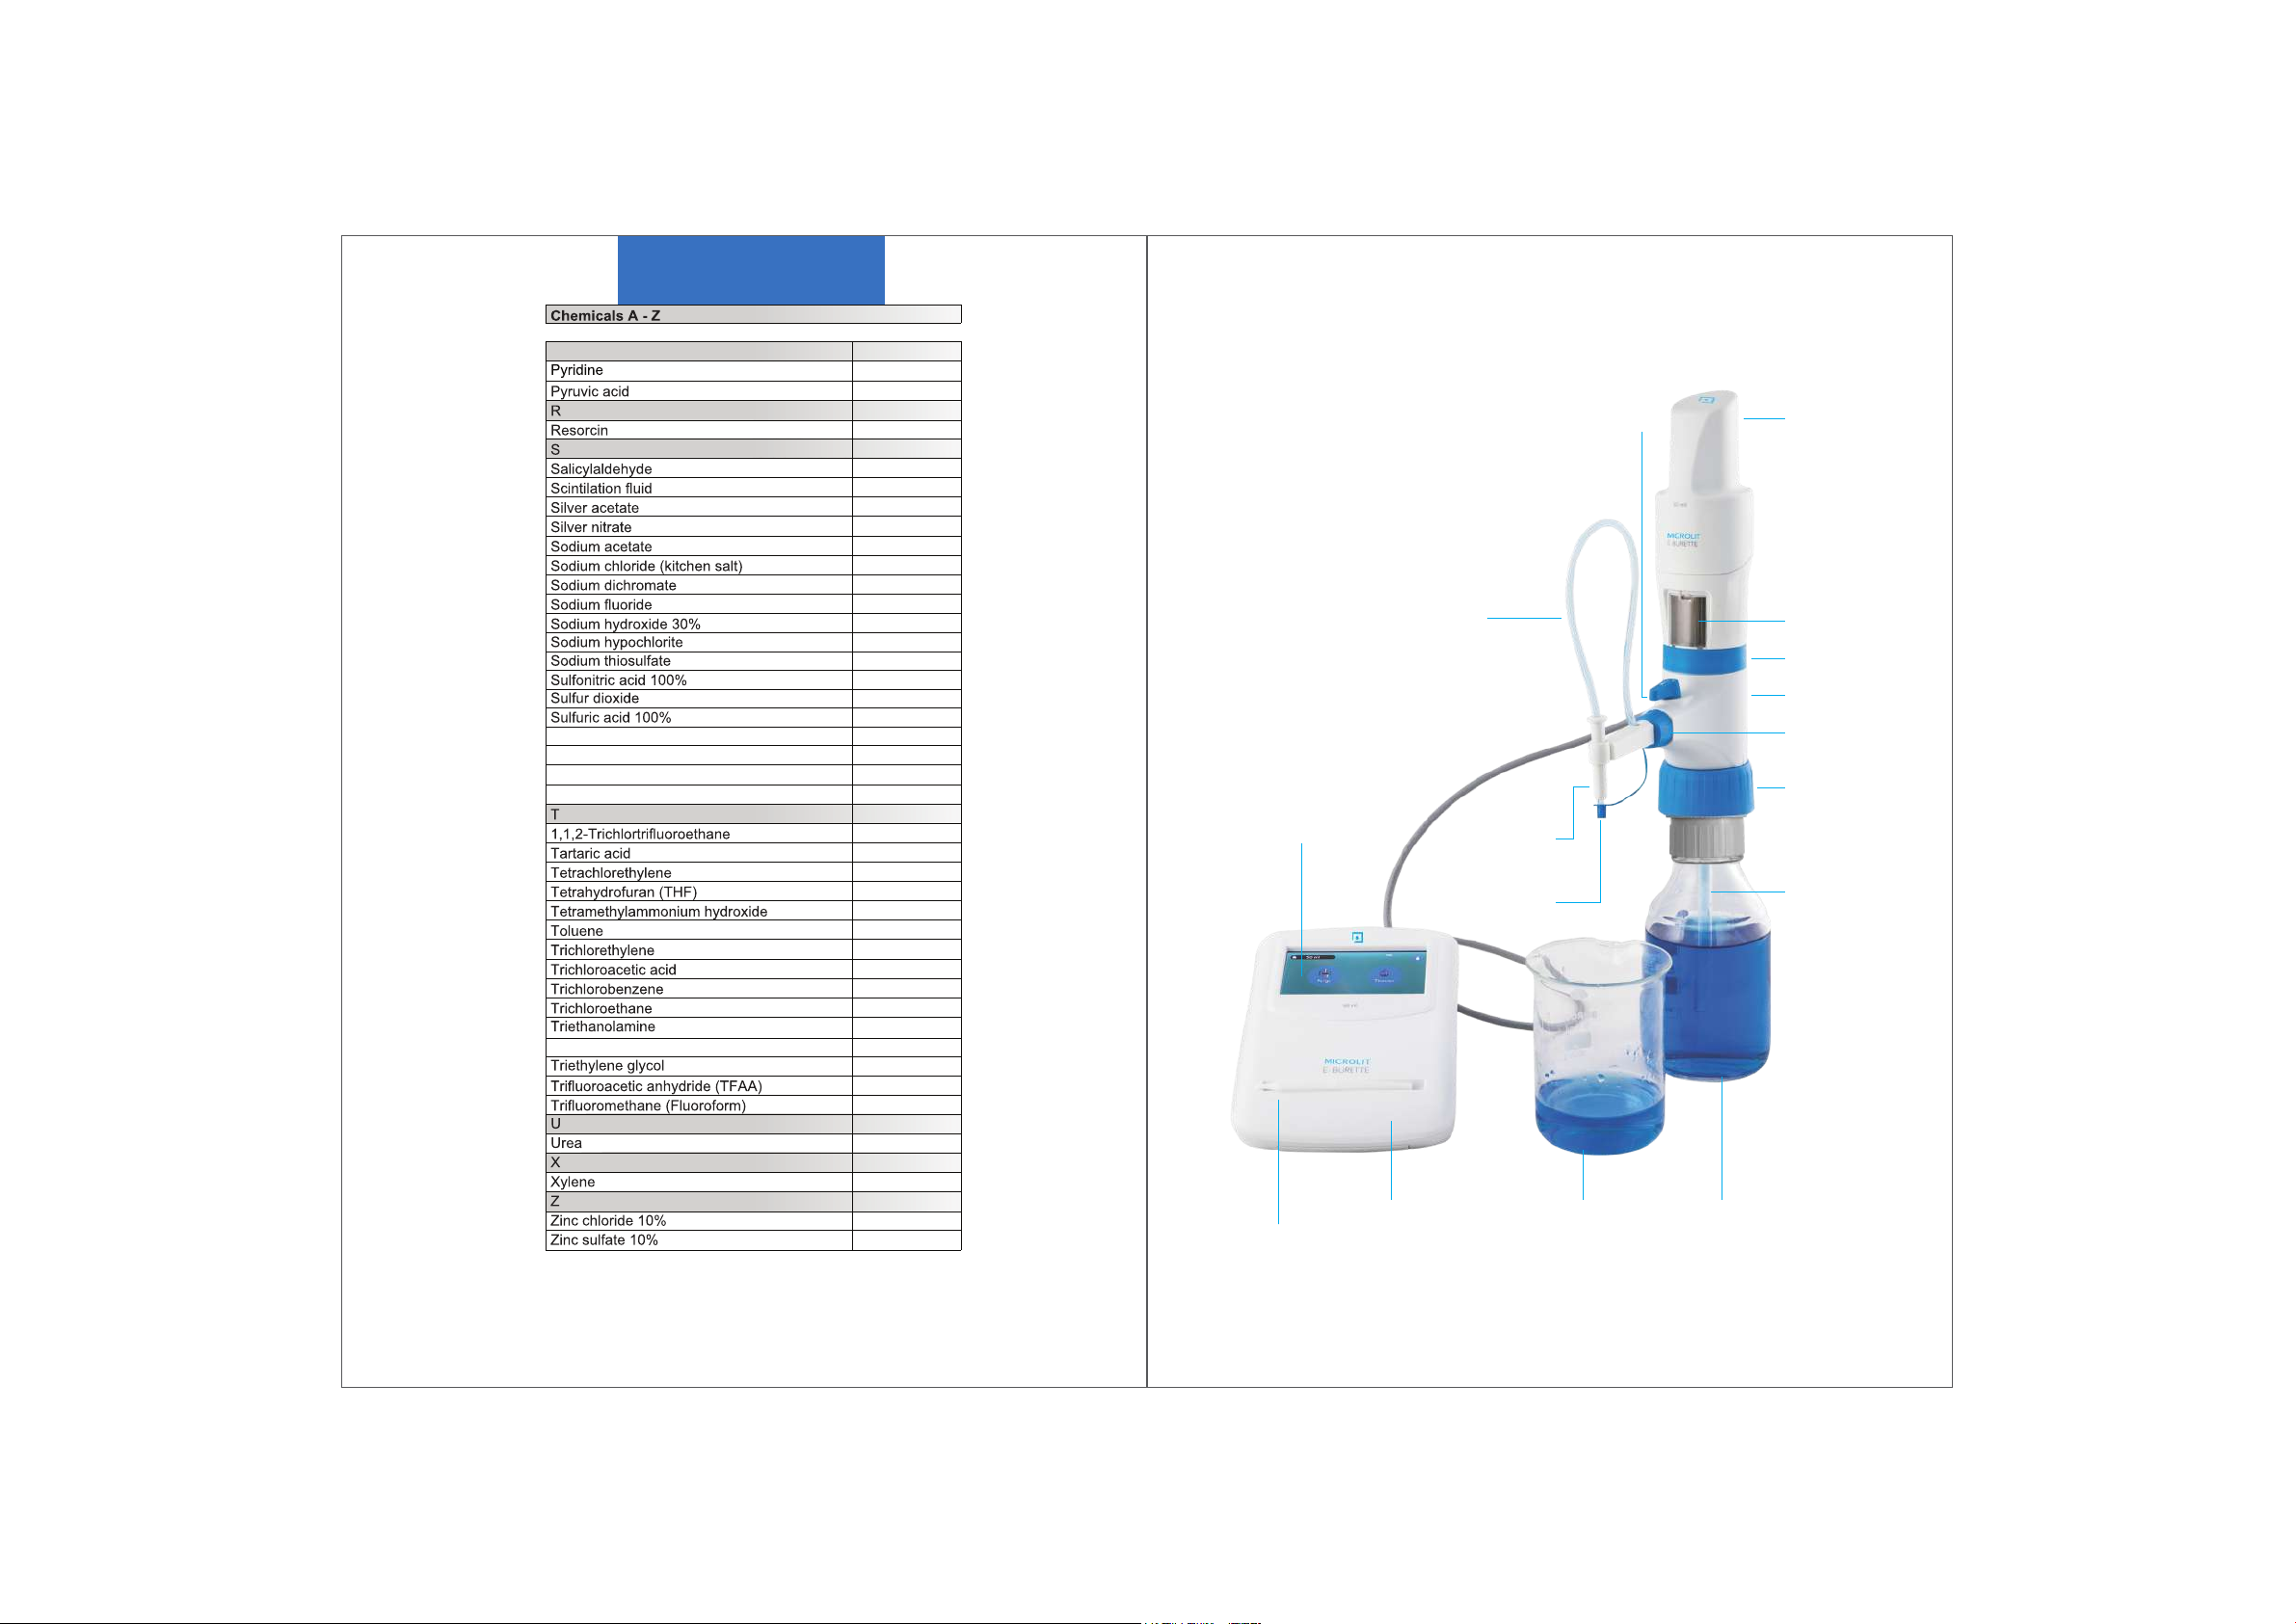
Operating Exclusions
Do not use the instrument with:
Liquids that attack FEP, PFA and PTFE (e.g. dissolved Sodium Azide*).
Liquids that attack borosilicate glass (e.g. Hydrofluoric acid).
Hydrochloric acid > 40% and Nitric acid >70%.
Tetrahydrofuran or Oxolane.
Trifluoroacetic acid.
Explosive liquids (e.g. Carbon Disulfide).
Suspensions (e.g. of charcoal) as the solid particles may clog or
damage the instrument.
•
•
C.
•
•
•
5.
•
•
•
•
•
•
•
•