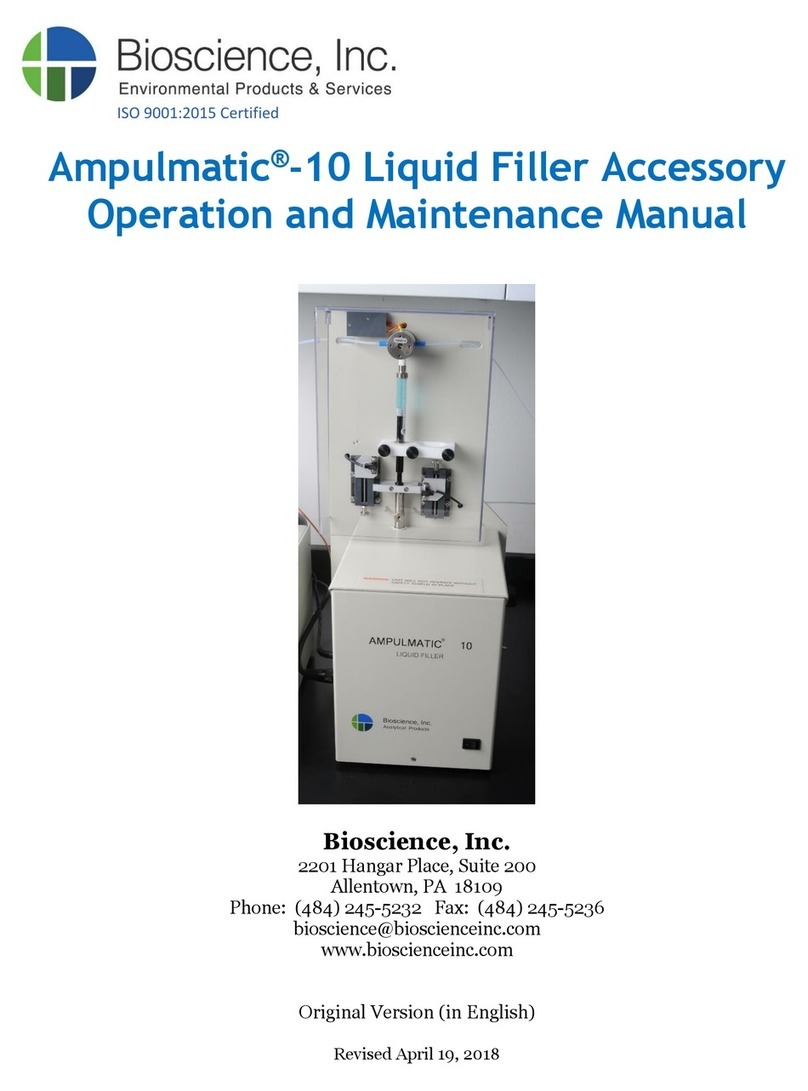
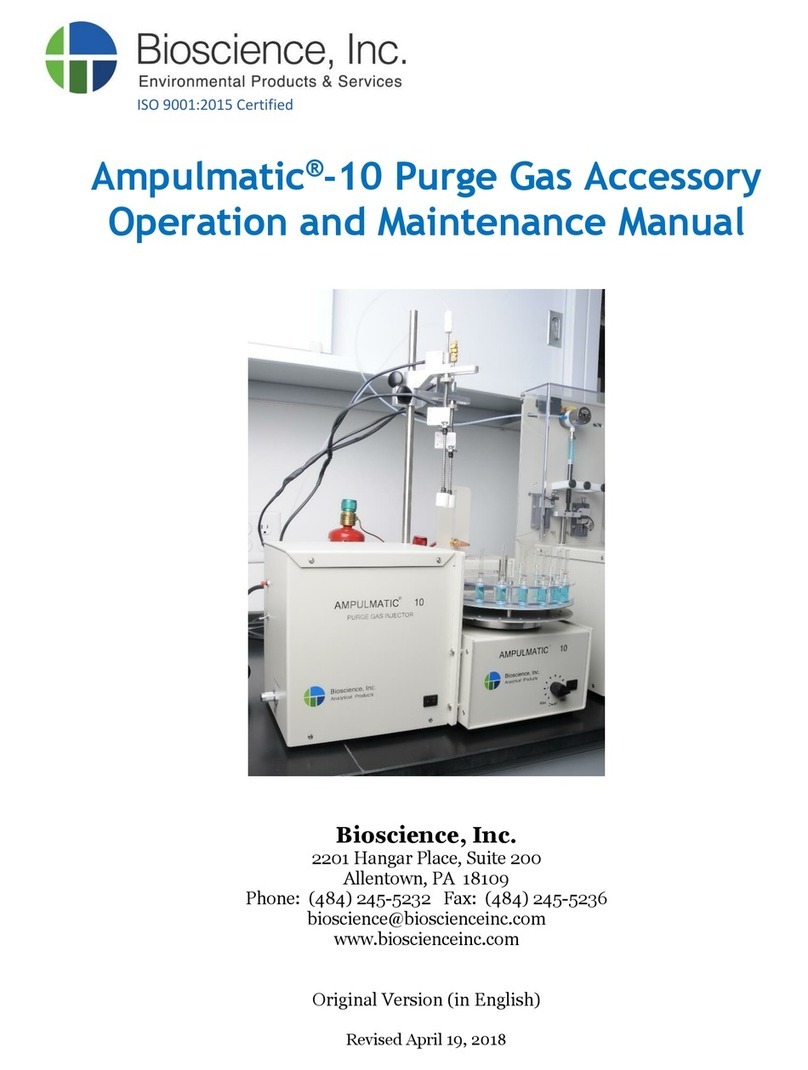
Bio-Science Ampulmatic-10 Purge Gas Injector User manual

ISO 9001:2015 Certified
Ampulmatic®-10 Laboratory Ampule Sealer
Operation and Maintenance Manual
Bioscience, Inc.
2201 Hangar Place, Suite 200
Allentown, PA 18109
Phone: (484) 245-5232 Fax: (484) 245-5236
bioscience@bioscienceinc.com
www.bioscienceinc.com
Original Version (in English)
Revised March 22, 2018

Contents
Section-Page
Title
1-1
Introduction
2-1
Model Description
2-2
Ampulmatic-10 Features –Front View
2-3
Ampulmatic-10 Features –Back View
3-1
Statement of Warranty
4-1
Unit Specifications
5-1
Where to Install Your Unit
6-1
Unpacking and Assembly
6-1
Setting Up Oxygen and Propane
6-1
Gas Pressures/Flow
6-2
Connecting to Compressed Gas Cylinders
6-3
Placing the Carousel on the Turntable
6-4
Placing the Torch Tip Assembly
6-4
Power Requirements
7-1
Operating Procedures
7-1
Lighting the Burner
7-1
Flame and Ampule Dwell Time Adjustment
7-2
Ampule Sealing Trouble Shooting
7-2
Turning off the Ampulmatic-10 Sealer
7-3
Sealing Volatile Substances
7-4
Sealing Corrosive Substances
7-4
Ampule Glass and Size
7-5
Sealing Thick Glass Ampules
7-5
Opening the Sealed Ampules
8-1
Maintenance
8-1
Preventative Maintenance Recommendations
8-1
Carousel Advance System
8-2
Ampule Spinning Drive Belt Replacement
8-2
Ampule Spinning Drive Belt Diagram
8-2
Carousel Advance Motor Speed Adjustment
9-1
Troubleshooting Guide
10-1
Replacement Parts List
11-1
Accessories List
11-1
Safety Accessories List

Introduction
Thank you for choosing the Ampulmatic®-10 Laboratory Ampule Sealer. Bioscience, Inc. has
striven to create the most reliable, easy-to-maintain and easy-to-use instrument available for
bench-scale filling and sealing of small batches of ampules. This equipment has been tested
extensively in our labs and in the field to ensure that the components and systems are reliable.
We have gone to extra lengths to ensure that should something become misaligned, require
adjustment or need to be replaced, it is easily accessed and addressed. Finally, the unit has been
designed with a good deal of flexibility to allow a sufficient range of sealing temperatures, dwell
times and motor speeds so that the Ampulmatic-10 ampule sealer can easily adapt to the sealing
demands of a variety of ampule types, sizes and sources worldwide. We have had extensive
experience dealing with the unique sealing problems of our customers over several decades and
are proud to be the leader in bench-scale ampule sealing. We will be happy to work with you to
furnish custom solutions to your specific filling and sealing problems at your request.
For maximum value and ease of startup, please proceed as follows:
1. Inspect the carton and the unit for shipping damage. Notify the carrier immediately if
damage is found.
2. Use the "Accessory Check List" attached to this manual when unpacking the unit to verify
that the complete unit has been received. Do not discard packing materials until everything
has been accounted for.
3. Read the “Where to Install Your Unit” section of the manual before deciding on an
appropriate location for the unit. You must consider the availability of power and other
equipment requirements as well as user convenience in operation.
4. Carefully follow directions in the "Unpacking and Assembly" section of the manual.
5. Insist that each operator be familiar with the "Operating Procedures" section of the manual.
6. Follow the recommended preventive maintenance measures found in the “Maintenance”
section of this manual for long equipment life. Avoid strong corrosives as they may damage
critical components of the system.
7. Keep this manual in a safe location for ready reference to the "Operating Procedures" and
"Maintenance" sections.
8. If you have any questions, please contact our Technical Service department at 484-245-
5232, 800-627-3069, or bioscience@bioscienceinc.com.
All Rights Reserved
The information contained in this manual is the exclusive property of Bioscience, Inc. and has been provided
solely to enable the users of the equipment described herein to operate and maintain such equipment. No
warranty for fitness for a particular purpose is provided. Any other use of this information, or the
reproduction or transmission of all or any portion of this manual, without prior written consent of Bioscience,
Inc. is expressly prohibited.
1-1

Model Description
The Bioscience, Inc. Ampulmatic®-10 Ampule Sealer is an automated sealing device capable of
flame-sealing glass ampules in sizes ranging from 1 ml to 50 ml. It is designed to seal up to
approximately 900 ampules per hour in a laboratory setting. Each ampule in the carousel is
automatically indexed into position and a hemispherical seal is created as the ampule spins in front
of a propane and oxygen flame.
The design provides easy adjustments to ensure that an
excellent seal can be obtained under a variety of conditions.
Oxygen and fuel gas flow are metered by needle valves on the
rear of the unit to control flame size and temperature. The
dwell time of each ampule in front of the flame can be adjusted
by turning a knob on the front of the unit. The carousel
advance speed is also adjustable internally, if necessary. The
height of the sealing flame and distance from the ampule can
also be changed to accommodate different size ampules.
Note: While different sizes can be handled, ampules batch to batch must be consistent in height,
diameter, form, etc.
The Ampulmatic-10 Ampule Sealer was designed to withstand non-corrosive chemicals commonly
found in lab environments. The case is designed to protect interior components from chemical
leakage or spillage. The materials of construction include aluminum (case, carousel parts and
machined parts), stainless steel (machined parts and fasteners), brass (machined parts), copper
tubing and chemically-resistant polycarbonate (carousel). Corrosive liquids must be tested in
advance of filling and sealing for compatibility with the materials of construction of the
Ampulmatic-10 base unit and its accessories. Corrosion resistant replacement parts may be
available.
A variety of carousels are available to handle ampules of different sizes. They are designed to hold
up to 20 ampules (with the exception of the 50 ml carousel which
holds 10 ampules). As the carousel rotates, most users will add
filled ampules to the left side of the carousel and remove sealed
ampules from the right side of the carousel (after they have cooled
enough to handle or while wearing heat resistant gloves).
However, it is also possible to remove and replace entire carousels
for batch operations.
The Ampulmatic-10 sealer was also
designed to be expandable to
accommodate additional ampule filling
and inerting functionality. An add-on
port and mounting points are available
to allow plug-and-play devices, such as a
Purge Gas Injector and a Liquid Filler.
2-1

Ampumatic-10 Features –Front View
2-2
Power
Switch
Dwell Time
Adjustment
Turntable
Optical
Sensors
Ampule Spinning
Drive Belt
Carousel
Spindle
Torch Tip
Torch Tip
Bracket

Ampumatic-10 Features –Back View
2-3
Propane Tank
Valve Attachment
Torch
Height
Adjustment
Propane
Tank
Bracket
Oxygen
Inlet
Circuit
Breaker
Power
Inlet
Oxygen
Toggle
Valve
Oxygen
Needle
Valve
Propane
Needle
Valve

Statement of Warranty
The Ampulmatic®-10 bench-scale automatic ampule sealer and its accessories are warranted
against faulty workmanship or the use of defective materials for a period of 365 days from the date
of shipment. This warranty is the only warranty made by Bioscience, Inc. (Manufacturer) and is in
lieu of all other warranties, expressed or implied, except as to title and can be amended only by a
written instrument signed by the Manufacturer. The Manufacturer provides no warranty to the
Customer, either express or implied nor for title. Manufacturer further disclaims any warranty of
merchantability or fitness for a particular purpose in connection with the customer’s purchase of
units of any Product under this agreement. The liability of the Manufacturer under this warranty is
limited solely to replacing, repairing, or issuing credit (at Manufacturer’s discretion) for any device
which is returned by the customer during the period provided for above, provided that (a)
Manufacturer’s product is returned properly packaged in the package made per specifications equal
to or better than Manufacturer’s original carton specifications, (b) Manufacturer is promptly
notified in writing upon discovery of such defects by customer, and customer obtains return
authorization from Manufacturer to ship the unit, (c) the defective unit is returned to Manufacturer,
transportation charges prepaid by customer, (d) warranty card, with date of receipt of product and
signed by the customer, is returned to the Manufacturer within 30 days of purchase, and (e)
Manufacturer’s examination of such unit shall disclose, to its good faith satisfaction, that such
defects have not been caused by misuse (including the filling and/or sealing of corrosive materials),
neglect, improper shipping or installation, repair, alteration, or accident. In no event shall
Manufacturer be liable for loss of profits, loss of use, or damages of any kind based upon a claim for
breach of warranty.
All claims under this warranty will be made directly to Manufacturer. Faulty units are to be shipped
prepaid to the Manufacturer’s designated location. Manufacturer shall prepay transportation
charges when repaired units are returned and bill customer unless the units are found defective
under this warranty. Manufacturer shall pay return freight of units found defective under warranty.
Claims with the freight carrier for damages in shipment shall be made by the party of destination.
For your records, please record: Ampulmatic-10 Serial No. __________________________
Complete, Detach and Return Within 30 Days of Receipt
--------------------------------------------------------------------------------------------------------------------------------
User’s Name _________________________User’s Signature ____________________________
Title_______________________________Ship Date ________________________________
Company ___________________________ Receipt Date_______________________________
Address____________________________ Warranty Received at Bioscience_________________
____________________________ Have you set up your new Ampulmatic? ___________
Phone ____________ Fax _____________ Have you operated your Ampulmatic?_____________
Ampulmatic 10 Serial No. _______________ Carousel Rack Size__________________________
Comments (Sales, Delivery, Manual, Instructions)
3-1

Unit Specifications
Overall Dimensions
The overall dimensions of the Ampulmatic-10 Ampule Sealer are 8.5” W x 12” H x 17” D (21.6 cm W
x 30.5 cm H x 43.2 cm D).
Shipping Weight
The shipping weight of the Ampulmatic-10 Ampule Sealer base unit is approximately 21 lbs (9.53
kg).
Carousel Capacity
Carousel racks are available from Bioscience, Inc. in the following sizes and capacities. Refer to the
“Replacement Parts List” in this manual for part numbers. Custom carousels are also available by
request for other ampule sizes.
Ampule size
Number of
ampules
1 ml
20
2 ml
20
5 ml
20
10 ml
20
20 ml
20
50 ml
10
Electrical Requirements
All electrical parts are UL listed/approved. The Ampulmatic-10 base unit operates internally on 12
VDC. This voltage can be supplied by the power transformer furnished with your unit from a power
source of from 100 to 240 VAC (50-60 Hz). Power consumption of the base unit (not including add-
on modules) is less than 30 watts and the base unit has a resettable circuit breaker on the rear panel
which limits the internal current to 3 amps at 12 VDC.
Gas Requirements
The Ampulmatic-10 ampule sealer requires the blending of a propane, MAPP, or natural gas source
with oxygen in order to create a flame for sealing. See the “Unpacking and Assembly” section in this
manual for more information.
Operating Conditions:
Acoustic Noise: <70db(A)
Atmospheric Pressure: 760-1080mBar
Storage Temperature: Between 5°C to 40°C
Operating Temperature: Between 5°C to 40°C
Altitude: Less than 2000m
Humidity Conditions: Between 30% to 90% (non-condensing)
Country of Origin
The Ampulmatic-10 ampule sealer is manufactured by Bioscience, Inc. in the USA.
4-1

Materials of Construction
Outside Body
Powder Coated Aluminum
Carousel
Chemical-Resistant Polycarbonate and Anodized Aluminum
Burner Tip
Copper
Gas Tubing and Fittings
Copper, Brass, 316ss
Note: Corrosive liquids must be tested in advance of filling and sealing for compatibility with the
materials of construction of the Ampulmatic-10 base unit and its accessories. Special materials for
corrosion resistant Ampulmatic-10 models may be available for specific applications by request.
CAUTION: Do not operate the Ampulmatic-10 ampule sealer with corrosive liquids
that are incompatible with the materials of construction of the unit.
Durability
The Ampulmatic-10 Ampule Sealer is designed for light to medium duty applications in a
laboratory. Consult your Bioscience Technical Representative for recommendations should heavy
duty, large scale sealing be desired.
4-2

Where to Install Your Unit
The Ampulmatic-10 ampule sealer should be installed on a level and stable bench or table with easy
access to required electrical and gas supplies. It must be placed in an area with good ventilation due
to its use of flammable gases and the production of by-products from combustion. It is
recommended that the unit be placed in or directly in front of a fume hood. Due to the presence of
an open flame, the area around the Ampulmatic-10 sealer should be free of combustible materials.
Crimping or excessive bending of the gas tubing leading into the Ampulmatic-10 sealer may create
gas leaks or limit gas flow. Use the appropriate length of tubing for your installation. Use a power
source easily accessible to the unit to avoid stretching the power cord.
5-1

Unpacking and Assembly
The Ampulmatic-10 Sealer carton contains the Ampulmatic-10 base unit, the torch tip assembly,
and a stainless steel rod (carousel spindle), along with a spare parts pack and certain tools and any
purchased carousels. Please use the “Accessory Check List” in this manual when unpacking to verify
that the complete unit has been received.
1. Setting up Oxygen and Propane
The Ampulmatic-10 ampule sealer requires the blending of a propane, MAPP, or natural gas
source with oxygen in order to create a flame for sealing. These gases are generally available
and are plumbed into the instrument with 1/8” (0.32 cm) outside diameter (OD) copper or
plastic tubing. A regulator valve is provided for use with a conventional commercially
available tank as a source for propane or MAPP gas. However, other fuel gas sources, such
as larger tanks or plumbed natural gas, can also be used with suitable adapters. The oxygen
is plumbed into the instrument through the Swagelok®fitting accessible at the rear of the
instrument.
You will need a cylinder of commercial grade oxygen with a 2-stage regulator, a standard 14
ounce disposable bottle (3 inch [7.62 cm] diameter) of propane of the type available from
hardware or sporting goods stores and a convenient length of 1/8” (0.32 cm) OD tubing to
run from the oxygen tank to the Ampulmatic-10 unit. Small oxygen tanks are not
recommended. Connect the 1/8” OD tubing to your oxygen regulator and momentarily pass
oxygen through the tube to remove any dust particles. Connect the other end of this tube to
the oxygen bulkhead connector (a 1/8” Swagelok®compression fitting). Check to see that
the propane regulator valve is turned off, and then connect the propane bottle to the propane
regulator and install the bottle in the bracket on the rear of the unit. Check for gas leaks
with soap solution.
2. Gas Pressures/Flow
A pressure of 10-20 pounds per square inch (psi) for oxygen (and propane if using larger
bottles and regulator) is recommended. This allows for the best adjustment of the needle
valves for flow control.
Typical propane usage is 0.1-0.15 liters per minute (lpm) and typical oxygen usage is 0.6-
0.8 lpm. However, measured gas flow for different sized ampules is variable. Both propane
and oxygen flow should be increased as the ampule size increases. Torch tip position
adjustments (distance from the ampule during sealing) will also affect gas flow
requirements. Slight adjustment may also be required depending on the ampule contents
(e.g. solvents and whether solvents are chilled before sealing).
In the Purge Gas Injector accessory, purge gas flow will also depend on ampule size, liquid
volume and dwell time. At least 10 ampule headspace volumes are recommended in the
normal ~5 seconds of purging. Thus, for a 10mL actual volume (not nominal volume), purge
gas flow should be 10mL*10 volumes/5 seconds*60 seconds/min = 1,200 mL/min = 1.2
lpm.
Note: a 1mL nominal ampule contains ~2.5 mL total volume before sealing.
6-1

3. Connecting to Compressed Gas Cylinders
The gas inlets to the Ampulmatic-10 base unit are 1/8” compression fittings. To connect to
larger cylinders you will need to purchase a regulator and adapter for 1/8” OD tubing.
McMaster-Carr is a vendor that supplies a wide range of equipment and components and will
typically carry everything you need to get started. Bioscience doesn’t endorse a particular
vendor and you may be able to find equivalent or better equipment or components at a lower
cost. McMaster-Carr part numbers have been provided for reference only.
NOTE: If metric parts are required, contact Bioscience, Inc. for guidance.
Regulators
Single stage regulators, though less expensive, will show significant pressure changes as the
supply pressure decreases (as the tank empties). For best results, a two stage regulator is
recommended. The example regulators referenced below have “outlet” configurations such
as 9/16”-18 Right Hand (RH) or Left Hand (LH). To adapt the regulator to 1/8” OD tubing you
will need an adapter with ¼” NPT threads on one end and a 1/8” OD compression fitting on
the other. Note that the regulators for each gas type are different. Part specifications can be
found below.
Propane
The valve supplied with the Ampulmatic-10 ampule sealer screws onto small propane tanks
(generally 14-16 oz.). These are available from vendors ranging from home improvement
stores, camping suppliers, and general merchandisers such as Walmart, Sears, or K-mart.
The inlet to the Ampulmatic-10 base unit is a 1/8” compression fitting. To connect to larger
cylinders you will need to purchase a regulator and adapter for 1/8” OD tubing.
Large Propane Cylinder Connection Parts:
•Single-Stage Gas Regulator (McMaster-Carr #7897A66) or Two-Stage Gas Regulator
(McMaster-Carr #7897A18).
•Straight Adapter (McMaster-Carr #5272K291).
•Copper tubing (McMaster-Carr #5174K1) or Nylon tubing (McMaster-Carr
#8359K11).
Oxygen
The inlet to the Ampulmatic-10 base unit is a 1/8” compression fitting. To connect to larger
cylinders you will need to purchase a regulator, adapter, and 1/8” OD tubing. Use only large
oxygen cylinders for oxygen supply. Small oxygen cylinders are not recommended.
Large Oxygen Cylinder Connection Parts:
•Single-Stage Gas Regulator (McMaster-Carr #7897A61) or Two-Stage Gas Regulator
(McMaster-Carr #7897A3).
•Straight Adapter (McMaster-Carr #5272K291).
•Copper tubing (McMaster-Carr #5174K1) or Nylon tubing (McMaster-Carr
#8359K11).
6-2

Gas Regulator Specifications
Gas
Type
CGA
#
Connection
Type
For
Tank
Threads
Stage
Operating
Pressure
(psi)
Tank
Content
(psi)
McMaster-
Carr Item
#
Propane
510
Male
Standard
Duty
Female
Single
0-50
0-400
7897A66
Two
7897A18
Oxygen
540
Female
Standard
Duty
Male
Single
0-145
0-4,000
7897A61
Two
0-125
7897A3
Straight Adapter Specifications
Tubing
Type
OD
Wall
ID
Max psi
Bend
Radius
McMaster-
Carr Item
#
Copper Tubing
⅛”
0.03”
0.065”
3,000 @
100°F
-
5174K1
High Strength
Clear Nylon Tubing
⅛”
0.014”
0.096”
430 @ 75°F
1 ¼”
8359K11
4. Placing the Carousel on the Turntable
Place the carousel on the Ampulmatic-10 turntable by sliding the notched bottom of the
carousel across the carousel turntable so that the center hole aligns with the hole in the
turntable. Insert the carousel spindle through the hole in the carousel and push it down
through the carousel guide holes into the turntable, making certain that it is down as far as
it will go. The drive belt and drive wheels will fit between the top plates of the carousel. Be
careful not to dislodge the ampule spin belt while placing the carousel. If the
belt is dislodged, see the “Maintenance”section of this manual to restore the belt to
operating position. Correct placement of the spindle will leave about 1 inch (2.54 cm) of the
spindle showing above the top plate of the carousel. Plug in the power supply and turn on
the unit to advance the carousel into position. The carousel should then advance to the next
position automatically. The amount of time in front of the torch tip is controlled by the
“dwell” knob on the front. Turn the knob toward Minimum to decrease the dwell time and
toward Maximum to increase the dwell time.
CAUTION: Do not operate the Ampulmatic-10 ampule sealer without the
carousel and carousel spindle in place. Exposed belt drive may present a pinch
hazard when carousel is not in place.
6-3
Adapter Type
For Tube
OD
Pipe
Size
Pressure Rating
McMaster-
Carr Item #
For Tube
Wall
Thick.
Max. psi
@ 72°F
Tube-to-Male
Threaded Pipe
⅛”
¼”
0.035”
2,900
5272K291

5. Placing the Torch Tip Assembly
Loosely attach the torch tip assembly to the top of the unit with the two screws provided.
Both washers should be on top of the torch tip assembly plate. Attach the rubber tubing
from the torch tip to the hose barb fitting on the rear of the Ampulmatic-10. Next, place an
ampule into the carousel one or two positions before the torch tip (carousel rotates
clockwise). Turn on the unit and allow the ampule to index in front of the torch tip. Turn off
the power and adjust the height of the torch tip to about 3/16” (5 mm) below the top of the
ampule to be sealed.
Torch Tip Height
To adjust torch tip height, loosen the torch tip height adjust knurled nut, move the torch tip
to the desired height and re-tighten the nut.
Torch Tip Horizontal Position
If necessary, the horizontal alignment of the torch tip can be adjusted by loosening the two
screws holding the torch tip bracket to the top of the case. Reposition the bracket and torch
tip slightly and retighten the screws.
Torch Tip Distance from Ampule
To adjust the distance of the torch tip to the ampule, adjust the two knurled nuts located in
front and behind the torch bracket. We recommend 1/8” (3 mm) distance from the torch
tip to the ampule.
6. Power Requirements
The Ampulmatic-10 ampule sealer is supplied with a 3-prong grounded plug power cord
(US and selected countries) and an external transformer for your safety. If a power cord is
not supplied, a locally obtained power cord with IEC 320 connector should be used. The
required power source is 100 to 240 VAC (50-60 Hz). The base unit is designed to draw less
than 30 watts of power. Add-on modules such as the Purge Gas Injector and Liquid Filler
accessories will have a separate power source.
6-4

OPERATING PROCEDURES
Note: Use appropriate Personal Protective Equipment (PPE) when operating the
Ampulmatic-10 System. Review the Safety Data Sheets of all chemicals being filling
and/or sealed with this equipment. Recommended PPE includes eye protection and
heat resistant gloves. See the Safety Accessory section of this manual for more
information.
1. Lighting the Burner
Each Ampulmatic-10 ampule sealer is tested by Bioscience, Inc. before leaving the factory.
Factory gas flow settings should allow the flame to be ignited and (when oxygen is turned
on) an ampule to be sealed with minimal adjustment of gas flows. If multiple sizes of
ampules are to be sealed, however, adjustment may be necessary for each ampule size.
CAUTION: Do not light the burner until after the carousel is installed on the
turntable. Always turn the burner off before removing the carousel or use
flame resistant gloves while removing the carousel spindle to avoid burns.
1. Install carousel on turntable.
2. Verify that the toggle valve on the rear panel marked “oxygen on/off” is off (lever should
be parallel to back of case).
3. Open the oxygen tank valve and adjust the oxygen delivery pressure at the regulator to
about 20 psi.
4. Open the propane regulator valve at the bottle fully.
5. Ignite the flame, then adjust for a 2-1/2” (6.35 cm) flame, if necessary.
6. Turn on the oxygen flow by pulling the toggle switch slowly to a position perpendicular
to the case.
7. Place several ampules in the carousel and turn on the Ampumatic-1o power (switch on
front of unit). An ampule will advance to the position in front of the flame and seal
before advancing. Make small adjustments to the flame temperature or dwell time until
the seal is perfect.
If the ampule is not completely sealed, slowly increase the oxygen to the flame with the
oxygen adjust valve (counterclockwise) until the flame is intense blue and oxidizing with no
white or yellow area.
If the ampule has a bubble on top or the seal blows out, reduce oxygen flow (clockwise
rotation of the oxygen adjust valve).
The dwell time (the time the ampule is in front of the flame) can also be adjusted by rotating
the knob next to the power switch (counterclockwise increases dwell time). An increase in
dwell time can be used to correct an incomplete ampule seal and a decrease in dwell time
can reduce bubble formation or blow-out.
Once adjusted these settings can be maintained by following the turn-off procedure below.
The Ampulmatic-10 ampule sealer will then require little or no readjustment when restarted
for the same size ampules.
7-1

2. Flame and Ampule Dwell Time Adjustment
The Ampulmatic-10 ampule sealer was designed to provide flexibility in sealing ampules
ranging from <1 mL capacity to 50 mL capacity and made of various types of glass. As
shipped from the factory, the Ampulmatic-10 sealer is set to a relatively short dwell time in
order to seal more vials in a given time.
It is possible to shorten the dwell time by using a hotter flame (substituting MAPP gas for
propane will allow higher flame temperature). However, remember that as the dwell time
is reduced, small inconsistencies in ampules to be sealed (imperfect glass of the ampule, a
drop of liquid on the ampule neck, small dimensional variation, etc.) may lead to an
imperfect seal. Dwell time is adjustable from approximately 2 seconds to 14 seconds. As
ampule size increases, the amount of heat necessary to seal the ampule will increase.
Increased heat can be accomplished by increasing flame size (increase fuel and oxygen),
increasing temperature (increase oxygen) and/or increasing dwell time.
Once a good sealing flame is achieved for a particular ampule size, it may be most convenient
to adjust dwell time to accommodate another ampule size. Use the following table to
troubleshoot common sealing problems.
Ampule Sealing Trouble Shooting
Symptom
Possible Causes
Solutions
Seal is brittle, glass cracks
Flame is too hot
Reduce oxygen and increase dwell
time
Bubble forms on top of ampule
Flame too hot
Ampule dwell time too long
Reduce oxygen
Reduce ampule dwell time
Ampules not completely sealed
Flame too cold
Ampule dwell time too short
Increase oxygen
Increase ampule dwell time
Uneven seal
Turning belt dirty, ampule slipping
Wipe belt with alcohol
Pinhole through seal
Burner hitting too high on ampule
Flame too cold
Ampule dwell time too short
Lower burner height
Slightly increase oxygen
Increase ampule dwell time
Discoloration of the components
Corrosive liquids
Stop operation and consult with
Bioscience, Inc.
Ampules Breaking
If using accessories, misalignment
of purge or fill head.
Adjust purge or fill head position.
3. Turning Off the Ampulmatic-10 Sealer
1. Make sure no ampules are in front of flame.
2. Turn off the Ampumatic-1o base unit power (switch on front of unit).
3. Turn off the oxygen toggle valve on the rear panel marked “oxygen on/off” (lever
should be parallel to back of case).
CAUTION: Always turn the oxygen toggle valve to the “Off” position before
turning off the propane. The flame will change from blue to orange.
7-2

4. After the oxygen has been turned off, turn the propane off at the bottle with the propane
regulator valve. The flame will disappear in a few seconds, as quickly as the fuel in the
line has burned off.
CAUTION: The burner, spindle, and ampules may be hot. Protect skin from
heat damage before handling.
It is not necessary to remove the carousel but if so desired, wear heat-proof gloves or wait
until the spindle is thoroughly cooled, remove the spindle from the carousel, then carefully
remove the carousel. Keep the carousel parallel to the turntable to avoid dislodging the belt.
4. Sealing Volatile Substances
Many Ampulmatic-10 ampule sealer users seal ampules containing a variety of flammable
liquid solvents for gas chromatography standards and other applications. For the safe
handling of such flammable liquids use the following guidelines:
a. Flammable solvents may be chilled by immersion in cold baths of various types
prior to flame sealing (see table below).
b. The polycarbonate plates, used for the carousel of the Ampulmatic-10 sealer,should
not be immersed in a dry ice cold bath to avoid crazing and cracking of the
polycarbonate plastic. Ampules should be chilled separately, then inserted into the
carousel.
c. A shorter dwell time can be used to minimize the time required to advance and seal
the ampules, thus minimizing warm-up of the solvent.
d. An inert gas such as nitrogen or argon can be injected above the liquid (using the
optional Purge Gas Injector accessory) to prevent mixing of solvent vapor and
oxygen.
e. All procedure development should be done with the smallest volatile liquid volumes
possible and a safety shield should be used to protect users from possible explosion.
f. Ampules should be inspected prior to use to remove ampules with cracks or other
flaws that might cause breakage and spilling of the contents.
g. Make sure the Ampulmatic-10 sealer is set-up and adjusted correctly to handle the
ampule size being used. Make all adjustments with ampules containing non-
flammable solvent (e.g., water) to minimize warm-up of the solvent during
adjustment.
h. Clean solvent spills up as soon as they occur to avoid damage to the Ampulmatic-10
components.
7-3
Bath Components
Concentration of *
Temperature (°C)
Ice/water/NaCl*
Excess
-10 to -15
Ice/water/CaCl2*
Excess
-29
Dry ice*/ethanol or isopropanol
Excess
-72 to -78
Dry ice*/ethylene glycol
Excess
-15

5. Sealing Corrosive Substances ( e.g. acids)
Sealing corrosive materials poses special challenges for the Ampulmatic-10 ampule sealer.
For concentrated and volatile corrosives, additional steps may need to be taken to ensure a
consistent, reliable sealing operation. Corrosion resistant parts may be available by request.
Contact your Bioscience Technical Representative for more information.
6. Ampule Glass and Size
The type of glass and size of ampules are important factors to consider in getting the best
results with your sealer. Soft glass is not recommended due to the rapid heating and cooling
during flame sealing; seals will tend to be brittle and crack easily especially when volatile
substances are being sealed.
Standard carousels are designed for Wheaton gold band ampules or equivalent. The
Ampulmatic-10 Ampule Sealing System can be adapted to seal a variety of ampule designs
and sizes. However, non-standard sizes or designs should be submitted to Bioscience to
confirm suitability prior to purchase. Custom carousels may be available for non-standard
ampule sizes.
Ampulmatic®-10 Recommended Ampule Specifications
Wheaton Brand Ampule Specifications
Size
Diameter
(mm)
Height
(mm)
1ml
10.5
67
2ml
12
75
5ml
16.5
84
10ml
19
107
20ml
22.5
130
50ml
26
150
7-4

Ampulmatic Carousel Specifications
Rack
Size
Min Outside
Diameter
Max Outside
Diameter
Min Height
Max Height
In
cm
In
cm
In
cm
In
cm
1ml
0.356
0.89
0.418
1.05
2.63
6.68
4.75
12.06
2ml
0.418
1.06
0.480
1.22
2.94
7.47
5.00
12.70
5ml
0.621
1.57
0.683
1.73
2.75
6.98
5.00
12.70
10ml
0.715
1.81
0.777
1.97
3.25
8.26
5.50
13.97
20ml
0.840
2.13
0.902
2.29
3.25
8.26
5.50
13.97
50ml
1.121
2.84
1.183
3.00
3.25
8.26
7.25
18.42
Custom carousels may be available for other ampule sizes.
Please contact your Bioscience, Inc. representative for more information.
7. Sealing Thick Glass Ampules
A Dual Flame module is available for sealing thicker glass ampules. Contact your Bioscience
Technical Representative for more information.
8. Opening the Sealed Ampules
Sealed ampules are best opened by sliding an ampule breaker over the top of the ampule to
the color break or scored line and then breaking with a bending motion. A piece of flexible
or semi-flexible plastic tubing can be placed over the neck of the ampule if no ampule
breaker is available. Gloves are recommended to protect hands from broken glass and/or
possible contact with contents of the ampule.
7-5

Maintenance
Make no attempt to service or repair the Ampulmatic-10 ampule sealer while still under warranty
before consulting with Bioscience, Inc. After the warranty period, such consultation is still advised,
especially when the repair may be technically sophisticated or difficult. No equipment, however,
should be returned to the manufacturer without prior approval. Obtain a Return Authorization
(RA) Number from Bioscience, Inc. before returning the equipment. Mark the RA number on the
shipping label.
1. Preventive Maintenance Recommendations
The following preventive maintenance measures will help to ensure that the Ampulmatic-
10 Ampule Sealer continues to function properly and that there are no unintended
interruptions in service from the unit.
Note: Turn the power switch “off” and unplug the unit from its power source.
Disconnect all gas connections before attempting to clean any spills or to
perform maintenance, repairs or service.
•General cleaning of the outside cabinet is recommended after use. Use a mild
detergent and moist towel to wipe the outside surface of the Ampulmatic-10 base unit
and the carousel rack clean. Organic solvents other than alcohol are not
recommended, especially for the carousel polycarbonate plates.
•Regular cleaning of the Ampulmatic-10 belt is required to ensure proper rotation of
the ampule while in the sealing position. Use alcohol on a paper towel or cloth to clean
the belt, by gently pressing it against the belt while it is spinning.
•The ampule spinning drive belt should be replaced every 12 months or 1,000,000
ampules. The Ampulmatic-10 ampule sealer will seal about 100,000 ampules per
month if used continuously, 40 hours per week.
•Occasional checks for gas tubing leaks are recommended to ensure safe operating
conditions.
•Immediately clean all spills of solvents and corrosives. Neutralization of acids with
5% sodium bicarbonate and bases with 5% acetic acid are recommended.
•Any broken glass should be carefully removed with vacuum cleaner.
2. Carousel Advance System
The current design of the Ampulmatic-10 Ampule Sealer uses optical switches to position
the carousel. There are no mechanical parts to adjust or replace in the carousel advance
system.
8-1
Other manuals for Ampulmatic-10 Purge Gas Injector
2
Table of contents
Other Bio-Science Laboratory Equipment manuals
