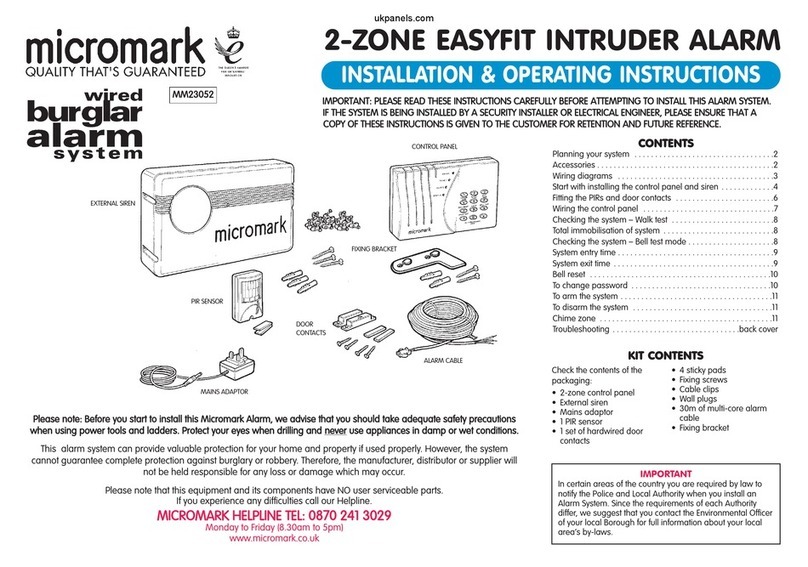
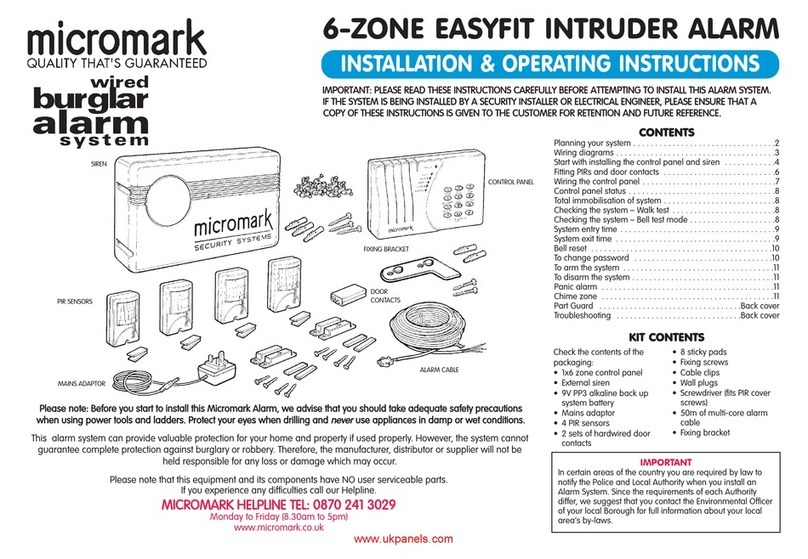
Micromark MM23292 Manual

INSTALLATION & OPERATING INSTRUCTIONS
IIMMPPOORRTTAANNTT::PPLLEEAASSEERREEAADDTTHHEESSEEIINNSSTTRRUUCCTTIIOONNSSCCAARREEFFUULLLLYYBBEEFFOORREEAATTTTEEMMPPTTIINNGGTTOOIINNSSTTAALLLLTTHHIISSAALLAARRMMSSYYSSTTEEMM..
IIFFTTHHEESSYYSSTTEEMMIISSBBEEIINNGGIINNSSTTAALLLLEEDDBBYYAASSEECCUURRIITTYYIINNSSTTAALLLLEERROORREELLEECCTTRRIICCAALLEENNGGIINNEEEERR,,PPLLEEAASSEEEENNSSUURREETTHHAATTAA
CCOOPPYYOOFFTTHHEESSEEIINNSSTTRRUUCCTTIIOONNSSIISSGGIIVVEENNTTOOTTHHEECCUUSSTTOOMMEERRFFOORRRREETTEENNTTIIOONNAANNDDFFUUTTUURREERREEFFEERREENNCCEE..
This alarm system can provide valuable protection for your home and property if used properly. However, the system
cannot guarantee complete protection against burglary or robbery. Therefore, the manufacturer, distributor or supplier will
not be held responsible for any loss or damage which may occur.
WIREFREE DUAL POWERED BURGLAR ALARM
Check the contents of the
packaging:
• Dual Power external
control panel/siren
• 2 RF keyfobs
• 2 wirefree PIR sensors
• Self-adhesive sticky
pads
• Fixing screws and wall
plugs
• Installation and
Operating Instructions
IMPORTANT
In certain areas of the country you are required by law to
notify the Police and Local Authority when you install an
Alarm System. Since the requirements of each Authority
differ, we suggest that you contact the Environmental Officer
of your local Borough for full information about your local
area‘s requirements.
Please note that this equipment and its components have NO user serviceable parts.
If you experience any difficulties call our Helpline.
MMIICCRROOMMAARRKKHHEELLPPLLIINNEETTEELL::0088770022441133002299
Monday to Friday (8.30am to 5pm)
www.micromark.co.uk
CCOONNTTEENNTTSS
Planning your system . . . . . . . . . . . . . . . . . . . . . . . . . . .2
Accessories . . . . . . . . . . . . . . . . . . . . . . . . . . . . . . . . . . .2
Fitting the batteries . . . . . . . . . . . . . . . . . . . . . . . . . . . .3-4
PIR check . . . . . . . . . . . . . . . . . . . . . . . . . . . . . . . . . . . . .4
Panic alarm . . . . . . . . . . . . . . . . . . . . . . . . . . . . . . . . . . .4
Installing the PIRs . . . . . . . . . . . . . . . . . . . . . . . . . . . . . . .5
Anti-tamper switch . . . . . . . . . . . . . . . . . . . . . . . . . . . . . .5
Replacing cover . . . . . . . . . . . . . . . . . . . . . . . . . . . . . . . .5
Installing control panel/siren . . . . . . . . . . . . . . . . . . . . . .5
System operation at a glance . . . . . . . . . . . . . . . . . . . . .6
Anti-jamming . . . . . . . . . . . . . . . . . . . . . . . . . . . . . . . . . .6
Changing batteries . . . . . . . . . . . . . . . . . . . . . . . . . . . . .6
Troubleshooting . . . . . . . . . . . . . . . . . . . . . . . . . . . . . . . .7
Control panel/siren fixing template . . . . . . . . .back cover
KKIITTCCOONNTTEENNTTSS
PPlleeaasseennoottee::BBeeffoorreeyyoouussttaarrttttooiinnssttaalllltthhiissMMiiccrroommaarrkkAAllaarrmm,,wweeaaddvviisseetthhaattyyoouusshhoouullddttaakkeeaaddeeqquuaatteessaaffeettyypprreeccaauuttiioonnss
wwhheennuussiinnggppoowweerrttoooollssaannddllaaddddeerrss..PPrrootteeccttyyoouurreeyyeesswwhheennddrriilllliinnggaannddnneevveerruusseeaapppplliiaanncceessiinnddaammppoorrwweettccoonnddiittiioonnss..
WIREFREE PIR
WIREFREE PIR
WIREFREE REMOTE
KEYFOBS
WEATHERPROOF
CAPS
CONTROL PANEL
SIREN BOX
SOLAR PANEL
BLUE INDICATOR
LED
YYoouuccaanneexxppaannddtthhiissssyysstteemmwwiitthhaaddddiittiioonnaallaacccceessssoorriieessaattaannyy
ttiimmee((sseeeeppaaggee22))..
TToooollssaannddeexxttrraaiitteemmss
rreeqquuiirreedd::
Drill
Drill bit
Cross head screwdriver
Batteries required:
6 x ‘D’ cell and 2 x PP3
(alkaline type batteries)
Ladder or tower.
ukpanels.com

WHAT IS DUAL POWER?
This alarm offers the energy efficient combination of solar power and battery power. Solar cells convert the sun’s energy into electrical
power, while alkaline dry cell batteries provide power for the system at night or on overcast days (control panel/siren only).
WHAT IS A ZONE?
Throughout these instructions the term ZONE is used, meaning a defined area of protection, for example, the entry/exit door. This
system also has the added protection of 24-hour anti-tamper guard and panic alarm.
The anti-tamper guard protects against removal of the control panel/siren box from its fixing.
The sensors supplied with this alarm system will protect two zones (areas of protection), for example, cover the entry/exit door -
hallway and the main living area.
The alarm operates instantly a PIR is activated by a warm moving body.
HOW IT WORKS
The alarm system is armed and disarmed by the wirefree remote keyfob. The keyfob sends an RF signal which activates or de-
activates the siren. In the armed state when a PIR senses movement in its detection path, it sends an RF signal to the siren to activate.
On exit from your property press the ON button on the keyfob to arm the system. On your return press the OFF button to disarm the
system.
IMPORTANT POINTS TO CONSIDER
When planning your system and before installation consider the
following points:
This system comprises of 2 wirefree PIRs, 2 wirefree remote
keyfobs and control panel/siren. See the diagram to help plan
your system.
• DDoonnoottmount the Control Panel/Siren close to metal fittings
such as metal downpipes or satellite dishes which may affect the
operation of the system.
• The PIR must be in radio range of the control panel/siren (up to
maximum 32m/100ft). Please note the type, style and
construction of your home can affect the signal transmission
range. Whenever possible locate the sensors as close to the
siren as you can.
• The wirefree PIRs communicate by radio frequency to trigger
the siren so there is nnoowwiirriinnggbbeettwweeeenntthheeccoommppoonneennttss. This
makes the system easily expandable with the addition of extra
sensors (see accessories).
• Do not position PIR facing windows, in direct sunlight, above a
heat source such as radiator, or in conservatories or draughty
areas.
• When armed, keep pets out of areas protected by PIR sensors.
2
PLANNING YOUR SYSTEM ACCESSORIES
We recommend that you check or change the battery in all
sensors every 6 months. The batteries in the control panel/siren
should provide up to 3 years’ life before replacement, however,
we recommend you check them every year.
SSIIRREENN
PPIIRRMMMM2233229988
WWiirreeffrreeeeddoooorr
ccoonnttaaccttss//ttrraannssmmiitttteerr
Use on the main entry/exit
door to your property.
MMMM2233229966
WWiirreeffrreeeePPIIRRsseennssoorr
Use to protect additional
rooms.
PPlleeaasseennoottee::This Wirefree Alarm System will
not work with wirefree accessories from other
Wirefree Alarms.
TTooeexxppaannddyyoouurrssyysstteemm::
Should you wish to expand your system to suit
your property requirements, the specially
adapted wirefree accessories shown below
are available from our customer helpline
service on 0088770022441133002299..
WWhheennaasskkiinnggtthheeccuussttoommeerrhheellpplliinneeffoorr
wwiirreeffrreeeeaacccceessssoorriieess,,iittiissiimmppoorrttaannttttooqquuoottee
tthheeHHoouusseeCCooddeeoonnyyoouurreexxiissttiinnggkkeeyyffoobb,,PPIIRRss
oorrddoooorrccoonnttaaccttss..
SSeeeeppaaggee33eexxppllaaiinniinnggHHoouusseeccooddeess..
MMMM2233229977
WWiirreeffrreeeerreemmoottee
kkeeyyffoobb
For use by other
family members.
ukpanels.com

3
FITTING THE BATTERIESKEYFOB
Remove the cover by releasing the six screws.
Switch the Power On/Off switch to the OFF position.
The anti-tamper jump link is factory set to cover both pins – anti-tamper circuit disabled.
Insert six ‘D’ cell alkaline batteries in the compartments, so they face the same direction and have the same polarity.
(Have the Keyfob ready to use.)
TThheeccoonnttrroollppaanneell//ssiirreenn//ssttrroobbeehhaassttoolleeaarrnntthheehhoouusseeccooddeeffrroommtthheekkeeyyffoobbffoorriittttoowwoorrkk..
Turn the Power On/Off switch to ON. The LED illuminates for 20 seconds, signalling the self-learn period.
Press the keyfob ON button within the 20 seconds for the control
panel/siren/ strobe to ‘learn’ the house code. It learns the first transmission
only. Two loud bleeps are heard and the LED goes out to confirm that this
has been done. MMoovveeoonnttootthheenneexxttsseeqquueennccee..
* You can fit 6 or 3 batteries. If you only use 3, then the operational life is reduced
accordingly. To use only 3 batteries, locate them in matched terminals, (ie. AAA or
BBB).
22
CONTROL PANEL/SIREN
1
CCHHEECCKKLLIISSTT
Has the protective tab been removed
from the keyfob?
Does the indicator light show when the
On/Off button is pressed on the keyfob?
Are the batteries inserted correctly in the
control panel/siren?
Is the Power ON/OFF switch set to
ON position?
Has the control panel/siren ‘learnt’ the
house code?
Screws
Screws
Power
On/Off
switch
Anti-tamper
jump link
Cover
LED
LED
On Off
Transit battery
protective tab
Screw
PPlleeaasseennoottee::The control panel/siren/strobe has to
‘learn’ the house code from the keyfob which is
factory set and cannot be changed.
The keyfob is supplied with the battery installed.
Lightly loosen the screw at the back of the
casing so the transit battery protective tab can
slide out.
PPuulllloouutttthheepprrootteeccttiivveettaabbaannddrreettiigghhtteenntthhee
ssccrreeww..
Press either the ON or OFF button to check that
the LED lights.
If the LED does not light, the battery may need
replacing (see page 6).
3
Off button
HHOOUUSSEECCOODDEESS
On the keyfob PIRs and door contacts are labels with a row of numbers comprising of ‘0’ and ‘1’. It is important that the keyfob/sensors have the
same identical row of numbers. This number is called the house code and is transmitted by the keyfob and PIRs to trigger the control panel/siren.
BBeeffoorreeiinnssttaallllaattiioonncchheecckkkkeeyyffoobb,,ddoooorr//wwiinnddoowwccoonnttaaccttssaannddPPIIRRllaabbeellss..IIfftthheennuummbbeerrssoonntthheekkeeyyffoobb,,ddoooorr//wwiinnddoowwccoonnttaaccttssaannddPPIIRRssaar