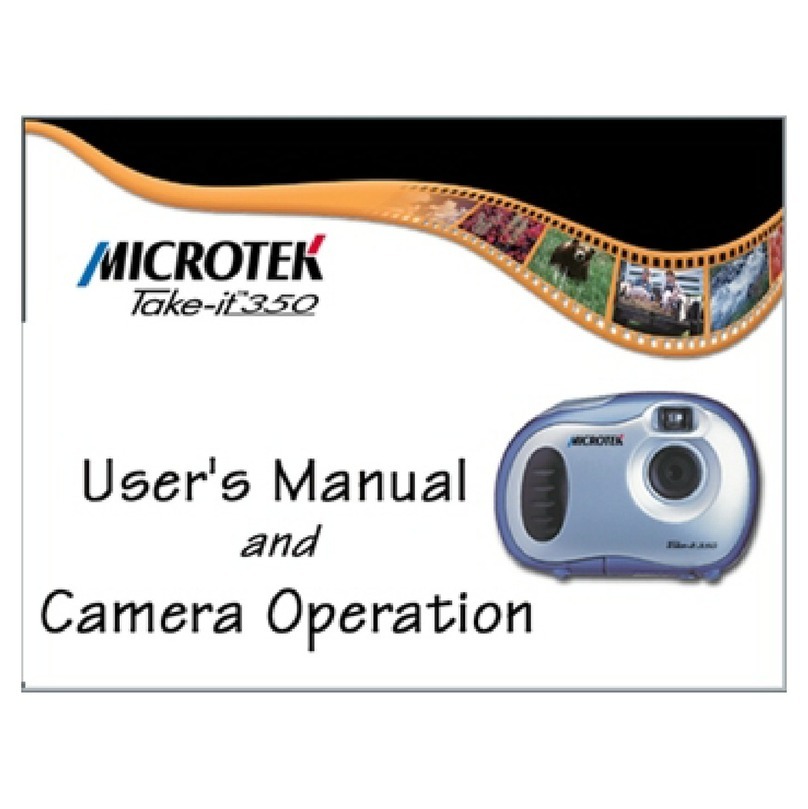
Microtek Take-it 350 User manual


Copyright © 2000 Microtek International Inc.Copyright © 2000 Microtek International Inc.
Copyright © 2000 Microtek International Inc.
Allrightsreserved.
November 2000
TT
TT
Trademarksrademarks
rademarksrademarks
rademarks
MicrotekTM is aregisteredtrademarks of Microtek International Inc. Macintosh®,
andApple® areregisteredtrademarksofAppleComputerInc. Windows®isa
trademarkofMicrosoftcorporation. Adobe ®,Acrobat®,andPhotoshopare
registeredtrademarkof AdobeSystemsIncorporated.Ulead®,PhotoExpress®,
PhotoImpact®, and PhotoExplorer ®are registered trademarks of Ulead Systems Inc.
BridgewellTMandPageabc®aretrademarksof BridegwellIncorporated.TrellixTM and
Trellix WebTM aretrademarks of TrellixCorporation. All other productsorname
brandsaretrademarksoftheirrespectiveholders.
ImportantImportant
ImportantImportant
Important
Pictures youmayacquirefromanyofthebundledsoftwareand/orPictures,or
Documents youscanmaybeprotectedundercopyrightlaw. Theunauthorizeduse
ofsuchmaterials couldbea violation oftherights ofthecopyright holder.Microtek
bearsnoresponsibilityfortheunauthorizeduseofcopyrightedmaterials.

Table of Contents
PackageContentsPackageContents
PackageContents..........................................................................................................................................................
..........................................................................................................................................................
............................................................................. 11
11
1
FeaturesFeatures
FeaturesFeatures
Features ....................................................................................................................................................................................
....................................................................................................................................................................................
.......................................................................................... 22
22
2
Camera ComponentsCamera Components
Camera Components ..............................................................................................................................................
..............................................................................................................................................
....................................................................... 33
33
3
GettingReadyGettingReady
Getting Ready ..............................................................................................................................................................
..............................................................................................................................................................
............................................................................... 4-54-5
4-54-5
4-5
A. Loading the Battery ....................................................................................4
B. BasicPictureTakingOperation ....................................................................5
Other Modes of OperationOther Modes of Operation
Other Modes of Operation ........................................................................................................................
........................................................................................................................
............................................................ 6-96-9
6-96-9
6-9
A. 107Shots Mode.........................................................................................6
B. 26 Shots Mode...........................................................................................7
C. ContinuousShooting Mode........................................................................8
D. Self-Timer Mode ........................................................................................9
Erasing All Images from CameraErasing All Images from Camera
Erasing All Images from Camera............................................................................................................
............................................................................................................
......................................................1010
1010
10
Connecting the Camera to PCConnecting the Camera to PC
Connecting the Camera to PC ..................................................................................................................
..................................................................................................................
.........................................................1111
1111
11
Utility Software InstallationUtility Software Installation
Utility Software Installation................................................................................................................
................................................................................................................
........................................................12-1312-13
12-1312-13
12-13
A. Installing Camera Driver .......................................................................... 12
B. Installing OtherBundledSoftware ............................................................. 13
Using the TUsing the T
Using the Take-it 350 as a Digital Cameraake-it 350 as a Digital Camera
ake-it 350 as a Digital Cameraake-it 350 as a Digital Camera
ake-it 350 as a Digital Camera................................................................................
................................................................................
........................................1414
1414
14
Take-it 350 Digital Camera Interface..............................................................14
Zoom ....................................................................................................... 14
Acquire ..................................................................................................... 14
AcquireAll................................................................................................ 14
Download .................................................................................................14
AVICreator .............................................................................................. 14
Exit.......................................................................................................... 14

Downloading Images to your PCDownloading Images to your PC
Downloading Images to your PC ................................................................................................
................................................................................................
................................................15-1715-17
15-1715-17
15-17
Using AdobePhotoDeluxe............................................................................15
Using UleadPhotoExplorer6........................................................................16
UsingTrellix WebMicrotek Edition ............................................................... 17
Using the TUsing the T
Using the Take-it 350 as a PC/Wake-it 350 as a PC/W
ake-it 350 as a PC/Wake-it 350 as a PC/W
ake-it 350 as a PC/Web Cameb Cam
eb Cameb Cam
eb Cam ..........................................................................
..........................................................................
.....................................18-1918-19
18-1918-19
18-19
A. Select Camera Source ................................................................................ 18
B.SendaVideoMail ...................................................................................... 19
AppendicesAppendices
Appendices................................................................................................................................................................
................................................................................................................................................................
................................................................................20-2220-22
20-2220-22
20-22
AppendixA:Take-it350DigitalCameraSpecifications ................................... 20
AppendixB: FCCStatement .......................................................................... 21
AppendixC:DeclarationofConformity ......................................................... 22

1
Take-it 350
Digital Camera Special USB cable
Warranty and Quick
Reference Cards
Digital Camera CD-ROM
(Contains digital camera driver,
software, and user's manual)
Package Contents
Camera Safety Strap
Mini-Tripod
4 AAA Batteries
(Alkaline is recommended)
Camera Pouch

2
••
••
•Compact and lightweightCompact and lightweight
Compact and lightweightCompact and lightweight
Compact and lightweight
Size:::::102 x 71 x 35 mm Weight:::::84g (w/o batteries)
••
••
•Easy to operateEasy to operate
Easy to operateEasy to operate
Easy to operate
Fixedfocuswithonlytwo-button(modeselectandshutter)operation
••
••
•Three choices of picture taking modesThree choices of picture taking modes
Three choices of picture taking modesThree choices of picture taking modes
Three choices of picture taking modes
Continuousshooting mode(26 or107shots maximum)
Self-Timermode(10secondsdelay)
VGA(26 shots)QVGA (107shots)image recordingmode (640x480&
320x240pixelsrespectively)
••
••
•AA
AA
AVI Image ConversionVI Image Conversion
VI Image ConversionVI Image Conversion
VI Image Conversion
Easilytransfer "Still" imagesinto"Moving pictures"using the AVI
(AudioVideoInterlead)formatapplication.
••
••
•Instant image frames erasureInstant image frames erasure
Instant image frames erasureInstant image frames erasure
Instant image frames erasure
All imagescanbeclearedinstantlytostartanew picturetaking session.
••
••
•Low power consumption with auto energy-save modeLow power consumption with auto energy-save mode
Low power consumption with auto energy-save modeLow power consumption with auto energy-save mode
Low power consumption with auto energy-save mode
New batteries can take up to 1000 shots. Camera automatically enters into
"sleep"(energy-saving)modewhenitremainsinactivefor30seconds.
••
••
•Supports USB interfaceSupports USB interface
Supports USB interfaceSupports USB interface
Supports USB interface
WithUSB,downloadofimagestoyourPCisaccomplishedathigherspeed.
••
••
•Software package bundleSoftware package bundle
Software package bundleSoftware package bundle
Software package bundle
AdobePhotoDeluxe
UleadPhotoExplorer6
EyeStar Mail Microtek Edition (PC camera software)
Trellix Web Microtek Edition
AdobeAcrobatReader
Features

3
Camera Components
SHUTTER
BUTTON
LENS
BATTERY
COMPARTMENT
TRIPOD MOUNT
VIEWFINDER
GRIP
POWER AND FUNCTION MODE
SELECTION BUTTON STRAP MOUNT
BATTERY
COMPARTMENT
LOCK
USB PORT
LCD DISPLAY
PANEL

4
A. Loading the Battery
(4AAAsizebatteries,Alkalinerecommended)
1Unlock the battery compartment cover by
liftingthe locktoward"OPEN"position.
2Slidecompartment coveroutward(as
indicatedbythearrowshownontopofthe
cover)andopenthecover.
3Inserteachof the4AAA batteries intoits
chambersmakingsure thatthepositive (+)
andnegative(-)endsareproperlyoriented
withthepolarityindicatedon topofeach
chamberandat the back ofthecover.
4Close and slide the battery compartment
coverback toits originalposition andlock
thecover.
WARNING
: When the LCD Panel display
starts to blink, it indicates that the batteries
power is low. Stop taking pictures and transfer the
images data to your PC within a week before the
batteries completely lose its power. Otherwise, all
the images will be erased.
Getting Ready
Correct battery polarity at outer end of
the compartment are indicated at the
back of cover or as illustrated above.
Slide toward
arrow
direction to
open battery
cover
++
++
+
__
__
_
++
++
+__
__
_
BATTERY
COMPARTMENT
LOCK
LIFT away
from the
camera to
unlock

5
B.Basic Picture Taking Operation
NOTENOTE
NOTENOTE
NOTE
: The camera is designed without a power switch. It uses energy-saving or "sleep"
mode to control its power. If the camera is off, press the Function Mode button to turn the
camera back on.
11
11
1Withthecamerastraploopedaroundyour wrist,holdthecameraby itsgrip.
Lookthroughtheviewfinderandsetupyourpicture.Adjustsizeofyour
compositionbyincreasingordecreasingdistancebetweencameraandsubjectbut
notnearerthanonemeter.
22
22
2Press the Shutter button to take a picture of
yoursubject.Ashortbeepsoundemitsat
each click of the shutter to confirm that a
shothasbeentakenandthecameraisready
to take the next picture.
NOTES
: 26 or 107shots mode is available
with erase capability (see next page for details).
After each shot, the LCD Panel will show the
number of remaining shots available.
For the mode, the LCD screen will only show
“99” pictures. However, when you start to take
the first 8shots -- the no. of pictures taken (in
between these 8shots) will not be deducted from
“99” until you take the 9th shot.
WARNING
: A warning beep (longer and lower tone compared to normal beep) will emit if
exposure is too dark for a normal picture taking. No image is taken when this condition
occurs.

6
Other Modes of Operation
Repeatedly press this
Function Mode button
until the "LrLr
LrLr
Lr" icon is
displayed
107Shots mode is
ready only when the
LCD Panel displays
the "9999
9999
99" icon
When the "LrLr
LrLr
Lr" icon
appears on the LCD
Panel, press Shutter to
display the "9999
9999
99" icon
99
A.107Shots Mode
Thismodeofoperationallowsyoutotake107shotsoflower-resolutionimagesin
(320 x 240) QVGA format. To set your camera into 107Shot mode-
11
11
1RepeatedlypresstheFunctionModebuttonuntilthe"LrLr
LrLr
Lr"iconisdisplayedonthe
LCDDisplayPanel.
22
22
2PresstheShutterbuttonandthe"LrLr
LrLr
Lr"iconbecomes"9999
9999
99"whichwouldindicate
that the 106Shot mode is ready.
For the mode, the LCD screen will only show “99” pictures. However, when you
start to take the first 8shots -- the no. of pictures taken (in between these 8shots)
will not be deducted from “99” until you take the 9th shot.
NOTE:
Switching from 107 pictures mode to 26 pictures modes will not erase any images
in the camera. If you attempt to continue shooting at the end of 107th shot, a repetitive beep
will emit when you press the Shutter button.

7
B. 26 Shots Mode
Thismodeof operationallowsyou totake26 shotsofimages athigherresolution
(640 x 480) VGA format. To set your camera back to 26 Shot mode after operating
in106shotsmode-
1RepeatedlypresstheFunctionModebuttonuntilthe"HrHr
HrHr
Hr"iconisdisplayedonthe
LCDDisplayPanel.
2PresstheShutterbuttonandthe"HrHr
HrHr
Hr"iconbecomes"2626
2626
26"whichwouldindicate
that the 26 Shot mode is ready.
WARNING:
Switching from 26 pictures mode to 107pictures modes will not erase any
images in the camera.
If you attempt to continue shooting at the end of 26th shot, a repetitive beep will emit when
you press the Shutter button.
Repeatedly press this
Function Mode button
until the "HrHr
HrHr
Hr" icon is
displayed
26 Shots mode is
ready only when the
LCD Panel displays
the "2626
2626
26" icon
When the "HrHr
HrHr
Hr" icon
appears on the LCD
Panel, press Shutter to
display the "2626
2626
26" icon
26

8
C. Continuous Shooting Mode
Repeatedly press this Function Mode
button until the Continuous Shooting
mode icon is displayed
CLCL
CLCL
CL
Thismodeof operation allowsyouto take
multipleframesofimageswhenholding
downtheShutter button while aimingat
your subject. A maximum of 26 or 107
shotscanbetakendependingonwhich
shootingmodeyouarein.Continuous
shootingunder26Shotsmodetakesabout
1.5secondstofullyconsumethe26
frames,whileittakesabout6.5seconds
under107Shotsmode.Ifyoureleasethe
Shutter midway, only part of the available
frameswillbeloadedwithimages.
To set camera into Continuous Shooting
mode,repeatedlypresstheFunctionMode
select button until the "
" icon is
displayedontheLCDDisplayPanel.
Continuous Shooting
mode is ON when this
LCD Panel displays
the " " icon
CLCL
CLCL
CL

9
Repeatedly press this
Function Mode button
until the Self-Timer
mode icon is displayed
D. Self-Timer Mode
TheSelf-Timermodeofoperationallowsa10secondsshutterreleasedelayafter
pressingtheShutterbutton.Mountthecamerainatripodwhenoperatingunder
Self-Timermode.
1SetcameraintoSelf-Timer mode by repeatedlypressing theFunctionMode
selectbuttonuntil the "
"iconis displayed ontheLCD Display Panel.
2ThenpresstheShuttertostartthe10secondcountdown.
Self-Timer mode is ON
when this LCD Panel
displays the
" " icon
Press the Shutter button to
start the delay countdown
SLSL
SLSL
SL
SLSL
SLSL
SL

10
Wheneveryouwish todiscardtheimagesyouhavealready taken,youcanerase
themfromthecamera.Takenotethat thiserasefeaturefunctions onlyas"All-Frame-
Erase."Nopartialerasureisallowed.
1Enablethe"All-Frame-Erase"featurebyrepeatedlypressing theFunctionMode
selectbuttonuntil the "
"iconis displayed ontheLCD DisplayPanel.
2Press the Shutter button twice to start erasing all images in the camera.
NOTE
: If you do not press the Shutter a second time within 5 seconds, the erase function is
aborted.
Erasing All Images from Camera
CLCL
CLCL
CL
Repeatedly press this
Function Mode
button until the
"All-Frame-Erase"
icon is displayed
Press the Shutter button to
start the delay countdown
"All-Frame-Erase" is ON
when this LCD Panel
displays the " " icon
CLCL
CLCL
CL

11
NOTE
: It is assumed that you have already installed the bundled software into your
computer. If not, install software as instructed in the section on "Utility Software Installation"
of this manual.
Connecting the Camera to PC
To transfer (download)the images datafromthe
camera to your PC, connect the camera to your
PCwiththesuppliedUSBcable.
1Insert the smaller terminal of the USB cable
intothecamera's USBport.
2Plug the other end of the USB cable into the
USB port of your computer.
3PerformdownloadstoyourPCbyreferring
to the section on Downloading images later
inthismanual.
4Operate the camera as web camera by
referringtothe EyeStarMailuser's manual
provided in the Take-it 350 Digital Camera
utility CD.

12
The Utility CD that accompanies your camera contains the Take-it 350 Digital
CameraDriverbundledwithvaluabeimage-editingsoftware.
Utility Software Installation
A. Installing Camera
Driver
1Insert the utility CD into the CD-ROM
drive.
NOTE
: If the installer screen does not
automatically display, click Start button,
then click Run from Windows Start menu,
and execute the file cdsetup.exe from the
CD.
2Whenthe TT
TT
Take-it 350 Softwarake-it 350 Softwar
ake-it 350 Softwarake-it 350 Softwar
ake-it 350 Softwaree
ee
e
InstallerInstaller
InstallerInstaller
Installerscreenappears,clickthe
Camera DriverCamera Driver
Camera Driverinstall button from the
Installerscreen. Followtheon-line
instructionstocompletethedriver
intallation.
NOTE
::::
: You may be prompted to restart
the computer at this point. Do not restart
your computer until all the software has
been installed.
3ConnectoneendoftheUSBcable
to your PC and the other end to
yourTake-it 350’sUSB port.
4Installalltheothersoftware asset
on the next page.
Click this
icon to
view the
User’s
Manual
Click this button to
start camera driver
installation

13
B. Installing Other
Bundled Software
1From the TT
TT
Take-it 350 Softwarake-it 350 Softwar
ake-it 350 Softwarake-it 350 Softwar
ake-it 350 Softwaree
ee
e
InstallerInstaller
InstallerInstaller
Installerscreen,clickeachsoftwarein
theorderthatitappearsonthescreen,
followtheon-lineinstructionsto
completetheinstallationofallsoftware
components:
Adobe PhotoDeluxe
Thisisyour Image-editingsoftwarefor
creatingdigitalphoto albums.
Ulead Photo Explorer 6Ulead Photo Explorer 6
Ulead Photo Explorer 6
This is your Image-editing software that
includesafreePhoto-sharingsiteto
instantly upload your images to the
Web.
EyeStarMailMicrotekEditionEyeStarMailMicrotekEdition
EyeStarMailMicrotekEdition
ThisisyourPCand/orWebCamera
software.
TT
TT
Trr
rr
rellix Wellix W
ellix Wellix W
ellix Web Micreb Micr
eb Micreb Micr
eb Microtek Editionotek Edition
otek Editionotek Edition
otek Edition
Easilycreate,publish,andupdateyour
ownWebsite.
Adobe Acrobat ReaderAdobe Acrobat Reader
Adobe Acrobat Reader
Softwareforreadingandprinting
manualson yourCD-ROM.
2Adesktopshortcutoftheprogramis
automatically created after
successfulinstallation.RestartRestart
RestartRestart
Restartyour
computerwhenyouhavefinished
installingalloftheabovesoftware.
Clickanyof these
iconstoviewthe
user'smanual
Clickany ofthesebuttons
tostartinstalling each
softwarecomponent.
Click "EXIT"
toclosethe
Installer
program.
.

14
Zoom
Clickthe ZoomZoom
ZoomZoom
Zoombuttontoenable/disable
imageinterpolationapplicationfor
downloadedimages.
Acquire
Double-click the image that you wish to
sendandprocesstoanimage-editing
software,andthenclickthe AcquireAcquire
AcquireAcquire
Acquire
button.
Acquire All
Click the Acquire AllAcquire All
Acquire AllAcquire All
Acquire Allbutton to send
andprocessallthethumbnailimageson
thepaneltoaselectedapplication.
Download
Click the DownloadDownload
DownloadDownload
Downloadbutton to tramsfer
and/ordownloadanothersetofimages
from your Take-it 350 Camera. Existing
images will be overwritten.
Using the Take-it 350 as a Digital Camera
The TT
TT
Take-it 350 Digital Cameraake-it 350 Digital Camera
ake-it 350 Digital Cameraake-it 350 Digital Camera
ake-it 350 Digital Camerainterfacewillbelaunched,whenyoustart
downloading images from your digital camera to any of your image-editing software.
AVI Creator
Click the AA
AA
AVI CrVI Cr
VI CrVI Cr
VI Creatoreator
eatoreator
eatorbutton to transfer
and/ordownload“Still”imagesfromyour
Take-it 350 Camera and convert it into
“MovingPictures”throughtheAVI(Audio
VideoInterleavedformatapplication.
Exit
Click the ExitExit
ExitExit
Exitbutton to close/quit
Take-it 350 Digital Camera Interface.

12
Installation Under Windows 98
Using Adobe
PhotoDeluxe
1. Launchthe Adobe PhotoDeluxeAdobe PhotoDeluxe
Adobe PhotoDeluxeAdobe PhotoDeluxe
Adobe PhotoDeluxe.
Youcanalsouseanyapplicationwitha
TWAIN acquire menu item. (e.g.
Photoshop, etc.)
2. Click the Get PhotoGet Photo
Get PhotoGet Photo
Get Photo button; click the
Get PhotoGet Photo
Get PhotoGet Photo
Get Phototab, and then click the
bottom half of the Camera button.
3. Fromthe Select Data sourceSelect Data source
Select Data sourceSelect Data source
Select Data sourcebox,
choose the TT
TT
Take-it 350ake-it 350
ake-it 350ake-it 350
ake-it 350 fromthe list of
sources,andthenclickOKOK
OKOK
OK.
4. Clickthe CameraCamera
CameraCamera
Cameraicon/button.The
DigitalCamerainterfaceappears.
Double-clickanyofthethumbnail
image(s) you wish to transfer to
Adobe PhotoDeluxeAdobe PhotoDeluxe
Adobe PhotoDeluxe.
5Click ExitExit
ExitExit
Exitwhenyouare ready to
return to Photo DeluxePhoto Deluxe
Photo DeluxePhoto Deluxe
Photo Deluxetofurther
enhancetheselectedimage(s).
Downloading Images to your PC
Formoredetailsonhowtoenhance
yourimages,please refer to theHelp
menu of Adobe PhotoDeluxeAdobe PhotoDeluxe
Adobe PhotoDeluxeAdobe PhotoDeluxe
Adobe PhotoDeluxe.

16
1Launch Photo ExplorerPhoto Explorer
Photo ExplorerPhoto Explorer
Photo Explorerbydoingthe
followinginsuccession: StartStart
StartStart
Start, ProgramsPrograms
ProgramsPrograms
Programs
- Photo Explor-- Photo Explor
-- Photo Explor-- Photo Explor
-- Photo Explorerer
erer
er.
2Fromthe MenuBar,select FileFile
FileFile
File,TWTW
TWTW
TWAINAIN
AINAIN
AIN
AcquireAcquire
AcquireAcquire
Acquire,Select SourceSelect Source
Select SourceSelect Source
Select Source,andthenchoose
TT
TT
Take-it 350 Digital Cameraake-it 350 Digital Camera
ake-it 350 Digital Cameraake-it 350 Digital Camera
ake-it 350 Digital Camerafromthe
Select SourceSelect Source
Select Sourcedialogbox.
3From the FileFile
FileFile
Filemenu, choose TWAINTWAIN
TWAINTWAIN
TWAIN
AcquireAcquire
AcquireAcquire
Acquire,then click Acquire nowAcquire now
Acquire nowAcquire now
Acquire now to
start acquiring images from your camera.
4The TT
TT
Take-it 350 Digital Cameraake-it 350 Digital Camera
ake-it 350 Digital Cameraake-it 350 Digital Camera
ake-it 350 Digital Camera
interfaceappears. Double-clickthe
image(s) you wish to transfer to PhotoPhoto
PhotoPhoto
Photo
ExplorerExplorer
ExplorerExplorer
Explorerfromthepanel.
5Click ExitExit
ExitExit
Exitwhen youarereadytoreturn
to Photo ExplorerPhoto Explorer
Photo ExplorerPhoto Explorer
Photo Explorertofurtherenhance
theselectedimages.
Formoredetailsonhowtoenhanceand
incorporatespecialeffects/filterstoyour
images, refer to Photo ExplorPhoto Explor
Photo ExplorPhoto Explor
Photo Explorer’er’
er’er’
er’ss
ss Help
s Help
menu.
Using Ulead Photo
Explorer 6
Other manuals for Take-it 350
1
Table of contents
Other Microtek Digital Camera manuals

Microtek
Microtek Take-it 350 User manual

Microtek
Microtek Take-it D1 User manual

Microtek
Microtek Take-it D3 User manual

Microtek
Microtek Take-it S3 User manual

Microtek
Microtek Take-it S1 User manual

Microtek
Microtek Take-it D1 User manual

Microtek
Microtek MN100 User manual

Microtek
Microtek Take-it D3 User manual

Microtek
Microtek Take-it D3 User manual

Microtek
Microtek MN100 User manual