Midtronics DSS-5000 User manual

DSS-5000
Midtronics Inc. 7000 Monroe Street Willowbrook, IL 60527
www.midtronics.com
Page 1
Quick Start Guide
May 2020
167-000868EN-B
Quick Start Guide
May 2020
167-000868EN-B
DSS-5000
Toyota/Lexus
IMPORTANT: Always place the DSS-5000 in the
plugged-in charging dock when not in use to allow
the tool to automatically check for and perform any
available software updates.
Controller
Carrying Handle: For carrying the Controller and Tester Pod
(when attached).
Controller Release Lever: Press to release the Controller
from the Tester Pod.
Power Button: Hold for 2 seconds to
turn the Controller on
and o independent of the Tester Pod. Flashes when the
Controller is being charged.
Touch Screen: Primary user interface.
Camera & Flashlight: For VIN scanning and identication.
Temperature Sensor: For measuring battery temperature.
Micro-USB Port: For updating and servicing the Controller
when a WiFi network is not available.
Power Supply Connection
Tester Pod
Accessory Connector: For connecting an optional acces-
sory (ex. Amp Clamp / DMM Cable) to the Tester Pod.
Controller Charging Contacts: For charging and communi-
cating
with the Controller when mounted to the Tester Pod.
Status Indicator LEDs:
- Power is on - Clamps reversed
- Tester Pod is communicating with the Controller
Integrated Printer: For printing and sharing test results.
Clamp Storage Mounts: Use to keep the test clamps pro-
tected when the tester is not in use.
Tester Pod Internal Batteries
Charging Dock
Tester Pod Charging Contacts: For charging the Tester Pod
Power Supply Connection

Midtronics Inc. 7000 Monroe Street Willowbrook, IL 60527 www.midtronics.com
DSS-5000
Page 2
Quick Start Guide
May 2020
167-000868EN-B
Initial Power Up
1. Upon initial power-up, the Language Settings screen is dis-
played. Tap Next to continue.
2. A Consent to collect data screen is displayed (details on
page 4). Tap the check box to agree and Next to continue.
3. Select the correct logo for the dealer location.
4. The Date/Time Settings are displayed. Tap Next to continue
after making any adjustments.
5. The Test Settings are displayed. Tap Next to continue after
making any adjustments.
6. If necessary, pair the DSS-5000 Controller with the Base.
7. A list of detected Congured WiFi networks is displayed.
To select a network: For initial setup, no networks will be
displayed here yet.
To add a network: Tap the plus (+) sign, then select from one
of the displayed detected networks.
To manually add a network, tap the plus (+) sign again.
Follow the on-screen instructions to select the Network
SSID, Security, and IP Settings. Tap Next when nished.
Use the onscreen keypad to manually enter the Network
SSID, security type, and IP settings. If necessary, enter the
WiFi network password. Tap Next when nished.
A conrmation screen is displayed when the analyzer has
successfully connected to the WiFi network.
To delete a network: Tap a displayed network to select it.
Tap trash can icon (3) to delete it.
8. Select the country in which the tool will be used (U.S. or Canada).
9. The BMIS (Battery Management Information System) Account
screen is displayed. If the username and password are not dis-
played, enter the correct username and password.
Country Username Password
Toyota
Canada
[email protected] Toyota1!
Toyota U.S.
[email protected] LexusMdx1!
Toyota
Canada
[email protected] LexusMdx1!
DSS-5000
Midtronics Inc. 7000 Monroe Street Willowbrook, IL 60527
www.midtronics.com
Page 3
Quick Start Guide
May 2020
167-000868EN-B
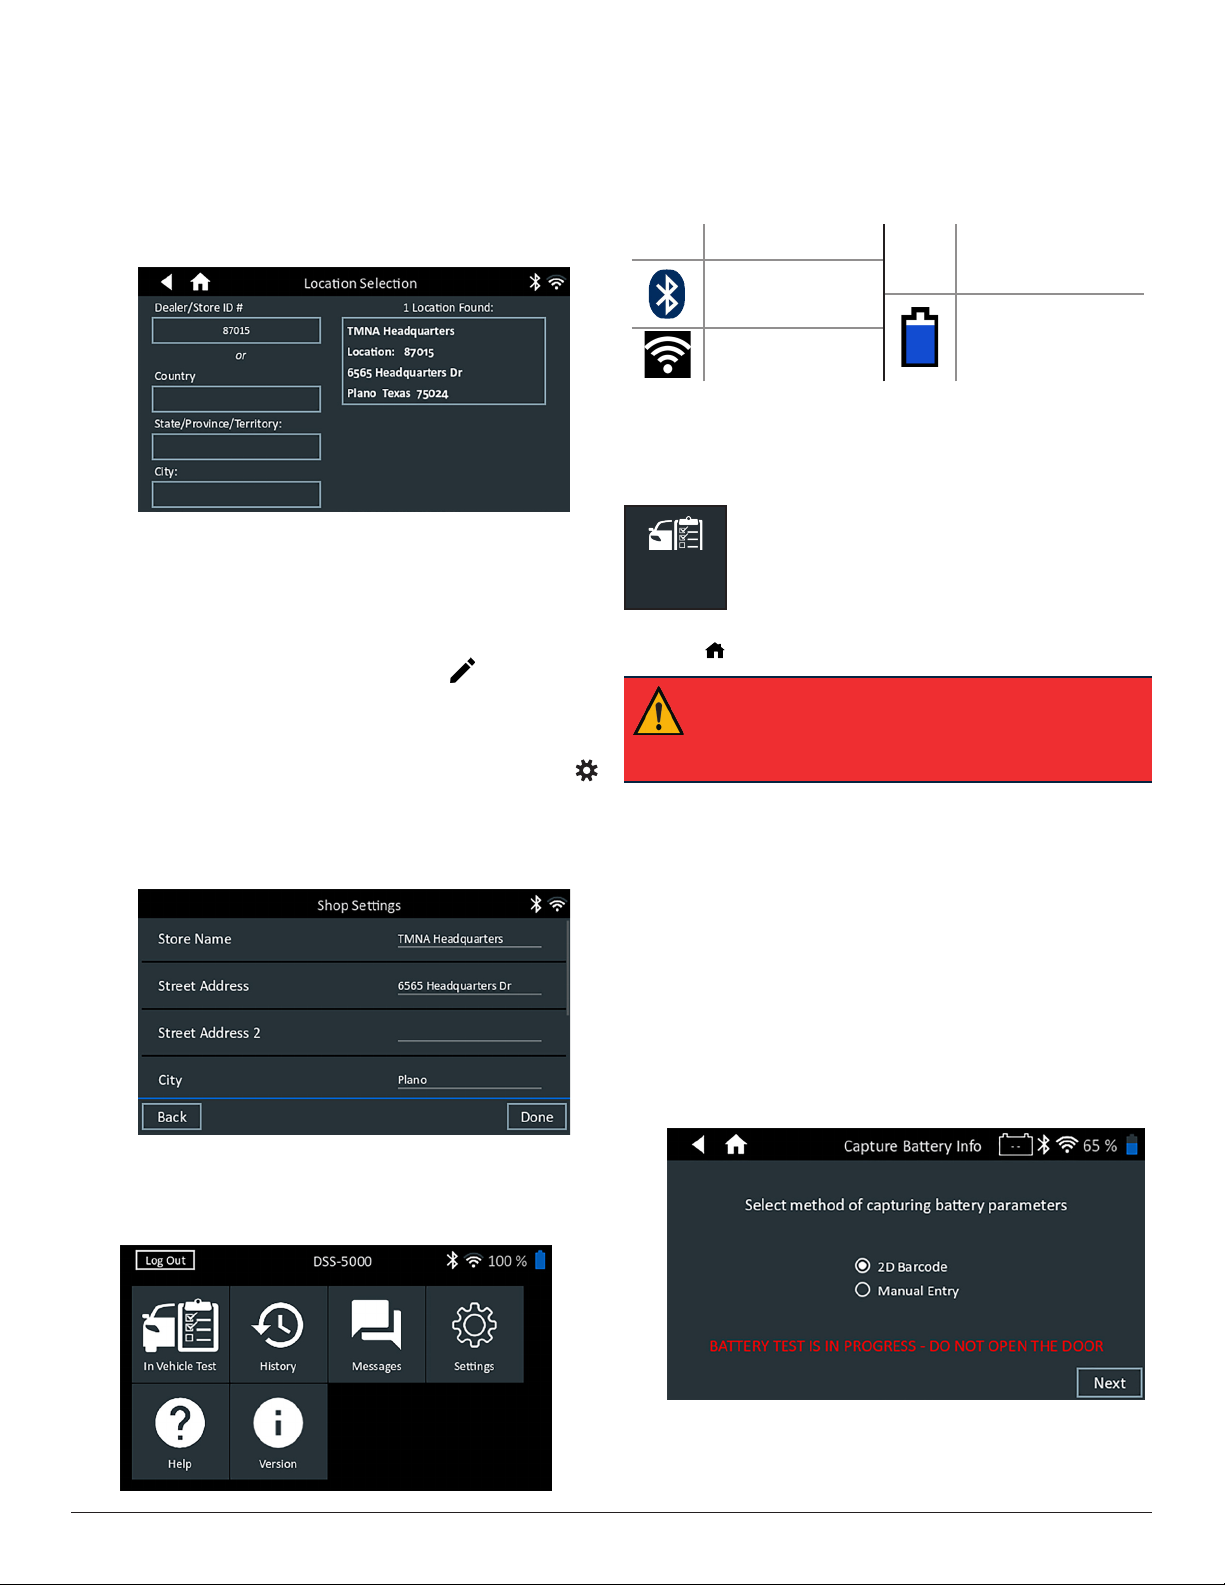
10. Press to download the list of BMIS locations.
11. Enter the Dealer ID or dealership name to search for the cor-
rect dealership and tap on the displayed location.
12. Tap on the displayed location to connect the analyzer to an
existing BMIS account.
The email Address Book screen is dis-
played.
To add an email address: Tap the plus (+) sign, then use the
displayed keyboard to add the address.
To edit an email address: Tap the pencil icon, then use
the displayed keyboard to edit the address.
To delete an email address: Tap a displayed email address to
select it. Tap trash can icon (3) to delete it.
To use the Default Email Server Settings: Tap the gear
icon to use the default.
13. The Shop Information screen is displayed. Use the onscreen
keypad to enter the store name, address, and phone num-
ber. Tap Next to continue.
14. The Main Menu screen is displayed.
Main Menu
Menu Bar
Log Out Log out current user
93% Controller internal
battery level
Bluetooth
connectivity status
Controller internal
battery status
WiFi signal strength
Main Menu Selection Area
In Vehicle Test
In VehicleTest
Use In Vehicle Test to perform Battery Tests on
in-vehicle batteries based on test parameters
entered by the user. A System Test (with the
option to use an Amp Clamp) is also available.
At any time during the test tap to return to the previous
screen or to return to the Main Menu.
IMPORTANT: Always place the DSS-5000 in the
plugged-in charging dock when not in use to allow
the tool to automatically check for and perform any
available software updates.
Battery Test
1. Connect the Tester Pod test clamps to the battery and re-
move the Controller.
2. On the Controller at the Main Menu tap In Vehicle Test. The
Connect Clamps screen is displayed.
3. Tap Next to begin the test. If the Tester Pod clamps have al-
ready been connected to the battery terminals, the 60-sec-
ond test begins automatically by applying a small load to
the battery and measuring the reserve capacity.
4. Scan the 2D Barcode on the vehicle battery or manually en-
ter the battery parameters.

Midtronics Inc. 7000 Monroe Street Willowbrook, IL 60527 www.midtronics.com
DSS-5000
Page 4
Quick Start Guide
May 2020
167-000868EN-B
www.midtronics.com
Corporate Headquarters
Willowbrook, IL USA
Phone: 1.630.323.2800
Canadian Inquiries
Toll Free: +1 1 866 592 8052
Midtronics b.v.
European Headquarters
Houten, The Netherlands
Serving Europe, Africa, the Middle
East, and The Netherlands
Phone: +31 306 868 150
Midtronics China
China Operations
Shenzhen, China
Phone: +86 755 2374 1010
Midtronics India
Navi Mumbai, India
Phone: +91 22 2756 4103/1513
Contact Corporate Headquarters
Phone: +1.630.323.2800
Asia/Pacíc (excluding China)
5. When the 2D Barcode is scanned the battery temperature is
also measured. Skip to Step 7.
For Manual Entry, enter the Battery Rating Units, Type, and
Rating.
Battery
Rating
Units
CCA
Cold Cranking Amps:
Battery current at 0 ºF
(–17.8 ºC).
100 to
3000
JIS
Japanese Industrial
Standard: Usually
printed on battery label.
26A17 to
245H52
Battery
Type
Flooded, AGM (Absorbed Glass Mat),
AGM Spiral, Gel, EFB
Battery
Rating Enter the Battery Rating Units value.
6. Following the testing process, if the battery parameters
were entered manually, the Temperature screen is displayed.
7. The Acquire VIN screen is displayed. Use the built-in camera
to scan the VIN bar code, usually located on the driver’s side
door frame.
NOTE: Refer to the Appendix in the Instruction
Manual for recommended scanning procedures
and VIN scanning help.
Manual Entry: Use the on-screen keypad to manually type
the 17-digit VIN and tap Next. The displayed Digits counter
will count up the alphanumeric characters as they are being
entered on the keypad.
Use Manual Entry if the battery being tested is not listed.
Tap >to continue to the Edit Battery Information screen.
8. At the Edit Battery Info screen, tap on the corresponding
box to edit the parameter information.
NOTE: Battery Type, Units, and Rating must be
lled in before proceding.
Battery Test Results
The test results are displayed on the Controller screen. Swipe
horizontally or vertically across the Controller screen to view
additional results screens.
Screen 1
Screen 2
Screen 3
Screen 1
Screen 2
Swipe Horizontally Swipe Vertically
To print or send the test results to a congured printer tap Send
Results. To return to the Home Screen, tap Done
or System
Test to continue with the System Test.
Other manuals for DSS-5000
6
Other Midtronics Automobile Accessories manuals


Popular Automobile Accessories manuals by other brands

Lund Industries
Lund Industries ODM-CGR installation instructions

Trioma
Trioma MOST-AiNet2.0 quick guide

MetalCloak
MetalCloak LED Flasher Relay installation instructions

Scania
Scania PTO EL manual

MobileVision
MobileVision M37 Operation and installation manual

Atwood
Atwood APC45 Installation, operation and maintenance


