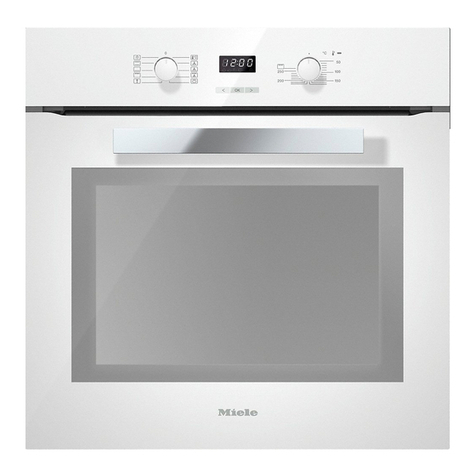
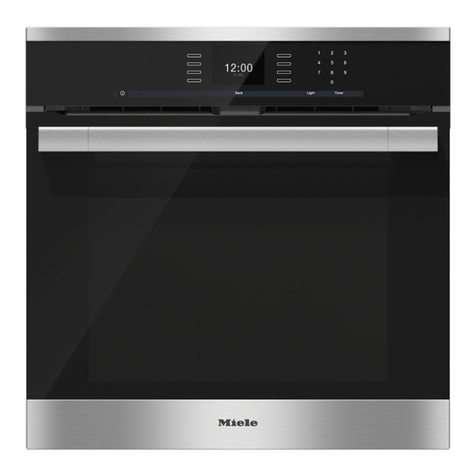
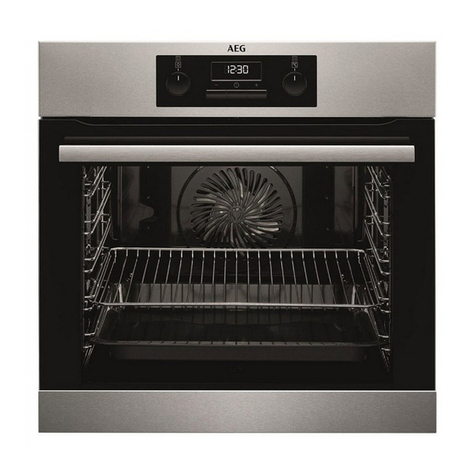
Miele H 2890 B User manual

Operating and installation instructions
Oven
To avoid the risk of accidents or damage to the appliance it is essential
to read these instructions before it is installed and used for the first time.
en-GB M.-Nr. 11 190 380

Contents
2
Warning and Safety instructions.......................................................................... 5
Caring for the environment ................................................................................ 14
Oven overview ..................................................................................................... 15
Oven controls....................................................................................................... 16
Function selector .................................................................................................. 17
Temperature selector ............................................................................................ 17
Clock/timer............................................................................................................ 17
Display.............................................................................................................. 17
Sensor controls ................................................................................................ 17
Features................................................................................................................ 18
Data plate .............................................................................................................. 18
Scope of delivery................................................................................................... 18
Accessories supplied and available to order......................................................... 18
Functions............................................................................................................... 23
Safety features ...................................................................................................... 23
PerfectClean treated surfaces............................................................................... 23
Before using for the first time ............................................................................ 24
Before using for the first time................................................................................ 24
Setting the time of day for the first time ............................................................... 24
Heating up the oven for the first time.................................................................... 25
Energy saving tips ............................................................................................... 26
Using the oven..................................................................................................... 28
Simple operation ................................................................................................... 28
Cooling fan ............................................................................................................ 28
Pre-heating the oven ............................................................................................. 29
Clock/timer .......................................................................................................... 30
Display................................................................................................................... 30
Symbols on the display ...................................................................................30
Sensor controls ..................................................................................................... 30
Setting the time ..................................................................................................... 31
Time display ..................................................................................................... 31
At the end of the duration................................................................................. 31
Using the minute minder................................................................................... 32
To set the minute minder.................................................................................. 32
Changing the minute minder duration.............................................................. 33
To delete the minute minder duration............................................................... 33

Contents
3
Switching on and off automatically ....................................................................... 34
Setting a cooking duration ............................................................................... 34
At the end of the cooking duration:.................................................................. 35
Setting a cooking duration and a finish time.................................................... 36
Changing the cooking duration ........................................................................ 37
Deleting a cooking duration ............................................................................. 38
Deleting the finish time..................................................................................... 38
Changing the time of day ...................................................................................... 39
Changing settings ................................................................................................. 40
Baking................................................................................................................... 42
Tips on baking....................................................................................................... 42
Notes on the cooking charts ................................................................................. 42
Notes on the functions .......................................................................................... 43
Roasting ............................................................................................................... 44
Tips for roasting .................................................................................................... 44
Notes on the cooking charts ................................................................................. 44
Notes on the functions .......................................................................................... 45
Grilling .................................................................................................................. 46
Tips for grilling....................................................................................................... 46
Notes on the cooking charts ................................................................................. 46
Notes on the functions .......................................................................................... 47
Further applications ............................................................................................ 48
Defrost................................................................................................................... 48
Low temperature cooking...................................................................................... 49
Frozen food/Ready meals...................................................................................... 50
Heat crockery ........................................................................................................ 50
Cleaning and care ............................................................................................... 51
Unsuitable cleaning agents ................................................................................... 51
Removing normal soiling ....................................................................................... 52
Removing stubborn soiling (excluding the FlexiClip runners) ............................... 52
Stubborn soiling on the FlexiClip runners ............................................................. 53
Cleaning the catalytic enamelled back panel........................................................ 54
Removing soiling caused by spices, sugar and similar deposits..................... 54
Removing oil and grease.................................................................................. 54
Door removal......................................................................................................... 55
Dismantling the door ............................................................................................. 56
Fitting the door ...................................................................................................... 59
Removing the side runners with FlexiClip runners................................................ 60
Lowering the top heat/grill element....................................................................... 60
Contents
4
Removing the back panel...................................................................................... 62
Problem solving guide ........................................................................................ 63
Service.................................................................................................................. 66
Contact in case of malfunction ............................................................................. 66
Warranty ................................................................................................................ 66
Installation............................................................................................................ 67
Installation dimensions.......................................................................................... 67
Installation in a tall or base unit........................................................................ 67
Tall unit side view ............................................................................................. 68
Base unit side view........................................................................................... 69
Connections and ventilation............................................................................. 70
Installing the oven ................................................................................................. 71
Electrical connection ............................................................................................. 72
Cooking charts .................................................................................................... 74
Batter..................................................................................................................... 74
Shortcrust pastry................................................................................................... 75
Yeast dough .......................................................................................................... 76
Quark dough.......................................................................................................... 77
Sponge mixture ..................................................................................................... 77
Choux pastry, puff pastry, meringue..................................................................... 78
Savoury dishes...................................................................................................... 79
Beef ....................................................................................................................... 80
Veal........................................................................................................................ 81
Pork ....................................................................................................................... 82
Lamb, game .......................................................................................................... 83
Poultry, fish............................................................................................................ 84
Note for test institutes ........................................................................................ 85
Test food according to EN60350-1 ...................................................................... 85
Energy efficiency class according to EN60350-1................................................. 86
Data sheet for household ovens ...................................................................... 86

Warning and Safety instructions
5
This oven complies with all current local and national safety
requirements. However, inappropriate use can lead to personal
injury and damage to property.
Read the operating and installation instructions carefully before
using the oven. They contain important information on safety,
installation, use and maintenance. This prevents both personal
injury and damage to the oven.
In accordance with standard IEC/EN60335-1, Miele expressly and
strongly advises that you read and follow the instructions in the
chapter on installing the oven as well as the safety instructions and
warnings.
Miele cannot be held liable for damage caused by non-compliance
with these instructions.
Keep these instructions in a safe place and pass them on to any
future owner.

Warning and Safety instructions
6
Appropriate use
This oven is intended for domestic use and use in other similar
environments.
The oven is not intended for outdoor use.
The oven is intended for domestic use only to bake, roast, grill,
cook, defrost and dry food.
All other types of use are not permitted.
This oven may only be used by people with reduced physical,
sensory or mental capabilities or lack of experience and knowledge if
they are supervised whilst using it.
They may only use it unsupervised if they have been shown how to
use it in a safe manner. They must be able to recognise and
understand the dangers of misuse.
The oven compartment is equipped with special lamps to cope
with particular conditions (e.g. temperature, moisture, chemical
resistance, abrasion resistance and vibration). These special lamps
must only be used for the purpose for which they are intended. They
are not suitable for room lighting.

Warning and Safety instructions
7
Safety with children
Children under 8 years of age must be kept away from the oven
unless they are constantly supervised.
Children aged 8 and older may only use the oven without
supervision if they have been shown how to use it in a safe manner.
Children must be able to understand and recognise the possible
dangers caused by incorrect operation.
Children must not be allowed to clean or maintain the oven
unsupervised.
Children should be supervised in the vicinity of the oven. Never
allow children to play with the oven.
Risk of suffocation due to packaging material. Whilst playing,
children may become entangled in packaging material (such as
plastic wrapping) or pull it over their head, presenting the risk of
suffocation.
Keep packaging material away from children.
Risk of injury caused by hot surfaces. Children’s skin is far more
sensitive to high temperatures than that of adults. External parts of
the oven such as the door glass, control panel and the vent become
quite hot.
Do not let children touch the oven when it is in operation.
Risk of injury from the open door.
The oven door can support a maximum weight of 15kg. Children
could injure themselves on an open door.
Do not let children sit on the open door, lean against it or swing on it.

Warning and Safety instructions
8
Technical safety
Unauthorised installation, maintenance and repairs can cause
considerable danger for the user. Installation, maintenance and
repairs must only be carried out by a Miele authorised technician.
Damage to the oven can compromise your safety. Check the oven
for visible signs of damage. Do not use a damaged oven.
Reliable and safe operation of this oven can only be assured if it
has been connected to the mains electricity supply.
The electrical safety of this oven can only be guaranteed when
correctly earthed. It is most important that this basic safety
requirement is fulfilled. If in doubt, the electrical installation should
be checked by a qualified electrician.
The connection data (voltage and frequency) on the data plate of
the oven must match the mains electricity supply in order to avoid
the risk of damage to the oven. Compare this before connecting the
appliance to the mains. If in any doubt, consult a qualified
electrician.
Multi-socket adapters and extension leads do not guarantee the
required safety of the appliance. Do not use these to connect the
oven to the mains electricity supply.
For safety reasons, the oven may only be used when it has been
fully installed.
The oven must not be used in a non-stationary location (e.g. on a
ship).
Risk of injury due to electric shock. Any contact with live
connections or tampering with the electrical or mechanical
components of the oven will endanger your safety and may lead to
the oven malfunctioning.
Do not open the oven housing under any circumstances.
While the oven is under warranty, repairs should only be
undertaken by a Miele authorised service technician. Otherwise the
warranty will be invalidated.

Warning and Safety instructions
9
Miele can only guarantee the safety of the oven when original
Miele spare parts are used. Faulty components must only be
replaced by original spare parts.
If the oven is delivered without a power connection cable, a
special cable must be installed by a Miele authorised service
technician (see “Installation”, “Electrical connection”).
If the connection cable is damaged, it must be replaced with a
special connection cable by a Miele authorised service technician (see
“Installation”, “Electrical connection”).
During installation, maintenance and repair work, e.g. if the oven
interior lighting is faulty (see “Problem solving guide”), the oven must
be completely disconnected from the household electricity supply.
To ensure this, do one of the following:
– Disconnect the mains fuse
– Completely unscrew the screw-out fuse (in countries where this is
applicable)
– Pull out the plug (if one is present) at the wall socket To do this,
pull the plug and not the mains connection cable.
The oven requires a sufficient supply of cool air for efficient
operation. Make sure that the supply of cool air is not hindered in
any way (e.g. by fitting heat insulation strips in the housing unit).
Furthermore, the required supply of cool air must not be excessively
heated by other heat sources (e.g. solid fuel stoves).
If the oven is built in behind a furniture front (e.g. a door), do not
close the furniture door while the oven is in use. Heat and moisture
can build up behind the closed furniture door. This can result in
damage to the oven, housing unit and floor. Leave the furniture front/
door open until the oven has cooled down completely.

Warning and Safety instructions
10
Correct use
Risk of injury caused by hot surfaces. The oven gets hot during
operation. You could burn yourself on the heating elements, oven
compartment, accessories or food.
Wear oven gloves when placing hot food in the oven or removing it
and when adjusting oven shelves, for example, in a hot oven
compartment.
Due to the high temperatures radiated, objects left near the oven
could catch fire. Do not use the oven to heat up the room.
Oils and fats can ignite if allowed to overheat. Never leave the
oven unattended when cooking with oil or fats. Never attempt to put
out oil or fat fires with water. Switch the oven off and extinguish the
flames by leaving the door closed.
Grilling food for excessively long cooking durations can cause it to
dry out with the risk of catching fire. Do not exceed the
recommended cooking durations.
Certain foods dry out quickly and may catch fire due to high grill
temperatures.
Never use grill modes to finish baking partially baked rolls or bread or
to dry flowers or herbs. Instead, use the Fan plus or Conventional
heat function.
If using alcohol in your recipes, please be aware that high
temperatures can cause the alcohol to evaporate. The vapour can
catch fire on hot heating elements.
When using residual heat to keep food warm, corrosion from high air
humidity and condensation can occur in the oven. This can also cause
damage to the control panel, worktop and surrounding kitchen
furniture. Keep the oven on and select the lowest temperature available
for the selected function. The cooling fan will then continue to run
automatically.

Warning and Safety instructions
11
Food which is stored in the oven compartment or left in it to be kept
warm can dry out and the moisture released can lead to corrosion
damage in the oven. Always cover food that is left in the oven to keep
warm.
An accumulation of heat can cause the floor of the oven to crack
or flake off.
Never line the floor of the oven compartment with aluminium foil or
oven liners.
If you wish to place crockery on the oven floor during cooking, or
place crockery on the oven floor to heat it up, you can do so, but
only with the Fan plus or Eco Fan heat function.
The oven compartment floor can become damaged by items
being pushed around on it. When placing pots, pans or crockery on
the oven compartment floor, ensure that you avoid pushing them
around.
Risk of injury caused by steam. Pouring a cold liquid onto a hot
surface creates steam, which can cause severe scalding. The
sudden temperature change can also cause damage to hot
enamelled surfaces. Never pour cold liquids directly onto hot
enamelled surfaces.
It is important that the temperature in the food being cooked is
evenly distributed and sufficiently high. This can be achieved by
stirring or turning the food.
Plastic dishes that are not suitable for use in an oven will melt and
may ignite at high temperatures, and can damage the oven.
Use only plastic containers that are suitable for use in an oven.
Follow the manufacturer’s instructions.
Heating up food in closed containers, such as tins or sealed jars,
will result in an increase in pressure, which can cause them to
explode. Do not heat up unopened tins or jars of food in the oven.
Risk of injury from the open door. You could bang into the open
door or trip over it. Avoid leaving the door open unnecessarily.

Warning and Safety instructions
12
The door can support a maximum load of 15kg. Do not lean or sit
on an open door, or place heavy items on it. Make sure that nothing
gets trapped between the door and the oven compartment. This
could damage the oven.
The following applies to stainless steel surfaces:
Adhesives will damage the stainless steel surface and cause it to
lose its dirt-repellent protective coating. Do not use sticky notes,
adhesive tape or other types of adhesive on the stainless steel
surface.
Magnets can cause scratches. Do not use the stainless steel
surface as a magnetic notice board.

Warning and Safety instructions
13
Cleaning and care
Risk of injury due to electric shock. The steam from a steam
cleaning appliance could reach live electrical components and cause
a short circuit. Do not use a steam cleaner to clean the appliance.
Scratches on the door glass can cause the glass to break. Do not
use abrasive cleaners, hard sponges, brushes or sharp metal tools to
clean the door glass.
The side runners can be removed (see “Cleaning and care” –
“Removing the side runners with FlexiClip runners”). Refit the side
runners correctly.
The catalytic enamelled back panel can be removed for cleaning
purposes (see “Cleaning and care – Removing the back panel”).
Ensure that the back panel is replaced correctly and do not use the
oven without it fitted.
In warm, moist environments, there is a higher probability of pest
infestations (such as cockroaches). Ensure the oven and the area
surrounding it are always kept clean.
Damage caused by pests is not covered by the warranty.
Accessories
Only use original Miele accessories. If other parts are used,
warranty, performance and product liability claims will be invalidated.

Caring for the environment
14
Disposal of the packing
material
The packaging is designed to protect
the appliance from damage during
transportation. The packaging materials
used are selected from materials which
are environmentally friendly for disposal
and should be recycled.
Recycling the packaging reduces the
use of raw materials in the
manufacturing process and also
reduces the amount of waste in landfill
sites.
Disposing of your old
appliance
Electrical and electronic appliances
often contain valuable materials. They
also contain specific materials,
compounds and components, which
were essential for their correct function
and safety. These could be hazardous
to human health and to the environment
if disposed of with your domestic waste
or if handled incorrectly. Please do not,
therefore, dispose of your old appliance
with your household waste.
Please dispose of it at your local
community waste collection / recycling
centre for electrical and electronic
appliances, or contact your dealer or
Miele for advice. You are also
responsible for deleting any personal
data that may be stored on the
appliance being disposed of. Please
ensure that your old appliance poses no
risk to children while being stored prior
to disposal.

Oven overview
15
aControl elements
bTop heat/grill element
cAir inlets for the fan with ring heating element behind it
dCatalytic enamelled back panel
eSide runners with 3shelf levels
fFront frame with data plate
gDoor

Oven controls
16
aFunction selector
For selecting oven functions
bClock/timer
For displaying the time of day and
settings
cSensor control
For modifying times and settings
dOKsensor control
For selecting functions and saving
settings
eSensor control
For modifying times and settings
fTemperature selector
For setting the temperature

Oven controls
17
Function selector
Use the function selector to select the
required function and switch on the
oven lighting independently.
It can be turned clockwise or anti-
clockwise.
In the 0 position it can be retracted by
pressing it in.
Functions
Lighting
Conventional heat
Bottom heat
Full grill
Booster
Fan plus
Fan grill
Eco Fan heat
Temperature selector
Use the temperature selector to select
the temperature for cooking processes.
It can be turned clockwise until a
resistance is felt and then turned back
again. When the selector is in the
position, it can be retracted by
pushing it in.
The temperature settings are marked on
the temperature selector and on the
control panel.
Clock/timer
The clock/timer is operated via the
display and the, OK and sensor
controls.
Display
The display shows the time of day or
your settings.
It goes dark if settings are not being
entered.
Please refer to “Clock/timer” for more
information.
Sensor controls
The sensor controls respond to the
touch of a fingertip. Every touch on the
sensors is confirmed by an audible
tone.
The tone can be switched off by
changing setting to status (see
“Clock/timer – Changing settings”).

Features
18
A list of the models described in these
operating and installation instructions
can be found on the back page of this
booklet.
Data plate
The data plate is located on the front
frame, visible when the door is open.
The data plate states the model
number, the serial number as well as
connection data (voltage, frequency
and maximum rated load).
Please have this information to hand,
should you need to contact Miele
regarding any questions or problems.
Scope of delivery
– Operating and installation
instructions for using the oven
– Screws for securing your oven in the
housing unit
– Various accessories
Accessories supplied and
available to order
Features will vary depending on
model.
Side runners, universal tray and wire
rack (or “rack” for short) are supplied
as standard with the oven.
Depending on the model, your oven
may also come supplied with some of
the accessories listed here.
All the accessories listed as well as the
cleaning and care products are
designed for Miele ovens.
These are available to order via the
Miele Webshop, the Miele Customer
Service Department or from your Miele
dealer.
When ordering, please quote the model
number of your oven and the reference
number of the accessories required.
Side runners
There are runners on the left and right
of the oven compartment with
shelves for inserting accessories.
The numbers for the shelf levels are
marked on the front frame.
Each level consists of 2rails, one above
the other.
The accessories (e.g. the rack) are
pushed into the oven between the two
rails.
The FlexiClip runners (if present) are
fitted on the lower rail.
You can remove the side runners (see
“Cleaning and care” – “Removing the
side runners with FlexiClip runners”).

Features
19
Universal tray and rack with anti-tip
safety notches
Universal tray HUBB92:
Rack HBBR92:
These accessories are inserted into the
oven between the two rails of a side
runner.
Always place the rack with the loading
surface in the lower position.
These accessories have non-tip safety
notches on their short sides. The non-
tip safety notches prevent the trays
from being pulled out completely from
the side runners when you only wish to
pull accessories out partially.
Insert the accessories into the oven
with the non-tip safety notches
towards the back.
If you are using the universal tray with
the rack on top, insert the tray between
the rails of the side runners and the rack
will automatically slide in above them.

Features
20
FlexiClip runnersHFC
You can use the FlexiClip runners on
shelf levels1–3.
Push the FlexiClip runners right into
the oven compartment before placing
accessories on them.
The accessories will then
automatically sit securely in between
the stoppers at either end of each
runner and be prevented from sliding
off.
The FlexiClip runners can support a
maximum load of 15kg.
Fitting and removing FlexiClip
runners
Danger of injury caused by hot
surfaces.
The oven gets hot during operation.
You could burn yourself on the
heating elements, oven compartment
or accessories.
Allow the heating elements, oven
compartment and the accessories to
cool before fitting or removing the
FlexiClip runners.
The FlexiClip runners are fitted in
between the two rails that make up a
shelf level.
The FlexiClip runner with the Miele logo
should be fitted on the right.
When fitting or removing the FlexiClip
runners, do not extend them.
Hook the FlexiClip runner onto the
front of the lower rail of a shelf level
(1.) and then push it along the rail into
the oven compartment (2.).
Table of contents
Other Miele Oven manuals

Miele
Miele H 5900 B User manual

Miele
Miele H 7260 BP User manual

Miele
Miele H 7440 BMX User manual

Miele
Miele H 5240 B Specification sheet

Miele
Miele H 4412 BP User manual

Miele
Miele DG 6010 User manual

Miele
Miele H 4540 Pyrolytic User manual

Miele
Miele DG 155-2 User manual

Miele
Miele H 6000 Quick guide

Miele
Miele DGC 7860 User manual

Miele
Miele DGC 6700 User manual

Miele
Miele H6461B User manual

Miele
Miele HR 1954-2 User manual

Miele
Miele H6160B User manual

Miele
Miele DG 6500 User manual

Miele
Miele H 5240 BP Specification sheet

Miele
Miele H 7464 BP User manual

Miele
Miele H 6880 BP Instructions for use

Miele
Miele 11 900 040 User manual

Miele
Miele DG 7440 User manual