Mileage Ace Wifi User guide

Setup ManuaL
Mileage Ace Wi
Normal Use Instructions & Warranty

WELCOME
NORMAL USE
Once setup, The Mileage Ace is designed to stay permanently in
your car, always connected to the USB car charger. As soon as it
turns on it will begin tracking your trip. When you turn your car o
it will search for a WiFi network to upload through. Mileage Ace will
never try to upload over WiFi while the car is moving.
The device can hold approximately 50 hours worth of driving
between uploads, but it is recommended you upload as frequently
as possible.
YOUR RESPONSIBILITY
It is your responsibility to ensure your device is correctly set up
by adding WiFi networks and linking the device to your account. It
is also your responsibility to ensure the device is always on when
you are tracking miles, and that it has access to your WiFi signal to
perform uploads often enough exceed its internal memory.
Check your online account once per week to ensure every trip is
recorded and uploaded. Failure to do so can result in lost trips and
lost mileage.
2

HOW TO GET HELP
SEE OUR HELP ARTICLES
Visit www.mileage-ace.com/help to nd our ever-growing
knowledgebase of helpful articles. We are always adding articles
and tutorials that cover common questions and help you quickly
nd answers.
NEED SETUP HELP OR TECH SUPPORT?
Our USA-based Mileage Ace support team can be reached directly
We ask that any help or tech-support related questions initially
get started with an email. Once we have received that email, we
can provide telephone support including remote screen sharing to
your computer to troubleshoot any problems you may have.
WARRANTY REPLACEMENT?
Please contact our support team as quickly as possible. We will
swiftly arrange for a device inspection and/or replacement.
3

SETUP STEP 2:
INSTALL SOFTWARE
When Prompted On Setup Page.
Please disable any virus protection software during installation.
Once completed you’ll need to reboot the computer.
4
SETUP STEP 1:
visit setup web page
Navigate your web browser to:
www.mileage-ace.com/setup
You will be asked to login to your account.
If your purchase was made through the Mileage Ace website, your
account has already been created and an email was sent to you
with your login information.
If your purchase was through Amazon or another vendor, you will
need to create an account rst by clicking Create An Account.

SETUP STEP 3:
CONNECT YOUR DEVICE
Using the provided USB cable.
Re-visit the setup web page and launch the Mileage Ace Device
Link application. When prompted, connect your Mileage Ace
device.
IF MILEAGE ACE DEVICE LINK DOES NOT OPEN
You can manually launch the application. It will be located as
follows:
WINDOWS: All Applications -> Mileage Ace
-> Mileage Ace Device Link
MAC: Applications -> Mileage Ace Device Link
5

SETUP STEP 4:
setup service
Payment info may be required but
nothing will be charged.
We are getting your account ready for tracking.
YOU MAY NOT BE ASKED FOR THIS
Depending on your account type and where you made your
purchase, this step may not be required.
PRE-PAID & FREE PERIODS STILL APPLY
Any periods already purchased or included with your purchase still
apply. This step simply ensures your account does not accidentally
lapse in service after these periods expire.
6

ASKED FOR AUTHORIZATION CODE?
Authorization codes are needed for adding a device that is owned
by another account. These codes can be found in the owner’s
Trackers / Vehicles page.
If you are the owner of this device and are prompted for a code,
your device may have a duplicate Device ID. Please send an email
to [email protected] with this info and we will x the
conict promptly.
SETUP STEP 5:
confirm link device
Click ‘Yes’ when prompted to link the
device to your account.
You will be asked to start your tracking service.
7

Click next to each of your networks
to add them to your device
You will be asked to enter the network password.
SETUP STEP 6:
ADD WIFI NETWORKS
NEED TO LOG A TRIP?
If you receive a message that the device needs a trip before it
will search for wi, please log a trip in your vehicle then return to
complete the setup process.
WIFI NETWORK NOT FOUND?
There are a few reasons why your network may not be shown. For
help, click Where Is My Network?
8

Click TEST next to your network to
verify the device connects properly.
You will be taken through steps to perform the test.
SETUP STEP 7:
TEST WIFI CONNECTION
THIS IS OPTIONAL (BUT RECOMMENDED)
Compleleting the test upload ensures your device conencts to your
network and reaches the web server.
YOU NEED A TRIP TO TEST
If you cannot perform the test, please log a trip with the device then
return to the setup page to complete the test.
9

Mount your Mileage Ace in your vehicle.
Connect the device to the included USB car charger or your
vehicle’s USB port using the USB cable.
SETUP STEP 8:
INSTALL IN VEHICLE
PORTS THAT TURN OFF WITH THE CAR
If available, we recommend you use one of these power ports.
Trips will start and end when you turn the car on and o.
PORTS THAT ALWAYS STAY ON
Your device will end trips when the vehicle stops for 5 minutes.
We highly recommend the device be allowed to turn o once per
month and that you disconnect it from power if the vehicle is not
being used for more than 4 days.
10

suggested install
locations
DO mount the device where it has good access to the sky. We
suggest the lower dash or console area. Try a few spots to see how
it works before nal mounting.
DO NOT MOUNT THE DEVICE IN DIRECT SUNLIGHT. Excessive
direct sunlight generates signicant heat and destroys electronics.
This damage is not covered by warranty.
11

BUTTONS AND LIGHTS
BUSINESS BUTTON
Press this button to toggle into and out of
Business Mode. If on, this guarantees your trip
will be logged as business. If this is blinking blue,
business mode is ON.
LIGHT COLORS (BUSINESS MODE + GPS STATUS)
This button lights to three dierenct colors.
GREEN: Good GPS signal (it’s tracking you)
RED: Acquiring GPS signal (it’s not tracking you)
BLUE (Blinking): Business Mode is ON
If the device is in Business Mode, this light will blink betwen BLUE
and either GREEN or RED so you can also see the GPS signal status.
12
If you would like to use this button to also set your personal trips
(when business mode is o), choose Manual when prompted
while linking your device to your account or visit the Automatic
Business Trip Detection section of the Account Settings page
and turn the setting o for this device.
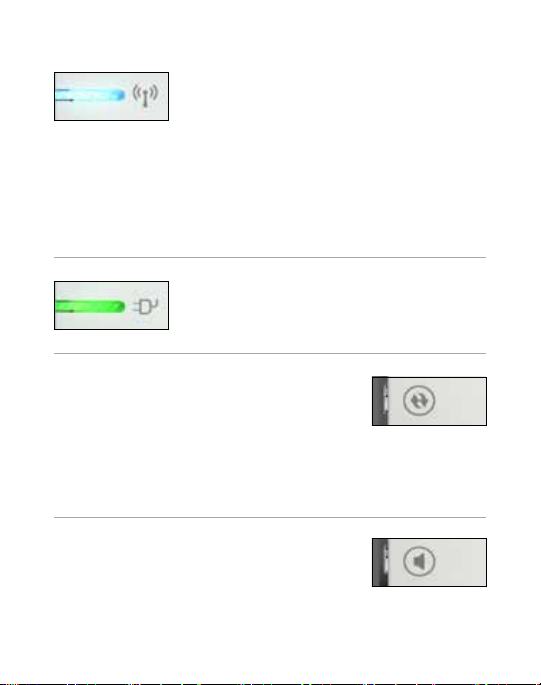
WIFI LINK STATUS - usually this is o
ORANGE: Searching for a known Wi network
BLINKING BLUE AND GREEN: Uploading
RED: Contact support if you always see this.
POWER STATUS
GREEN: Getting power from USB
ORANGE: Turning o
WPS CONNECT
Wi-Fi Protected Setup (WPS) is an easy and
secure way to connect your Mileage Ace to
your router without any settings and password input. Just press this button
and the WPS button on your router. The WiFi light will turn blue as your
network name (SSID) and password are automatically added to your Mileage
Ace. Requires your router to have WPS functionality enabled.
BUSINESS AUDIO REMINDER ON/OFF
By default, your Mileage Ace will play a sound
to remind you it is in Business Mode. Press this
button to toggle that sound on or o.
13
Mileage Ace only attempts WiFi connections right after turning on,
and right after it has lost USB power (before it turns o). If the light
turns Orange then turns o, it either did not nd a known network
or was unable to connect. Use the Setup page to troubleshoot WiFi.

LIMITED WARRANY
A. Warranty and Warranty Periods. Epion Technologies Inc. (Epion) warrants only to the original
end user that the products and parts set forth below will be free from defects from material and
workmanship for the applicable warranty periods set opposite thereto (such warranty periods to be
determined commencing on date of invoice to the end user. If the end user cannot provide proof of
invoice, then obligation of warranty is at Epion’s sole discretion):
PRODUCT OR PART APPLICABLE WARRANTY PERIOD
• MILEAGE ACE DEVICE • Product Lifetime (see B.1)
(Includes internal battery and all interior
electronics)
• CHARGERS & USB CABLE • 1 Month
B. Epion’s Obligation Under Warranty. Epion’s sole obligation under the above warranty shall
be to repair or replace products and parts during the warranty period. Epion does not assume
responsibility for delays in replacement or repair of products or parts. Products and parts repaired or
replaced by Epion under warranty shall be warranted for the balance of the original warranty period
or ninety (90) days, whichever is longer.
1. Denition of Product Lifetime: The duration in which Epion continues providing warranty
support for this product. Epion promises to notify customers of any stoppage in Warranty service at
least ninety (90) days before such service ends.
C. DISCLAIMER OF ALL OTHER WARRANTIES. NO OTHER WARRANTIES, EXPRESSED OR IMPLIED,
ARE GIVEN, AND EPION EXPRESSLY DISCLAIMS ALL OTHER WARRANTIES, INCLUDING AND WITHOUT
LIMITATION, THE IMPLIED WARRANTIES OF MERCHANTABILITY AND FITNESS FOR A PARTICULAR
PURPOSE.
D. Limitations. No salesperson, representative, or agent of Epion is authorized to make any
guarantee, warranty, or representation that contradicts the terms contained in this Limited Warranty.
Any waiver, alteration, addition, or modication to the warranties contained herein must be in
writing and signed by authorized representatives of Epion to be valid, binding, and enforceable.
Epion does not assume responsibility for any specic application to which any products or parts are
applied including, but not limited to, compatibility with other equipment. All statements, technical
information, or recommendations relating to the products or parts are based upon tests believed
to be reliable, but do not constitute a guarantee or warranty. EPION SHALL NOT UNDER ANY
CIRCUMSTANCES WHATSOEVER BE LIABLE TO ANY PARTY FOR LOSS OF PROFITS, DIMINUTION, OF
GOOD WILL, OR ANY OTHER SPECIAL, CONSEQUENTIAL, OR INCIDENTAL DAMAGES WHATSOEVER
WITH RESPECT TO ANY CLAIM IN CONNECTION WITH EPION PRODUCTS AND/OR PARTS.
E. What May Void the Warranty. This Limited Warranty shall be null and void in the following
circumstances:
1. Modication or repair of any covered product or part by the end user or any non-authorized
Epion service provider; or
2. Improper use or installation, failure to conduct regular maintenance, or damage by accident or
neglect, of any covered product or part by the end user or any third party; or
3. Failure of the end user or any third party to exercise caution to protect any covered product
or part from electrostatic discharge damage, adverse temperature and humidity conditions (with
respect to Epion’s electronic devices, the device is NEVER IN DIRECT SUNLIGHT), or physical abuse; or
4. Failure by the end user to follow the Return Appointment Process set forth below.
14

F. Return Appointment Process. As a condition precedent to the above Limited Warranty, the end
user must:
1. Obtain a return material authorization (RMA) from Epion, which will include an RMA number that
must be prominently displayed on the outside of the shipping container. Returns without an RMA
number may be rejected by Epion and immediately returned to end user, freight collected. An RMA
can be obtained by emailing [email protected] or [email protected]
2. Ship the items being returned to Epion, freight pre-paid, together with a written description of
the claimed defect.
3. Pack the items being returned in the original packing carton or equivalent. Damage in transit is
end user’s responsibility and may be cause to void the warranty claim.
G. Transportation Costs. Epion will pay surface freight to return products or parts covered by this
Limited Warranty. However, if Epion determines in the exercise of its reasonable but sole discretion
that the product or part returned for warranty service is not defective or does not otherwise qualify
for warranty service, end user shall be liable for all costs of handling and transportation.
LIMITATION OF LIABILITY AND INDEMNITY
All end users represent and warrant to Epion that they will (i) properly inspect and test any and all
Epion Products they purchase (by any means, and from any source) prior to use, (ii) when using any
such Product specically act in accordance with the practices of a reasonable person who is using
such Products for their intended purpose as published by Epion, and (iii) act in strict compliance
with all applicable laws and regulations, now and hereinafter enacted when using any and all Epion
Products. All Purchasers of Epion Products represent and warrant that they understand that no Epion
Product guarantees protection against an IRS audit, nor does Epion guarantee any assistance, either
nancially or legally, for any customer who is found by the IRS or its representatives to have a fully or
partially invalid mileage log.
END USER AGREES TO HOLD NO LIABILITY AGAINST EPION FOR ANY MISUSE OF EPION PRODUCTS
WHATSOEVER, EITHER INTENTIONAL OR UNINTENTIONAL, WHICH MAY CAUSE FINANCIAL OR ANY
OTHER KIND OF HARM TO END USER OR ANY THIRD PARTY.
IN NO EVENT WILL EPION BE LIABLE FOR ANY INCIDENTAL, SPECIAL, CONSEQUENTIAL, EXEMPLARY
OR INDIRECT DAMAGES ARISING OUT OF (I) THE USE OF OR INABILITY TO USE OR ACCESS WWW.
MILEAGE-ACE.COM (THE SITE) OR ANY RELATED CONTENT, (II) THE OFFERING AND/OR PURCHASE OF
ANY PRODUCT(S), (III) THE CONTENT PROVIDED ON THE SITE OR WITH RESPECT TO ANY PRODUCT(S)
IN ANY MEDIUM WHATSOEVER, (IV) THE LOSS OF ANY DATA WHILE USING THE SITE OR ACCESSING
ANY RELATED CONTENT, EVEN IF EPION HAS BEEN ADVISED OF THE POSSIBILITY OF SUCH DAMAGES,
AND WHETHER BASED ON CONTRACT, TORT, NEGLIGENCE, PERSONAL OR BODILY INJURY, PRODUCT
LIABILITY, STRICT LIABILITY OR OTHERWISE, OR (V) THE MIS-USE.
ALL END USERS REPRESENT AND WARRANT THAT EPION IS NOT IN THE BUSINESS OF PROVIDING
LEGAL, FINANCIAL, ACCOUNTING, TAX OR OTHER PROFESSIONAL SERVICES OR ADVICE. Consult the
services of a competent professional when you need this type of assistance.
Date Drafted: August 8, 2016
Epion Technologies
1056 Bath Ln Ventura CA 93001 USA T +1 805 765 1163 www.mileage-ace.com
15

The Mileage Ace
support@mileage-ace.com
© Epion Technolgies, 2016
The Mileage Ace is an electronic device. Excessive heat and any
moisture will destroy the device and void the warranty. Treat it as
delicately as you would your cell phone.
FCC - DECLARATION OF CONFORMITY:
CONTAINS TX FCC ID: QR4WF5370M08
This device complies with Part 15 of the FCC rules. Operation is subject to the
following two conditions (1) this device may not cause harmful interference,
and (2) this device must accept any interference received, including interfer-
ence that may cause undesired operation.
To comply with FCC RF radiation exposure requirements, the antenna(s) used
for this module must not be co-located or operating in conjunction with any
other antenna or transmitter. End user must be informed: 1) to keep at least
20 cm separation with the antenna while this end product is installed and op-
erated. 2) the FCC radio-frequency exposure guidelines for an uncontrolled
environment can be satised. 3). any changes or modications not expressly
approved by the manufacturer could void the user’s authority to operate this
equipment.
Table of contents
Other Mileage Ace Automobile Accessories manuals

Popular Automobile Accessories manuals by other brands


Sony
Sony X-7BT operating instructions

Hella
Hella Comet FF 200 Mounting instructions

CrimeStopper
CrimeStopper Electroplate EP-3000 installation instructions

Mitsubishi Electric
Mitsubishi Electric PEA-RP200WKA Service manual

rough country
rough country 11826 manual

Auto Styling
Auto Styling Truckman 8HTCL00AATOH6E Fitting instructions

Kiyo
Kiyo D ULTIMATE User and installation manual

EZTRUNK
EZTRUNK PHANTOM JK Assembly manual

Yakima
Yakima K1092 manual

Hyundai
Hyundai 9999Z057196 Fitting instructions

Federal Signal Corporation
Federal Signal Corporation CommCenter D1 Series Installation and service instructions

ECS Tuning
ECS Tuning Ziza ES2538942 Installation procedures