- Place the chair on a FLAT and LEVEL surface.
- Confirm that the chair hydraulic is at the lowest setting
before customer use.
- Operator should always assist customer when entering
and exiting the chair.
- DO NOT step or stand on the footrest. This can cause
the chair to tip over.
- Footrest is optional.
Failure to follow these instructions could result in injury.
A
A
B
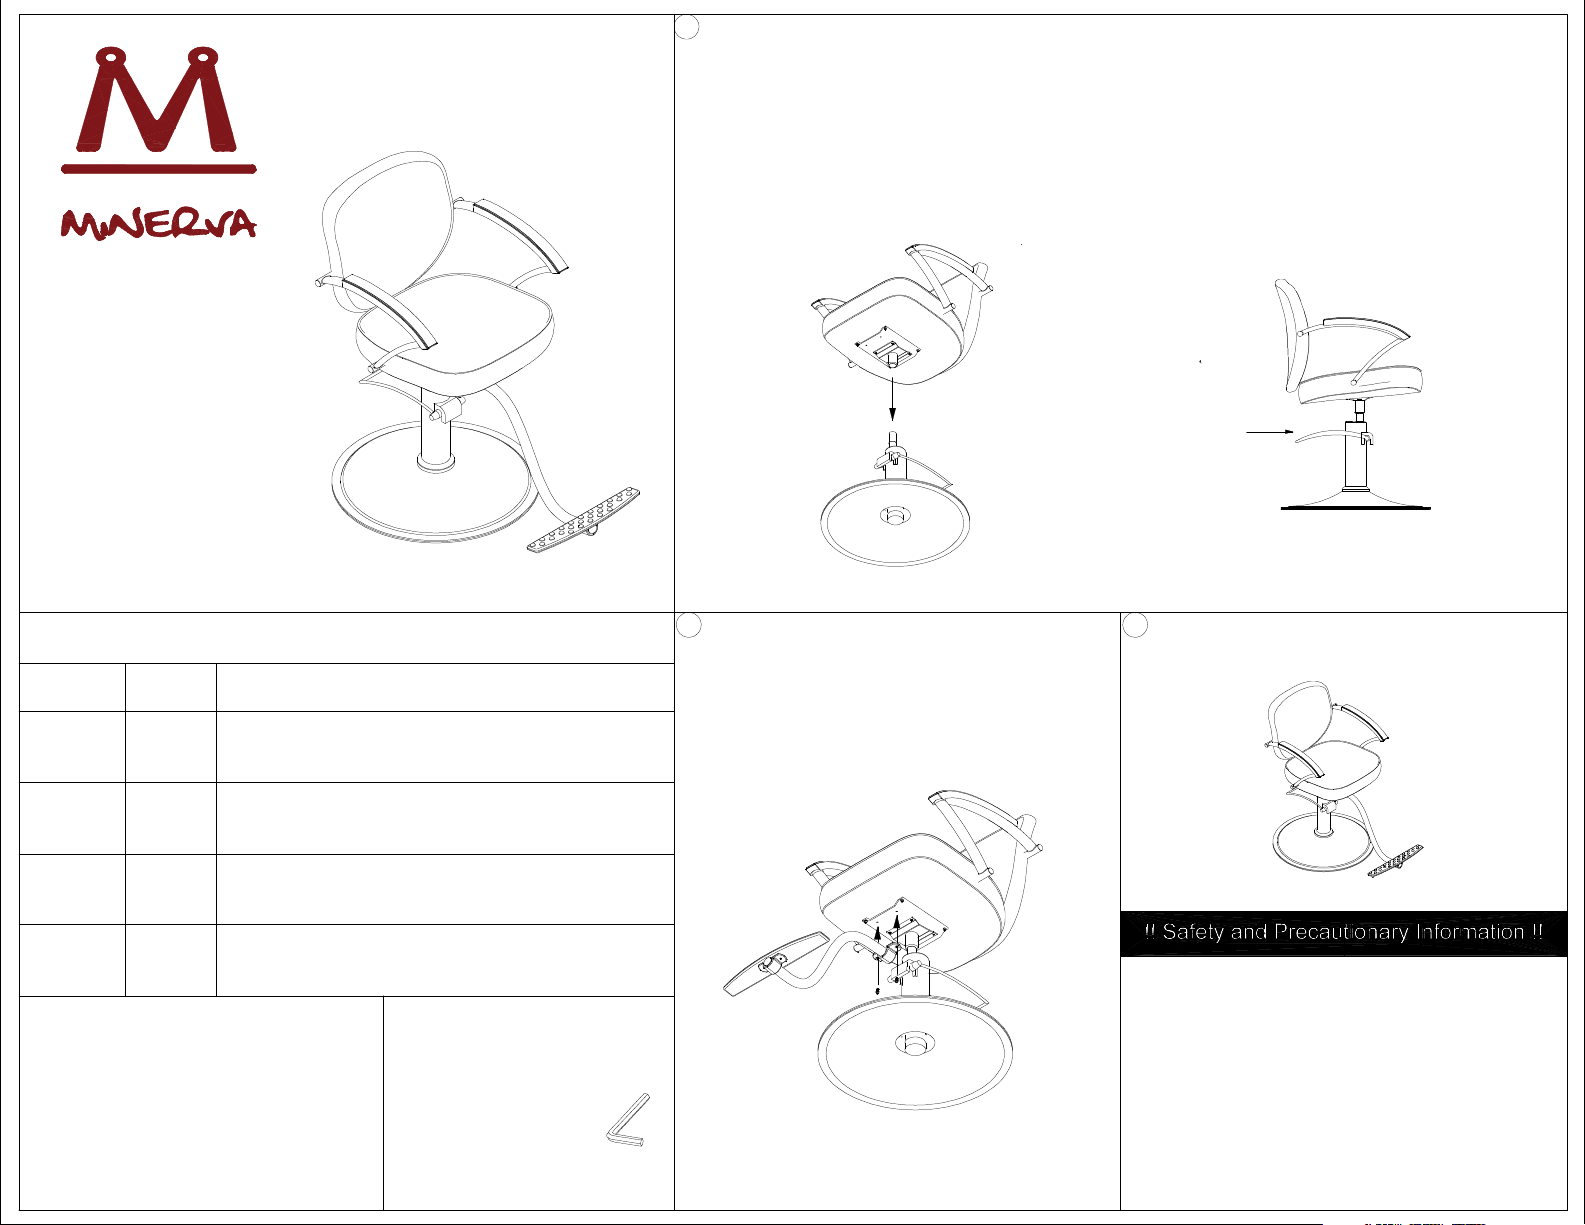
1) Chair is assembled.
3
1) Position the footrest so that the two front bracket holes
on the chair are in line with the two holes in the
bracket of the footrest(C).
2) Insert two bolts into the holes as shown.
2
*Open all boxes to check for parts
before beginning assembly.
**All bolt/washer sets are already
in the brackets and footrest.
Allen wrench (included)
Tools required:
D**
C
Footrest
Bolt + washer + lock washer
1
Part Qty.
PARTS LIST*
1A
B 1
Description
Chair top
Base and hydraulic
Assembly Instructions
1
! ALWAYS KEEP HYDRAULIC BASE UPRIGHT.
THE HYDRAULIC SHOULD NEVER BE
TURNED UPSIDE-DOWN !
1) Locate the base with attached hydraulic foot pump (A)
and remove the two bolts holding on the small cushion.
2) Discard the cushion and bolts.
3) Place the chair(B) on top of the base and hydraulic(A) so
that the chair fits into the indentation on the hydraulic and
secure the chair by pushing the chair down with force.
4) Make sure that the higher end of the bracket on top of the
hydraulic is in the front.
Lever stradles
the hydraulic
C
D
B
2
Aston Styling Chair
Model #2816


