MIO-CARE A200 Series User manual

Revision: R01
(12/2014)
Disclaimer
Specifications and documents are subject to change without notice. The manufacturer
does not warrant this document is error-free. The manufacturer assumes no liability for
damage incurred directly or indirectly from errors, omissions, or discrepancies between
the device and the documents.
Notes
Not all models are available in all regions.
Depending upon the specific model purchased, the color and look of your device and
accessories may not exactly match the graphics shown in this document.
The screenshots and other presentations shown in this document are for reference only.
They may differ from the actual screens and presentations generated by the actual
product.
A200/A300 Series
N R
Quick Start Guide en
Schnellstartanleitung de
Guía de inicio rápido es
Guide de mise en route fr
Guida rapida it
Snelstartgids nl
Guia Rápido de Iniciação pt
Instrukcja szybkiego uruchomienia pl
Hızlı Başlangıç Kılavuzu tr
クイック スタート ガイド ja
快速使用指南 tc

1
en
Welcome
Thank you for purchasing a MioCARE product. This Quick Start Guide guides you through the
successful setup of your device and familiarises you with the basic skills of using the device.
Getting to know your device
* For selected models only.
1. LED Indicator 1
Barcode reader status*:
Green/Amber
2. LED Indicator 2
Battery charge status:
Green/Amber
3. Barcode Reader*
4. POWER Button
5. NFC (Near Field
Communication) Sensor
6. Speaker
7. Rear Camera
8. Flash
9. Front Camera
10. Microphone
11. HD Connector
12. Mini-USB Port
13. Dock Connector
14. Headphone Socket
15. Lanyard Holder
16. Micro SIM Card Slot*
17. Volume Up Button /
Barcode Reader Button*
18. Volume Down Button /
Programmable
Application Button
19. Memory card slot
2
1
4
12 13 14 15
11
3
10
1
2
19
17
18
16
78
6
95

2
en
3
Getting started
Charging the battery
When charging the battery for the very first time, you should charge it for at least 8 hours (using the AC
charger) with your device turned off. To charge the battery, plug the home charger cable into the Mini-
USB port on the bottom of your device and the mains power charger into the power socket*.
* The plug type varies with the region of your purchase.
The LED indicator will blink Amber while the battery power is less than 15%. During charging, the
LED indicator on the device lights up to indicate the battery charge status:
Green – battery full;
Amber – battery charging.
CAUTION! For optimal performance of the lithium battery, note the following:
•Do not charge the battery where the temperature is high (e.g. in direct sunlight).The battery
will stop charging when the ambient temperature is less than -10ºC (14ºF) or more than 60ºC
(140ºF).
•Recharge the battery when it is nearly discharged. When recharging, make sure that the battery
is fully charged. Doing so can extend the battery life.
•If the device has not been used for over a month or if you find the discharge/recharge time has
been shortened, be sure to fully discharge the battery first before recharging it. You are also
advised to fully discharge and recharge the battery once every 1~2 months.
•Failure to follow the battery usage instructions can cause damage to your device, battery and
even bodily injury or property damage and will void the warranty.

2
3
en
Installing the memory card and SIM card
1. Open the cover on the left side of the device to locate the Micro SIM card
slot* (a) and MicroSD card slot (b).
2. Follow the instruction to install the cards (not supplied).
3. Replace the cover and ensure the cover is securely closed.
* For selected models only.
Notes:
•The device supports up to 64GB MicroSD memory cards. However, it
does not guarantee the device’s compatibility with memory cards from all
manufacturers.
•While installing a card, do not apply pressure to the centre of the card. Do not
use your finger or any metal objects to touch and scratch the contact part of
the card.
•To remove a card, gently push the top edge of the card inwards to release it
and then pull it out of the slot.
Connecting your device to a computer
Connect the Mini-USB end of the USB cable to your
device ( 1) and the other end to a USB port in your
computer ( 2). Once connected, you will be able to
transfer the files between your computer and device
easily through MTP*.
* MTP (Media Transfer Protocol) allows media files (including music, pictures, and other files) to
be transferred automatically to and from portable devices. However, for Windows XP users, it is
required to install Windows XP Service Pack 3 and Windows Media Player 10 (or higher).
a.
b.

4
en
5
Operating basics
Using the POWER button
•To turn on the device
Press and hold the POWER button until the
device turns on. After the boot up screen, the
Home screen will be displayed and the device
is in Lock mode by default.
Drag the Lock icon ( > ) to unlock the system. You can now use your device.
•Sleep mode
Your device will automatically enter Sleep mode after 1 minute (by default) of inactivity. You can
also manually switch to Sleep mode by pressing the POWER button briefly.
To resume from Sleep mode, briefly press the POWER button.
•Aeroplane mode
When you are in an aeroplane or in the area where the use of wireless radio is prohibited, enable
Aeroplane mode. Many of your devices applications will continue to work (e.g. playing games or
listening music) but all wireless radios, including wireless network and Bluetooth, on the device
are turned off – it cannot send or receive data.
To enter Aeroplane mode, press and hold the POWER button and select Aeroplane mode from
the option menu.
•To restart / turn off the device
Press and hold the POWER button and select Restart / Power off from the option menu.
•To shut down the device manually
Press and hold the POWER button for 5 seconds.

4
5
en
Navigating on the screen
To operate your device, touch the screen with your fingertip. You can perform the following actions:
•Tap: Touch the screen once with your fingertip to open items or select onscreen buttons or
options.
•Tap and hold: Tap and hold on the desired item to open the pop-up menu that contains the
available options for the item.
•Drag: Tap and hold on the item and then move it to the target position without releasing your
fingertip.
•Slide: Drag to the left/right (or the top/bottom) to switch to the next/previous item on the list.
•Multi-touch gestures: Move your fingertips apart or together on the screen to zoom in or out
while viewing a picture or a web page.
•Rotating the screen: For most applications, you can automatically change the screen orientation
(from portrait to landscape, and vise versa) by turning the device sideways.

6
en
7
Home screen
The Home screen is your starting place for tasks, providing quick access to frequently used
applications and settings.
Status Bar
Desktop
Quick Launcher
Soft keys: BACK / HOME / RECENT APPS
All Applications button
Shortcuts/widgets
Tip: To display the Home screen, tap the HOME button at any time.
Customising your device
You can customise the device through the Settings menu, including personalising the Home screen,
changing the display and sound settings, configuring the connection settings, and more.
From the desktop, do one of the following to access the Settings menu:
•Tap the All Applications button ( ) > Settings.
•Tap from the Quick Launcher.

6
7
en
Using the Barcode Reader (for selected models only)
By using the Barcode Reader, your device will be able to read the information contained in the
barcode.
1. Tap > BCR Reader to launch the Barcode Reader
application on your device.
2. Position your device close to the barcode (approximately
5~10 cm), and point the barcode reader sensor to the barcode.
3. Tap the “Scan” button of the application to start scanning;
meanwhile, hold your device steadily to keep the barcode
within the sensor coverage until the information is displayed
on the screen.
4. The LED indicator blinks once to indicate the scanning status:
Green – successful scan.
Amber – scan failed; please try again.
5. To configure the Barcode Reader, tap > BCR Settings.

8
en
9
Safety precautions
The product covered is an accessory intended for use with Medical Equipment to process data.
This device is considered as Medical Device Data System (MDDS), which is designed to serve as a
supplementary apparatus for real time or unreal time monitoring on the patient’s bio-signals which
are generated by other compatible medical monitoring equipment through Wi-Fi, Bluetooth, 3G or
USB flash drive. It is hardware product that transfer, store, convert formats, and display medical device
data.This device does not modify the data or modify the display of the data, and it does not by itself
control the functions or parameters of any other medical device. MDDS are not intended to be used
for active patient monitoring.
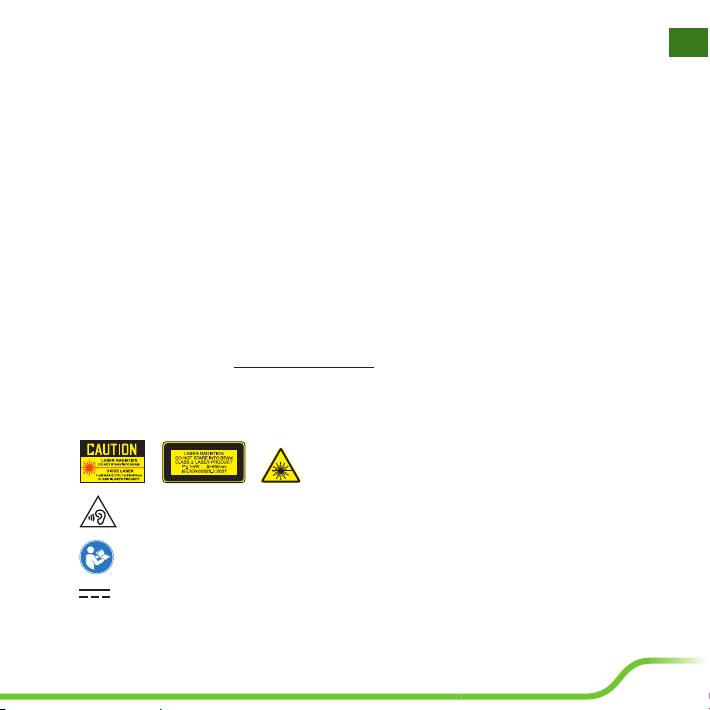
Caution:
•The equipment provides 1 MOOP (means of operator protection) during the use of car charger
that could be touched by the operator but shall not be touched by the patient.
•The device has I/O ports for signal communication. The LED flash light is for assisting the exposure
when using camera.
About the charger
•Type of protection against electric shock: Class I equipment.
•Only use the specified power supply: SINPRO MPU16A-102
Input: Universal 100-240 VAC / 47-63 Hz; output: +5 VDC / 2.6A
About charging
•Use only the charger supplied with your device. Use of another type of charger will result in
malfunction and/or danger.
•WARNING! To avoid the risk of electric shock, this device must only be connected to supply mains
with protective earth.
•Do not use the charger in a high moisture environment. Never touch the charger when your hands
or feet are wet.
•Allow adequate ventilation around the charger when using it to operate the device or charge the
battery. Do not cover the charger with paper or other objects that will reduce cooling. Do not use
the charger while it is inside a carrying case.
•Connect the charger to a proper power source.The voltage requirements are found on the product
case and/or packaging.
•Do not use the charger if the cord becomes damaged.

8
9
en
•Do not attempt to service the unit.There are no serviceable parts inside. Replace the unit if it is
damaged or exposed to excess moisture.
•To fully disengage the power to the unit, please disconnect the power cord from the AC inlet.
About the battery
CAUTION!This unit contains a non-replaceable internal Lithium Ion battery. The battery can burst or
explode, releasing hazardous chemicals.To reduce the risk of fire or burns, do not disassemble, crush,
puncture, or dispose of in fire or water.
•Use a specified battery in the equipment.
•Important instructions (for service personnel only)
•Caution: Risk of explosion if battery is replaced by an incorrect type. Dispose of used batteries
according to the instructions.
•Replace only with the same or equivalent type recommended by the manufacturer.
•The battery must be recycled or disposed of properly.
•Use the battery only in the specified equipment.
For more information about the device (including the specifications and features, environmental
conditions, and more), visit http://miocare.mio.com/
Symbols and markings
This appendix provides information about the symbols that are used on the MioCARE series, its
accessories or packing.
Class II product: Laser Radiation
Do not stare into beam.
To prevent possible hearing damage, do not listen at high volume levels for long periods.
Follow operating instruction when using device.
Direct current

10
en
11
For more information
Support
For initial support, contact your IT department or your local authorised dealer.
Occasionally, the manufacturer may offer free system updates to improve user experience. Please
regularly check the website http://miocare.mio.com/ for more information.
IP54
The IEC 60529/IP54 is a European system of test specification standards for classifying the degree
of protection provided by the enclosures of electrical equipment. An IP54 designation means that
the unit withstands dust protected (Ingress of dust is not entirely prevented, but it must not enter in
sufficient quantity to interfere with the satisfactory operation of the equipment; complete protection
against contact), and water splashing for up to 5 minutes (water volume: 10 litres per minute,
Pressure: 80-100kPa). The manufacturer guarantees this grade provided the battery door and all jack
covers are properly and securely closed.This device is not IPX7/IPX8 grade; immersion in water or
water-pressure such as washing the unit with running water may cause damage to the unit and voids
warranty.
Caring for your device
Taking good care of your device will ensure trouble-free operation and reduce the risk of damage to
your device.
•Keep your device away from excessive moisture and extreme temperatures.
•Avoid exposing your device to direct sunlight or strong ultraviolet light for extended periods of
time.
•Do not place anything on top of your device or drop objects on your device.
•Do not drop your device or subject it to severe shock.
•Do not subject your device to sudden and severe temperature changes. This could cause
moisture condensation inside the unit, which could damage your device. In the event of moisture
condensation, allow the device to dry out completely before use.
•The screen surface can easily be scratched. Avoid touching it with sharp objects. Non-adhesive
generic screen protectors designed specifically for use on portable devices with LCD panels may be
used to help protect the screen from minor scratches.
•Never clean your device with it powered on. Use a soft, lint-free cloth to wipe the screen and the
exterior of your device.
•Water or rubbing alcohol – A piece of cloth a bit with some water or rubbing alcohol and rub it on
the unit.

10
11
en
•Do not use paper towels to clean the screen.
•Never attempt to disassemble, repair or make any modifications to your device. Disassembly,
modification or any attempt at repair could cause damage to your device and even bodily injury or
property damage and will void any warranty.
•Keep your device and its accessories out of the reach of small children or animals.
•Do not store or carry flammable liquids, gases or explosive materials in the same compartment as
your device, its parts or accessories.
•To discourage theft, do not leave the device and accessories in plain view in an unattended vehicle.
•Do not leave the device and its accessories in a vehicle in direct sunlight. Overheating may damage
the device.
Troubleshooting
Problem Solution
Power does not switch on
when using battery power. The remaining battery power may be too low to run your device.
Charge the battery.
Screen responds slowly. Make sure that your device is not running out of battery power.
If the problem still persists, reset your device.
Screen freezes. Reset your device.
Screen is hard to read. Make sure that the backlight of the display is set to a high-
enough brightness.
Cannot establish a connection
with a computer.
•Make sure that your device and your computer are both
switched on before trying to establish a connection.
•Make sure that the cable is securely plugged into the USB
port on your computer and on your device. Connect the
USB cable directly to your computer—do not run the cable
through a USB hub.
•Reset your device before connecting the cable. Always
disconnect your device before you restart your computer.

12
en
13
Note:
•If you encounter a problem you cannot solve, contact an authorised service centre for assistance.
•WARNING! Do not modify this device without authorization of the manufacturer.
•Never open the device. For safety reasons, only qualified service personnel should open the device.
Regulatory information (CE)
2200
Note: For regulatory identification purposes, your device is assigned a model number of N435.
This device complies with the R&TTE Directive (1999/5/EC), the EMC Directive (2004/108/EC), and
the Low Voltage Directive (2006/95/EC) issued by the Commission of the European Community. -
issued by the Commission of the European Community. Compliance with these directives implies
conformity to the following European Standards:
EN 301 489-1: Electronic compatibility and Radio spectrum Matters (ERM), Electromagnetic
Compatibility (EMC) standard for radio equipment and services; Part 1: Common technical
requirements.
EN 301 489-3: Electromagnetic compatibility and Radio spectrum Matters (ERM); ElectroMagnetic
Compatibility (EMC) standard for radio equipment and services; Part 3: Specific conditions for Short-
Range Devices (SRD) operating on frequencies between 9 kHz and 246 GHz
EN301489-17: Electronic compatibility and Radio spectrum Matters (ERM), Electromagnetic
Compatibility (EMC) standard for radio equipment and services; Part 17: Specific conditions for 2.4
GHz wideband transmission systems and 5 GHz high performance RLAN equipment.
EN 300 328: Electromagnetic compatibility and Radio spectrum Matters (ERM); Wideband
Transmission systems; Data transmission equipment operating in the 2.4 GHz ISM band and using
spread spectrum modulation techniques; Harmonized EN covering essential requirements under
article 3.2 of the R&TTE Directive.
EN 301 893: Broadband Radio Access Networks (BRAN); 5 GHz high performance RLAN; Harmonized
EN covering the essential requirements of article 3.2 of the R&TTE Directive
EN 300 440: Electromagnetic compatibility and Radio spectrum Matters (ERM); Short range devices;
Radio equipment to be used in the 1 GHz to 40 GHz frequency range; Part 2: Harmonized EN covering
the essential requirements of article 3.2 of the R&TTE Directive

12
13
en
EN 302 291-1: Electromagnetic compatibility and Radio spectrum Matters (ERM); Short Range
Devices (SRD); Close Range Inductive Data Communication equipment operating at 13,56 MHz; Part 1:
Technical characteristics and test methods
EN 302 291-2: Electromagnetic compatibility and Radio spectrum Matters (ERM); Short Range
Devices (SRD); Close Range Inductive Data Communication equipment operating at 13,56 MHz; Part 2:
Harmonised EN under article 3.2 of the R&TTE Directive
EN 50566: Product standard to demonstrate compliance of radio frequency fields from handheld and
body- mounted wireless communication devices used by the general public (30 MHz — 6 GHz)
EN 62209-2: Human exposure to radio frequency fields from handheld and bodymounted wireless
communication devices — Human models, instrumentation, and procedures
EN 62479: Assessment of the compliance of low power electronic and electrical equipment with the
basic restrictions related to human exposure to electromagnetic fields (10 MHz to 300 GHz)
EN 50332: Prolonged listening of music in maximum volume can damage the ears.
This device have been tested to comply with the Sound Pressure Level requirement laid down in the
applicable EN 50332-2 standards. Permanent hearing loss may occur if earphones or headphones are
used at high volume for prolonged periods of time.
EN 55022: Radio disturbance characteristics
EN 55024: Immunity characteristics
EN 60601: Medical electrical equipment —Part 1-2: General requirements for basic safety and
essential performance — Collateral standard: Electromagnetic compatibility — Requirements and tests
EN 61000-3-2: Limits for harmonic current emissions
EN 61000-3-3: Limitation of voltage fluctuation and flicker in low-voltage supply system
IEC 60601-1:2005: Product Safety
For MioCARE A300 series:
EN 301 489-7: Electromagnetic compatibility and Radio spectrum Matters (ERM); ElectroMagnetic
Compatibility (EMC) standard for radio equipment and services; Part 7: Specific conditions for mobile
and portable radio and ancillary equipment of digital cellular radio telecommunications systems (GSM
and DCS)
EN 301 489-24: Electromagnetic compatibility and Radio spectrum Matters (ERM); ElectroMagnetic
Compatibility (EMC) standard for radio equipment and services; Part 24:Specific conditions for IMT-
2000 CDMA Direct Spread (UTRA and E-UTRA) for Mobile and portable (UE) radio and ancillary
equipment

14
en
EN 301 908-1: IMT cellular networks; Harmonized EN covering the essential requirements of article
3.2 of the R&TTE Directive; Part 1: Introduction and common requirements
EN 301 908-2: IMT cellular networks; Harmonized EN covering the essential requirements of article
3.2 of the R&TTE Directive; Part 2: CDMA Direct Spread (UTRA FDD) User Equipment (UE)
EN 301 511: Global System for Mobile communications (GSM); Harmonized EN for mobile stations
in the GSM 900 and GSM 1800 bands covering essential requirements under article 3.2 of the R&TTE
directive (1999/5/EC)
The manufacturer cannot be held responsible for modifications made by the User and the
consequences thereof, which may alter the conformity of the product with the CE Marking.
Declaration of Conformity
Hereby, MiTAC declares that this N435 is in compliance with the essential requirements and other
relevant provisions of Directive 1999/5/EC.
SAR information
The radio wave exposure guidelines employ a unit of measurement known as the Specific Absorption
Rate (SAR), which adopts the limit of 2 W/kg averaged over ten (10) gram of tissue. Your device has
been designed to comply with applicable safety requirements for exposure to radio waves.
SAR ≦0.96 W/kg
Bluetooth
Bluetooth DID D021801
WEEE
This product must not be disposed of as normal household waste, in accordance with the
EU directive for waste electrical and electronic equipment (WEEE - 2002/96/EC). Instead,
it should be disposed of by returning it to the point of sale, or to a municipal recycling
collection point.

15
de
Willkommen
Vielen Dank, dass Sie ein MioCARE-Produkt erworben haben. Diese Schnellstartanleitung führt
Sie durch die erfolgreiche Einrichtung Ihres Gerätes und stellt Ihnen grundlegende Fähigkeiten der
Gerätenutzung vor.
Ihr neues Gerät
* Nur bei bestimmten Modellen.
1. LED-Anzeige 1
Barcodeleserstatus*:
Grün/Orange
2. LED-Anzeige 2
Ladezustand des Akkus:
Grün/Orange
3. Barcodeleser*
4. Ein-/Austaste
5. NFC (Near Field
Kommunikation) Sensor
6. Lautsprecher
7. Rückseitige Kamera
8. Blitzlicht
9. Frontseitige Kamera
10. Mikrofon
11. HD-Anschluss
12. Mini-USB-Port
13. Docking-Anschluss
14. Kopfhöreranschluss
15. Tragebandhalter
16.
Micro-SIM Karteneinschub*
17. Lauter-Taste /
Strichcodeleser-Taste*
18. Leiser-Taste /
Programmierbar
Anwendungstaste
19. Speicherkartenschacht
2
1
4
12 13 14 15
11
3
10
1
2
19
17
18
16
78
6
95

16
de
17
Erste Schritte
Akku laden
Laden Sie den Akku beim ersten Mal mindestens 8 Stunden lang per Netzteil auf. Das Gerät sollte
dabei abgeschaltet bleiben. Um den Akku aufzuladen, stecken Sie das Netzteilkabel in den Mini-USB
Anschluss an der Unterseite des Gerätes und das Netzteil in die Steckdose*.
* Der Stecker kann je nach Land etwas anders aussehen.
Die LED-Anzeige blinkt Orange, wenn der Akkuladestand weniger als 15% beträgt. Während des
Ladevorgangs leuchtet die LED-Anzeige auf dem Gerät zur Anzeige des Akkuladestatus:
Grün – Akku voll;
Orange – Akku wird geladen.
VORSICHT! Bitte beachten Sie zur Optimierung Ihrer Akkuleistung folgende Hinweise:
•Laden Sie den Akku nicht bei hohenTemperaturen auf (z. B. im direkten Sonnenlicht). Bei
Umgebungstemperaturen unter -10ºC (14ºF) und über 60ºC (140ºF) wird das Aufladen des Akkus
ausgesetzt.
•Laden Sie den Akku nach, wenn er nahezu entleert ist.Achten Sie beim Aufladen darauf, dass der
Akku grundsätzlich komplett geladen wird.Auf diese Weise lässt sich die Akkulaufzeit verbessern.
•Falls Sie das Gerät längere Zeit (länger als einen Monat) nicht genutzt haben oder deutlich
verkürzte Lade-/Entladezeiten bemerken, entleeren Sie denAkku unbedingt vollständig, bevor
Sie ihn wieder aufladen. Wir empfehlen, den Akku alle 1 – 2 Monate komplett zu entladen und
anschließend wieder vollständig aufzuladen.
•Bei Nichtbeachtung der Hinweise zum richtigen Umgang mit dem Akku können Beschädigungen
des Gerätes, des Akkus bis hin zu Sachschäden und Verletzungen eintreten; zusätzlich erlischt die
Garantie.

16
17
de
Einlegen der Speicherkarte und der SIM-Karte
1. Öffnen Sie die Abdeckung an der linken Seite des Gerätes, um den Micro-SIM
Karteneinschub* (a) und den MicroSD Karteneinschub (b) zu lokalisieren.
2. Folgen Sie den Anweisungen, um die Karten (nicht mitgeliefert) einzulegen.
3. Bringen Sie die Abdeckung wieder an und achten Sie darauf, dass die
Abdeckung richtig geschlossen ist.
* Nur bei bestimmten Modellen.
Hinweise:
•Ihr Gerät unterstützt microSD-Speicherkarten bis 64 GB. Allerdings können
wir nicht gewährleisten, dass Ihr Gerät mit Speicherkarten sämtlicher
Hersteller einwandfrei funktioniert.
•Achten Sie beim Einlegen einer Karte darauf, keinen Druck auf die Mitte der
Karte auszuüben. Berühren Sie die Kontakte der Karte nicht mit den Fingern
und nicht mit Metallgegenständen.
•Drücken Sie zum Entfernen sanft auf die Kante der Karte; dadurch springt
diese ein Stück heraus. Ziehen Sie sie aus dem Steckplatz.
Ihr Gerät an einen Computer anschließen
Schließen Sie das Mini-USB-Ende des USB-Kabels
an Ihr Gerät ( 1) und das andere Ende an einen
USB-Port Ihres Computers an ( 2). Sobald die
Verbindung steht, können Sie Dateien einfach und
bequem per MTP* zwischen Computer und Ihrem
Gerät übertragen.
* MTP (Media Transfer Protocol – Medienübertragungsprotokoll) ermöglicht eine automatische
Übertragung von Mediendateien (Audio-, Bild- und andere Dateien) zu und von tragbaren Geräten.
Falls Sie jedoch noch mit Windows XP arbeiten sollten, müssen Sie dazu das Windows XP Service
Pack 3 und den Windows Media Player ab Version 10 installieren.
a.
b.

18
de
19
Grundbedienung
Ein-/Austaste
•Gerät einschalten
Drücken und halten Sie die EIN/AUS-Taste,
bis sich das Gerät einschaltet. Nach dem
Systemstart mit Ladebildschirm erscheint der
Startbildschirm.
Das Gerät ist in diesem Moment per Vorgabe gesperrt. Zum Entsperren des Systems ziehen Sie
das Schlosssymbol ( > ) mit dem Finger zur Seite. Jetzt können Sie Ihr Gerät benutzen.
•Schlafmodus
Ihr Gerät wechselt automatisch in den Schlafmodus , wenn Sie es eine Minute (Standardvorgabe)
lang nicht bedienen. Sie können das Gerät auch manuell in den Schlafmodus versetzen, indem Sie
die Ein-/Austaste kurz drücken.
Zum Aufwecken aus dem Schlafmodus drücken Sie kurz die Ein-/Austaste.
•Flugzeugmodus
Wenn Sie sich in einem Flugzeug oder einer Umgebung befinden, in der die Nutzung von
Drahtlosfunk verboten ist, aktivieren Sie bitte den Flugzeugmodus. Viele Ihrer Geräteanwendungen
funktionieren weiter (z. B. Spiele oder Musikwiedergabe), doch der gesamte Drahtlosfunk am
Gerät, inklusive WLAN-Netzwerk und Bluetooth, wird ausgeschaltet – es können keine Daten
empfangen oder gesend et werden.
Zum Umschalten in den Flugzeugmodus halten Sie die Ein-/Austaste gedrückt, anschließend
wählen Sie Flugmodus aus dem Auswahlmenü.
•Neu starten/abschalten
Halten Sie die Ein-/Austaste gedrückt, wählen Sie dann Neustart/Ausschalten aus dem
Auswahlmenü.
•Abschalten erzwingen
Halten Sie die Ein-/Austaste-Taste 5 Sekunden lang gedrückt.

18
19
de
Bildschirmnavigation
Berühren Sie den Bildschirm zum Bedienen Ihres Gerätes mit Ihrer Fingerspitze. Sie können folgende
Aktionen durchführen:
•Tippen: Berühren Sie den Bildschirm zum Öffnen von Elementen oder Auswählen von
Bildschirmschaltflächen oder Optionen einmal mit Ihrer Fingerspitze.
•Tippen und halten: Tippen und halten Sie das gewünschte Element zum Öffnen des
Kontextmenüs, das die zum Element verfügbaren Optionen enthält.
•Ziehen: Tippen und halten Sie das Element, verschieben Sie es dann an die Zielposition, ohne Ihre
Fingerspitze vom Bildschirm zu lösen.
•Wischen: Ziehen Sie zum Aufrufen des nächsten/vorherigen Elements in der Liste nach links/
rechts (bzw. oben/unten).
•Multitouch-Gesten: Bewegen Sie Ihre Fingerspitzen beim Betrachten eines Bildes oder einer
Webseite zum Vergrößern oder Verkleinern auseinander oder zusammen.
•Bildschirm drehen: Bei den meisten Anwendungen können Sie die Bildschirmausrichtung durch
Drehen des Gerätes automatisch ändern (vom Hoch- ins Querformat und umgekehrt).
This manual suits for next models
1
Table of contents
Languages:
Other MIO-CARE Medical Equipment manuals