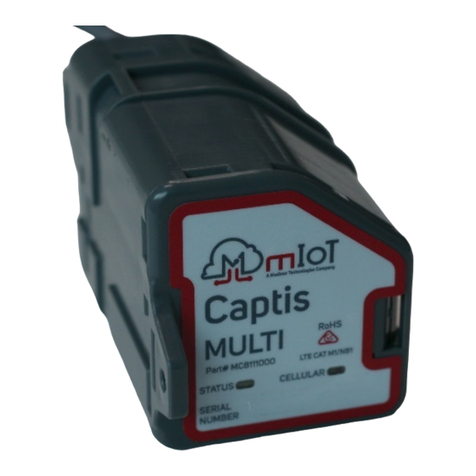
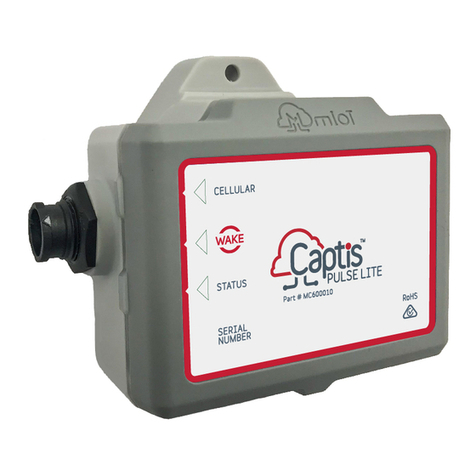
mIoT Captis Pulse Lite User manual

1

2
Contents
CAPTIS PULSE LITE TECHNICAL INFORMATION ................................................................................................3
BEFORE YOU BEGIN........................................................................................................................................................4
INSTALLATION...................................................................................................................................................................5
Mount your Captis Pulse Lite .....................................................................................................................................5
Terminate the Sensor ...................................................................................................................................................6
Best Practice Considerations......................................................................................................................................6
TROUBLESHOOTING....................................................................................................................................................... 7
MAINTENANCE & SAFETY ............................................................................................................................................8
Maintenance....................................................................................................................................................................8
Electromagnetic Radiation – Human Exposure ...................................................................................................8
Battery Handling & Disposal ......................................................................................................................................8

3
CAPTIS PULSE LITE TECHNICAL INFORMATION
1 x Pulse Input Passive Suitable for Reed SW + Open Collector + Dry Contact
Maximum Pulse Frequency 1000Hz
Sensor Minimum Open Resistance 1.25MΩ
Sensor Maximum Closed Resistance 60kΩ
Physical Dimensions 95 x 105 x 60 mm
Weight < 500g
IP Rating IP68

4
BEFORE YOU BEGIN
Before starting this installation, you will need the following items:
•The contents of your Captis device box
•A small flat blade screwdriver and crimping tool
•An internet-connected device, such as a phone or tablet
What’s in your Captis device box?
•Captis Pulse Lite
•Attachment bracket
•Activation magnet
•Amphenol

5
INSTALLATION
To successfully install the Captis you must perform the following steps:
1. Mount your Captis Pulse Lite
2. Terminate the sensor
3. Test the sensor
4. Test connectivity
Mount your Captis Pulse Lite
Your Captis Pulse Lite can be mounted in a range of position using either:
•2 screws via tabs for wall mounting
•15mm max pipe clamp or cable ties via vertical and horizontal channels on bracket
When mounting your Captis Pulse Lite, ensure that there is enough length in the sensor cable to reach
without any undue stress.
Note: If the Captis Pulse Lite is to be installed underground or inside a metal cabinet, an external
LTE antenna must be used. Ensure that your Captis device supports external antenna
connection. The antenna lead must be routed to an open area where cell signal is less
obstructed.

6
Terminate the Sensor
Your Captis Pulse Lite is provided with a four-pin Amphenol plug that can be connected to one or two
sensors and/or measurement devices.
Use a crimping tool (not included) to ensure that the pins are securely fastened to the end of the sensor
cable and insert into the appropriate receptacles of the Amphenol plug.
•A light tug on the cables will ensure that the pins are inserted and crimped correctly
Use the table below to determine how to wire the connections between the Captis Pulse Lite and the
sensor via the provided Amphenol plug.
PIN
Description
1
Pulse -
2
Pulse +
3
Switch +
4
Switch -
Best Practice Considerations
Use the appropriate O-ring (included) for the sensor cable diameter
Do not remove pins from Amphenol plug without an appropriate removal tool (not included)
Ensure there is no debris between the plug and the Captis Pulse Lite prior to connecting.
Test the Sensor
When the sensor has been terminated into the provided Amphenol plug, it is recommended that the
sensor itself is tested prior to connection with the Captis device. This can be achieved by:
•Connecting the sensor to the desired output
•Use a multimeter (not included) on the Amphenol plug to prove the sensor output
Once this step is complete, the plug may be fasted to the Captis Pulse Lite.
Test Connectivity
Use the magnet provided to ‘Wake’ the Captis Pulse Lite by holding it over the symbol.
The device should then connect to your platform.
Ensure that the device is tested in its final install location to prove that there is adequate signal
strength.
If the device does not connect to your platform, please refer to the Troubleshooting section below.
WAKE

7
TROUBLESHOOTING
SYMPTOM MEANING WHAT TO DO
x20 Device is on/ awake. Device is working as it should,
leave device to collect data.
solid Device connected to LTE
network.
Device is working as it should,
leave device to collect data.
no LED status
The device battery may be
depleted, or a device fault may
have occurred.
Use a different device and
contact the supplier.
x2 long + x1 short
No cellular registration
(connection to the network) is
being achieved.
Check network provider
coverage map to ensure the
site is covered by the LTE-M or
NBIoT cellular network.
If the area is covered, and the
device cannot connect, contact
the supplier.
x2 long + x8 short Device cellular module failed to
boot.
Return the device to the
supplier if the issue persists.
Sensor connection not working
(not flashing the LED after LED
flash turned on in Captis
Configuration Toolset).
Connection wired incorrectly.
Confirm that the sensor is
properly attached. Contact
support if issue persists.
Sensor readings not
uploading/appearing in Captis
Cloud.
Sensor not triggering.
Ensure the sensor can be
triggered by checking that the
sensor is securely installed.
Contact support if issue persists
No cellular signal
Check Status and Cellular LED.
If flashing, complete
troubleshooting for a flashing
Cellular LED.
Contact support if issue persists.

8
MAINTENANCE & SAFETY
Maintenance
Your Captis Pulse Lite does not require any maintenance once installed. Your Captis Pulse Lite device
uses a non-rechargeable Lithium ION battery, and there are no user serviceable parts inside the
device.
If you encounter any issues with the device during its standard operation, contact your support team.
Electromagnetic Radiation – Human Exposure
It is the installer’s and end customer’s responsibility to ensure that no person has any body parts
within 20cm of the device or antenna while device is transmitting. Device is transmitting when the
‘Cellular’ LED is lit.
Battery Handling & Disposal
This Captis devices uses a Lithium ION Battery.
The Captis device should not be tampered with, drilled directly into for mounting purposes, otherwise
opened, or crushed. If necessary, the Captis device should only be disposed or destroyed of in a safe
and environmentally compliant manner.
Visit the Australian Battery Recycling Initiative (ABRI): https://batteryrecycling.org.au/recycle-
batteries/why/find-a-recycler/ for more information on lithium battery disposal in your state and
across Australia.
Note: Opening the Captis Pulse Lite device will void warranty and could cause significant
damage to the device.
Warning: This device has a Maximum Permissible Exposure (MPE) radius of 20cm.
Note: There are no user serviceable parts inside the Captis device.
Other manuals for Captis Pulse Lite
3
Table of contents
Other mIoT Measuring Instrument manuals
Popular Measuring Instrument manuals by other brands

Danfoss
Danfoss RAVK 10-30 operating guide

Ludlum Measurements
Ludlum Measurements 3002 manual

Extech Instruments
Extech Instruments HT200 user manual

Agilent Technologies
Agilent Technologies E5070B ENA Series Installation and quick start guide

VorTek
VorTek SonoPro Professional S36 Series instruction manual

BIRD
BIRD TERMALINE 8135 Operation manual