miseno MNO490EC User manual

Contact Miseno at (855) 480-2915 or email [email protected] with any questions. Copyright ©2019, Miseno. All rights reserved
PAGE 1
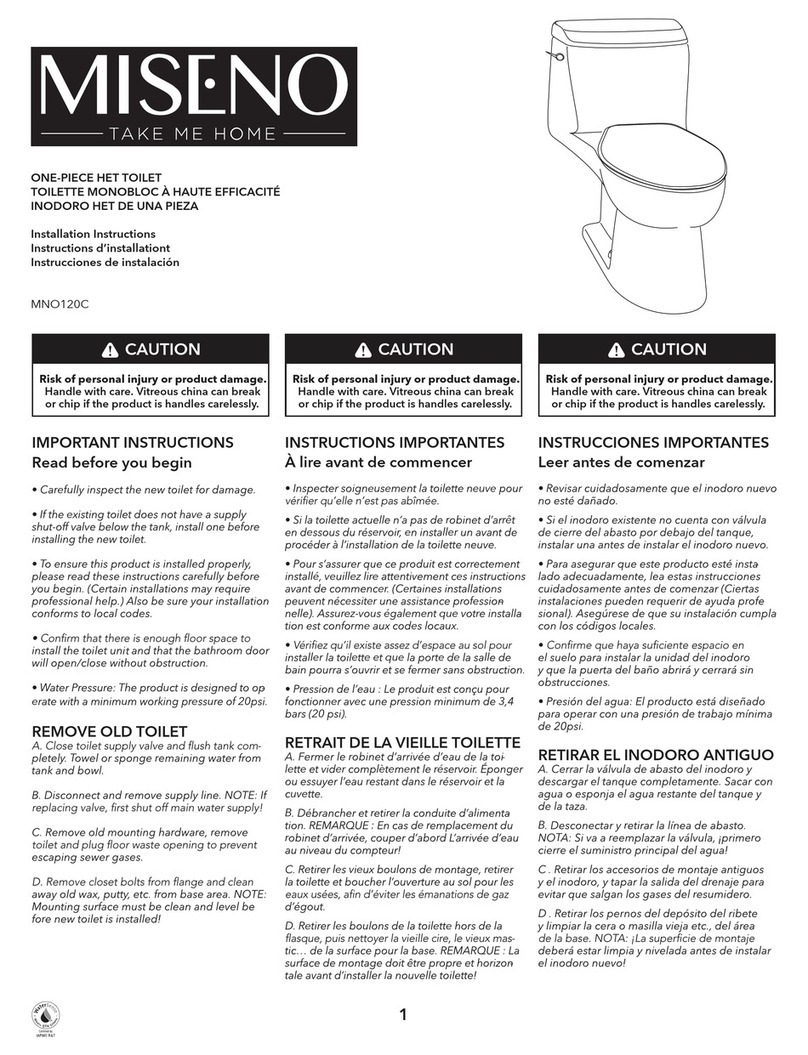
Skirted HET Single- and Dual-Flush Toilet
Installation Instructions
A
B
C
DE
F
G
H
I
J
Recommended Tools & Materials Items Included
K
L
M
R&TIAPMO
A. Screwdriver
B. Adjustable wrench
C. Pencil or marker
D. Tape measure
E. Level
F. Drill
G. Toilet flange
H. Wax ring
I. T-bolts, nuts and washers
J. Supply line
K. Wax ring seal plate
L. Fixing screws and caps
M. Flange connecting brackets
CAUTION: PRODUCT IS FRAGILE
Handle with care to avoid breakage and potential injury
Note: Illustrations in this guide are general representations and may not necessarily define the exact contours of the product.
• Shut off water supply line to toilet. Flush toilet and remove all water from the bowl and tank using a sponge.
• Disconnect the water supply line from the tank.
• (OPTIONAL) Remove the tank from toilet base, use a screwdriver, adjustable wrench or socket wrench as necessary.
• Loosen toilet bowl flange nuts under bolt caps. Remove old toilet base by carefully lifting it off the floor.
• Clean flange and plug the drain with a rag to prevent sewer gas from escaping. Remove rag before placing new toilet.
To remove old toilet:
Floor
Outlet
Flange
12” (305mm)
T-Connection
Bolts
T-Bolts
Floor
Outlet
Flange
Wax Ring
Flange Seal Plate
T-Bolt Connection Nuts & Washer
Connection Bracket
for Attaching Toilet
to Floor Flange
Seal Plate Assembly
Step 1. Install wax ring seal plate and connection brackets.
A. Place two new T-bolts into the slots on the floor outlet
flange.
B. Install the wax ring onto the underside of the wax ring
seal plate, then press the seal plate down evenly and
firmly over the T-bolts and floor outlet flange.
C. Place the flange connection “L” brackets onto the
T-bolts then attach the washers and nuts to the T-Bolt (see
illustration).
D. Align flange connection brackets to the sides of the
seal plate (see illustration) then tighten the nuts
until snug to seal the wax ring to the floor outlet flange.
Note: This mounting assembly assumes your floor outlet
flange is proud of, or even with your flooring. Recessed
flanges may not seal correctly and leakage is possible.
Additional sealing may be necessary in this instance.

Contact Miseno at (855) 480-2915 or email [email protected] with any questions. Copyright ©2019, Miseno. All rights reserved
PAGE 2
Skirted HET Single- and Dual-Flush Toilet
Installation Instructions
Step 2. Install toilet base. E. Place toilet base upside down on a clean surface.
F. Install a bead of sealant or plumber’s putty around the foot of
the base (see illustration).
G. Lift the base, flip it over and lower it into place on the floor
outlet flange. Align the connection “L” brackets to the connec-
tion holes in toilet base. Bracket ears should poke through
slots in toilet base.
H. Firmly push toilet down to seat the outlet horn into the
rubber gasket on the seal plate assembly. Set toilet by firmly
pushing down at all points around the perimeter of the base.
I. With base firmly set, insert fixing screws into screw base and
then into connection holes in toilet base (see illustration).
J. Tighten screws and snap on decorative caps.
Sealant or
Plumber’s Putty
Flange
Connection
Holes
Outlet Horn
Decorative Cap Connection Screw Base
Ta n k
Connection
Bolts (2)
Flexible
Supply
Tube
Rubber
Coupling
Gasket
Ta n k
Connection
Washer (2)
Bottom Tank
Connection
Washer(2)
Nuts (2)
Tank
Connection
Gasket (2)
Tank Flapper
Chain Hook to
be attached to
triplever
Step 3. Install toilet tank to base. L. Lay tank on clean, stable surface and check
fittings and handles for tightness. Install rubber
coupling gasket by pushing onto flush valve stem.
M. Connect the flexible supply valve to the supply
tube and snug this connection by hand.
N. Slide washers and rubber gaskets onto tank
connection bolts and insert bolts through holes in
tank.
O. Lift the tank and set it into place on the base,
guiding the connection bolts through the holes in
the base, and the supply tube through its hole.
P. While holding tank in position, place washers and
nuts onto bolts. Tighten nuts evenly until rubber
coupling gasket forms a tight seal.
DO NOT OVERTIGHTEN BOLTS! BREAKAGE WILL OCCUR! DO NOT USE SEALANTS ON TANK BOLTS, AS THIS WILL VOID THE WARRANTY!

Contact Miseno at (855) 480-2915 or email [email protected] with any questions. Copyright ©2019, Miseno. All rights reserved
PAGE 3
Skirted HET Single- and Dual-Flush Toilet
Installation Instructions
Step 4. Connect the water supply.
Q. Route the supply line tube from behind the bowl and
connect it to the water shut-off valve.
R. Open the valve slowly and check for leaks at both the
valve connection and tank connection
Step 5. Flush rod adjustment (dual-flush only)
WaterLine
Water
Shut-O
Vavle
S. Use the thumbscrew on the fill valve inside the toilet
tank to adjust waterline level to the waterline mark on
the valve riser.
Push Button
Button
Locknut
Rod Locknut
Push Rod
Tank
Flush Valve
Short Flush Button
Long Flush Button
T. The flush button is pre-assembled and
adjusted at the factory, but may require proper
alignment and adjustment of the flush rods
upon installation.
First position the lid so that it is aligned where
it will sit in its final resting position, then check
to make sure the button assembly also aligns
correctly with the actuators on the flush valve.
If adjustment is needed, loosen the button
locknut and reposition. Retighten the locknut.
Second, make sure the tip of the push rods
lightly touch the top of the flush valve buttons.
To increase or decrease rod length, first loosen
the rod locknut, then adjust the threaded rod to
the desired length. Retighten the locknut to
secure the rod.

Contact Miseno at (855) 480-2915 or email [email protected] with any questions. Copyright ©2019, Miseno. All rights reserved
PAGE 4
Skirted HET Single- and Dual-Flush Toilet
Installation Instructions
Step 6. Install tank lid and seat. U. Set the tank lid on the toilet tank.
V. To install the seat, push the quick-connect bolts
through seat hinges, then push them through the seat
bolt holes in toilet base. Adjust seat until it sits in
required position and snug down bolts.
WARNING!
.
A
C
H
D
R
N
O
B
L
E
A
C
H
D
R
O
P
-
I
N
S
N
O
B
L
E
O
P
-
I
N
S
A
C
H
D
R
DO NOT USE IN-TANK TOILET BOWL
CLEANERS CONTAINING
BLEACH OR CHLORINE
Use of such products will:
1. Result in damage to tank components and may
cause flooding and property damage.
2. Void the manufacturer’s warranty.
TANK REPLACEMENT PART INFORMATION: The inside back of the toilet tank is stamped with replacement part information. Please record
and maintain this record for future maintenance and reliable service of your new toilet.
TROUBLESHOOTING
Adjustable
Rod
Float Cup
Fill valve body
Triangle Gasket
Plastic Seal
Hexagon Seal Rubber Seal
Problem Reason Solution
Fill valve will not fill.
Fill valve will not stop.
Leaks!
Poor flush.
Water supply is closed?
Float valve is stuck?
Drain guards are stuck?
Water supply continues to run?
Float is stuck?
Flapper is stuck open?
Flush valve nut is loose?
Fill valve nut is loose?
Flapper is not seated properly?
Water level is not set to proper height?
Low water pressure?
Obstruction in bowl?
Short flush?
Turn on water supply at angle stop valve.
Loosen fill valve nut and turn fill valve away from back of tank.
Clean drain guard of debris.
Turn off water and clean inside of fill valve.
Loosen fill valve nut and turn fill valve away from back of tank.
Check chain length and flush valve seat.
Check that the flush valve is tightened into place.
Check hex nut on fill valve to assure that it is tight.
Clean flush valve seat, replace flapper if necessary.
Adjust the water level set screw to assure water is at the
maximum level line.
Make sure the minimum water pressure is above 35 PSI.
Plunger the bowl and clean the drain line as necessary.
Adjust the chain length of the flapper.
CARE AND MAINTENANCE
When cleaning your toilet, wash it with mild, soapy water then rinse thoroughly with clear water.
Dry with a soft cloth. Avoid detergents, disinfectants or cleaning products in aerosol cans.
NEVER use abrasive scouring powders or abrasive pads on your toilet set. Some bathroom chemicals and
cosmetics may damage the seat’s finish.
CAUTION: This product is fragile. To avoid breakage and possible injury handle with care.
DO NOT use abrasive powder or liquid cleaners which can damage the product surface. Overtightening of the
locknut or coupling nut could result in breakage and flooding.
DO NOT use the supplied cone washer with a plastic supply line.
DO NOT use pipe dope or other silicon-based materials to tighten supply coupling nut.

Contact Miseno at (855) 480-2915 or email [email protected] with any questions. Copyright ©2019, Miseno. All rights reserved
PAGE 5
Skirted HET Single- and Dual-Flush Toilet
Installation Instructions
MISENO PLUMBING FIXTURES LIMITED WARRANTY
What is the warranty period?
The warranty is for ten (10) years from date of purchase on the tank and base, of either the product or the
home. The ballcock, flush valve and trip lever are warranted for one (1) year from date of purchase.
Who is covered?
The warranty covers the original purchaser or first home owner.
What does the warranty cover?
The warranty covers the vitreous china product that is defective in materials or workmanship.
What does the warranty not cover?
Failures to fittings due to chlorine or other chemicals.
Installation and labor costs you incurred for replacement.
Repair costs and dmage due to leaks from supply line failures.
Products not installed per Miseno’s instructions.
Product that were subject to abuse or misuse.
Products that do not meet local building code requirements.
Products with faulty maintenance.
What will Miseno do to correct problems?
We will repair or replace the product with a replacement model.
What do you do to get service or order replacement parts?
Table of contents
Other miseno Toilet manuals
Popular Toilet manuals by other brands

Crosswater
Crosswater Ressa X1 US-RS100W installation manual

Fresca
Fresca VOLNA FTL2133 installation guide

IFO
IFO Sign Art 6775 Operating and maintenance instructions

Kohler
Kohler REACH K-18643T-SLJ installation instructions

URIMAT
URIMAT 18200 Installation instruction

DURAVIT
DURAVIT Durafix 2220.90000 Mounting instructions