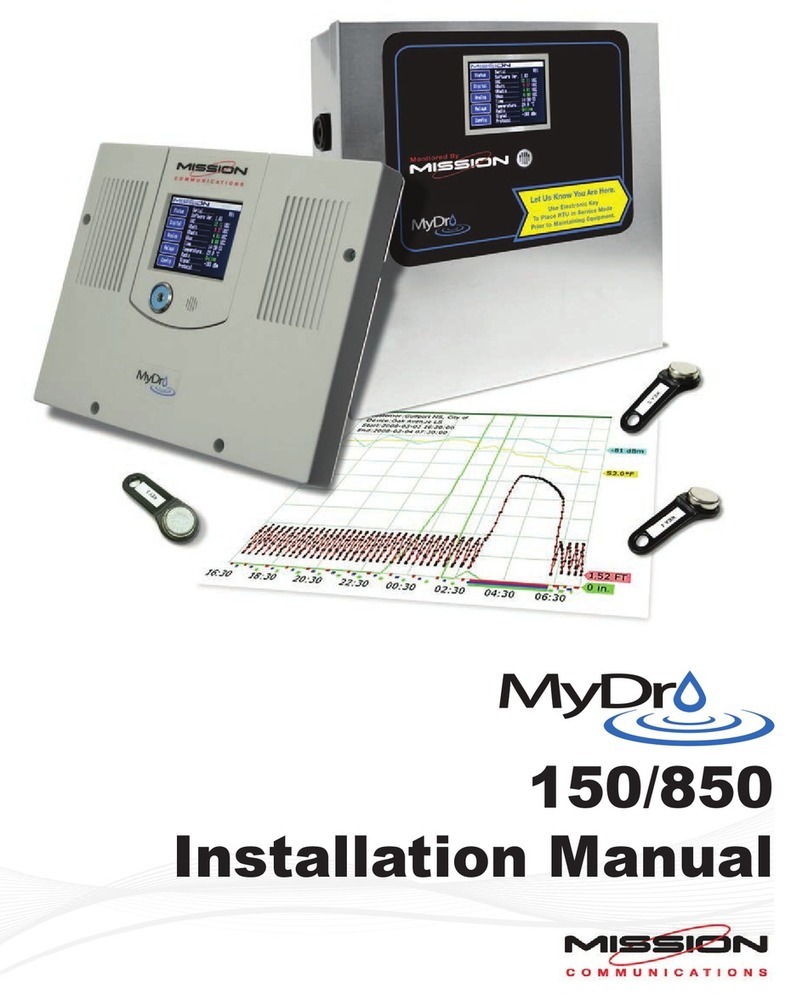
Mission MyDro M150 User manual

150/850
Installation Manual
PMS 660

2
Welcome,
This manual is intended to guide end-users through the proper installation for MyDro
(M150 and M850) remote terminal units (RTUs). The beginning chapters focus on pre-
installation and are intended to optimize installation. Mission recommends users read
this document completely and conrm that all necessary materials have been gathered
before beginning the installation process.
Prior to installation, users should complete and submit the RTU Setup Forms associated
with the units to be installed to [email protected]. New customers will have
additionally received the Account Setup Form and Notication Setup Form, which should
also be submitted before installing RTUs.
See the back cover of this document for information about available support resources,
including weekly webinars, training tutorials, quarterly newsletters, troubleshooting
documentation, and Twitter updates.
Mission Technical Support is available 24-7-365 on a responsive callback basis for after-
hour emergencies at (877) 993-1911 option 2 or [email protected]. Please have
the customer name and appropriate unit serial number ready.
Thank you,
The Mission Communications Team
Warning: This symbol indicates there is caution or warning to avoid damage to your property or product.
Note: This symbol indicates that there is something that requires your special attention.
This device complies with part 15 of the FFC Rules. Operation is subject to the following two conditions: (1) This
device may not cause harmful interference, and (2) this device must accept any interference received, including
interference that may cause undesired operation.
This device is SGS Safety Certied
710198

3
Contents
Chapter 1: Overview
Chapter 2: Site Survey and Connectivity Test
Chapter 3: Antenna Installation
Chapter 4: RTU Installation and Wiring
Chapter 5: RTU Startup
Chapter 6: Test the Installation
Chapter 7: Site Commissioning
Appendix A: Terminology
Appendix B: Solid State Relay Wiring Diagram
4
6
8
10
15
17
19
20
22

4
Chapter 1: Overview
M150/M850 at a Glance
Each RTU is packaged with everything
necessary for a standard installation
Enclosures
NEMA 1—indoor mounting
NEMA 4X—outdoor mounting
FlatPak—control panel inner door mounting
FlatPak Retrot—(convert M110 or M800
to MyDro)
Hardware Included with RTUs
RTU with NEMA 1, NEMA 4X, or FlatPak enclosure
RTU Installation Packet: RTU Form, User Guide, and emergency notice label
Battery—12 volt, 5 amp-hour
Flying Lead Transformer—120 VAC to 12 VAC, 1.2 amp
Universal Antenna Mount Kit: 11’ RG58 cable with SMA-M connector, pole, or wall
mount bracket, dual-band antenna whip, mini whip antenna, (2) pole clamps, and
(2) MOVs rated for 120-volt control circuits
Accessory Bag: (4)1000 ohm long, yellow EOL resistors, (8) 1000 ohm EOL
resistors, (2) current sensing switches, tie wraps, (4) wire nuts, (8) screws, (2)
ferrite cores, and an interchangeable Phillips/athead screwdriver
New customers will also be given a New Customer Packet which includes Account and
Notication Setup Forms, (5) electronic keys with instructions, and the Managed SCADA
document.

5
Recommended Tools and Materials (Not Included)
Mechanical Tools Electrical Tools Materials
Drill motor Voltmeter/multimeter 18 or 22 gauge wire—2,
4, or 8 conductor stranded
and shielded
Step drill or 3/4” hole saw Wire cutters 12–14 gauge green wire
for grounding the RTU
(follow NEC standards)
Hack/reciprocating saw Wire strippers 3/4” Flex conduit with
straight and elbow ttings
Metal cutting blades Unistrut rail and hardware
for mounting
Pliers Interposing relays and
bases (if no dry contacts
are available)
5/16” nut driver Interposing relay (if output
relays will be used)
Phillips-head screwdriver Sealant
Ladder (for antenna
mounting)
Available Input/Output Expansion
Mission offers a variety of expansion modules to extend the utility of the RTU. Available
options are summarized below:
• Safe Module Plus: intrinsically safe oat circuit, local relay, 4 pulse channels
• Digital Input: adds 8 channels
• Analog Input: adds 4 channels
• Analog Output: provides 2 channels
• Pulse Input: provides 2 channels
For more information, see the Safe Module Plus and
MyDro Expansion Module specication sheets, as well
as the Expansion Module Installation manual.

6
Chapter 2: Site Survey and Connectivity Test
Prior to installation, please complete and submit the RTU Installation Form via fax
at (770) 685-7913 or email to [email protected] so Mission can set up the
new unit(s) on your web portal. New customers must also complete and submit both
forms within the New Customer Packet. The web portal can be accessed with the
login credentials you provided within the Account Setup Form. Once completed and
entered by Technical Support, alarms can be enabled for your RTU(s) immediately after
installation so you can perform end-to-end testing.
By powering the RTU and testing connectivity before mounting the hardware, you can
optimize the signal strength for years of trouble-free communication. The test only takes
a few minutes because the included battery provides temporary power. Refer to Chapter
3 for best practices when positioning the antenna.
1. Remove the RTU from the box and place it on or near the control panel it will be
monitoring. Remove the antenna cable and antenna whip from the package and
hand-tighten the SMA-M connector to the radio SMA-F connection on the RTU
(see Figure 1).
2. Screw the antenna whip onto the molded antenna base and place it outside as high
as possible. Mount the antenna to the aluminum bracket.
Warning: Hand-tighten the nut on the underside plus 1/4 turn with a wrench. Do
not overtighten.
3. Power the RTU with the 12 VDC battery (see Figure 1). Connect the negative (black)
lead to the battery and then connect the positive (red) lead. Once the sequence is
completed, you will hear three beeps from the buzzer. This indicates the unit has
connected to Mission servers. If the RTU does not connect after two attempts, call
Technical Support.
4. Notice the signal strength reading on the LCD as shown in Figure 1. The goal is
to mount the antenna where the signal is the strongest. A -75 dB signal is better
than that of -100 dB. Temporarily position the antenna for about a minute in a few
locations and take note of the signal strength.

7
Figure 1:
Main Printed Circuit Board Wired for Site Survey

8
Overview
The antenna should be mounted outdoors
and above other objects. By optimizing the
placement of the antenna, you increase the
chances that the radio can communicate with
more than one cell tower. The coaxial cable
should reach the Mission RTU radio connection
with no severe routing of the coaxial cable.
Consider where the RTU will be mounted in
relation to the location of the antenna.
1. Install the antenna cable and antenna whip.
Connect the SMA-M cable connector to the
SMA-F connector on the mainboard (see
Figure 1). Unscrew the nut from the molded
antenna base. Feed the molded antenna
base through the square cut out on the
bracket. Place the molded antenna base in
the circle cutout.
Warning: Secure the molded antenna
base to the bracket with the nut. Hand-
tighten the nut, plus ¼ turn with a
wrench. Do not overtighten.
2. Install the mounting bracket. Mount the
Universal Antenna Mount directly on the
face of a at surface or a metal pipe using
the included pipe clamps (placing above
any obstruction).
Note: The mini whip antenna may provide
superior connectivity for applications
using LTE service. Mission recommends
trying this antenna during installation
and appreciates any feedback from eld
experience.
Chapter 3: Antenna Installation
Tie wraps Hose clamp nut

9
Antenna Best Practices
Do Don’t
Mount the antenna outside as high as possible,
preferably above the roof or other objects.
Mount the antenna underground, in a dry well, or
inside a canned lift station.
Mount the antenna above all metal surfaces close
to the installation.
Mount the antenna horizontally or bend the antenna
whip.
Coil excess coaxial in circles of 5–7 inches in
diameter. Pinching or tight bends in the coaxial can
restrict the high frequency/low power radio signal
path in much the same way water ow is restricted
through a tight bend in a hose.
Mount the antenna inside a metal control cabinet.
Even berglass cabinets degrade the signal.
Ensure that the weight of the cable does not
damage the antenna base. There should be enough
slack in the cable so it does not rest or touch the top
surface of the mounting bracket.
Mount the antenna on the side of a metal cabinet
or adjacent to a tank. Metal surfaces will reect
the radio signal, preventing it from traveling in all
directions.
Incorporate a drip loop when installing the cable to
prevent water from penetrating into the building or
enclosure.
Cut, lengthen, or shorten the coaxial cable.
Mission can supply antenna extension cables and
connectors up to 50 feet. For lengths above this
limit, another RTU mounting location should be
considered.
Wiring Best Practices
• Signal cables should not run parallel with high voltage AC wires (load conductors).
• Where signal wires and load conductors must cross, do so at right angles.
• High voltage should not enter the Mission RTU. Mount the supplied transformer outside the Mission
enclosure.
• Lay wires in wire trays with the excess near terminations. Replace wire race covers
• Cables used for digital and analog inputs should be 18 to 22 gauge, shielded, twisted pair wire with the
shield connected to ground at the RTU and not on the other end of the cable (to prevent ground loop
current).
• MOVs can be installed across AC contactor coil terminals to shunt voltage spikes away from the RTU
inputs and other electronics in the panel. Voltage spikes can be caused by coils de-energizing. The
included MOVs are rated for 120 V circuits and will suppress excess voltage above 150 V. These parts
are application dependent. They have a nite lifespan and will need to be replaced over time.
Warning: Follow requirements for eld wiring installation and grounding as
described in NEC and the local/state electrical codes.

10
Locate the RTU as close as possible to the
control cabinet while considering the antenna
cable length.
Warning: Turn off station power to
avoid damage to mainboard.
Note: MyDro units should be connected
to a LPS-certied power supply (12 VAC
60 Hz ~ or 12 VDC ).
1. Mount the enclosure.
2. Cut the conduit and wiring holes. Drill and
attach the conduit in the control cabinet
and Mission RTU. Use sealant where
appropriate.
3. Pull the wires and cables.
4. Ground the RTU. Use 12 to 14 gauge
green wire to connect the grounding lug
on the backplate in the RTU to the stations
Earth ground (refer to Figure 1).
Note: If using the Safe Module Plus
for sensing the high-level oat in an
intrinsically safe manner, install it now.
Refer to the MyDro Expansion Module
Installation Manual for more information.
5. Terminate digital inputs. Refer to the
wiring diagram on the M150/M850 cover/
door and the RTU Installation Form in the
packing box. Record input names on the
setup form and the diagram.
Chapter 4: RTU Installation and Wiring
Enclosure Options
NEMA 4X
Mount outdoors on
unistrut or a wall. Allow
clearance for hinge (left)
and key reader (right).
Consider the NEMA 4 for
indoor application where
wash-downs occur.
Conduit connections
can enter from bottom,
but leave space for the
included battery.
NEMA 1
FlatPak
Use indoors where no wash-downs occur.
Allow for space on bottom of the enclosure for
the battery.
Mount inside the control cabinet.
Two large holes are provided for through-wires.
Place battery inside the control cabinet.

11
The default digital input (DX) connections are as follows:
• D1—pump 1 (M150 runtime accumulator, M850 status and runtime accumulator)
• D2—pump 2 (M150 runtime accumulator, M850 status and runtime accumulator)
• D3—pump 3 runtime or simultaneous pump (1 and 2) runtime accumulator*(M150)
• D4—high level oat
• D5—pump 1 fail
• D6—pump 2 fail
• D7—phase fail
• D8—unassigned or multiple pump runtime accumulator*(M850)
MyDro Digital Inputs feature software selectable input characteristics including:
• Dry contacts with wire fault supervision (requires 1000 ohm EOL resistors)
• Dry contacts no wire fault supervision (NF)
• Strap on current sensing switches (Mission PN OP400) with wire fault supervision
• Strap on current sensing switches (Mission PN OP400) without wire fault supervision
Note: The MyDro does not directly support the Wet Well Module. See the technical
document, Wet Well Module with MyDro, if replacing M110 or M800 with Wet Well
Module to MyDro.
Warning: Digital inputs require dry contacts. This means that wires running to
these inputs must not supply any voltage. Use an interposing relay if there are no
dry contacts available.
The digital inputs are set as normally open (N/O) by default. You must use N/O contacts
on pump runtime inputs. You may use either N/O or normally closed N/C contacts on
digital inputs 4 through 8. Notify Mission Technical Support (or indicate on RTU setup
form) to change the default settings (refer to Figure 2).Connect the shields of digital input
wires to the grounding lug located inside the RTU.
Pump Runtime Inputs: On M150 RTUs, only inputs D1–D3 can be congured for pump
runtimes. However, they can also be set as alarm inputs. D4–D8 on an M150 can only
be congured as alarm inputs. D3* can be used for simultaneous runtimes by conguring
digital input on touch screen.
On M850 RTUs, D1–D8 (on the main board) can be congured as pump runtime, pump
runtime with alarm, or alarm inputs. As an option, the system can report multiple pump
runtimes on M850 RTUs on D8.*

12
Figure 2:
Digital Inputs—Current Sensor, Supervision, and Surge Suppression
Wire fault supervision: EOL resistors are optional with the
MyDro. When utilized and installed properly (at the far end
of the cable wired parallel to the switch) they allow the
system to alarm on a wire fault. Software selection of
this is done from the touch screen. From the cong
screen, go to Digital Input Setup and then Mode.
Choose Digital Input Dry Contact NF for no
EOL resistor (no wire supervision).
6. Terminate analog inputs. Two isolated analog inputs are available on the mainboard
(refer to Figure 3). These inputs can accept a 4–20 mA or 0–5 volt signal. Position
analog channel signal selector* to the left for a 4–20 mA signal and to the right for a
0–5 volt signal. If you use the auxiliary output power source, slip the ferrite core over
the postive conductor (see Figure 4A).
Warning: Take precautions when wiring the analog inputs. Reverse polarity may
damage the main board or the sensor.
The auxiliary output on the mainboard can be used to power the transducer as
seen in Case 1 of gure 3 (250 mA maximum). When using the auxiliary output, be
aware of the voltage drop in the 4–20 mA loop when wiring to the analog inputs. The
auxiliary output supply voltage is software congurable for 12 or 24 VDC.

13
Wire fault supervision: EOL resistors are optional with the
MyDro. When utilized and installed properly (at the far end
of the cable wired parallel to the switch) they allow the
system to alarm on a wire fault. Software selection of
this is done from the touch screen. From the cong
screen, go to Digital Input Setup and then Mode.
Choose Digital Input Dry Contact NF for no
EOL resistor (no wire supervision).
7. Wire the output relays. The output relays
are single pole, double throw and rated
up to 30 VDC or 120 VAC at 5 amp
maximum. They are used for remote
control applications such as Tank and
Well, and analog or digital interconnect.
You can wire the relay normally open
(default) or normally closed (refer to
Appendix B).
Warning: Relay behavior on
communication failure is congurable
under the Cong. Menu/Relay Comm
Fail Setup as Deenergize or No
Change.
Warning: If power to output relays is
supplied by Mission auxiliary power
port it is software congurable as 12
or 24 VDC. Specify coil voltage of
interposing relays appropriately.
Figure 3:
Analog Input Wiring
Figure 4:
Installing ferrite cores to (A) auxiliary output
and (B) AC input
A
B

14
Note: Many items should be considered with remote control applications. Refer to
the Best Practices for Remote Control document.
Wire the auxiliary output to common on the output relay. Wire the coil positive
terminal on the interposing relay to normally open or normally closed on the output
relay. Wire the negative coil terminal to Aux (-).
8. Install the 120 VAC transformer and wire AC power. Slip ferrite core over the two
conductors going to the AC in connection (see Figure 4B). Mount the transformer in
the control panel (not the Mission RTU).
It is very important to only provide 12–16 VAC to the Mission mainboard AC input.
Hooking up the transformer backwards will apply 1200 VAC to the mainboard and
cause permanent damage. Do not install transformer in the RTU. Install it in the
control cabinet.
Warning: Connect AC power to the primary input (black wires). Connect the
secondary output (red wires) to the mainboard input. The transformer steps the
power down from 120 VAC to 12 VAC. Do not turn on station AC power at this
time.
Figure 5:
Transformer Wiring

15
Chapter 5: RTU Startup
1. Power the Mission RTU with the 12 VDC battery only. Connect the black lead rst,
then the red lead (see Figure 6). The LCD will illuminate the start up screen. Once
the radio sequence is complete, you will hear three beeps from the buzzer. This
indicates the unit has connected to Mission servers. Allow the unit about two minutes
to perform its power-up sequence and synchronization to the network. If the RTU
does not connect after two attempts, contact Technical Support.
Figure 6:
Battery Wiring
2. Check the wiring connections before powering the pump station. If the wiring is
correct, power the pump station, and immediately focus on the mainboard. Check
to ensure the Mission RTU is still operating. If a wiring mistake has been made,
it will be evident. If there appears to be a mistake, immediately remove power. If
everything is correct, proceed to testing the RTU.
Warning: Risk of explosion if battery is replaced by an incorrect type. Dispose of
used batteries in accordance with local regulations.

16
Figure 7:
Test the Installation

17
Chapter 6: Test the Installation
It is imperative that alarm points are tested and that alarm notications are received
so they can be acknowledged by the customer or end-user once the unit is put into
production. This includes phone numbers, text messages, email addresses, fax
numbers, and pager numbers.
Additionally, it is recommended that the customer or end-user test all alarm points every
six months to ensure all electrical components and alarm parameters are still functioning
as desired and that alarms are being received and acknowledged by recipients. Refer to
the Spring Cleaning/Fall Fix-up document for testing procedures.
Complete the following tests prior to leaving the job site:
1. Conrm AC power. Use a voltmeter across the AC terminal to verify ~12–14 VAC is
present.
2. Test the battery. Remove the AC fuse and conrm the RTU stays online. Replace the
AC fuse.
3. Test the radio connection. Check the radio status on the LCD screen. It should read
“connected.” If not, call Technical Support at (877) 993-1911 option 2.
4. Inspect the status on the LCD. Analog, digitals, etc.
5. Test the digital alarm inputs. Put each digital input into an alarm state. From
the touch screen press digital and conrm inputs respond as expected. Mission
Technical Support is available to conrm that data is being properly transmitted and
received on your web portal. A smartphone can be used otherwise.
6. Test the pump runtime inputs. Turn on pump 1. Mission D1 should respond on the
touch screen. If not, check the wiring and/or end-of-line resistors. Repeat step for
pump 2 and 3, if used.
7. Test the high level alarm. Open the wet well. Pull the high-level oat up and put it into
alarm condition by tipping it. Ensure that the digital input four respond. If not, check
the wiring and the high level oat itself.

18
Verify alarm notications are received from the tests. Log on to your web portal with the
credentials specied on the Notication Setup form. Go to the Alarms page. You should
see a list of alarm events with event time and the result.
Call Mission Technical Support after testing the installation to enable the device for alarm
call-outs. A technician will verify proper operation of equipment.
You may nd it helpful to download the 123SCADA
mobile application, available for free download on the
Apple App Store and Google Play Store.

19
Chapter 7: Site Commissioning
Enable the RTU for alarm call-outs by calling Technical Support.
Setup Forms
Ensure setup forms have been submitted to [email protected]. Verify proper
labeling on your web portal and the wiring diagram on the Mission RTU. Users with
Superadmin or Admin credentials have the ability to make changes to the web portal.
Documentation and Help Guides
It is recommended that you review the online manuals for detailed operation of your RTU
and web portals. This can be found on your menu selection in the Download folder under
Documents.
The Operators Guide that came with the RTU should be distributed to your operators as
a how-to document to get operators started with the Mission system. It covers the basics
of the system capabilities, monitoring and alarming, and helpful resources.
Training Resources
Mission hosts weekly webinars nearly every Wednesday at 2 P.M. Eastern. The
revolving series covers the basics, advanced web portal options, and everything in
between. Mission wants to help you get the most out of your system, so please join and
feel free to ask questions.
Mission also offers short video tutorials and quarterly newsletters with timeless
information. Registration and archives can be found on the website.
Your unit is now ready for use. Visit 123scada.com and log in with your credentials to
view your web portal or go to 123mc.com to use the legacy web portal.

20
Appendix A: Terminology
Alarm Inputs
A digital or analog input that is congured to dispatch a notication when the alarm state or
threshold is reached.
Analog Inputs
Two analog inputs on M150 and M850 series RTUs can be used to report pressure, level,
chlorine pH, or any other dynamic readings by way of a 4–20 mA or 0–5 V transducer. High
and low analog alarm thresholds as well as high and low restore set points can be set from
the web portal. The M850 can be expanded to 6 analog inputs via expansion modules.
Digital Inputs
Eight inputs are available for sensing items like pump run, oat status, or pump fail. They
can be electrically congured (via LCD/Cong/Digital Input) for dry inputs or the strap on
current sensor where greater than ~5 amps indicates run. They can be logically congured
as alarm or accumulators for hourly pump run time and starts reporting. The M150 supports
up to three pump run time accumulators, the M850 supports up to eight. Also see end-of-line
resistor.
Digital Outputs
Three relay outputs can be remotely controlled to turn on pumps, wells, valves, or security
lights. Multiple M850s can be linked so an event at one station causes a relay change at
another. Mission’s Tank and Well Control option and Intertie rely on this feature. Consult Best
Practices for Remote Control Digital Intertie for more information (123mc.com/literature).
Electronic Key Reader
The included key reader allows on-site personnel to log a site visit, acknowledge, and
suspend alarms while service is performed at the station. Management can track the key
entries for productivity and regulatory reporting purposes. The functionality of the key can be
congured at the web portal.
End-of-Line Resistor
A resistor of known value (1000 ohm) that is used to terminate protective loops, and provide
wire supervision. Wire the EOL in parallel to a switch instrument. The requirement for an
end-of-line resistor is software congurable for fault (requires resistor) or no fault.
Long Term Evolution (LTE)
Generally known as 4G (see Radio Access Technology (RAT)) but by denition an
evolutionary standard. 5G builds on the LTE standard with the addition of millimeter wave
and ultra low latency technologies. The small radio waves are appropriate for dense urban
areas but not good for long idstance propagation.
This manual suits for next models
1
Table of contents
Other Mission Touch Terminal manuals