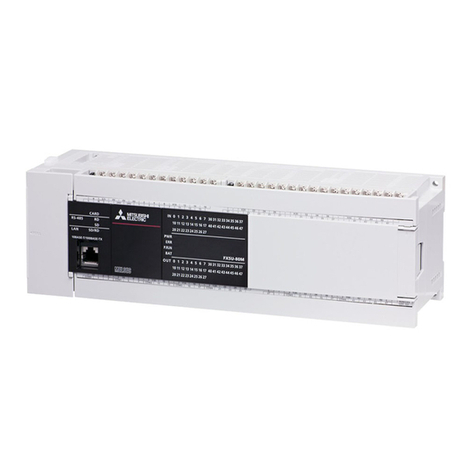
1.2 External dimensions and weight
Outer paint color Body: Munsell 0.6B7.6/0.2
2. Installation (general specifications)
As for installation of the I/O modules, expansion adapters and expansion
boards, refer to MELSEC iQ-F FX5U User's Manual (Hardware).
2.1 Generic specifications
*1 The simultaneous ON ratio of available PLC inputs or outputs changes with
respect to the ambient temperature. In the case where operating ambient
temperature is lower than 0
, the specifications are different from the above
description. Refer to MELSEC iQ-F FX5U User's Manual (Hardware).
*2 The operating ambient temperature is 0 to 55(32 to 131) for
products manufactured before June 2016. For intelligent function
modules, refer to the manual for each product.
*3 When used in a low-temperature environment, use in an environment
with no sudden temperature changes. If there are sudden temperature
changes because of opening/closing of the control panel or other
reasons, condensation may occur, which may cause a fire, fault, or
malfunction. Furthermore, use an air conditioner in dehumidifier mode to
prevent condensation.
*4 The criterion is shown in IEC61131-2.
*5 When the system has equipment which specification values are lower
than above mentioned vibration resistance specification values, the
vibration resistance specification of the whole system is corresponding to
the lower specification.
*6 Dielectric withstand voltage and insulation resistance are shown in the
following table.
For dielectric withstand voltage test and insulation resistance test of each
product, refer to the following manual.
Refer to MELSEC iQ-F FX5U User's Manual (Hardware).
*7 For grounding, refer to Section 3.3.
Model name W: mm W1: mm
Mounting hole pitches MASS (Weight): kg
FX5U-32M150 123 Approx. 0.7
FX5U-64M220 193 Approx. 1.0
FX5U-80M285 258 Approx. 1.2
INSTALLATION
PRECAUTIONS
Use the product within the generic environment specifications described in
section 2.1 of this manual. Never use the product in areas with excessive
dust, oily smoke, conductive dusts, corrosive gas (salt air, Cl2, H2S, SO2
or NO2), flammable gas, vibration or impacts, or expose it to high
temperature, condensation, or rain and wind.
If the product is used in such conditions, electric shock, fire, malfunctions,
deterioration or damage may occur.
INSTALLATION
PRECAUTIONS
Do not touch the conductive parts of the product directly. Doing so may
cause device failures or malfunctions.
When drilling screw holes or wiring, make sure that cutting and wiring
debris do not enter the ventilation slits of the PLC.
Failure to do so may cause fire, equipment failures or malfunctions.
For the product supplied together with a dust proof sheet, the sheet should
be affixed to the ventilation slits before installation and wiring work to
prevent foreign objects such as cutting and wiring debris. However, when
the installation work is completed, make sure to remove the sheet to
provide adequate ventilation.
Failure to do so may cause fire, equipment failures or malfunctions.
Install the product on a flat surface. If the mounting surface is rough, undue
force will be applied to the PC board, thereby causing nonconformities.
Install the product securely using a DIN rail or mounting screws.
Connect the extension cables, peripheral device cables, input/output cables
and battery connecting cable securely to their designated connectors.
Loose connections may cause malfunctions.
Turn off the power to the PLC before attaching or detaching the following devices.
Failure to do so may cause equipment failures or malfunctions.
- Peripheral devices, expansion board, expansion adapter, and
connector conversion adapter
- Extension modules, bus conversion module, and battery
Item Specification
Operating ambient
temperature
*1
-20 to 55 (-4 to 131 ), non-freezing*2
Storage ambient
temperature -25 to 75 (-13 to 167 ), non-freezing
Operating ambient
humidity
5 to 95%RH, non-condensing*3
Storage ambient
humidity 5 to 95%RH, non-condensing
W1
*
*
22
80
90
W83
8
2-4.5-diam mounting holes (FX5U-32M)
4-4.5-diam mounting holes (FX5U-64M, FX5U-80M)
FX5U-32Mdo not have the (*)-marked mounting holes. Unit: mm
Mounting
hole
pitches
Vibration
resistance*4*5
Frequency
(Hz)
Acceleration
(m/s2)
Half amplitude
(mm)
Sweep
count
Installed
on DIN rail
5 to 8.4
1.75
10 times each
in X, Y, Z
directions (80
min in each
direction)
8.4 to 150
4.9
Installed
directly
5 to 8.4
3.5
8.4 to 150
9.8
Shock
resistance*4 147 m/s2Acceleration, Action time: 11 ms,
3 times by half-sine pulse in each direction X, Y, and Z
Noise durability By noise simulator of 1000 Vp-p noise voltage, 1 μs noise
width and 30 to 100 Hz noise frequency
Dielectric
withstand voltage
*6
1.5 kV AC for 1 minute or 500
V AC for 1 minute Between each terminal
and ground terminal
Insulation
resistance*6
10 Mor higher by 500 V DC
insulation resistance tester
Grounding
Class D grounding (Grounding resistance: 100 or less)
<Common grounding with a heavy electrical system is
not allowed.>*7
Working
atmosphere
Free from corrosive or flammable gas and excessive
conductive dusts
Operating altitude
*8
0 to 2000 m
Installation location
Inside a control panel*9
Overvoltage category
*10
II or less
Pollution degree
*11
2 or less
Terminal Dielectric
strength
Insulation
resistance
CPU modules, I/O modules
Between power supply terminal
(AC power) and ground terminal
1.5 kV AC for
1 minute
10 Mor higher
by 500 V DC
insulation
resistance tester
Between power supply terminal
(DC power) and ground terminal
500 V AC for
1 minute
Between 24 V DC service power supply
connected to input terminal (24 V DC) and
ground terminal
500 V AC for
1 minute
Between output terminal (relay) and
ground terminal
1.5 kV AC for
1 minute 10 Mor higher
by 500 V DC
insulation
resistance tester
Between output terminal (transistor) and
ground terminal
500 V AC for
1 minute
Expansion boards, expansion adapters, intelligent function module
Between terminal of expansion board and
ground terminal Not allowed Not allowed
Between terminal of expansion adapter
and ground terminal
500 V AC for
1 minute
10 M
or higher by
500 V DC insulation
resistance tester
Intelligent function module Each manual
Item Specification *8 The PLC cannot be used at a pressure higher than the atmospheric
pressure to avoid damage.
*9 The programmable controller is assumed to be installed in an
environment equivalent to indoor.
*10 This indicates the section of the power supply to which the equipment is
assumed to be connected between the public electrical power distribution
network and the machinery within premises. Category II applies to
equipment for which electrical power is supplied from fixed facilities. The
surge voltage withstand level for up to the rated voltage of 300 V is 2500 V.
*11 This index indicates the degree to which conductive material is generated
in the environment in which the equipment is used. Pollution level 2 is
when only non-conductive pollution occurs. Temporary conductivity
caused by condensation must be expected occasionally.
2.2 Installation location
Install the PLC in an environment conforming to the generic specifications
(Section 2.1), installation precautions.
Installation location in enclosure
Space in enclosure
Extension devices can be connected
on the left and right sides of the CPU
module.
If you intend to add extension
devices in the future, keep
necessary spaces on the left and
right sides.
2.2.1 Affixing the dust proof sheet
The dust proof sheet should be affixed to the ventilation port before beginning
the installation and wiring work.
For the affixing procedure, refer to the instructions
on the dust proof sheet.
Be sure to remove the dust proof sheet when the installation and wiring work is
completed.
2.3 Procedures for installing to and detaching from DIN rail
The products can be installed on a DIN46277 rail [35 mm wide]. This section
explains the installations of the CPU modules.
2.3.1 Installation
1) Connect the expansion boards and expansion adapters to the CPU module.
2) Push out all DIN rail
mounting hooks (right
fig. A)
3) Fit the upper edge of the DIN rail
mounting groove (right fig. B) onto the
DIN rail.
4) Lock the DIN rail mounting hooks (below fig. C) while pressing the PLC
against the DIN rail.
2.4 Procedures for installing directly (with M4 screws)
The product can be installed directly on the panel (with screws).
This section explains the installation of the CPU modules.
2.4.1 Mounting hole pitches
Refer to the External Dimensions (Section 1.2) for the product's mounting hole
pitch information.
2.4.2 Installation
The FX5U-32Mis used as the CPU
module in this example.
1) Make mounting holes in the
mounting surface referring to the
external dimensions diagram.
2) Fit the CPU module (right fig. A)
based on the holes, and secure it
with M4 screws (right fig. B). (In the
case of FX5U-64M/80M, there
are four screw holes.)
3. Specifications and examples of external wiring
As for the details of the power supply wiring and input/output wiring, refer to
MELSEC iQ-F FX5U User's Manual (Hardware).
FX5-16EX
FX5-232ADP
FX5-16EYT
A
A
50 mm
A
A
AFX5U
CPU module
B
C4C4
DESIGN PRECAUTIONS
Make sure to set up the following safety circuits outside the PLC to ensure safe
system operation even during external power supply problems or PLC failure.
Otherwise, malfunctions may cause serious accidents.
- Most importantly, set up the following: an emergency stop circuit, a
protection circuit, an interlock circuit for opposite movements (such as
normal vs. reverse rotation), and an interlock circuit (to prevent
damage to the equipment at the upper and lower positioning limits).
- Note that when the CPU module detects an error, such as a watchdog
timer error, during self-diagnosis, all outputs are turned off. Also, when
an error that cannot be detected by the CPU module occurs in an input/
output control block, output control may be disabled.
External circuits and mechanisms should be designed to ensure safe
machinery operation in such a case.
- Note that the output current of the 24 V DC service power supply varies
depending on the model and the absence/presence of extension
modules. If an overload occurs, the voltage automatically drops, inputs
in the PLC are disabled, and all outputs are turned off.
External circuits and mechanisms should be designed to ensure safe
machinery operation in such a case.
- Note that when an error occurs in a relay or transistor of an output
circuit, the output might stay on or off.
For output signals that may lead to serious accidents, external circuits
and mechanisms should be designed to ensure safe machinery
operation in such a case.
Construct an interlock circuit in the program so that the whole system always
operates on the safe side before executing the control (for data change) of the
PLC in operation. Read the manual thoroughly and ensure complete safety
before executing other controls (for program change, parameter change,
forcible output and operation status change) of the PLC in operation.
Otherwise, the machine may be damaged and accidents may occur due to
erroneous operations.
DESIGN PRECAUTIONS
Simultaneously turn on and off the power supplies of the CPU module and
extension modules.
WIRING PRECAUTIONS
Make sure to cut off all phases of the power supply externally before
attempting installation or wiring work.
Failure to do so may cause electric shock or damage to the product.
Make sure to attach the terminal cover, provided as an accessory, before
turning on the power or initiating operation after installation or wiring work.
Failure to do so may cause electric shock.
The temperature rating of the cable should be 80or more.
Make sure to wire the screw terminal block in accordance with the
following precautions.
Failure to do so may cause electric shock, equipment failures, a short-
circuit, wire breakage, malfunctions, or damage to the product.
- The disposal size of the cable end should follow the dimensions
described in the manual.
- Tightening torque should follow the specifications in the manual.
- Tighten the screws using a Phillips-head screwdriver No.2 (shaft
diameter 6 mm or less). Make sure that the screwdriver does not touch
the partition part of the terminal block.
Make sure to properly wire to the terminal block (European type) in
accordance with the following precautions.
Failure to do so may cause electric shock, equipment failures, a short-
circuit, wire breakage, malfunctions, or damage to the product.
- The disposal size of the cable end should follow the dimensions
described in the manual.
- Tightening torque should follow the specifications in the manual.
- Twist the ends of stranded wires and make sure that there are no loose wires.
- Do not solder-plate the electric wire ends.
- Do not connect more than the specified number of wires or electric
wires of unspecified size.
- Affix the electric wires so that neither the terminal block nor the
connected parts are directly stressed.
B
B
A
