MKS Ophir FluxGage FGC100 User manual

Ophir Optronics Solutions Ltd.
FGC100
Calibration Unit FGC100
User Manual
FluxGage™
FluxGage™

FGC100 User Manual 2
1 Acronyms................................................................................................................................. 3
2 Introduction............................................................................................................................. 4
3 Mechanical Drawings .............................................................................................................. 6
4 Setting Up The FGC100............................................................................................................ 7
4.1 Operating the FGC100..................................................................................................... 9
5 Performing Calibration of FluxGage Using FGC100............................................................... 10
5.1 Calibration of the spectrum measurement and the total flux measurement............... 11
5.2 Calibration of the total flux measurement only............................................................ 11
5.3 Calibration of the spectrometer only............................................................................ 12
5.4 Back up calibration ........................................................................................................ 12

FGC100 User Manual 3
1Acronyms
DUT –Device Under Test
Note: The FGC100 calibration lamp complies with standard IEC 62471:2006 (First Edition)
"Photobiological safety of lamps and lamp systems" and is classified as Low risk (Risk Group 1)
when used as a standalone luminaire. When the FGC100 calibration lamp is connected to the
FluxGage system it is classified as Exempt Group (RG0).

FGC100 User Manual 4
2Introduction
The FGC100 calibration system is used to calibrate the FluxGage LED luminaire system. The
FGC100 includes:
12VDC adapter
Control unit
Lamp unit with protective cap
D-type cable
100-230VAC mains cable
Disk on key
Lamp Unit
Control
Unit
12VDC
Adapter
100-230VAC
Mains D-type
Cable
Figure 1. FGC100 Block Diagram
The lamp unit includes:
LED mounted on a heat sink
Temperature sensor
Fan for temperature control.
D-type connector
White reflector
Protective cap for the reflector
Two thumb screws for attaching the lamp unit to the FluxGage lid
Figure 2.FGC100 Lamp Unit

FGC100 User Manual 5
The control unit includes
Front panel
Fixed current source for the LED
Temperature stabilization circuit
General on/off switch
Hour meter
LED on/off push button
LED temperature indicator light (Green/Red)
Back Panel
D-type connector
USB connector (for usage at Ophir service centers only)
DC power in connector
Figure 3. FGC100 Control Unit –Front
Figure 4. FGC100 Control Unit - Back

FGC100 User Manual 6
3Mechanical Drawings

FGC100 User Manual 7
4Setting Up The FGC100
Place the FluxGage box on a flat surface.
Place the lid over the FluxGage. Make sure the lid is placed such that the round cover is
over the spectrometer diffuser.
Remove the round cover from the lid
Remove the protective cover from the FGC100 lamp unit
Insert the FGC100 lamp unit into the hole in the lid and secure it using the two thumb
screws
Connect the D-type cable between the FGC100 control unit and the FGC100 lamp unit
Connect the output cable of the 12VDC adapter to the FGC100 control unit
Connect the mains cable to the 12VDC adapter and plug it into a mains socket

FGC100 User Manual 8
Figure 5. FGC100 connected to FuxGage

FGC100 User Manual 9
4.1 Operating the FGC100
Figure 6. FGC100 Control Unit - Front
Turn the control unit on using the on/off switch (on the left)
Press the LED on/off push button to turn on the lamp unit
The temperature indicator will be red initially and will turn to green after a few minutes when
the temperature of the lamp unit will be stabilized. However, wait at least 30 minutes before
using the FGC100.
The hour meter display the total time in which the LED in the lamp unit was on. After 75 hours,
the FGC100 (lamp unit and control unit) should be sent to Ophir for recalibration.
FGC100 User Manual 10
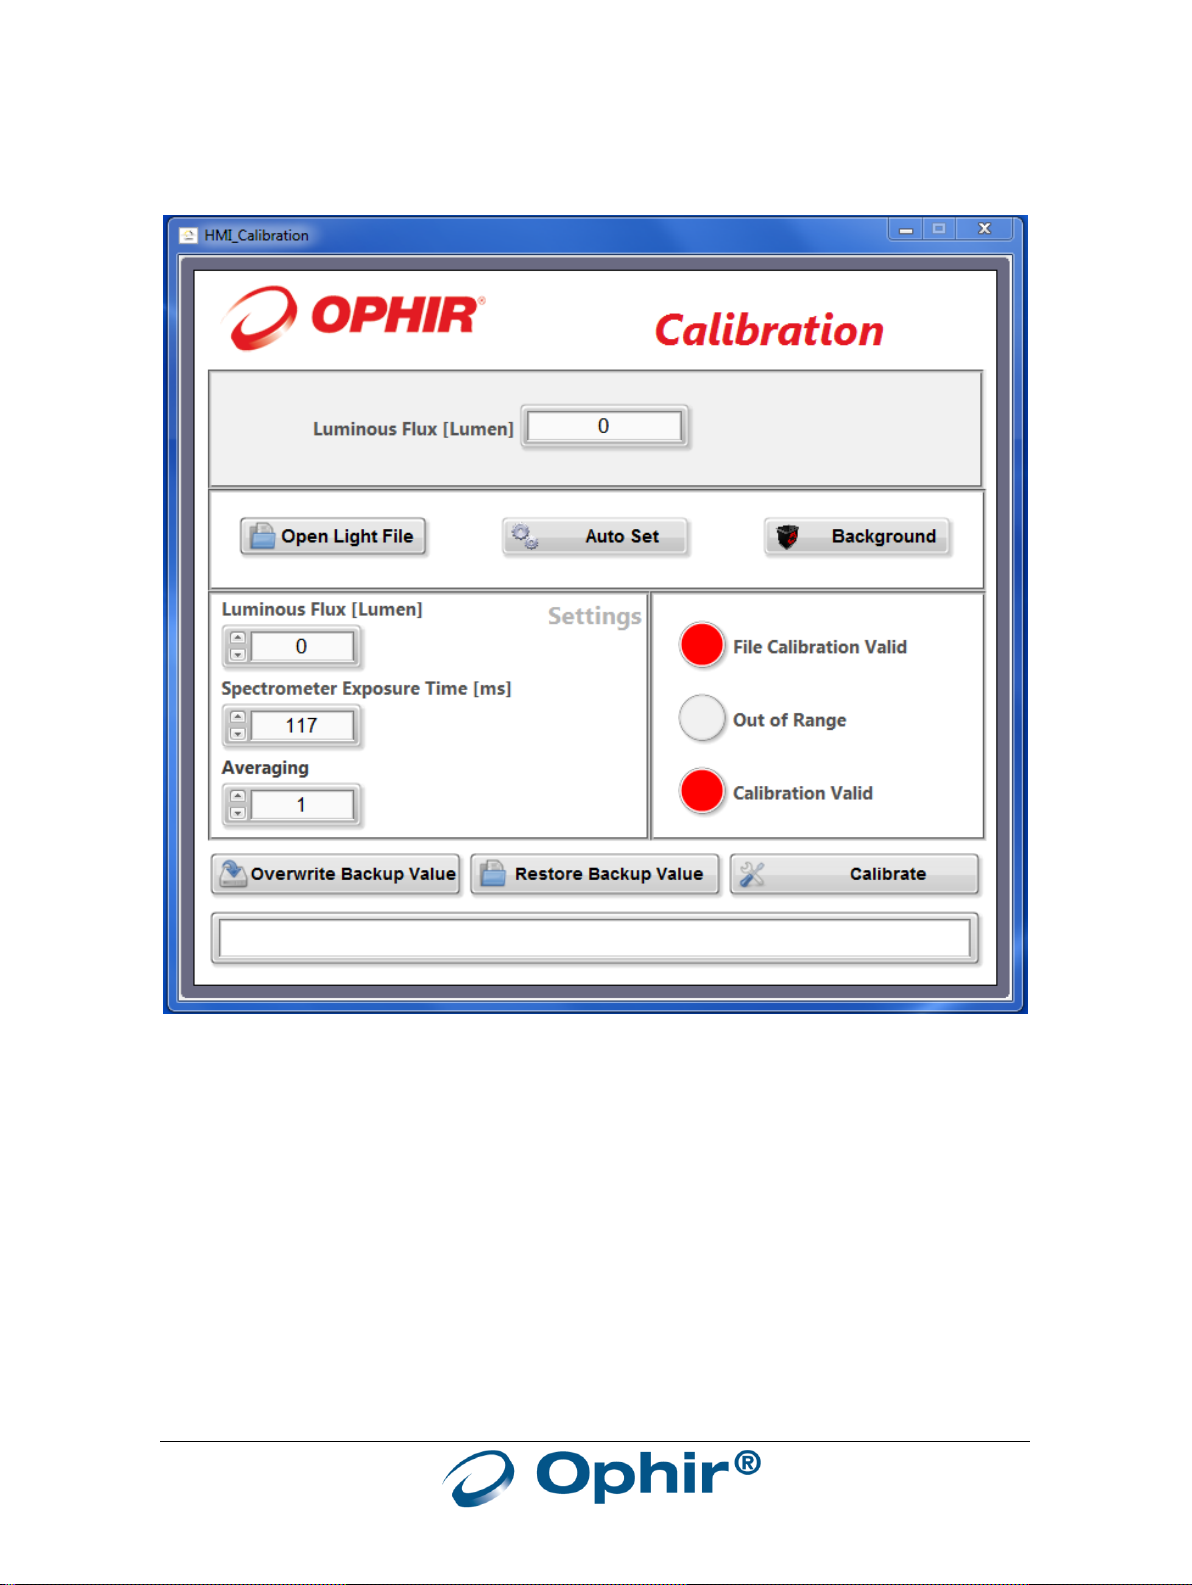
5Performing Calibration of FluxGage Using FGC100
Table of contents


