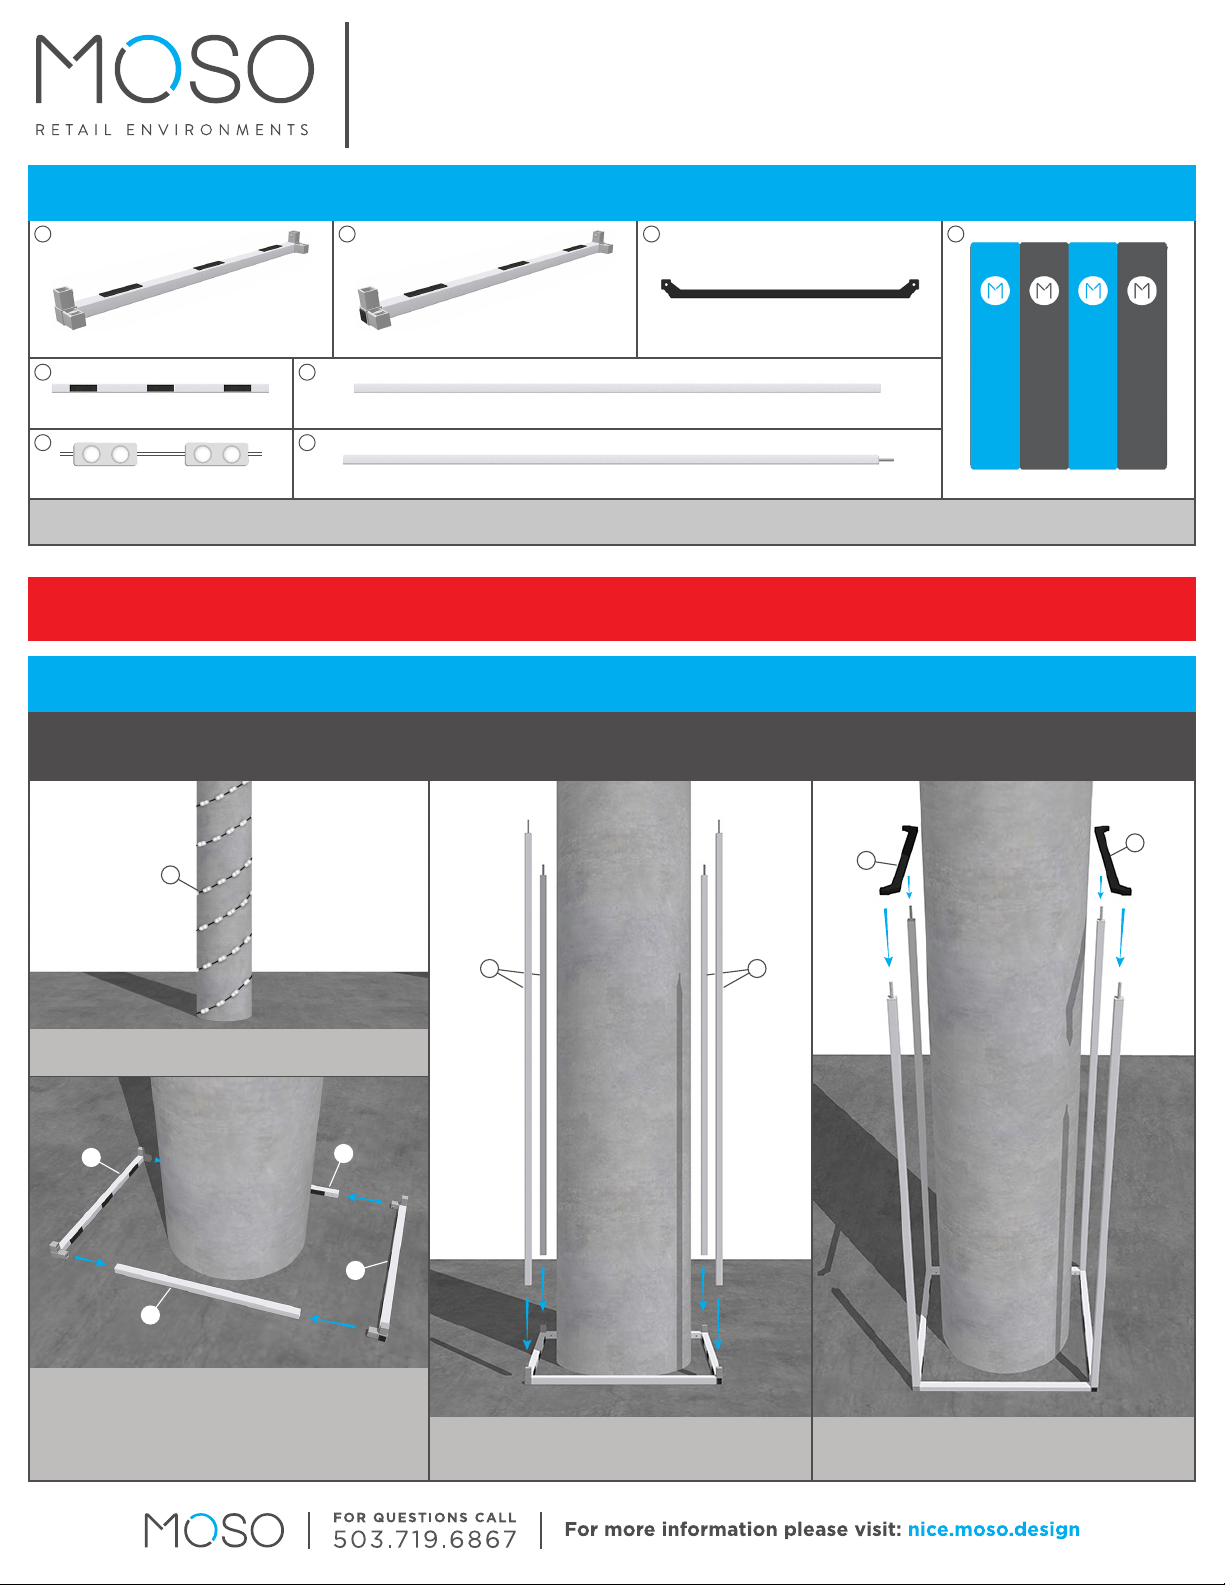
Insert the open end of the four long bars with
threaded rods8into the base connectors. The
threaded rods should be facing upward.
On opposite sides of the column, thread the rods of
the long bars through the ends of two middle bars3,
making sure the bar’s curve is facing inward.
Place two short bars5on opposite sides of the column
with the velcro facing inward. Next, with the velcro
sides again facing inward, insert an L-connector bar1
into the ends of one side of the short bars and an
L-connector bar with velcro2into the other ends of
the short bars to complete the base.
STEP 2
Peel o the adhesive backs of the lights7as you attach
them to the structural column in a spiral pattern.
7
8 8
1
2
5
5
STEP 1 STEP 3 STEP 4
1
5
7
6
L-Connector Bar
2 pc Long Bar with Threaded Rod 4 pc Graphic 1 pc
80ct Bag of Lights*
*If the Bella Monument is being ordered with the Lit Bella Insert, these lights will be included with that product.
4 pc
Short Bar with Velcro
ASSEMBLY GUIDE
BELLA MONUMENT COLUMN
While assembly is possible with one person, due to the size of the sign, two people is highly recommended
and three is preferred for easy assembly and installation.
Middle Bar
3 4
2 pc
L-Connector Bar w/Velcro End 4 pc
2
2 pc
4 pc
8
Long Bar
PARTS LIST
YOU WILL NEED: Ladder(s), hammer, screwdriver
3
3
ASSEMBLY INSTRUCTIONS
These steps show assembly around a structural column. If the Bella Monument is going to be freestanding, being used
with the separate Lit Bella Insert, or if you wish the graphic to be unlit, skip Step 1 and follow the remaining steps.


