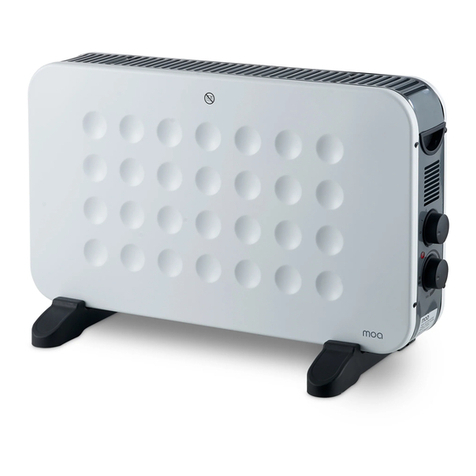
MOA PH15 User manual

Panel Heater PH15
Instruction Manual
English / Nederlands / Deutsch
www.moacolors.com

Panel Heater - English manual 2
EN
IMPORTANT SAFEGUARDS (1/3)
To get the most out of your new heater, please read through these
instructions and the attached safety regulations before use. Please also
save the instruction manual in case you need to remind yourself of the
heater’s functions at a later date.
Important: Before plugging the unit into the mains, ensure by visual
inspection that the unit is intact and has not suffered any damage
during transit.
Caution: The appliance must be always placed on a fl at and stable
surface. To avoid a hazard due to inadvertent resetting of the thermal
cutout, this appliance must not be supplied through an external
switching device, such as a timer, or connected to a circuit that is
regularly switched on and off by the utility.
1. Read all instructions before using the heater.
2. Only connect the heater to a single-phase socket with a mains
voltage as specifi ed on the rating plate.
3. Do not leave your home while the appliance is in function: ensure
that the switch is in OFF (0) position and the thermostat is in minimum
position. Always unplug the appliance.
4. Keep combustible material such as furniture, cushions, bedding,
paper, clothes, curtains, etc. at least 100cm away from the heater.
BEFORE USE
Before use, please read this manual carefully.
Only connect the appliance to an earthed wall socket.
This appliance is for household use only. When using electrical
appliances, basic safety precautions should always be followed to
avoid fi res, electric shocks, burns, or other injuries and damage. Read
these operating and safety instructions carefully.

Panel Heater - English manual 3
EN
IMPORTANT SAFEGUARDS (2/3)
5. Do not hang anything on or in front of the heater.
6. Always use the heater in an upright position.
7. Do not place the heater against walls, furniture, curtains, etc.
8. Do not use the appliance in rooms less than 4m² area.
9. Always unplug the heater when not in use. Do not pull the cord to
unplug the heater.
10. Keep the air inlet and outlet free from objects at least 1m in front
and 50cm behind the heater.
11. Do not install the heater immediately below a socket- outlet.
12. Do not let animals or children touch or play with the heater. Pay
attention to the air outlet gets hot during operation.
13. Do not cover. If covered, there is a risk of overheating.
14. Do not use this heater in the vicinity of showers, bathtubs,
washbasins, or a swimming pool, etc.
15. Do not use the heater in the rooms containing explosive gas
infl ammable solvents, varnish or glue.
16. Keep the heater clean. Do not allow any objects to enter any
ventilation or exhaust opening as this may cause electric shock or fi re
or damage to the heater.
17. If the heater has been dropped or damaged it should not be used
until it has been inspected by a qualifi ed service center.
18. Close supervision is necessary when the heater is being used by or
near children, persons suffering from any physical impairment or pets.
19. Do not use to dry clothes or any fabric.
20. Do not use the heater to dry your laundry. Never obstruct the intake
and outlet grilles (danger of overheating).
21. Do not move the appliance while it is functioning to avoid
overheating with the additional risk of fi re.

Panel Heater - English manual 4
EN
IMPORTANT SAFEGUARDS (3/3)
22. If any part of the heater or supply cord becomes damaged, it must
be replaced by a qualifi ed electrician. To avoid a hazard.
23. The heater must not be located immediately below a socket- outlet.
24. Do not use this heater with a programmer, timer, or any other
device that switches the heater on automatically, since a fi re risk exists
if the heater is covered or positioned incorrectly.
25. Do not leave the heater switched on when leaving your home or
going to sleep.
26. Children should be supervised to ensure that they do not play with
the appliance.
27. This appliance can be used by children aged from 8 years
and above and persons with reduced physical, sensory or mental
capabilities or lack of experience or knowledge if they have been given
supervision or instruction concerning use of the appliance in a safe way
and understand the hazards involved.
28. Children shall not play with the appliance. Cleaning and user
maintenance shall not be made by children without supervision.
29. Children of less than 3 years should be kept away unless
continuously supervised.
30. Children aged from 3 years and less than 8 years shall only switch
on/off the appliance provided that it has been placed or installed
in its intended normal operating position and they have been given
supervision or instruction concerning use of the appliance in a safe way
and understand the hazards involved.
31. Children aged from 3 years and less than 8 years shall not plug in,
regulate and clean the appliance, or perform user maintenance.
32. Do not leave unattended when plugging into the mains supply.
Caution: Some parts of the heater can become very hot and cause
burns. Do not touch hot surfaces. Particular attention has to be given
where children and vulnerable people are present.
Note: These heaters are intended for domestic use only. They can be
used as both a portable appliance and wall mounting appliance.

Panel Heater - English manual 5
EN
PARTS & INSTALLATION
Product features
1. Elegant black glass panel.
2. High-quality aluminum heating element: quick heating with higher
energy savings.
3. Touch screen control and remote control.
4. Timer from 1 to 24 hours to turn the convector heater on or off at the
desired time.
5. Digital display with automatic room temperature display.
6. For wall mounting or free standing with the tripod.
Installation (While use on the fl oor as a portable appliance)
Please attach the feet on the heater’s housing, and fi xing them with
supplied ST12x4mm(8pcs) screws.
Wall mounting (While use the heater as a fi xed appliance)
Please note that the product must be installed at least 15 cm from the
fl oor and 50 cm from the ceiling.
- For wall mounting study scheme.
1. Uninstall the bracket from the body, see the image1
2. Drill the holes at each side on the wall, then insert the plastic
expanded plugs within, Fix the bracket in the wall with a screw, see the
image 2
3. Fit the heater into a suitable position ensuing that the holes align with
the bracket. See image 3.
4. Tight the screw on the top of the bracket to catch steadily.

Panel Heater - English manual 6
EN
OPERATION
Insert the plug into a suitable socket outlet on an A.C. power supply
having the same voltage as that shown on its rating label.
The touch screen buttons located on the product correspond to the
remote control functions:
1. Display 2. Temperature“+” button
3. Temperature“-“ button 4. Power button
5. Mode button 6. Timer button
7. Receiver 8. Child clock button
Power function
1. Before you use the heater, you should turn on the power switch
located on the side of the heating panel.
2. Press the power button to set functions. The upper part of the display
shows the room temperature. The heater is working at low power
heating conditions.
Mode
Press the mode button to regulate low ,or high temperature power
Temperature selection
Press the “+” or “-” button to select the desired temperature from a
range of 5°- 40°C. The temperature indicator will remain lit for a long
time.

Panel Heater - English manual 7
EN
Timer
Press the timer button, to select the desired range between 1 hour to 24
hours. The remaining time will appear.
Child clock
Press the child clock button 3 seconds, will be displayed on the screen,
so you can not make any operate, and the same ways to touch to
delete the child clock function.
CONNECTION BY WIFI
1. Use your phone to scan the QR code below or search “Tuya Smart”
in Application on the market to download and install the App.
2. Select your country code, enter your email, and tap “Get” to get an
email containing verifi cation on code.
3. Enter the verifi cation on code in the message and tap “Login” to log
in to the App.
4. Switch on the product and make sure the product is in WIFI covered
environment. The indicator light will rapidly blink. If the indicator light
does no rapidly blinks, please press the “ mode ” button for 5 seconds
and the product will have a “bi” sound, then go to the App, tap “add
device” at the bottom, as shown in picture 1.

Panel Heater - English manual 8
EN
A) Press “+” in the top right corner, as shown in picture 2.
B) Choose “All Devices” as shown in picture 3.
C) Choose “Heater”, as shown in picture 4.
D) Press the “confi rm indicator rapidly blinks” when the indicating light
on the device rapidly blinks, as shown in picture 5.
E) Input password of WIFI and then confi rm, as shown in picture 6.
F) Wait for the APP to connect with the device until it is connected
successfully as shown in picture 7.
1 2
3 4
5 6

Panel Heater - English manual 9
EN
Operation by WIFI
1. You can operate the device by mobile under the WIFI or 4G LTE
environment, as shown in the picture.
2.Select “Weekly timer” button to operation:
A) Press the “Add schedule”, as shown in pic 9
B) U can choose the weekly and timer what u want, please note that u
must keep the set temperature higher the currently temperate when ON
the power, as shown in pic 10
C) Press the “Save” button in the top right corner, to save this during
“stop or start” weekly timer operation, as shown in pic 11.
D) Once again operation to set the next during “stop or start” weekly
timer.
E) Press the” back” button in the top left corner, to check the record
what u set.
F) Long time touch the record, you can choose to cancel.
Operating sound
The appliance emits a beep upon each operation setting.

Panel Heater - English manual 10
EN
DISPOSAL
Do not dispose of the device in normal domestic waste.
Dispose of the device over a registered waste disposal fi rm or through
your communal waste disposal facility.
Observe the currently valid regulations. In case of doubt, consult your
waste disposal facility.
WARRANTY
Dear Valued Customer,
Thank you very much for purchasing a MOA product.
We wish you to inform you that this product is covered by a warranty
which complies with all legal provisions concerning existing warranty
and consumer rights in the country where the product was purchased.
Should you fi nd any defect or malfunction of your MOA product,
please contact the appropriate Customer Care Center.
Sincerely yours,
The MOA Team

Panel Heater - English manual 11
EN

Paneelverwarming - Nederlandse handleiding 12
NL
VOOR HET GEBRUIK
Lees deze handleiding voor gebruik met aandacht.
Sluit het apparaat alleen aan op een geaard stopcontact.
Dit apparaat is alleen voor huishoudelijk gebruik. Bij gebruik van
elektrische apparaten, moeten algemene veiligheidsmaatregelen altijd
opgevolgd worden om brand, elektrische schokken, brandwonden en
andere verwondingen en vormen van schade te voorkomen. Lees deze
gebruiksaanwijzing en veiligheidsmaatregelen zorgvuldig.
BELANGRIJKE
VEILIGHEIDSMAATREGELEN (1/3)
Lees voor het beste gebruik van uw nieuwe verwarming eerste deze
instructies en veiligheidsvoorschriften. Bewaard de gebruikshandleiding
ook voor het geval u op een latere datum iets over de functies van de
verwarming wilt opzoeken.
Belangrijk: Controleer voordat u het apparaat aansluit eerst op het oog
of het intact is en bij het vervoer geen schade heeft opgelopen.
Waarschuwing: Het apparaat moet altijd op een plat en stabiel
oppervlak worden geplaatst. Om te voorkomen dat de thermostatische
schakelaar onopzettelijk wordt gereset moet dit apparaat niet worden
bediend via een extern schakelapparaat zoals een timer, of worden
aangesloten op een circuit dat regelmatig wordt in- en uitgeschakeld
door het elektriciteitsbedrijf.
1. Lees alle instructies voordat u het apparaat gebruikt.
2. Sluit de verwarming alleen aan op een eenfasig stopcontact met een
netspanning zoals aangegeven op het typeplaatje.
3. Verlaat uw huis nooit terwijl het apparaat aan staat: zorg dat de
schakelaar op OFF (0) staat en de thermostaat in de laagste stand
staat. Haal altijd de stekker uit het stopcontact.
4. Houd brandbaar materiaal zoals meubilair, kussens, beddengoed,
papier, kleding, gordijnen etc. op minstens 100 cm afstand van de
verwarming.

Paneelverwarming - Nederlandse handleiding 13
NL
BELANGRIJKE
VEILIGHEIDSMAATREGELEN (2/3)
5. Hang niets op of voor de verwarming.
6. Gebruik de verwarming altijd rechtopstaand.
7. Zet de verwarming niet tegen muren, meubels, gordijnen etc.
8. Gebruik het apparaat nooit in ruimtes van minder dan 4m2.
9. Haal altijd de stekker uit het stopcontact als het apparaat niet wordt gebruikt.
Trek niet aan het snoer om de stekker uit het stopcontact te halen.
10. Houd de lucht in- en uitvoer tenminste 1 meter voor en 50 cm achter de
verwarming vrij van voorwerpen.
11. Installeer de verwarming niet direct onder een stopcontact.
12. Laat dieren of kinderen het apparaat niet aanraken of ermee spelen. Wees u
bewust dat de luchtafvoer heet wordt als het apparaat aan staat.
13. Niet afdekken. Bij afdekken is er gevaar van oververhitting.
14. Gebruik deze verwarming niet in de buurt van douches, badkuipen,
wastafels of een zwembad, etc.
15. Gebruik de verwarming niet in ruimtes met ontvlambare, explosieve
oplosmiddelen, vernis of lijm.
16. Houd de verwarming schoon. Laat geen voorwerpen in de ventilatie- of
uitlaatopeningen komen, want dit kan elektrische schok, brand of schade aan de
verwarming veroorzaken.
17. Als de verwarming is gevallen of beschadigd, moet het niet meer worden
gebruikt tot het is gecontroleerd door een gekwalifi ceerd servicecentrum.
18. Streng toezicht is vereist als het apparaat wordt gebruikt door of in de
nabijheid van kinderen, mensen met een fysieke beperking of huisdieren.
19. Gebruik het apparaat niet om kleren of ander weefsel te drogen.
20. Gebruik de verwarming niet om uw wasgoed te drogen. Blokkeer nooit het
aanzuig- of uitblaasrooster (gevaar van oververhitting).
21. Verplaats het apparaat niet terwijl het aanstaat, om oververhitting en
daardoor kans op brand te vermijden.

Paneelverwarming - Nederlandse handleiding 14
NL
BELANGRIJKE
VEILIGHEIDSMAATREGELEN (3/3)
22. Als een onderdeel van de verwarming of het aansluitsnoer beschadigd
raken, moeten deze worden vervangen door een gekwalifi ceerde elektricien, om
ongelukken te voorkomen.
23. De verwarming moet niet direct onder een stopcontact worden geplaatst.
24. Gebruik deze verwarming niet met een programmer, timer of ander apparaat
dat de verwarming automatisch inschakelt, omdat er kans op brand is als de
verwarming is afgedekt of incorrect is geplaatst.
25. Laat de verwarming niet aan staan als u het huis verlaat of gaat slapen.
26. Op kinderen moet toezicht worden gehouden om te zorgen dat ze niet met
het apparaat spelen.
27. Dit apparaat mag worden gebruikt door kinderen vanaf 8 jaar en personen
met verminderde fysieke, zintuiglijke of mentale vermogens of gebrek aan
ervaring of kennis als ze toezicht krijgen of instructies over veilig gebruik van het
apparaat en de eraan verbonden risico’s begrijpen.
28. Kinderen mogen niet met het apparaat spelen. Reiniging en onderhoud mag
niet door kinderen zonder toezicht worden verricht.
29. Kinderen jonger dan 3 jaar moeten bij het apparaat worden weggehouden
tenzij ze voortdurend onder toezicht staan.
30. Kinderen ouder dan 3 en jonger dan 8 mogen het apparaat alleen in- en
uitschakelen als dit is geïnstalleerd in zijn bedoelde normale werkpositie en ze
toezicht of instructies krijgen over veilig gebruik van het apparaat en de eraan
verbonden gevaren begrijpen.
31. Kinderen ouder dan 3 en jonger dan 8 mogen het apparaat niet aansluiten,
regelen en reinigen of er onderhoud aan plegen.
32. Laat het apparaat niet onbeheerd achter als het op het lichtnet is aangesloten.
Waarschuwing: Sommige onderdelen van de verwarming kunnen zeer heet
worden en brandwonden veroorzaken. Extra aandacht is vereist als kinderen en
kwetsbare mensen aanwezig zijn.
Note: Deze verwarmingspanelen zijn uitsluitend voor huiselijk gebruik bedoeld.
Ze kunnen worden gebruikt als verplaatsbaar apparaat of op de muur worden
gemonteerd.

Paneelverwarming - Nederlandse handleiding 15
NL
ONDERDELEN & INSTALLATIE
Productkenmerken
1. Elegant zwart glaspaneel.
2. Hoge kwaliteit aluminium verwarmingselement: snelle opwarming
met hogere energiebesparing.
3. Bediening via touchscreen en afstandsbediening.
4. Timer van 1 tot 24 uur om de convectorverwarming op de gewenste
tijd in- en uit te schakelen.
5. Digitale display met automatische display van de kamertemperatuur.
6. Voor montage aan de muur of vrijstaand met driepoot.
Installatie (Bij gebruik op de vloer als verplaatsbaar
apparaat)
Bevestig de boeten aan de behuizing van de verwarming en zet ze
vast met de meegeleverde ST12x4mm schroeven (8 st.).
Montage aan de muur (Bij gebruik van de verwarming als
vast geïnstalleerd apparaat)
Zorg dat het product minstens 15 cm van de vloer en 50 cm moet
worden geïnstalleerd.
-Bestudeer het schema voor montage aan de muur
1. Verwijder de steun van de behuizing, zie afb. 1
2. Boor aan beide zijden gaatjes in de muur, steek er dan de plastic
pluggen in; bevestig de steun aan de muur met een schroef, zie afb. 2
3. Breng de verwarming in de juiste positie en zorg dat de gaten op
één lijn liggen met de steun
4. Draai de schroef boven aan de steun vast voor stabiliteit

Paneelverwarming - Nederlandse handleiding 16
NL
BEDIENING
Steek de stekker in een geschikt stopcontact met hetzelfde voltage als
aangeduid op het typeplaatje.
De knoppen op het touchscreen van het product corresponderen met de
knoppen op de afstandsbediening:
1. Display 2. Temperatuur ‘+’ knop
3. Temperatuur ‘-‘knop 4. Powerknop
5. Modusknop 6. Timerknop
7. Ontvanger 8. Kinderklok-knop
Powerfunctie
1. Vóór gebruik van de verwarming moet u de powerschakelaar aan
de zijkant van het verwarmingspaneel inschakelen.
2. Druk op de powerknop om functies in te stellen. De bovenkant
van de display toont de kamertemperatuur. De verwarming werkt
energiezuinig.
Modus
Druk op de modusknop om een lage
of hoge temperatuur in te stellen
Temperatuurkeuze
Druk op de ‘+’ of ‘-‘ knop om de gewenste temperatuur de kiezen uit
een bereik van 5°- 40°C. De temperatuurindicator zal lange tijd op
blijven lichten.

Paneelverwarming - Nederlandse handleiding 17
NL
Timer
Druk op de timerknop om het gewenste bereik tussen 1 en 24 uur in te
stellen.
De resterende tijd zal verschijnen.
Kinderklok
Druk de kinderklokknop 3 seconden in, dit wordt op het scherm
getoond; in deze stand kan het apparaat niet worden bediend; op
dezelfde wijze kunt u de kinderklokfunctie uitschakelen.
VERBINDING MET WIFI
1. Scan met uw telefoon de QR-code hieronder of zoek ‘Tuya Smart’
onder apps op de markt om deze app te downloaden en te installeren.
2. Selecteer uw landcode, vul uw e-mailadres in en tik op ‘Get’; u
ontvangt dan een e-mail met verifi catie van de code.
3. Vul de verifi catie van de code in in het bericht en tik op ‘login’ in de
app.
4. Schakel het product in en zorg dat het product zich in een omgeving
met Wifi bevindt. Het indicatielichtje zal snel gaan knipperen. Als dit
niet gebeurt, druk dan 5 seconden op de modus-knop; het product
geeft een piepgeluid. Ga nu naar de app, tik op ‘voeg apparaat toe’
onderaan, zoals weergegeven in afb. 1.

Paneelverwarming - Nederlandse handleiding 18
NL
A) Druk ‘+’in de rechterbovenhoek, zoals getoond in afb. 2
B) Kies ‘Alle apparaten’ zoals getoond in afb. 3
C) Kies ‘Verwarming’ zoals getoond in afb. 4
D) Druk de ‘bevestig indicator knippert snel’ als het indicatielichtje
knippert, zoals getoond in afb. 5
E) Wachtwoord van Wifi invoeren en dan bevestigen, zoals getoond in
afb. 6
F) Wacht tot de APP verbinding maakt met het apparaat tot de
verbinding is geslaagd, zoals getoond in afb. 7
1 2
3 4
5 6

Paneelverwarming - Nederlandse handleiding 19
NL
Bediening met Wifi
1.U kunt het apparaat met uw mobieltje bedienen in een Wifi - of
4G-LTE-omgeving, zoals getoond op de afbeelding.
2.Selecteer ‘Weektimer’ voor de bediening:
A) Druk op ‘Voeg schema toe’, zoals getoond in afb. 9
B) U kunt voor de weektimer instellen zoals u wilt, let op dat de
ingestelde temperatuur hoger is dan de huidige temperatuur als het
apparaat aan staat, zoals getoond in afb. 10
C) Druk op de ‘Opslaan’ knop in de rechterbovenhoek, om dit op te
slaan tijdens de het wekelijks op ‘stop of start’ instellen van de timer,
zoals getoond in afb. 11.
D) Opnieuw indrukken voor de volgende ‘stop of start’ instelling van de
weektimer.
E) Druk de ‘Terug’ knop in de linkerbovenhoek in om te controleren wat
u heeft ingesteld.
F) Lange tijd ingedrukt houden om de keuze tot annuleren te maken.
Bedieningsgeluid
Het apparaat laat een piep horen bij elke operationele instelling.

Paneelverwarming - Nederlandse handleiding 20
NL
VERWIJDEREN
Gooi het apparaat niet bij het huishoudelijk afval.
Breng het apparaat naar een geregistreerd afvalverwerkingsbedrijf of
naar de plaatselijke milieustraat.
Houd u zich aan de huidige geldige regelgeving. Neem in geval van
twijfel contact op met het dichtstbijzijnde afvalverwerkingsbedrijf.
GARANTIE
Gewaardeerde klant,
Hartelijk dank voor uw aankoop van een MOA-product.
Wij wensen u hierbij mee te delen dat dit product wordt gedekt door
een garantie die voldoet aan alle wettelijke bepalingen inzake de
heersende garantie- en consumentenrechten in het land waar het
product werd gekocht.
Mocht u een defect of storing vaststellen aan uw MOA-product, neemt
u dan a.u.b. contact op met het passende Customer Care Center
(klantenservice), waar u het product heeft gekocht.
Hartelijke groet,
Het MOA Team
Table of contents
Languages:
Other MOA Heater manuals
Popular Heater manuals by other brands

Bionaire
Bionaire BH1520 instruction manual

THERMEx
THERMEx TRIO manual

Heatscope
Heatscope ZERO MHS-ZE1800 Original installation and instruction manual

Ventair
Ventair Steampro STE31HLX Important Installation and Instruction Manual

KALOS
KALOS KLEH161-0600 Assembly instructions

Euromatic
Euromatic NHD-240 instruction manual