MobileODT EVA System User manual

EnhancedVisual
AssessmentSystem
EVA System –Software Guide
Instructions for Use

T ABLE OF CONTENTS
Preparing the phone for use..................................................... 3
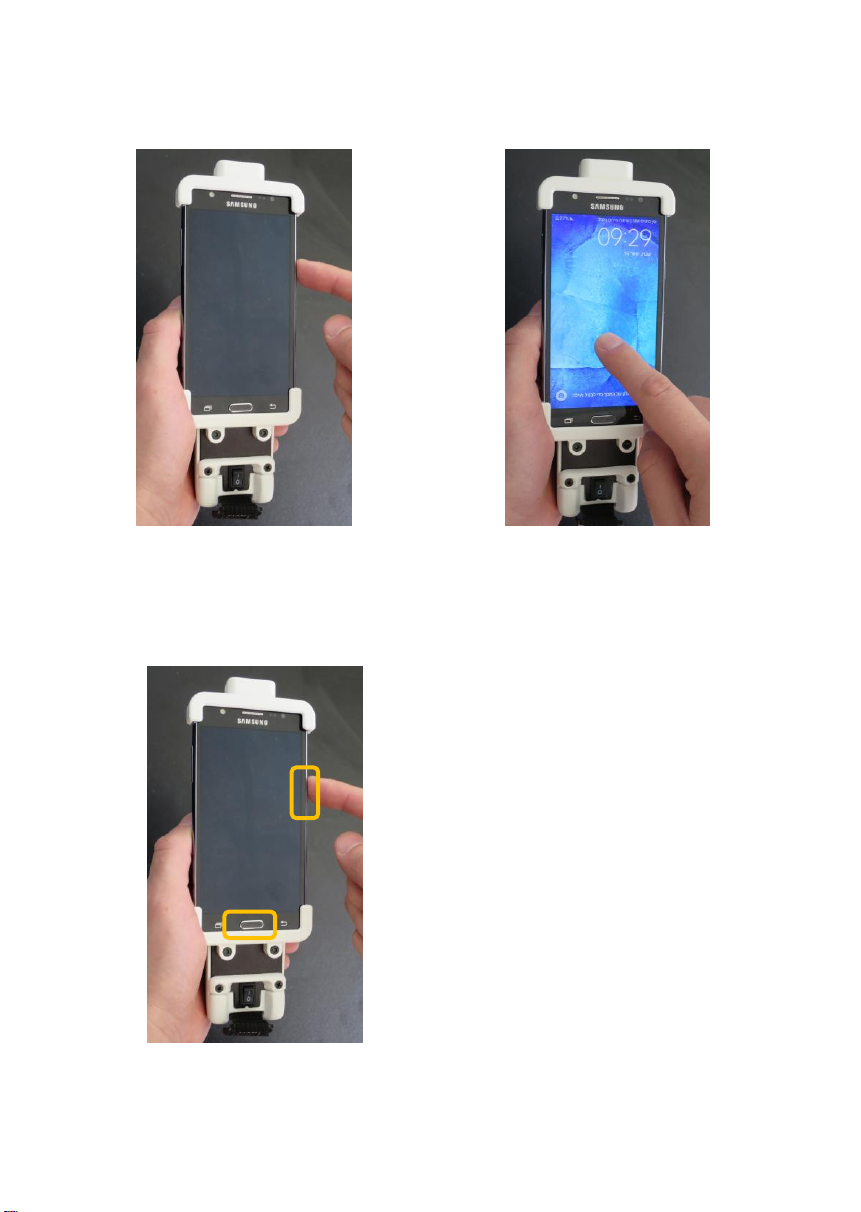
Step #1: Using the phone for the first time....................................3
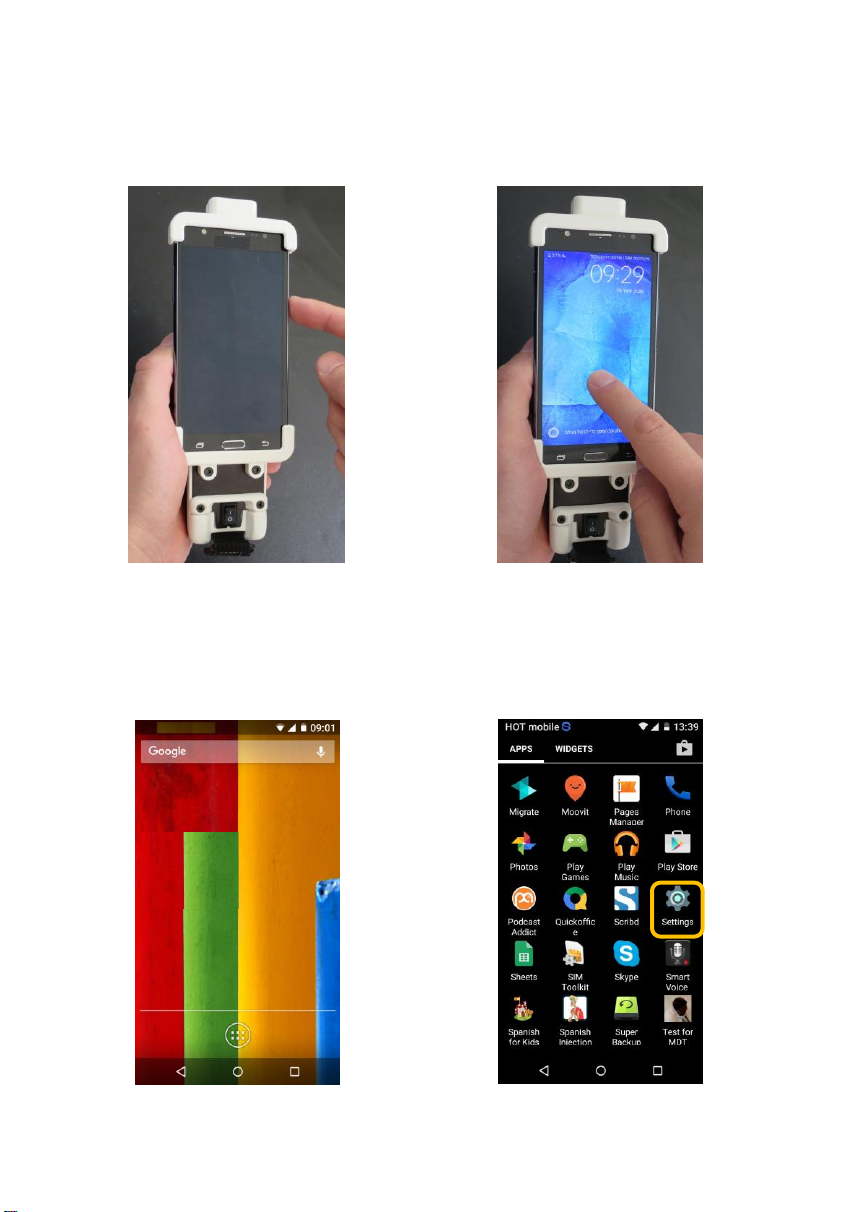
Step #2: Connecting the phone to the internet: ............................4
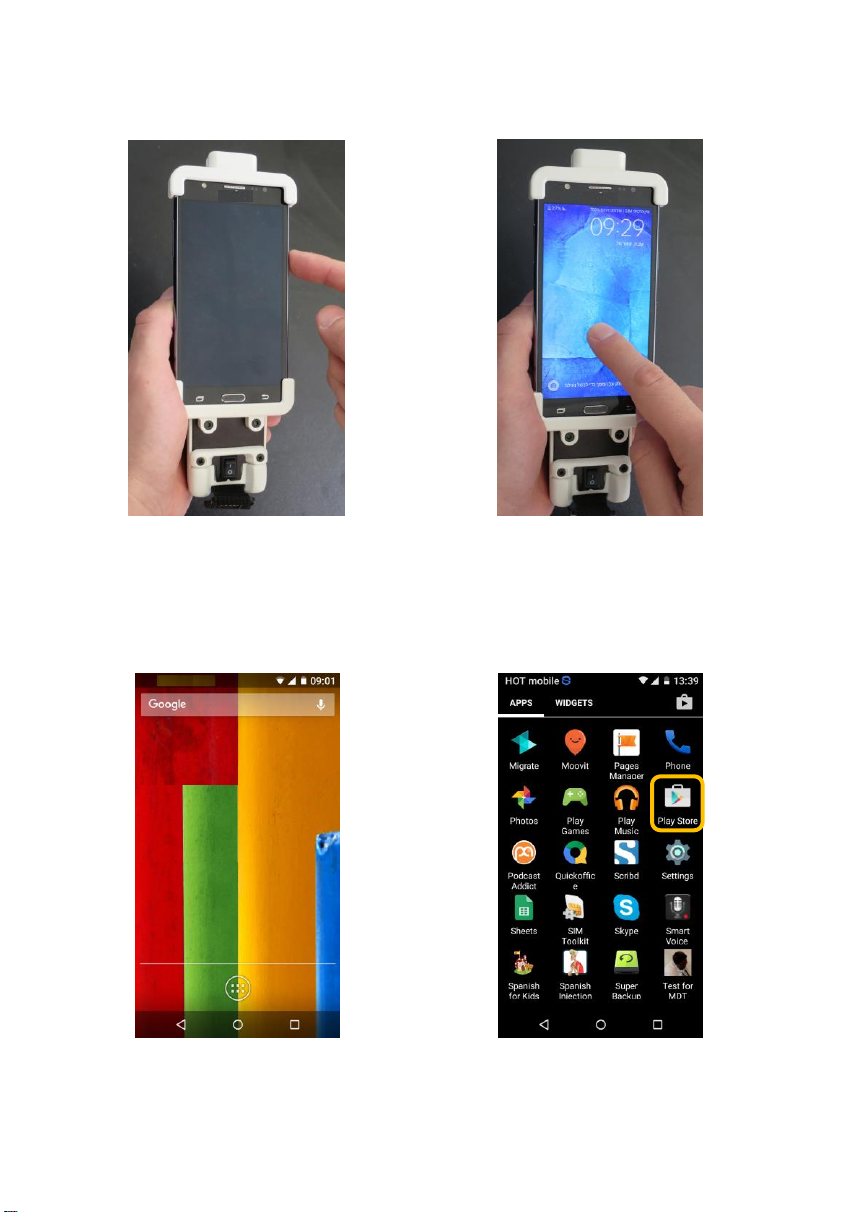
Step #3: Installing the CervDx app on the phone:..........................5
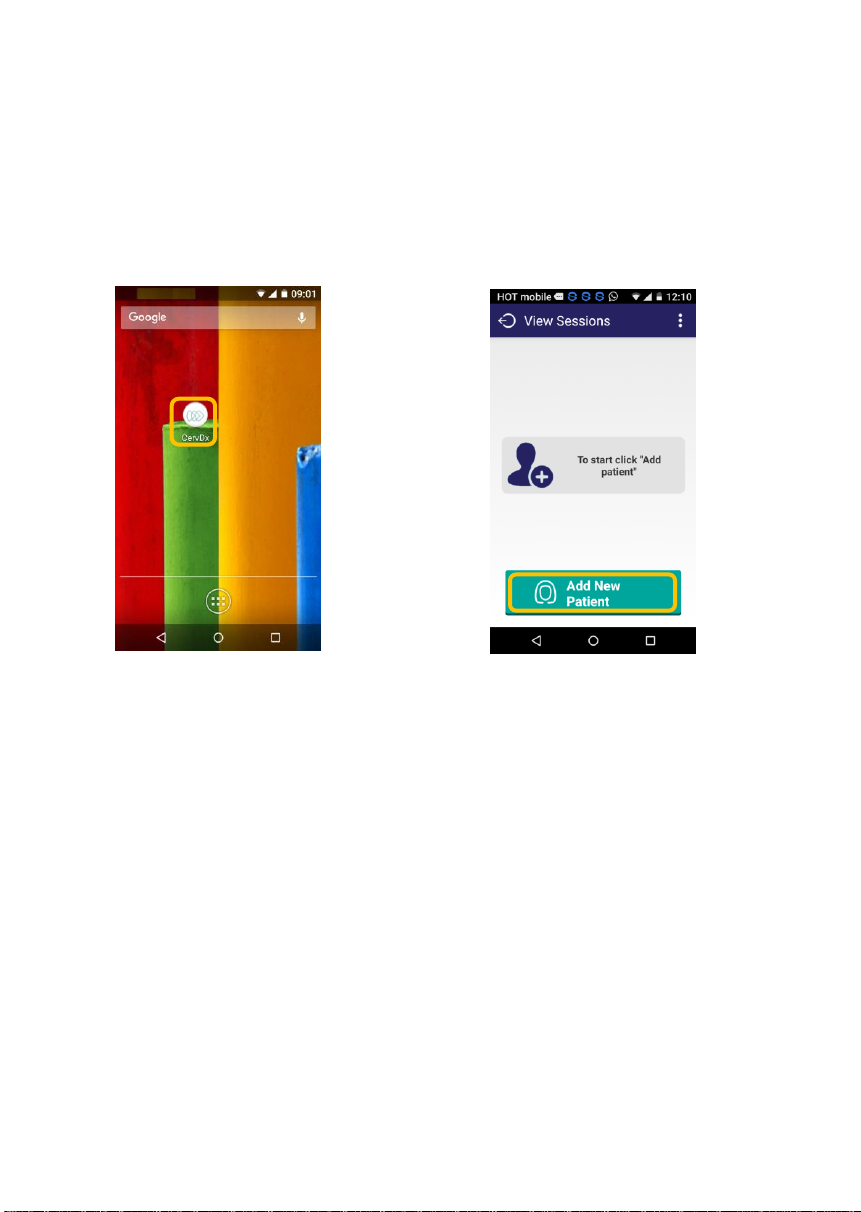
Step #4: Using the CervDX app for the first time ...........................8
Using the application in a session ............................................. 9
Step #1: Entering patient information ...........................................9
Step #2: Editing patient information............................................11
Step #3: Visualizing the cervix and capturing an image ...............12
Capturing an image ..................................................................12
Using the Green Filter ..............................................................13
Using the video feature ............................................................14
Capturing images without touching the phone .......................15
Using the timer while performing visual inspection with acetic
acid (VIA) ..................................................................................16
Step #4: Reviewing patient information........................................17
Step #5: Recording a clinical impression.......................................18
Accessing the settings ............................................................. 19
Troubleshooting...................................................................... 21
Software Troubleshooting .............. .תרדגומ הניא הינמיסה !האיגש
Web PortalTroubleshooting........... .תרדגומ הניא הינמיסה !האיגש

3
Preparing the phone for use
Step #1: Using the phone for the first time
1. Turn on the phone: press firmly
on the power button located on
the top/right corner of the phone.
2. Unlock the phone. Unlock the
phone by lightly sliding your
finger upward on the screen.
3. If the phone screen becomes
black, you can easily turn it back on
by pressing on the power button
again, or pressing on the center
button on the bottom of the phone.

4
Step #2: Connecting the phone to the internet:
The information provided in the next two pages are for those who do not have
SIM cards with data plans inserted into the phone.
1. Turn on the phone: press firmly
on the power button located on
the top right corner of the phone.
2. Unlock the phone. Unlock the
phone by lightly sliding your
finger upward on the screen.
3. On the main screen press the
"Apps" icon.
4. Locate the "Settings" button
and tap on it.

5
5. Locate "wi-fi" and tap on it.
6. Locate your network and
tap on it.
7. Enter your password and
tap "connect".
8. At the top of your phone a
"connected" icon should appear. If
not, please contact your mobile
network provider.

6
Step #3: Installing the CervDx app on the phone:
1. Turn on the phone: press firmly
on the power button located on
the top/right corner of the phone.
2. Unlock the phone. Unlock the
phone by lightly sliding your
finger upward on the screen.
3. On the main screen press the
"Apps" icon.
4. Locate the "Play Store" icon
and tap on it.

7
5. Tap the magnifying glass icon
on the top right.
6. Search for "CervDx" and tap
on the result.
7. Tap "Download" to
download the EVA System
App to your phone.
8. Once installed, the app icon
should appear on the main screen.
If not, it may be found in the app
drawer, accessed from the main
screen as before (page 11, item 3).

8
Step #4: Using the CervDX app for the first time
1. Enter the EVA System App:
CervDx. The app can be accessed by
tapping on it lightly.
2. To use the app you must
enter username (1) and
password (2), both of which
will be sent to you. Tap the
blank space above the lines
to enter the information, and
then press “Login”.
3. Create a 4-6 digit PIN (Personal
Identification Number) to be used
every time you login to the app.
1
2

9
Using the application in a session
Step #1: Entering patient information
Before you can visualize the cervix, you must first enter information about the
patient. Entering accurate patient information is critical for documentation and
follow-up. To enter patient information:
1. Enter the EVA System App:
CervDx. The software can be
accessed by tapping on it
lightly.
2. After logging in, tap the
"Add New Patient" icon to
create a new patient file.

10
3. Enter the patient ID (1), name
(2), age (3), phone number (4)
and number of children (5).
6. Scroll down to complete other
relevant fields. You
can record more
information on the patient by
tapping "Add New Note."
7. Enter your note in free text,
and then tap on the plus sign
next to the text to record it. You
can add more notes by tapping
on "Add New Note" again.
8. Once complete, tap on "Save
Details" (8) to record the
information, or on the Camera
icon (9) to enter the visualization
screen.
1
2
3
4
5
6
7
8
9

11
Step #2: Editing patient information
After you have entered patient information, you can edit it at any stage.
1. Tap on the "Details" tab and
then on the field you would like
to edit.
2. Correct the relevant
information.
3. Once corrected, tap "Save
Details" to save the change.

12
Step #3: Visualizing the cervix and capturing an image
After you enter the patient details, you can visualize the cervix and capture an
image.
Capturing an image
1. Swipe up to zoom in on the
cervix, and swipe down to zoom
out.
2. Capture images by tapping the
image capture button. You may
capture as many images as you like.
3. Once you tap the Image
Capture button there will be a
countdown of several seconds.
4
.The image captured
will be presented. Decide
if you would like to Keep
or Discard the image.

13
Using the Green Filter
For health providers who are using the EVA System for colposcopy, there is a
feature that allows applying a green filter to the image.
1. To use the green filter, enter the
visualization screen and tap on the green
button on the bottom-left of the screen.
2. Capture images with the green
filter is identical to the regular
visualization screen.
3. You can switch back to the
regular view by tapping on the
filter button again.
4
.Depending on your dominant hand, you can
move the button from left to right by swiping
from left to right on the screen. To move the
button back, swipe the screen from right to
left.

14
Using the video feature
If you use video in your examination, start a new session and enter the
visualization screen, by tapping on the camera icon in the Details screen.
1. To use the video feature, tap the video
icon in the bottom right corner (1). The
recording will begin automatically. To stop
recording, tap the center button (2).
2. A timer will appear in the bottom
right corner to let you know that you
are recording. The video will stop
recording after 5 seconds.
3. The video will save automatically.
Tap “images” to review the videos that
you have captured.
1
2

15
Capturing images without touching the phone
If your System is connected to a stand, you can capture images without touching
the phone, simply by waving your hand.
First, turn on the "Hand Gesture Feature" in the application settings:
1. Access the settings by tapping on
the icon in the top right corner of the
"patient list" screen.
2. Mark the box next to "Hand
Gesture Capture."
3. Access the "visualization
screen."
4. Wave your hand in front of
camera found at the top of the
phone.
Now you can use the feature:

16
Using the timer while performing visual inspection with acetic acid (VIA)
1. Apply acetic acid to the
cervix with a swab.
2. After applying acetic acid, tap
the timer at the top to begin.
3. The phone will vibrate once it is
ideal to examine the cervix (default
is 2 minutes).
4. After the viewing time has passed
the phone will vibrate again and the
timer will turn red (default is set to 5
minutes).

17
4. If you captured a video,
your videos will appear in the
gallery with a timestamp. Select
the video you want to watch and
then click the play button in
the middle of the screen.
Step #4: Reviewing patient information
After capturing the images, you can review the patient images and information:
1. Enter the patient gallery by
tapping on the "Images" tab at
the top of the screen.
2. In the images gallery, you can
review specific images and videos
by tapping on each one.
3. After reviewing the image you
can return to the Patient Gallery
(1), the Visualization screen (2), or
delete the image (3).
1
2
3

18
Step #5: Recording a clinical impression
You can use the EVA System to record your clinical impression.
1. To record a diagnosis, tap the
"Decision" tab on the top right
corner.
2. Complete the appropriate
steps in the decision-recording
tool.
3. Tap "Save and Finish" (1) to complete
the diagnosis. You can go back and
change your diagnosis at any stage by
tapping on the list icon (2).
4. After the list of steps opens,
choose the relevant step and re-
enter your diagnosis from that
stage.
1
2

19
Accessing the settings
1. To access settings enter the
patient list screen (the main
screen after login).
2. Settings can be accessed by
tapping the gear icon in the
top right corner.
3. On the settings screen you can:
Turn on/off information transfer through
the cellular network as well as Wi-Fi (1).
This is possible only when there is a SIM
card with data inserted into the phone.
Turn on/off Colposcope Mode, which
inverts images when lens is attached (2).
Turn on the "Hand Gesture Capture"
feature, that allows you to capture
images without touching the screen (3).
Determine the default zoom level (4).
Change the default language (5).
Check "Sync Status" of images with the
online cloud storage (6).
In settings you will also see the version of
the app you are using, the release date of
the app and the Device ID.
2
3
4
1
5
6

20
5. If you need to send
troubleshooting information,
simply tap on the bottom line.
4. Below the app details, you will find
options to seek help from MobileODT
online, read more about MobileODT,
the terms of use and privacy policy,
and the open source licenses on the
app.
6. Then, press "OK."
Other manuals for EVA System
2
Table of contents