modbar espresso system User manual

manual
modbar - espresso system

modbar - espresso system
Operating Manual V3.0 - 05/2022
MAN.20.01.01.02
EN
certications available:
La Marzocco S.r.l.
Via La Torre 14/H
Località La Torre
50038 Scarperia e San Piero
(Firenze) - ITALIA
www.modbar.com | @modbar
T: +39 055 849 191
F: +39 055 849 1990
Original instructions veried by the
manufacturer.
Scan QR Code to view the complete
Software Programming Guide available on
the modbar website International or US &
Canada.
Printed on recycled paper.
Chapters
1. General Warnings and Safety Specications
2. Denition of Available Models
3. Installation
4. Dispensing Operations
5. Maintenance and Periodic Cleaning Operations
6. De-commissioning and Demolition
7. Mandatory Maintenance and Check-up Operations
8. Basic diagnostics
page 3
page 8
page 10
page 14
page 15
page 17
page 18
page 19
9. Software Programming Guide page 20

EN
3
1) Important safeguards
• This machine is for
professional use only, and
should be installed in
locations where its use and
maintenance is restricted to
trained personnel. Children
are forbidden to operate or
play with the machine.
• The equipment must be
installed to comply with the
applicable federal, state, or
local electrical and plumbing
code. The installation
also must comply with the
manufacturer’s instructions,
and must be performed by
qualied and authorized
personnel.
• Ensure that the specications
on the equipment name
plate correspond to the main
electrical supply to which you
will connect the Modbar.
• Safe electrical operation of
this device will be achieved
only when the connection to
the power outlet has been
completed correctly and
1. General Warnings and Safety Specications
WARNING
This machine is for professional
use only and should be installed
in locations where its use and
maintenance is restriced to
trained personnel. Children are
forbidden to operate or play with
the machine.
WARNING
This machine is not suitable for
outdoor use. Jets of water should
not be used to clean the machine,
nor should it be placed where
water jets are used.
WARNING
As already mentioned in
the preceding notes, the
manufacturer shall not be held
responsible for damage to
objects, animals and/or people
whenever the machine has not
been installed according to the
instructions contained in this
manual, and is not used to do
what it was designed for (i.e.
preparing coffee and hot drinks).
WARNING
The Espresso Tap must be placed
in a horizontal position on a
counter higher than 80 cm from
the ground.

EN
4
in observance of all local,
national, and international
electrical codes and safety
regulations, and particularly
by grounding the unit.
Make sure grounding has
been done properly as it
represents a fundamental
safety requirement. Ensure
qualied personnel check
such connection.
• Improper use or installation
of Modbar equipment can
cause product damage and
or serious injury to end user.
Modbar will not be held
responsible for any damages
or injuries occurring if
equipment has been misused,
installed improperly, or
tampered with.
• When you receive your
equipment, thoroughly
inspect the packaging and
equipment for any signs
of damage. If damage is
suspected, please contact
Modbar support before
attempting to install or
operate the equipment.
• Modbar equipment is not
intended for use outdoors
or in an unconditioned
environment where freezing
temperatures may occur.
• Do not leave machine
unattended during brewing
processes.
• Do not use wet cloth to clean
screens or switches on unit(s)
as they are not waterproof.
• Repairs to Modbar
equipment should be made
only by trained technicians
and use only Modbar
approved parts.
• Incorrect installation may
cause injury and/or damages
to people, animals, or objects,
for which the manufacturer
shall not be held responsible.
• We do not recommend
using adapters, multiple
plugs and/or extension cords.
If you cannot avoid using
them, make sure that they are
exclusively of the kind which
conforms to local, national,
and international electrical
codes and safety regulations,
being careful not to exceed
the power and current ratings
indicated on such adapters
and extension cords.
• This device must be used
exclusively for the functions
which it has been designed
and built for. Any other
application is inappropriate

EN
5
and dangerous. The
manufacturer shall not be
responsible for any damages
caused by improper and/or
irrational use.
•Using any electrical
device requires that certain
fundamental rules be
observed.
• Do not touch the device
with wet or humid hands and
feet.
• Do not use the device while
having no shoes on your feet.
• Do not use extension cords
in bath or shower rooms.
• Do not unplug the device
from the power outlet by
pulling on the power supply
cable.
• Do not expose the device
to atmospheric agents (rain,
sun, etc.).
• Do not allow children or
untrained people to use this
device.
• Do not clean the control
panel with a wet cloth since
it is not watertight.
• Before performing any
maintenance and/or cleaning
operations, turn the main
power switch to the OFF
position and disconnect the
machine from the power
source by unplugging the
cord or by switching off the
relative circuit breaker. For
any cleaning operations,
follow exclusively the
instructions contained in the
manual.
• If the equipment is operating
in a faulty manner or breaks
down, turn the main power
switch to the off position,
disconnect the machine
from the power source (as
described in the previous
paragraph), and close the
water supply valve. Do not
attempt to repair it. Contact
a qualied and authorized
professional to perform any
repair. Any repairs must
be performed exclusively
by the manufacturer or by
an authorized technician
using only original parts.
Noncompliance with the
above could compromise
the safe operation of the
equipment.
• Do not obstruct air intake
and exhaust grilles.
• The machine’s power
supply cable must not be
replaced by users. In the
event that the power supply

EN
6
cable is damaged, shut off
the equipment, disconnect
the machine from the power
supply by switching off the
relative circuit breaker, and
close the water supply valve.
To replace the power supply
cord, contact a qualied
professional.
• If the supply cord is
damaged, it must be
replaced by a special cord or
assembly available from the
manufacturer or its service
agent.
• Use, cleaning and
maintenance of this coffee
machine are realized by
people (including children
more than 8 years of age) with
reduced physical, sensory or
mental capabilities, or lack
of experience and knowledge,
as long as they have been
given supervision by a person
responsible for their safety
and if they understand
dangers. Children should
be supervised to ensure
that they do not play with
the appliance. Keep the
appliance and its cord out
of the reach of children less
than 8 years of age.
• The coffee machine must
be placed in a horizontal
position on a counter.
• This machine is not suitable
for outdoor use. Jets of water
should not be used to clean
the machine, nor should it be
placed where water jets are
used.
• The machine must not be
dipped in, nor splashed with
water in order to clean it. For
cleaning operations, please
follow the instructions very
carefully.
• As already mentioned in
the preceding notes, the
manufacturer shall not be
held responsible for damage
to objects, animals and/or
people whenever the machine
has not been installed
according to the instructions
contained in this manual, and
is not used to do what it was
designed for (i.e. preparing
coffee and hot drinks).
• This machine should not be
installed in kitchens.
• Any modication to the
equipment is prohibited;
the manufacturer cannot
be held liable for damage
to property, animals, and/
or persons if the equipment

EN
7
undergoes technical
and aesthetic changes,
changes in performance
and characteristics, and in
general is tampered with in
one or more of its constituent
components.
• The machine should be
placed on a at counter
and must be placed in
settings with the following
temperatures:
Minimum room temperature:
5°C/41°F;
Maximum room temperature:
32°C/89°F.
• The weighted sound
pressure level of the machine
is lower than 70dBA.
CAUTION – Risk of re and
electric shock. Replace only
with manufacturer’s cord set,
part No. E-0118-01
Product Handling and
Transportation
Modbar equipment is
shipped in factory approved
packaging. Upon receipt
of equipment, thoroughly
inspect the packaging
for damage. If damage is
suspected, contact Modbar
immediately.
In the event that equipment
needs to be returned to
Modbar, or shipped for any
reason, it should be shipped
in the factory approved
packaging. If you have
discarded the packaging,
please contact Modbar for
replacements.
The equipment must be
properly drained prior to
shipment, to avoid damage
from freezing. If you have
questions about how to
properly drain equipment
for shipping, please contact
Modbar support.
Do not store the equipment
in places where temperature
may cause water in the boilers
to freeze.
A [mm]
B [mm]
C [mm]
WEIGHTModule [kg]
Dimensions and weights common to all
machines
A
C
B
DEF
421
16
136
406
D [mm]
E [mm]
F [mm]
296
137
137
WEIGHTTap [kg] 11,3

EN
8
2. Denition of Available Models
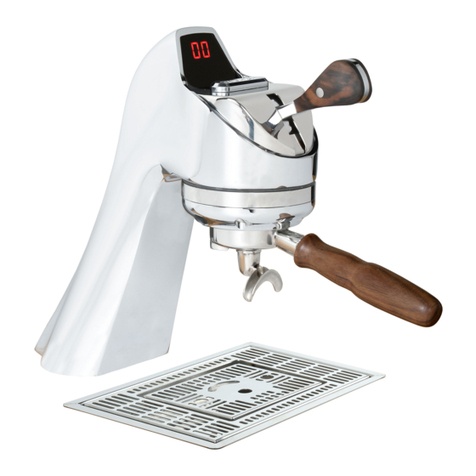
1Espresso Actuator Lever
2Digital Display
3Selector
4USB Port
5Touch Screen Display
6Multi-Function Joystick
Legend
Fig. 1 - Espresso System
1
4
5
6
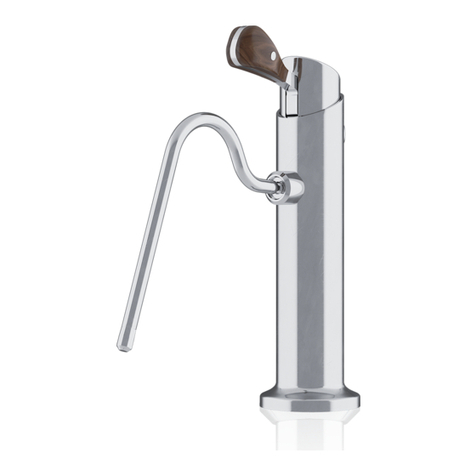
Espresso Tap
Espresso Module
2
For additional information on electronics,
keypads, and software programming,
please see the section entitled Software
Programming your Espresso Machine.
This operating manual refers exclusively to the following models, of our own manufacture:
MODBAR, Espresso System
3

EN
9
9Tap Fluid Connection
10 Water Inlet
11 Drain
12 ModLink Connections
13 Tap Electrical Connection
14 Power Switch
15 Power Inlet
Legend
Fig. 2 - Espresso System
9
For additional information on electronics,
keypads, and software programming,
please see the section entitled Software
Programming your Espresso Machine.
This operating manual refers exclusively to the following models, of our own manufacture:
MODBAR, Espresso System
10 11
12 13 14
15 Espresso Module

EN
10
3. Installation
WARNING
In order to prevent cracks or
leakage: do not store or install
the machine in places where
in boiler or hydraulicsystem to
freeze.
WARNING
For the connection of the
machine, it must be provided a
suitable disconnection device
near the installation, so that
in case of trip, it is possible to
operate the device near the
machine.
WARNING
Installation on the counter:
For cutting the counter refer to
cutting template placed inside
the package.
WARNING
This machine should not be
installed in kitchens.
WARNING
Replace fuses with the same size,
type and rating. e.g. F1 = 2A, 250V
WARNING
The machine is intended to be
permanently connected to xed
wiring, and it is mandatory that
a residual current device (RCD)
with a rated residual operating
current not exceeding 30mA is
installed.
WARNING
At each installation, the machine
should be equipped with a new
set of tubes for plumbing and
related gaskets.
WARNING
Hazardous voltage disconnect
from power supply before
servicing.
WARNING
The manufacturer declines
any responsibility for any
event leading to liability suits
whenever grounding has not
been completed according to
current local, national, and
international regulations and
electrical codes, or other
electrical parts have been
connected improperly.

EN
11
Fig. 2 - Installation guide
200 mm - 8 in.
Clearance rear
75 mm - 3 in.
Clearance right side
150 mm - 6 in.
Clearance above
75 mm - 3 in.
Clearance left side
350 mm - 14 in.
Minimum clearance
between Taps
69 mm - 2,7 in.
Clearance between portalter with
2 cup spout and counter
116 mm - 4,6 in.
Clearance between naked portalter
and counter
Recommended Clearances

EN
12
Note:
• The drinking water mains valve and
the circuit breakers for the electrical
system need to be located in the most
convenient position for the operator to
access them easily and quickly.
1) Power Switch Function
The two-position power switch on the
Modbar module back panel has two
separate functions: ON and OFF.
0 - Off: In this position, the
module is in the off position.
I - Standby Mode: In this position, the module
is in standby mode. When in standby
mode, all operations function as normal,
but no power is applied to the heating
elements. This mode is used for priming
the system upon installation, and can also
be useful for some diagnostic applications.
II - Operating Mode: In this position, the
module is in operating mode. Power is
applied to the heating elements, and all
functions operate as normal.
2) Installation guide
In order to connect the machine up to
the water mains proceed according to the
indications given in the Installation Guide
and in compliance with any local/national
safety standards of the location in which
the machine is being installed.
In order to prevent cracks or leakage: do
not store or install the coffee machine in
places where temperature may cause water
in boiler or hydraulics system to freeze.
Upon installation, the Modbar module
must be primed before use. This is
accomplished by the following steps.
• Ensure that ltered water is supplied to
the module.
• Ensure that the power switch is in the
off position.
• Ensure that the module power cable
is plugged into its appropriate power
source.
• Turn the power switch counter-clockwise
to place it in standby mode.
• Actuate the tap handle in manual
mode, as described in the “Dispensing
Operations” section of this guide.
• After water begins to pour from the tap
(This may take some time on a new
WARNING
- U.S.A. and CANDA only - Do not
connect to a circuit operating
at more than 150V to ground on
each leg.
WARNING
This machine is not suitable for
outdoor use. Jets of water should
not be used to clean the machine,
nor should it be placed where
water jets are used.
WARNING
This appliance is not intended
for use by persons (including
children) with reduced physical,
sensory or mental capabilities,
or with lack of experience and
knowledge, unless they have
been given supervision or
instruction concerning the use
of the appliance by a person
responsible for their safety.

EN
13
system) allow water to ow for at least
30 seconds to ensure that the system is
primed.
• At this point, it is safe to turn the switch
clockwise into operating mode.
3) General Use
During general use, the module is already
primed, and it is not necessary to prime
the system. To start the module, follow
these steps:
• Ensure that ltered water is supplied to
the module.
• From the off position, turn the power
switch clockwise to place it into
operating mode.
• At this point, the elements will begin
to heat. When each heat zone reaches
set temperature, the module is ready for
use.
4) Water Quality
Water quality is very important to
the proper function of your Modbar
equipment. Improper water ltration can
lead to serious problems with both your
equipment and the quality of the coffee
produced. At a minimum, the following
water standards need to be met.
Water specications table
Total Dissolved Solids (All Equipment) 90-150 ppm
Total Hardness (Steam Only) Less than 3 gpg
Total Hardness (Espresso and Pour-Over) Less than 5 gpg
pH (All Equipment) 6.5-7.5
N.B.: For more detailed information about water quality, please visit www.modbar.com/
support.

EN
14
4. Dispensing Operations
The Modbar espresso tap is able to command
mulple funcons using a single handle.
We do this by combining the movement of
three handle posions, as illustrated in the
above diagram. Following are instrucons for
operang each of the tap funcons.
1) Automatic Operations
Automatic mode dispenses using the
currently selected prole to control
pressure proling. To activate the machine
in automatic mode, simply pull the handle
from Position 1 to Position 3, and the tap
screen will display Auto and start counting
down time based of the total time of
currently selected prole.
2) Manual Operations
Manual mode dispenses using only the
MaxP (Maximum Pressure) and MEp
(Manual End Pressure) values from the
currently selected prole. To operate
in manual mode, pull the handle from
Position 1 to Position 2. While the handle
is at Position 2, the tap will dispense
at line pressure (“pre-infusion”). After
remaining in Position 2 for a minimum of
two seconds, the tap screen will display
Manual and continue counting time
up from zero. To turn on the pump and
dispense at MaxP place the handle in
Position 3. After dispensing at MaxP, place
the handle back to Position 2 to dispense
at the programmed MEp and/or return the
handle to Position 1 to cease dispensing.
3) Rinsing
To activate the pre-programmed rinse
cycle, quickly move the handle from
Position 1 to Position 2, and back to
Position 1. This quick toggle activates the
rinse cycle as programmed in the prole
screen. The parameters for duration and
pump duty cycle can both be adjusted to
your personal preference
4) Cleaning cycle
The Modbar also has integrated cleaning/
back ushing cycle functionality built in.
To use the cleaning cycle:
• Activate the cleaning cycle by toggling the
handle 3-times in short succession. The
toggle motion is the same as used in the
rinsing cycle.
• The tap screen will display “Clean” and
start counting down from 99. During this
time it will automatically cycle the pump
on and off per a typical cleaning cycle.
• When nished, rinse the group well with a
regular lter by actuating the rinse cycle
several times.
WARNING
The machine must not be dipped
in, nor splashed with, water in
order to clean it. For cleaning
operations, please follow the
instructions listed below very
carefully.
WARNING
This machine is designed only for
hot drinks.

EN
15
General service/maintenance safety guidelines
• Before performing any maintenance and/
or cleaning operations, turn the main
power switch to the OFF position and
disconnect the machine from the power
source by unplugging the cord or by
switching off the relative circuit breaker.
For any cleaning operations, follow
exclusively the instructions contained in
the manual.
• Always use care when performing
maintenance, as the equipment may
5. Maintenance and Periodic Cleaning Operations
WARNING
Jets of water should not be used
to clean the machine, nor should
it be placed where water jets
are used.
WARNING
This machine is for professional
use only and should be installed
in locations where its use and
maintenance is restriced to
trained personnel.
WARNING
The machine is intended to be
permanently connected to xed
wiring, and it is advisable that
a residual current device (RCD)
with a rated residual operating
current not exceeding 30mA is
installed.
WARNING
The machine must be installed
so that qualied technical
presonnel can easily access it
for eventual maintenance.
WARNING
The machine must not be dipped
in, nor splashed with, water in
order to clean it. For cleaning
operations, please follow the
instructions listed below very
carefully.
WARNING
The Boiler contains water at
elevated temperature. Water
temperature over 125°F / 52°C
can cause severe burns instantly
or death from scalding.
WARNING
In order to prevent cracks or
leakage: do not store or install
the coffee machine in places
where temperature may cause
water in boiler or hydraulic
system to freeze.
WARNING
If the above-mentioned
instructions are not adhered
to the manufacturer cannot be
held responsible for damage to
persons or things.

EN
16
be hot. We recommend allowing the
equipment to fully cool before performing
any maintenance procedures.
1) Regular cleaning procedures
Regular cleaning procedures are important
to both the longevity of the equipment
and to the quality of the beverages which
it produces. Following these procedures
will help ensure long life and great tasting
beverages.
2) Back ushing
Back ushing must be performed on a
regular basis to ensure the proper function
and cleanliness of the espresso system.
We recommend following this procedure
on a nightly basis.
• Put one scoop of detergent Puro Caff into
a blind lter, and insert it into the group to
be cleaned. (Use the amount of detergent
recommended on the package)
• Activate the cleaning cycle by toggling
the handle 3-times in short succession.
The toggle motion is the same as used in
the rinsing cycle.
• The tap screen will display “Clean” and
start counting down from 99. During this
time it will automatically cycle the pump
on and off per a typical cleaning cycle.
• When nished, run a steady stream of
water through the brewhead.
• Re-insert the the blind lter and run
the automatic cleaning cycle once more,
this time removing the lter during the
pauses, dumpling water from the lter and
re-inserting the lter before the cycle re-
engages the ow of water. (If water begins
to ow before you have a chance to insert
the lter, wait until the cycle pauses again
to avoid the risk of being splashed and
burned by hot water)
• Discard the rst shot of espresso before
resuming normal service to “season” the
brew head.
3) Cleaning Filters
• Put 2 or 3 teaspoons of detergent powder
Puro Caff for coffee machines in about
1/2 a liter of water inside a heat-resistant
container and boil.
• Dip spray head(s) in the boiled solution
and leave them fully submerged for about
30 minutes.
• Rinse thoroughly with clean water and
run hot water through the dispenser
several times with the tips in place.
• Make one cup of coffee and discard in
order to remove any unpleasant avor.
• Rinse the group using a normal lter, by
running hot water through it several times.
4) Cleaning the diffuser screen
Over time, coffee grounds may slowly
build up on and obstruct the diffuser
screen. To clean it, you must rst remove
it by unscrewing the diffuser screw with a
at screwdriver.
• Put 2 or 3 teaspoons of detergent powder
Puro Caff for coffee machines in about
1/2 a liter of water inside a heat-resistant
container and boil.
• Place diffuser screen(s) and diffuser
screw(s) in the solution and leave them
fully submerged for about 30 minutes.
• Install and run hot water through each
group several times with the screen
installed.
5) Cleaning the exterior of the equipment
The exterior of the taps and modules
should be periodically cleaned. We
recommend wiping the equipment with
a damp microber cloth. Do not use
cleaning solutions containing strong acids
or caustic solutions. Take care not to use
excessive liquid when cleaning around
electronics, so as not to damage them.
6) Water Filtration/Softener
It is very important that the media for
your water ltration is replaced on a
regular basis, in accordance with the
manufacturer’s recommendations. Please
refer to the documentation for your
ltration system for proper operating and
cleaning instructions.

EN
17
6. De-commissioning and Demolition
1) De-commissioning and demolition
Start by setting the main switch to the “0”
or OFF position.
Disconnecting from the power outlet
Disconnect the machine from the electrical
network by switching off the associated
circuit breaker or circuit protection device.
Remove the power supply cord from the
power connection. Remove the Pump Motor
Power Cord from the water pump motor.
Disconnecting from the water system
Shut off the water supply by closing the
specic tap located upstream of the water
lter/softener inlet. Disconnect the water
pipe at the water lter/softener inlet.
Remove the hose connecting the espresso
machine to the water pump. Remove
the reinforced plastic tubing on the drain
connection.
At this point, the machine may be removed
from the bar, being very careful not to drop
it or squash your ngers.
The machine is made out of various
materials and therefore, if you do not
intend to put it back in service, it must
be taken to a special disposal company
which will select the materials which can
be recycled and discard the others.
Current regulations make it illegal to
discard such machine by leaving it on
public grounds or on any private property.
Recycling notice: Warning for the protection of the
environment:
Used Electrical and electronic waste con-
tains hazardous but also valuable and scarce
materials which should be recovered and
recycled properly. We kindly ask that you
contribute to the protection of the environ-
ment and natural resources by delivering
used equipment to the relevant recycling
locations if such locations are available in
your country.

EN
18
7. Mandatory Maintenance and Check-up Operations
▪ Replace group gaskets
▪ Replace diffuser screens
▪ Check brew temperature
▪ Check brew pressure
▪ Check water quality
▪ Inspect water dispensing
solenoid valve
▪ Inspect plumbing for leaks or
clogs
▪ Check all switches for proper
operation
▪ Check filter baskets
It is important that periodic maintenance be performed to keep your equipment in peak operating condition. Maintenance should be
carried out by a qualied technician. Depending on usage, schedules may vary, but we recommend the following:
▪ Check the interior of the boilers, and if necessary rinse out with a proper cleaning product allowed for food and beverage appliances
EVERY THREE/FOUR MONTHS
EVERY YEAR (in addition to the above)
EVERY 3 YEARS (in addition to the above)
▪ Replace filter baskets
▪ Inspect electrical wiring
▪ Inspect boiler safety switches
▪ Remove and clean/inspect boiler
temperature probes

EN
19
8. Basic diagnostics
• Module not heating:
Verify that the power switch is turned
clockwise to the operating mode position
and not counter-clockwise to the standby
mode position. Also, ensure that the
tap is plugged in. If the module loses
communication with the tap, all heating is
terminated.
• Note on safety reset switches:
The espresso module features two safety
reset thermostat controlled switches, one
on each boiler. The espresso tap also
features one safety reset switch on the
brew head. If a boiler (or brew head) does
not heat it may be due to the activation of
one of these switches, which is triggered by
excess temperature and signies abnormal
operation and possibly failed components.
The safety switches mentioned are all
internal to the espresso module and
espresso tap and are not user re-settable.
If you believe a safety switch has been
activated, the module or tap may require
service by an authorized technician. Please
contact Modbar for additional support and
information.
• Tap not dispensing:
Verify that the water supply to the module
is turned on. Also, verify that there are no
kinks in the uid line between the tap and
the module. Verify that the tap display is
functioning as normal. If it is not, please
check that the tap electrical connection is
plugged in. If you are still having trouble,
please contact Modbar Support.
• Pump is overshooting pressure:
Verify that your prole has a minimum of
2 seconds programmed for T1. Less time
can cause the pump to overshoot, as it is
climbing to pressure to quickly.
Also, ensure that your ltration supply is
adequate for all of the equipment installed
on it. In some cases, running a sink or
other equipment connected to the same
ltration line as the Modbar will cause
pressure spikes during the extraction
process. This is due to a sudden amount
of water being drawn by a different device.
This causes the pump to compensate for
the reduced ow rate, and the pressure to
spike once the device stops drawing water.
• Module not dispensing water:
Verify that water is turned on to the
module.
Verify that water pressure is adequate.
The operable pressure range for Modbar
equipment is 0.25-0.50MPa. If water
pressure is too low, the module will not
dispensing water.

EN
20
9. Software Programming Guide
1) Interface:
The touch screen is used for selecting
and displaying data. The multi-function
encoder is used for editing data. The
functions of the encoder are shown below:
2) Home screen:
Process value: This is the current value in
degrees of the active heat zone (selected
by the heat zone button).
Set temperature: This is the current set-point
value in degrees for the active heat zone. To
change the set temperature, simply touch
the red value on the screen and the value
will be highlighted. Rotate the encoder left
or right to change the value in 1-degree
increments. Press the joystick up or down
to change the temperature in 1/10 degree
increments. Press the center button on
the joystick to save the change. (These
temperatures are saved to the currently
selected prole)
Ready indicator: This square icon indicates
whether the machine is at temperature to
dispense. When rst starting the machine,
the indicator will remain red in color
until all temperature zones are heated
to set temperature. Once all zones are
at temperature, the icon will turn green,
indicating that we are now ready to
dispense.
Heat zone: In automatic temperature mode,
this button has no function. In manual
temperature mode, pressing this button
cycles through the 3 heat zones on the
espresso system: Inlet Boiler, Outlet Boiler
and Brew Head. (Refer to “Advanced
preferences screen”).
Settings button: This button navigates to the
main settings screen.
Machine status: Displays the current status of
the module & tap.
Machine name: Displays the machine name
(user editable in advanced preferences).
Active pressure prole: Displays which pressure
prole is currently selected.
Volume read-out: Displays real-time fluid
volume information during any given
dispensing cycle (Manual, Auto and Rinse).
Pressure read-out: Displays current pressure
in the module.
Tip: When the module is in setup mode (no
heaters, main switch in the left position),
the pressure read-out will accurately
indicate your water supply pressure.
*boilers must be below 70°C or 150°F.
2) Main settings screen:
Home screen: This button navigates back to
the home screen / dashboard.
Prole menu: This button navigates to the
prole selection menu.
Preferences: This button navigates to the
system preferences page.
Other manuals for espresso system
1
Table of contents
Languages:
Other modbar Coffee Maker manuals
Popular Coffee Maker manuals by other brands

Hamilton Beach
Hamilton Beach 44559 - Classic Chrome 12 Cup Coffeemaker product manual

Cuisinart
Cuisinart DGB-900BCC Series Instruction booklet

Synesso
Synesso Cyncra 2016 owner's manual

Slayer
Slayer Single Group user manual

WMF
WMF 2000 S Cleaning instructions

Miele
Miele CVA6405 Operating and installation instructions