manuals.online logo
Brands
  1. Home
  2. •
  3. Brands
  4. •
  5. Model Rockets
  6. •
  7. Toy
  8. •
  9. Model Rockets CEE-YAH User manual

Model Rockets CEE-YAH User manual

Assembly
Instructions
Parts Included:
1 Nose Cone
1 Body Tube
3 Laser Cut Balsa Fins
1 Thrust Ring
1 Motor Spacer Tube (yellow
1 Launch Lug
1 Kevlar Shock Cord (yellow
1 Elastic Shock Cord (white
1 Plastic Streamer (color varies
2 Tape Discs
1 Decal Sheet
Materials Not Included:
Yellow Wood or White Glue
Sanding Sealer
Paint Brush
Sandpaper (#240 grit
Gloss Spray Enamel
Primer Spray Enamel
Masking Tape
Motor Mount and
Shock Cord Assembly
Step 1 –
Tie the yellow kevlar to the pre-
grooved thrust ring with a double knot. Make
sure the kevlar is tight in the groove and pull
the knot to the end of the thrust ring.
Step 2 –
Thread the end of the yellow
kevlar shock cord through the pre-marked fin
end of the body tube. Using a Q-tip or the tip
of your small finger, spread glue around the
inside of the body tube about 2” from the end
of the side that the shock cord was inserted
from.
Step 3 –
Using the yellow motor spacer
tube with the marked end outside, push the
thrust ring and yellow kevlar thread into the
tube until the motor spacer tube sticks out at
the ¼” mark from the end of the body tube.
Remove the motor spacer tube immediately
and set the body tube aside to dry for a few
minutes.
2
Preparing and
Attaching the Fins
Step 1 –
Press out the balsa fins from the
laser cut sheet. Stack together and sand
lightly on a piece of sandpaper laid flat on a
table surface to square the root edges where
the fins will attach to the body tube.
Step 2 –
Sand the leading edge and the tip
of each fin round. Leave the root of the fin
where it inserts and attaches to the body tube
un-sanded and square.
Step 3 –
Apply glue to the root edge on
each fin and place on the pre-marked
locations on the body tube. Immediately
remove each fin and set aside a couple of
minutes to tack up the glue. Do this for each
fin.
Step 4 –
After the glue has tacked, apply
another thin bead of glue to the root of the
each fin, then re-attach and hold the fin in
place on the pre-marked fin locations on the
body tube. Do the same for all fins with a few
minutes drying time between fins. Use the fin
alignment guide on this page to make sure
the fins are aligned while drying.
Step 5 -
Apply a thin bead of glue along the
length of the launch lug and attach to the pre-
marked launch lug location of the body tube.
3
Preparing and Attaching the Fins
Cont…
Step 6 -
Keep the fins and the launch lug
aligned on the lines while drying. Use the fin
marking guide on the previous page to make
sure the fins are aligned 120 degrees apart.
Step 7 –
After the fins and launch lug have
dried, apply a thin layer of glue between the
body tube and the fins, and the body tube and
launch lug with your finger to create a fillet
that will strengthen the fins and launch lugs.
Set aside to dry. Check the fin alignment to
make sure they are 120 degrees apart while
drying. Us the fin marking guide to check
alignment.
Attaching the Streamer
and Nose Cone
Step 1 –
If it is not already, feed the yellow
kevlar shock cord through the bottom of the
body tube and pull out through the top.
Step 2 –
Tie both the white elastic shock
cord and the yellow kevlar shock cord
together with a single looping knot and pull
both shock cords apart to tighten the knot.
Step 3 –
Remove the
2 tape discs from the
backing sheet and press firmly onto the
streamer on both sides over the hole that is
already punched in the end of the streamer.
Step 4 –
Pass the white elastic shock cord
through the hole and tape discs on the
streamer and then tie the nose cone to the
end of the white elastic shock cord with a
double knot.
4
Finishing Your Rocket
(optional)
Step 1 –
Using 240 grit sandpaper, sand
the fins of the rocket lightly to remove loose
grain and sand the nose cone so that the
paint will stick.
Step 2 –
Apply sanding sealer to the fins
and let dry. Sand the fins with 240 grit
sandpaper between coats of sanding sealer.
Re-do this process until the fins are smooth
and the balsa grain is filled.
Step 3 –
Roll up a sheet of paper and insert
into the bottom of the rocket body tube to
hold your rocket, apply a thin coat of flat
white or gray primer spray enamel to the
whole rocket using even back and forth
movements. Let the primer dry and sand
using 240 grit sandpaper. Re-coat and sand
as necessary.
Step 4 –
Apply a first thin color coat of
gloss yellow spray enamel to the whole rocket
using even back and forth movements. Let
the first coat tack up for a few minutes. Then
follow up with a heavier coat. Do not coat too
heavily or the paint will sag. The best results
are obtained when the color coat is just thick
enough to gloss. If additional coats are
needed to cover the primer with full color, re-
apply after the color coat has tacked up within
the first hour or wait 24 hours until the color
coat is completely dry.
Step 5 –
Remove the pressure sensitive
decals from the backing paper and apply to
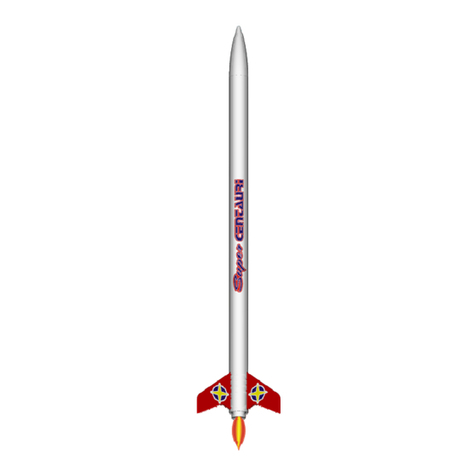
the fins and body tube. Use the picture on the
cover of this manual for a guide to decal
placement.
Flying Your Rocket
Flight checklist
□
Model Rocket
□
Launch Pad & Controller w/Batteries
□
Recovery Wadding
□
Model Rocket Motors and Igniters
Recommended Motors for the CEE-YAH rocket
are 1/2A6-2, A8-3. A6-4. B4-4, B6-4, C6-5 &
C6-7
Step 1 –
Insert 2 crumpled recovery
wadding sheets into the body tube and the
folded shock cord after the recovery wadding.
Step 2 –
Fold the streamer 3 times and roll
up small enough to fit into the rocket body
tube and insert into the rocket body tube,
then insert the nose cone to complete the
recovery assembly.
Step 3 –
Install model rocket motor igniter
according manufacturers recommended
procedure.
Step 4 –
Insert the rocket motor with the
nozzle/igniter end facing the rear of the
rocket. If the rocket motor is loose, add
masking tape to the outside of the rocket
motor until the motor inserts with enough
friction to retain the motor during flight. It
should not eject during recovery ejection.
IMPORTANT:
FOLLOW THE N.A.R.
SAFETY CODE REGARDING
LAUNCHING AND THE USE OF MODEL
ROCKET MOTORS
Other Model Rockets Toy manuals

Model Rockets 2.6 Rim-24 Tartar Expert Series User manual

Model Rockets

Model Rockets 2.6 Rim-24 Tartar Expert Series User manual

Model Rockets Turbo User manual

Model Rockets

Model Rockets Turbo User manual

Model Rockets SuperTooboh User manual

Model Rockets

Model Rockets SuperTooboh User manual

Model Rockets BOOSTAR-C User manual

Model Rockets

Model Rockets BOOSTAR-C User manual

Model Rockets Super CENTAURI User manual

Model Rockets

Model Rockets Super CENTAURI User manual

Model Rockets SWORD User manual

Model Rockets

Model Rockets SWORD User manual

Model Rockets Ruick Fly User manual

Model Rockets

Model Rockets Ruick Fly User manual

Popular Toy manuals by other brands

Mega Bloks Model Max Pro Rhino quick start guide

Mega Bloks

Mega Bloks Model Max Pro Rhino quick start guide

Traxxas Summit 5607 quick start guide

Traxxas

Traxxas Summit 5607 quick start guide

Carrera PROFI RC Speedray manual

Carrera

Carrera PROFI RC Speedray manual

Roban MD500D instruction manual

Roban

Roban MD500D instruction manual

REVELL 04655 manual

REVELL

REVELL 04655 manual

LEGO Architecture quick guide

LEGO

LEGO Architecture quick guide

JAKKS Pacific World of Nintendo Mariokart 7 manual

JAKKS Pacific

JAKKS Pacific World of Nintendo Mariokart 7 manual

PalPlay The House of Fun M780 Assembly instructions

PalPlay

PalPlay The House of Fun M780 Assembly instructions

Mega Construx POKEMON WONDER BUILDERS EEVEE GKY74 manual

Mega Construx

Mega Construx POKEMON WONDER BUILDERS EEVEE GKY74 manual

Schweizer 1-26 manual

Schweizer

Schweizer 1-26 manual

Trix BR 260 manual

Trix

Trix BR 260 manual

marklin 7548 instruction manual

marklin

marklin 7548 instruction manual

Faller 140119 manual

Faller

Faller 140119 manual

Thames & Kosmos Candy Claw Machine Experiment manual

Thames & Kosmos

Thames & Kosmos Candy Claw Machine Experiment manual

Eduard MiG-21bis Assembly instructions

Eduard

Eduard MiG-21bis Assembly instructions

Mega Bloks HALO 97139 manual

Mega Bloks

Mega Bloks HALO 97139 manual

AeroWorks 75cc YAK-54 ARF-QB Assembly manual

AeroWorks

AeroWorks 75cc YAK-54 ARF-QB Assembly manual

THE WORLD MODELS F4U CORSAIR EP instruction manual

THE WORLD MODELS

THE WORLD MODELS F4U CORSAIR EP instruction manual

manuals.online logo
manuals.online logoBrands
  • About & Mission
  • Contact us
  • Privacy Policy
  • Terms and Conditions

Copyright 2025 Manuals.Online. All Rights Reserved.