Increasing/decreasingpantographspring
tension
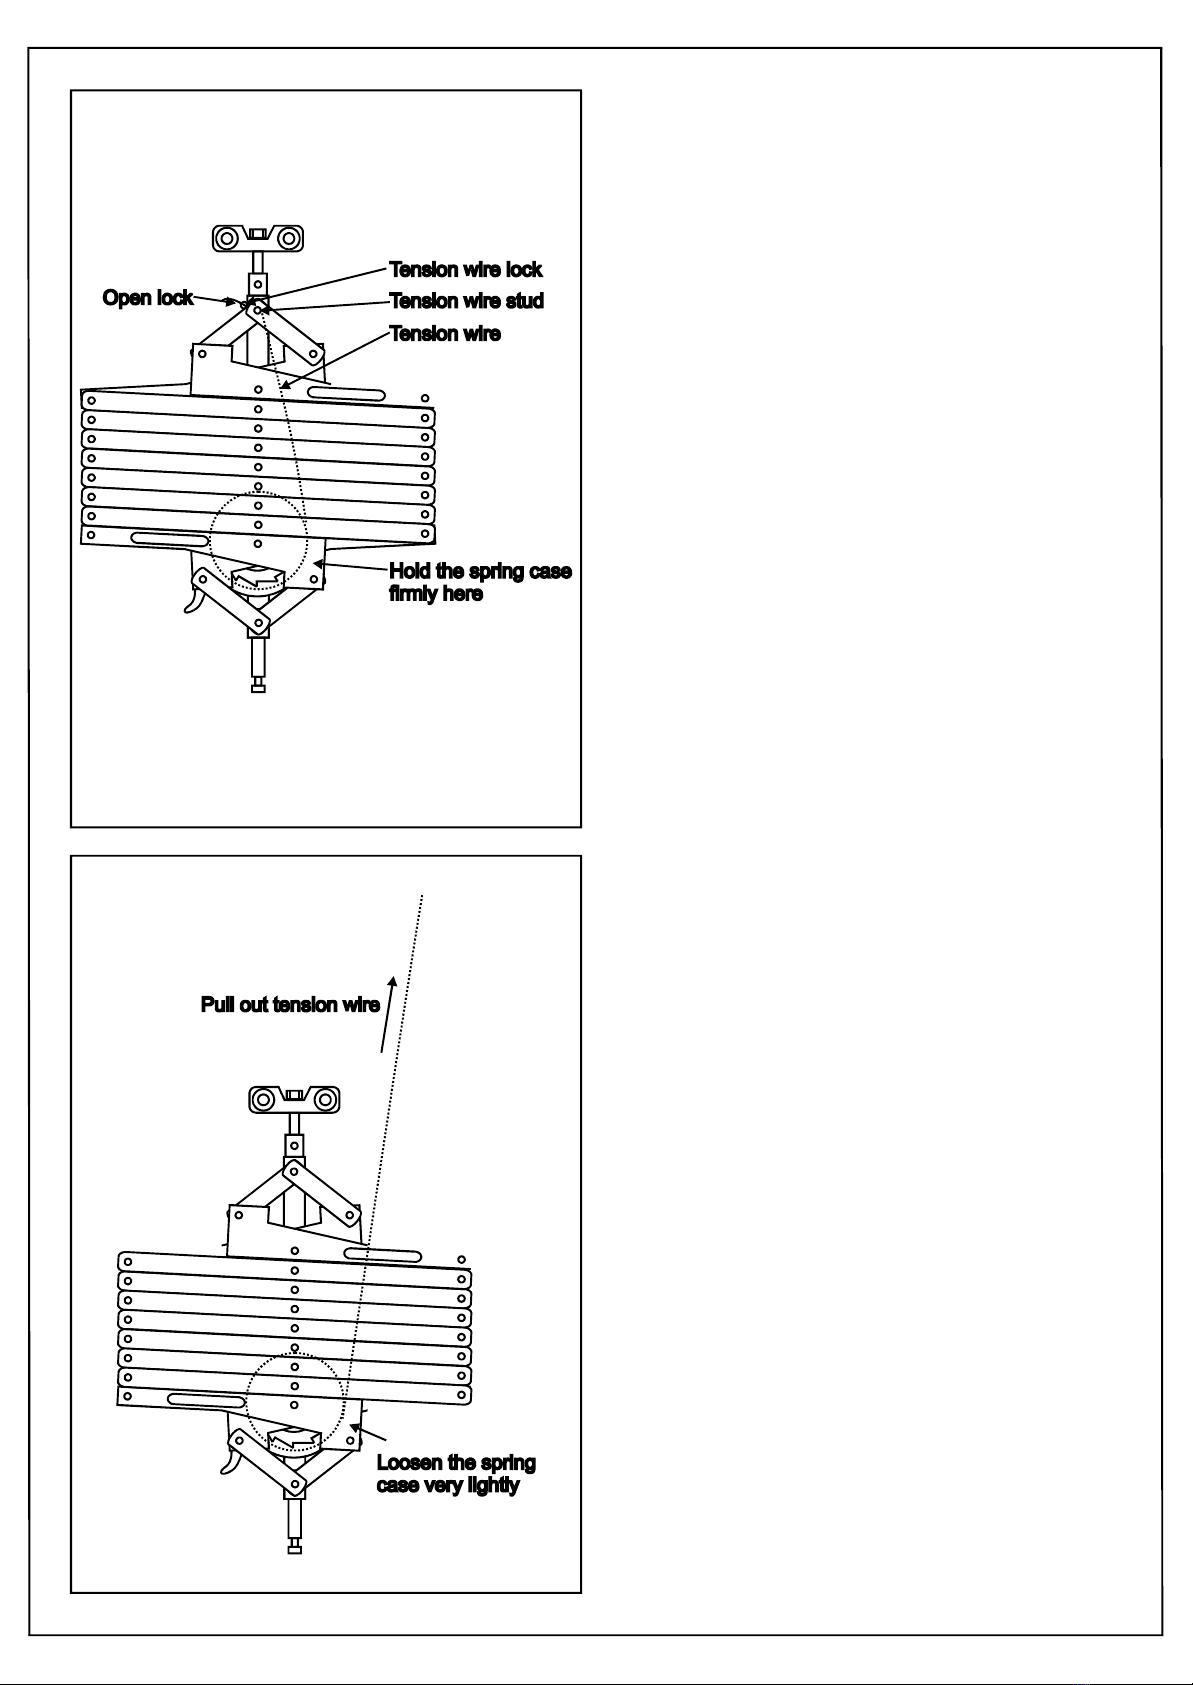
Step1:Openingtensionwirelock
NOTE:
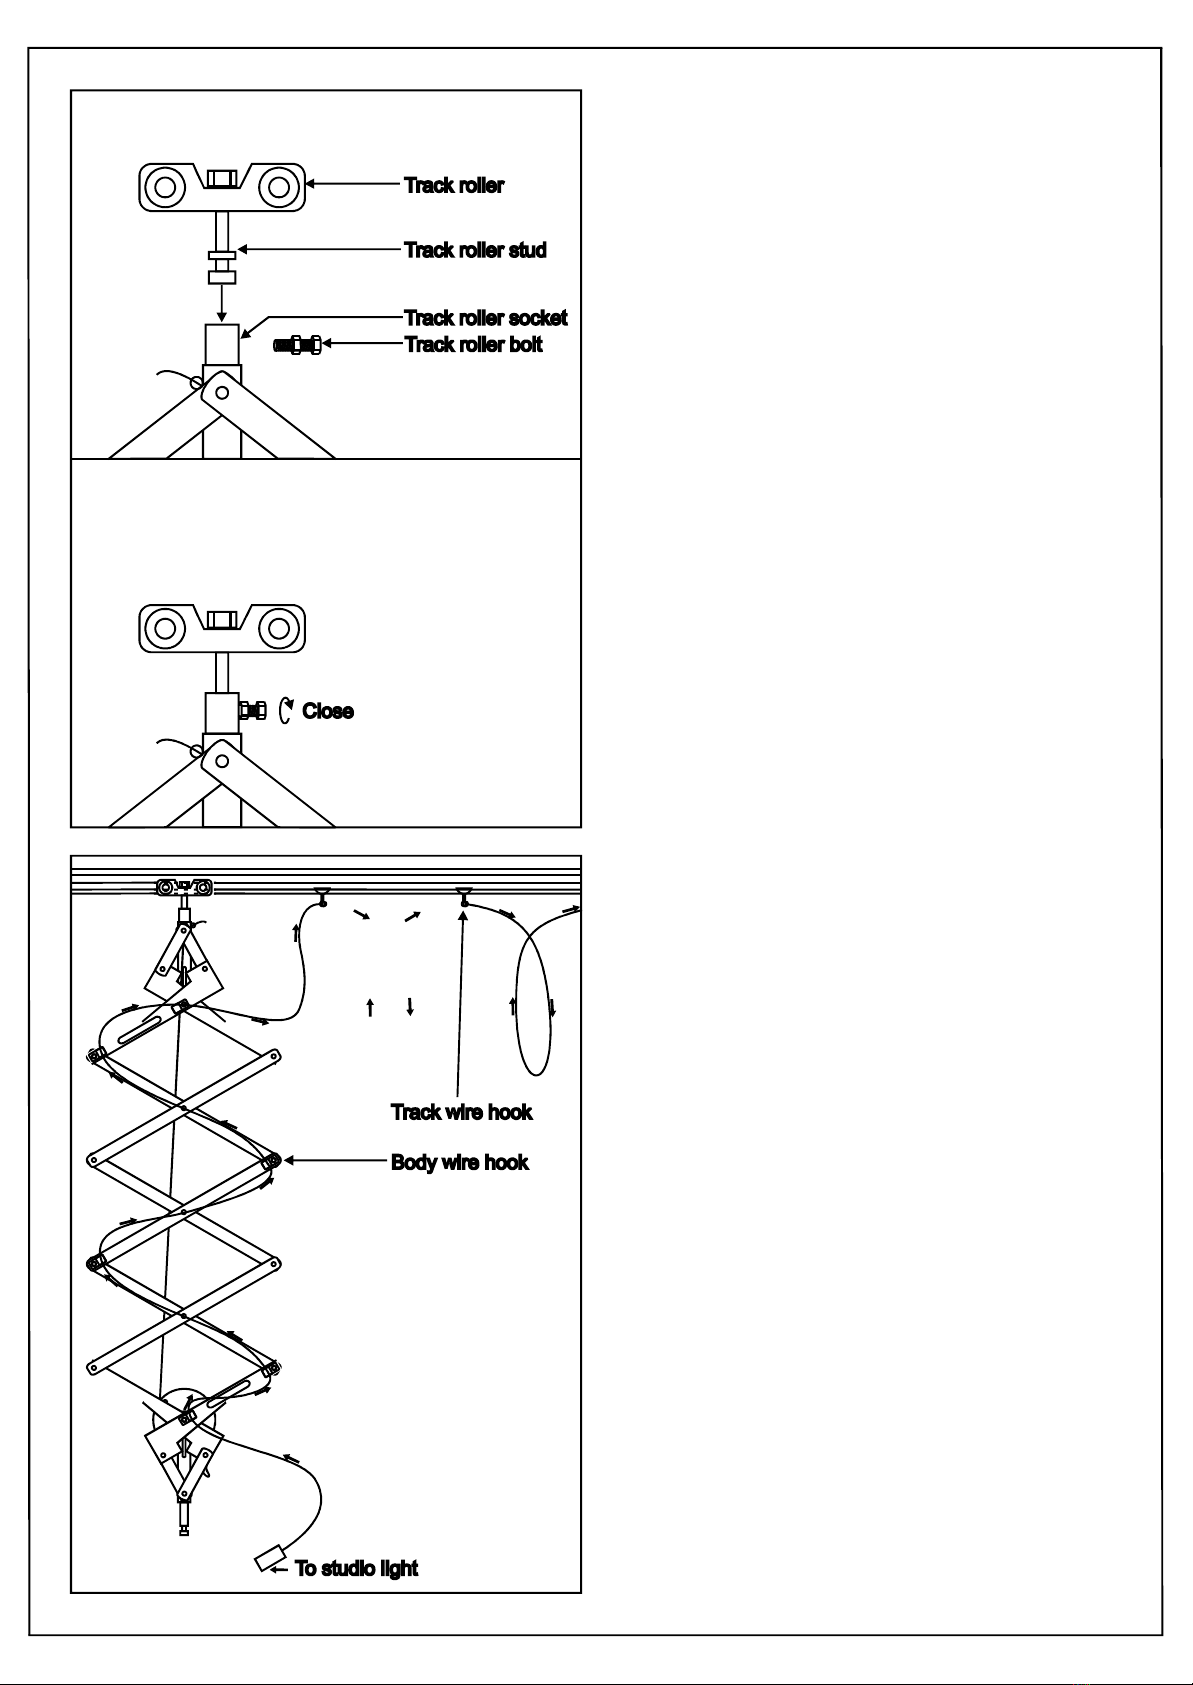
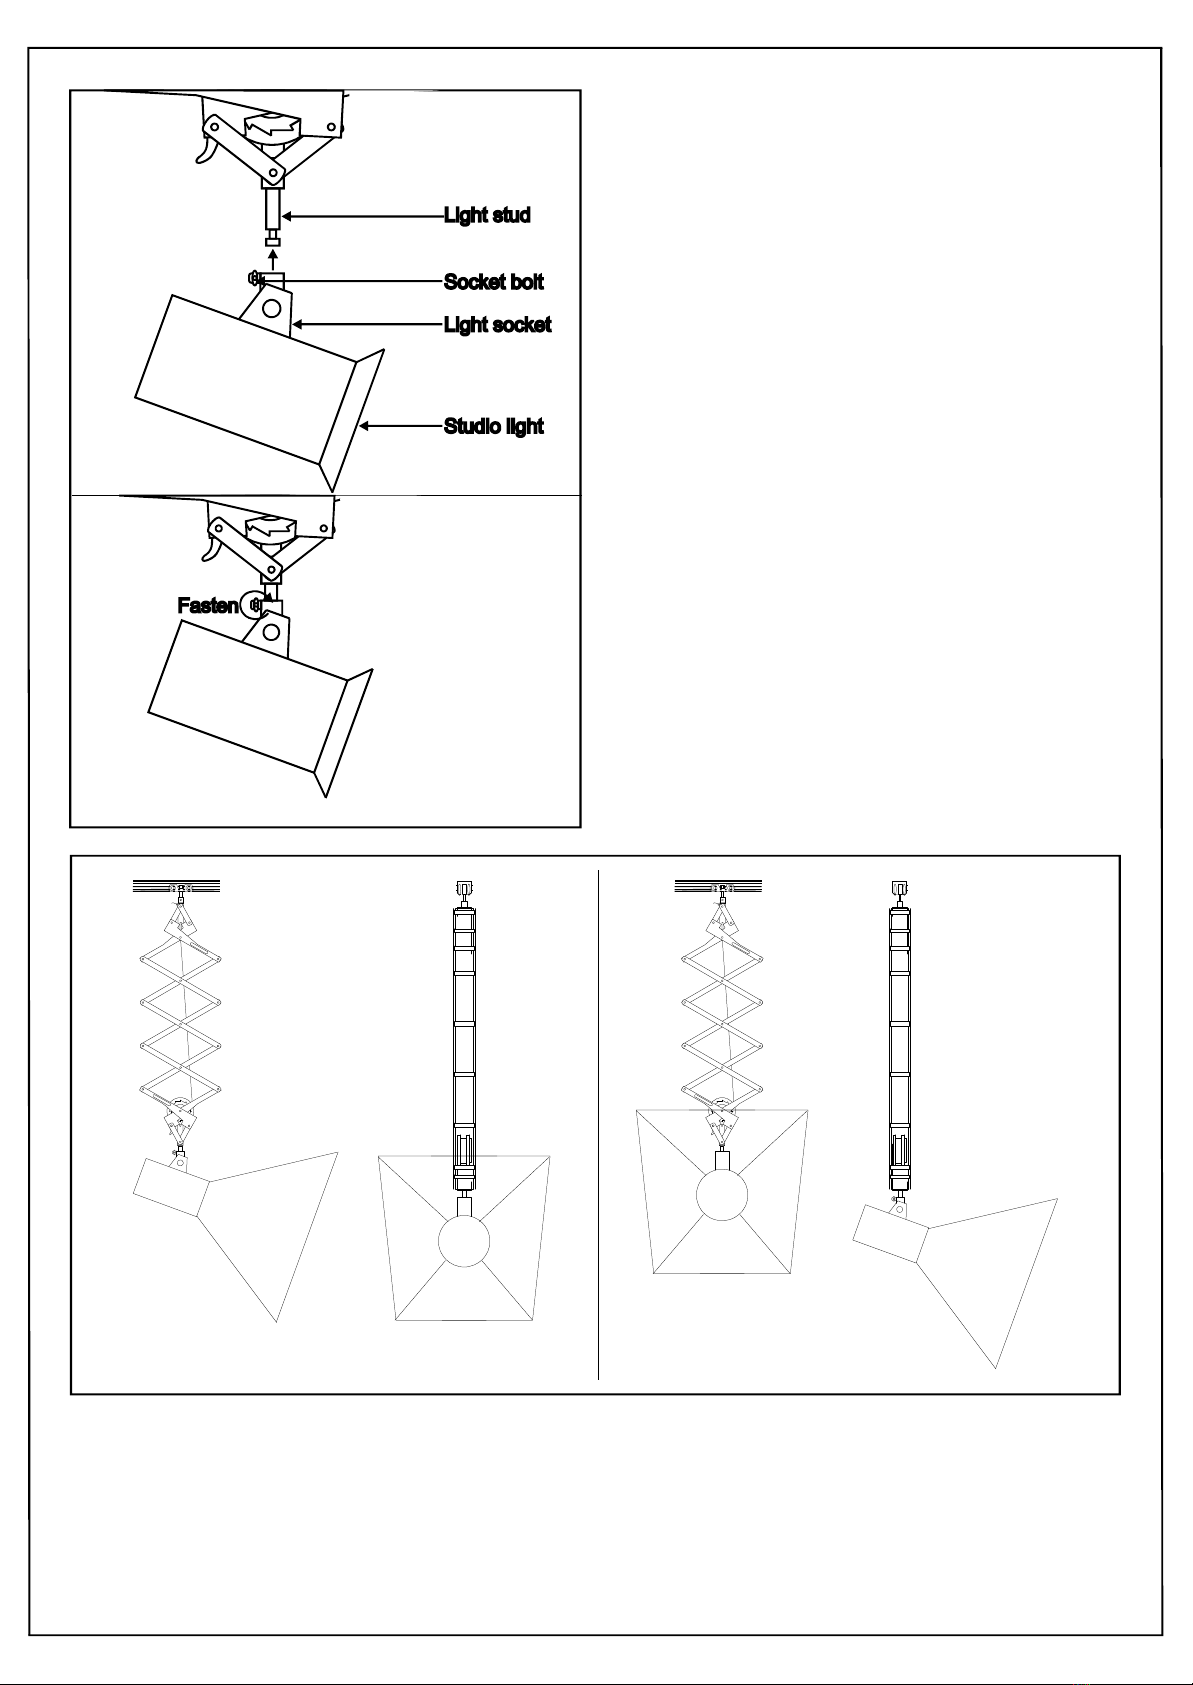
-Unmountthestudiolightattachedtolightstudof
pantographforsafety.
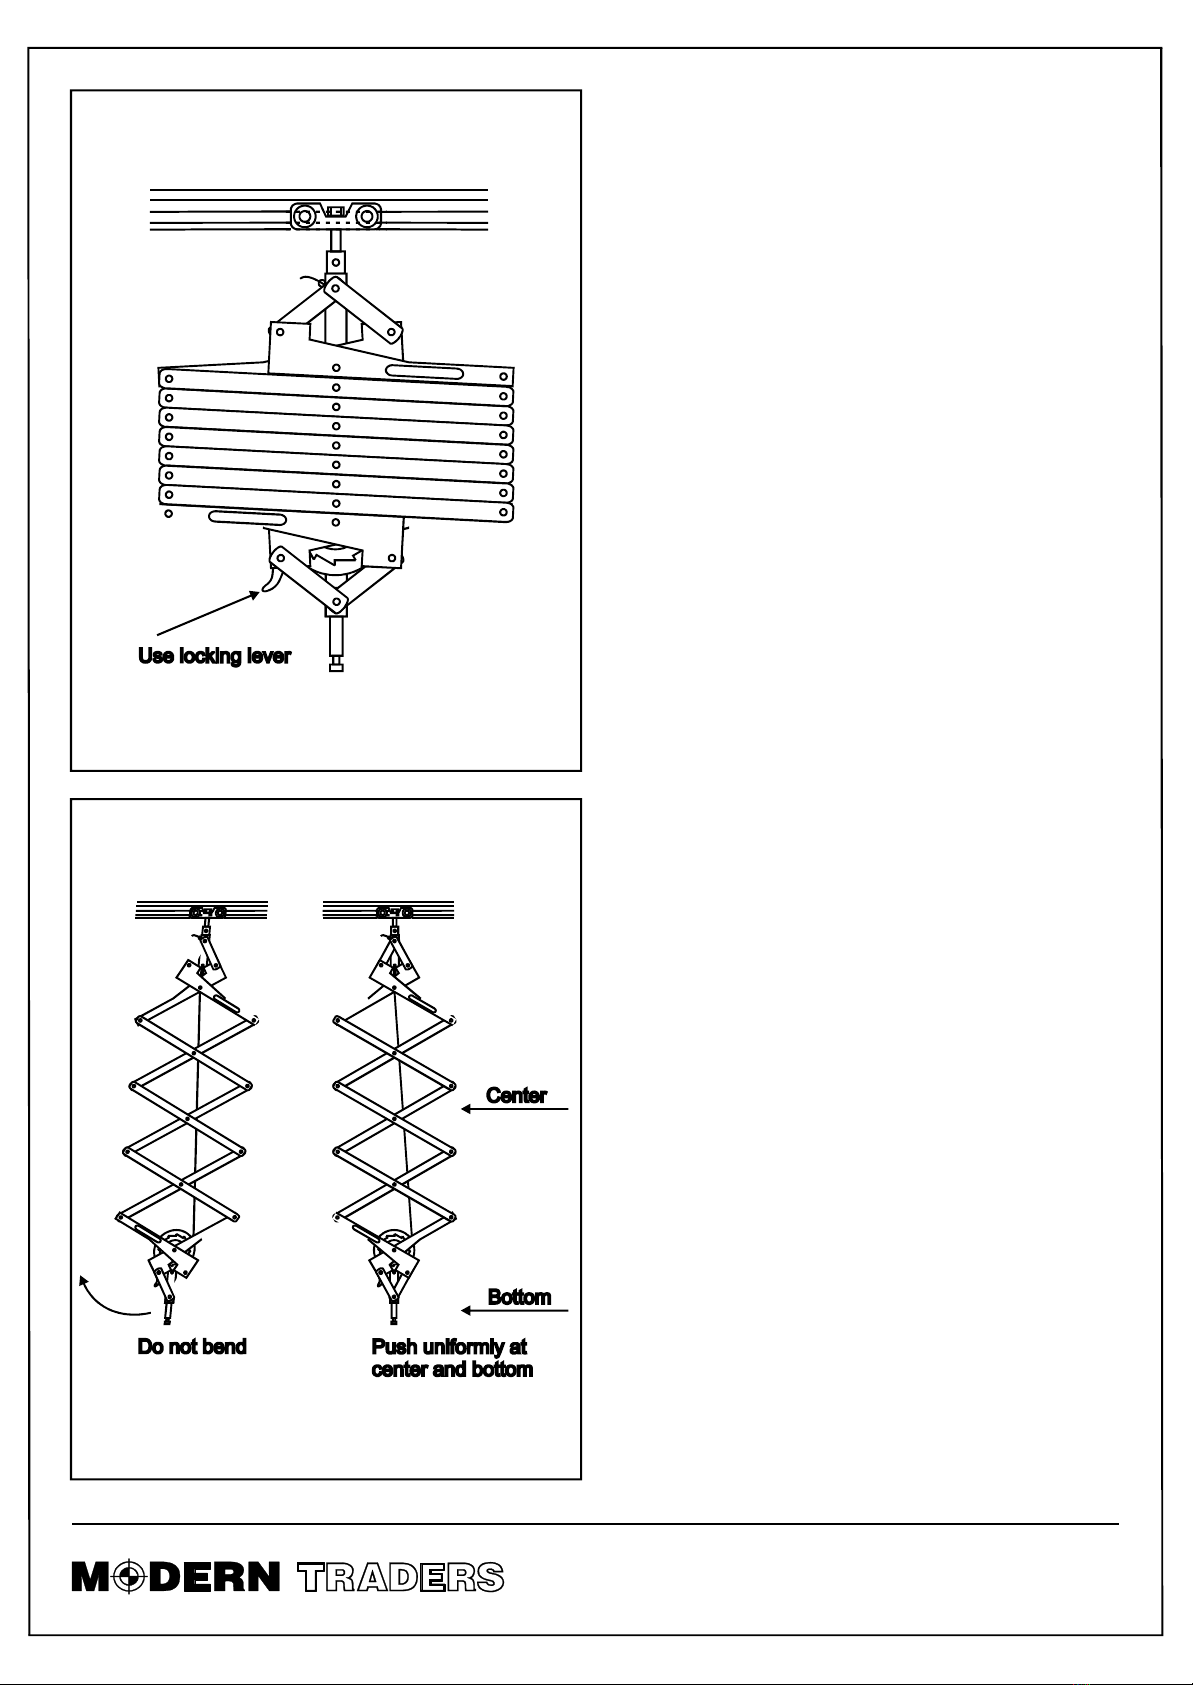
-Openthelowertrackendstopoftheslidingtrack
andunmountthepantographinshortenedform
asshownintheadjoiningdiagram
-Placethepantographfirmlyongroundinaway
thatthelightstudtouchedthegroundand
pantographstaysinuprightpositionasshown
here.
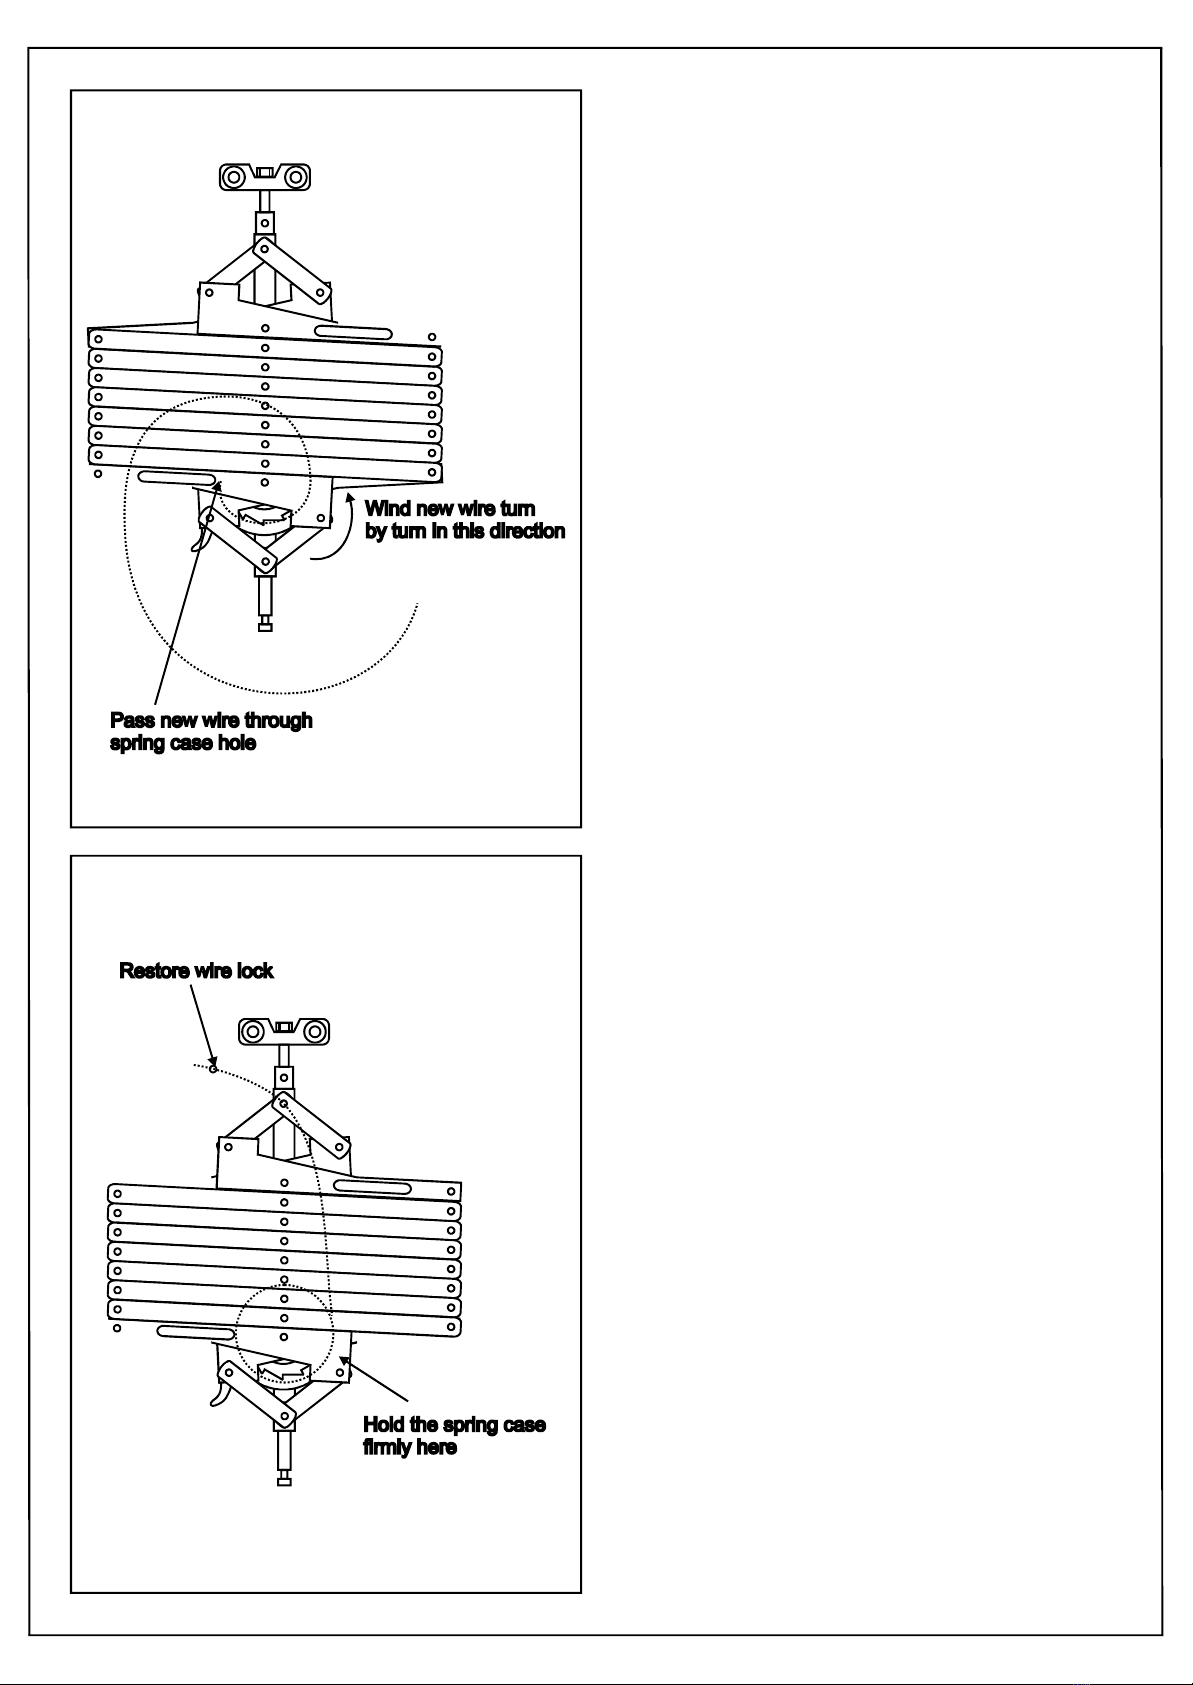
-Holdthespringcasefirmlysothatwhenthe
tensionwireisloosenthealreadyappliedtension
doesnotgetremoved.
-Oncethespringcaseisfirmlyheld,openthe
tensionwirestopwhichisattachedtoitsupper
endneartensionwirestudasshowninadjoining
diagram.
Keepthetensionwirefirmlystretched
aroundthespringcaseintheentireprocess.Ifthe
tensionwireisleftloose,itmightgetcoiled.Inthat
case,entiretensionwirewouldhavetobe
openedandrewoundaroundthespringcase.
Step2:Increasing/Decreasingtensionin
tensionwire
-Oncethetensionwirelockisremoved,loosen
thespringcaselightly(butstillkeeponholdingit)
andpulloutapproximately1feetoftensionwire.
-Thisstepwillstretchthespringinthespring
caseandasaresultextratensionwillbeaddedto
thetensionwireoutside.
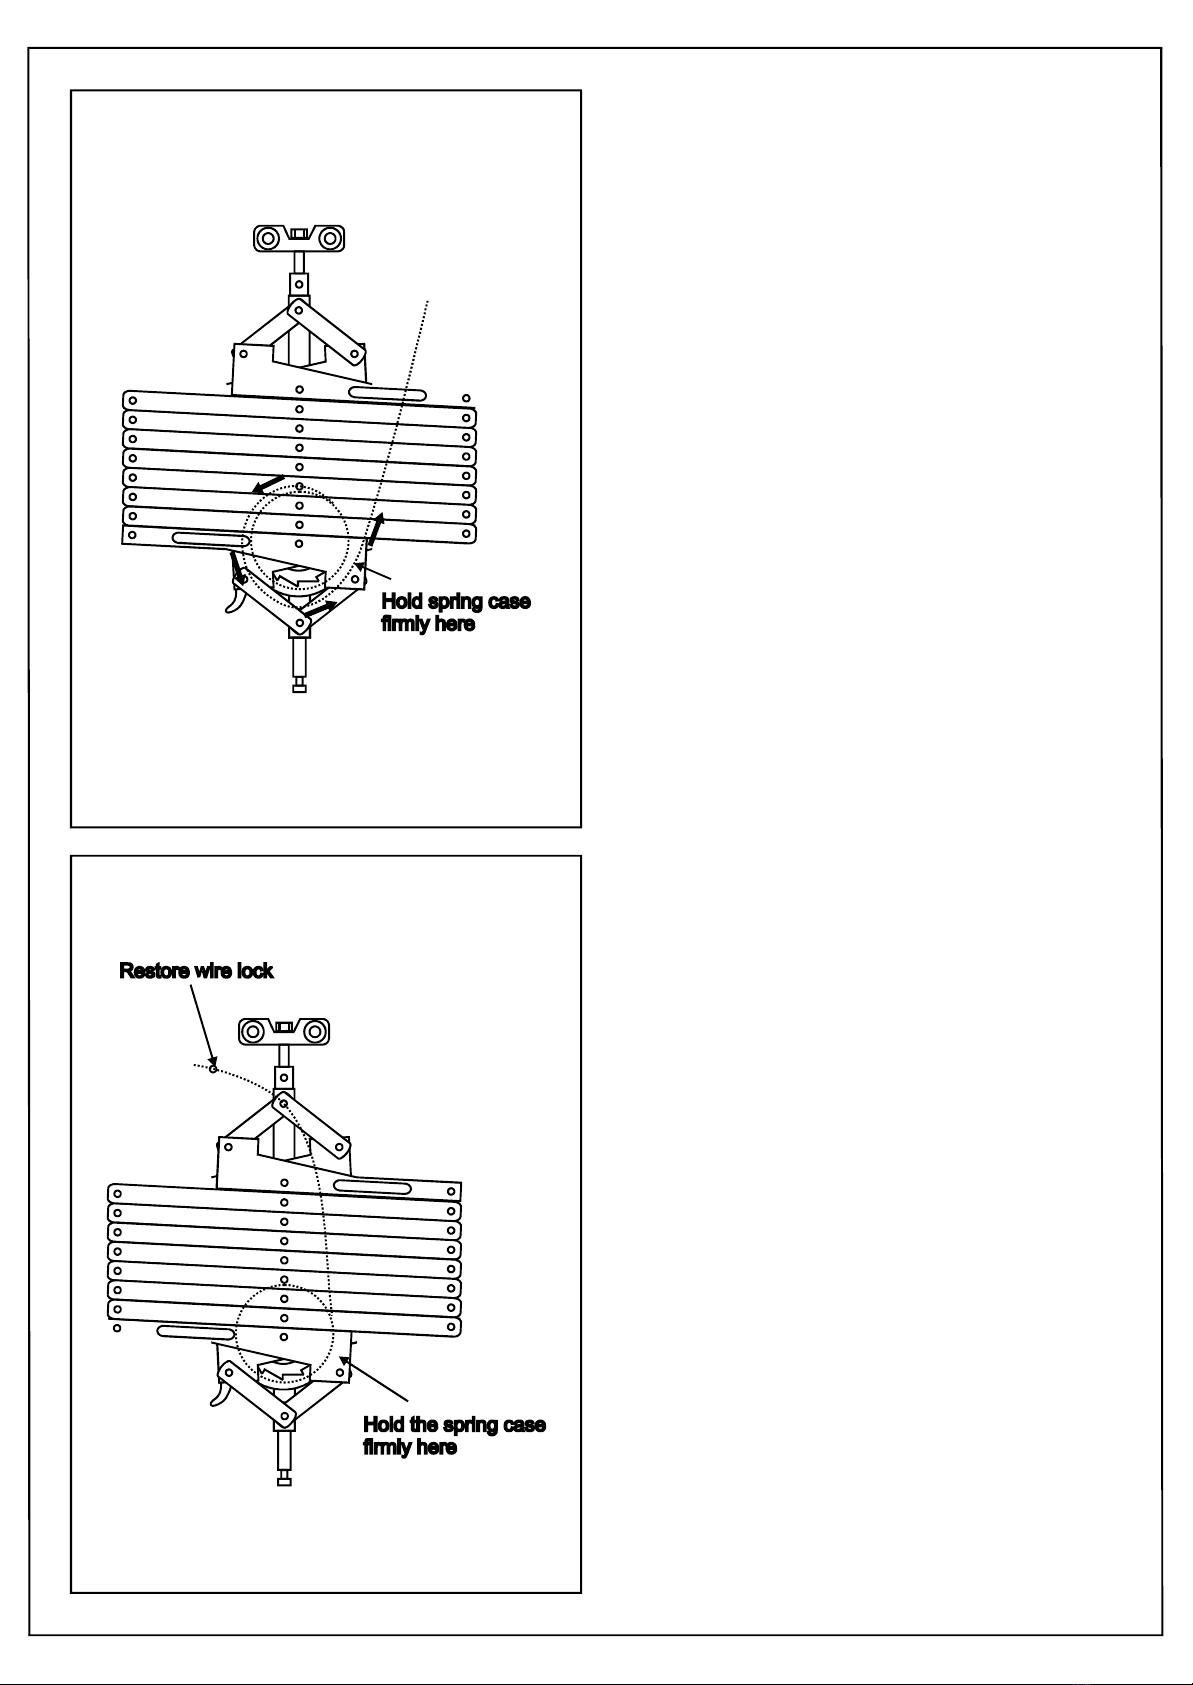
-Fordecreasingthetension,oncethetension
wirelockisremoved,unwind1turnofthetension
wirefromaroundspringcasewhileholdingspring
casefirmly.
-Nowwhilethetensionwireisfirmlyheld,loosen
thespringcaselightly(butstillkeeponholdingit).
Asaresultthespringcasewillwinditself
(becauseofthetensioninitsspring)withthe
extralengthoftensionwirethatisjustunwound.
-Thisstepwilldecreasethetensioninspring
insidethespringcaseandconsecutivelyinthe
tensionwireoutside.
4