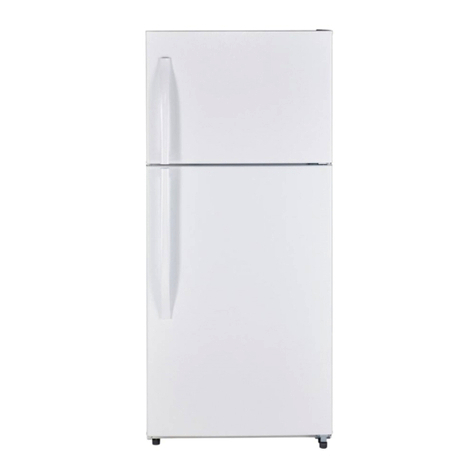
Moffat MAR04 User manual

www.moffatappliances.ca
Owner’s Manual and
Installation Instructions
Refrigerators
350A4502P659 29-5640 03/08
Safety Instructions . . . . . . . . . 2, 3
Operating Instructions
Care and Cleaning . . . . . . . . . . . .6
Control Settings . . . . . . . . . . . . . .4
Refrigerator Features . . . . . . . . . . .5
Installation Instructions . . . . 7, 8
Troubleshooting Tips . . . . . 9, 10
Consumer Support
Consumer Support . . . Back Cover
Warranty . . . . . . . . . . . . . . . . . . . 11
Write the model and serial
numbers here:
Model__________________
Serial __________________
You can find these numbers on a
label inside the refrigerator on
the side wall.
www.moffatappliances.ca
MAR04

IMPORTANT SAFETY INFORMATION.
READ ALL INSTRUCTIONS BEFORE USING.
WARNING!
Use this appliance only for its intended purpose as described in this Owner’s Manual.
SAFETY PRECAUTIONS
When using electrical appliances, basic safety precautions should be followed, including
the following:
This refrigerator must be properly installed
and located in accordance with the Installation
Instructions before it is used.
Do not allow children to climb, stand or hang
on the shelves in the refrigerator. They could
damage the refrigerator and seriously injure
themselves.
Do not touch the cold surfaces in the freezer
compartment, particularly when hands are
damp or wet. Skin may stick to these extremely
cold surfaces.
Do not store or use gasoline or other
flammable vapors and liquids in the vicinity of
this or any other appliance.
Keep fingers out of the “pinch point” areas;
clearances between the doors and between the
doors and cabinet are necessarily small. Be
careful closing doors when children are in the
area.
Unplug the refrigerator before cleaning and
making repairs.
NOTE: We strongly recommend that any servicing be
performed by a qualified individual.
Turning the temperature control to the
“0”
position stops cooling but does not shut off
power to the refrigerator.
PROPER DISPOSAL OF THE REFRIGERATOR
Child entrapment and suffocation are not
problems of the past. Junked or abandoned
refrigerators are still dangerous… even if they
will sit for “just a few days.” If you are getting rid
of your old refrigerator, please follow the
instructions below to help prevent accidents.
Before You Throw Away Your Old
Refrigerator or Freezer:
Take off the doors.
Leave the shelves in place so that children may
not easily climb inside.
CFC Disposal
Your old refrigerator has a cooling system that
used CFCs (chlorofluorocarbons). CFCs are
believed to harm stratospheric ozone.
If you are throwing away your old refrigerator,
make sure the CFC refrigerant is removed for
proper disposal by a qualified servicer. If you
intentionally release this CFC refrigerant you
can be subject to fines and imprisonment under
provisions of environmental legislation.
DANGER! RISK OF CHILD ENTRAPMENT
2
Consumer Support Troubleshooting Tips Operating Instructions Safety InstructionsInstallation InstructionsTroubleshooting Tips Installation Instructions Safety InstructionsOperating InstructionsTroubleshooting Tips Installation Instructions Safety InstructionsOperating Instructions

3
Consumer SupportTroubleshooting TipsOperating Instructions
Safety Instructions Installation Instructions
USE OF EXTENSION CORDS
Because of potential safety hazards under certain conditions, we strongly recommend against the
use of an extension cord.
However, if you must use an extension cord, it is absolutely necessary that it be a CSA approved,
3-wire grounding type appliance extension cord having a grounding type plug and outlet and that
the electrical rating of the cord be 15 amperes (minimum) and 120 volts.
www.moffatappliances.ca
HOW TO CONNECT ELECTRICITY
Do not, under any circumstances, cut or remove the third (ground) prong from the power cord. For
personal safety, this appliance must be properly grounded.
The power cord of this appliance is equipped
with a 3-prong (grounding) plug which mates
with a standard 3-prong (grounding) wall outlet
to minimize the possibility of electric shock
hazard from this appliance.
Have the wall outlet and circuit checked by a
qualified electrician to make sure the outlet is
properly grounded.
If you have only a standard 2-prong wall outlet, it
is your personal responsibility and obligation to
have it replaced with a properly grounded
3-prong wall outlet.
The refrigerator should always be plugged into
its own individual electrical outlet which has a
voltage rating that matches the rating plate.
This provides the best performance and also
prevents overloading house wiring circuits which
could cause a fire hazard from overheated wires.
Never unplug your refrigerator by pulling on the
power cord. Always grip plug firmly and pull
straight out from the outlet.
Repair or replace immediately all power cords
that have become frayed or otherwise damaged.
Do not use a cord that shows cracks or abrasion
damage along its length or at either end.
When moving the refrigerator away from the
wall, be careful not to roll over or damage the
power cord.

About the control on the refrigerator.
Control Settings
4
Consumer Support Troubleshooting Tips Operating Instructions Safety InstructionsInstallation InstructionsTroubleshooting Tips Installation Instructions Safety InstructionsOperating InstructionsTroubleshooting Tips Installation Instructions Safety InstructionsOperating Instructions
0
1
2
3
4
5
6
7
The temperature dial is located at the top of the fridge cabinet. The
“0”
position is off. Turn it to
the midpoint setting
(4)
.
Once the fridge is located, allow at least 24 hours before making any adjustments to the initial
setting.
Turn the dial clockwise to reduce the temperature. Aligning the arrow with
7
on the dial will
produce the lowest temperature.
As with any refrigeration product, there is a temperature variance at different locations within the
cabinet.
The upper part of the cabinet is the warmest section. The coldest part will be in the lower part of
the cabinet.

Consumer SupportTroubleshooting TipsOperating InstructionsSafety Instructions Installation Instructions
5
Shelves
About the refrigerator features. www.moffatappliances.ca
Door Shelves
Fruit/Vegetable Bin
To remove a shelf, lift up the back slightly and pull forward. Some models have
multi-position shelves that can be moved to different levels.
Shelves on the door provide convenient storage for frequently used items. Some
models have doors that are deep enough to store large bottles.
This compartment is for storing fruits and vegetables.

Consumer Support Troubleshooting Tips Operating Instructions Safety InstructionsInstallation InstructionsTroubleshooting Tips Installation Instructions Safety InstructionsOperating InstructionsTroubleshooting Tips Installation Instructions Safety InstructionsOperating Instructions
6
Care and cleaning of the refrigerator.
Cleaning the Outside
Cleaning the Inside
Keep the outside clean.
Wipe with a clean cloth lightly dampened with kitchen
appliance wax or mild liquid dish detergent. Dry and polish with a clean, soft cloth.
Do not wipe the refrigerator with a soiled dish cloth or wet towel. These may leave a residue
that can erode the paint. Do not use scouring pads, powdered cleaners, bleach or cleaners
containing bleach because these products can scratch and weaken the paint finish.
Protect the paint finish
. The finish on the outside of the refrigerator is a high quality,
baked-on paint finish. With proper care, it will stay new-looking and rust-free for
years. Apply a coat of kitchen/appliance wax when the refrigerator is new, and then
at least twice a year.
To help prevent odors,
leave an open box of baking soda in the refrigerator.
Unplug the refrigerator before cleaning.
If this is not practical, wring excess moisture out
of sponge or cloth when cleaning around the control.
Use warm water and baking soda solution–about a tablespoon (15 ml) of baking soda
to a quart (1 liter) of water. This both cleans and neutralizes odors. Rinse and wipe
dry.
Other parts of the refrigerator–including door gaskets, fruit and vegetable drawers,
and all plastic parts–can be cleaned the same way.
Do not wash any plastic refrigerator parts in the dishwasher.
Preparing for Vacation
For long vacations or absences, remove food and unplug the refrigerator. Move the
control to the
“0”
position, and clean the interior with a baking soda solution of one
tablespoon (15 ml) of baking soda to one quart (1 liter) of water. Leave the door
open.
Preparing to Move
Secure all loose items such as shelves and fruit/vegetable bin by taping them securely
in place to prevent damage.
Be sure the refrigerator stays in an upright position during moving.

Consumer SupportTroubleshooting TipsOperating InstructionsSafety Instructions Installation Instructions
7
Preparing to install the refrigerator. www.moffatappliances.ca
Read these instructions completely and carefully.
Do not install the refrigerator where the temperature will go below 50°F (10°C) because it will not
run often enough to maintain proper temperatures.
Install it on a floor strong enough to support it fully loaded.
Do not install it closer than 5” (13 cm) next to a range.
Do not install it in a recessed area.
Do not build in the refrigerator.
Refrigerator Location
Allow the following clearances for ease of installation and proper air circulation.
Sides 1/2” (13 mm)
Top 2” (51 mm)
Back 2” (51 mm) from the rear cabinet surface to the wall
Clearances
Leveling Legs (on some models)
Adjustable legs
at the front corners of the refrigerator should be set so the
refrigerator is firmly positioned on the floor and the front is raised just enough that
the door closes easily when opened about halfway.
To adjust the leveling legs,
turn the legs
counterclockwise to raise
the refrigerator,
clockwise to lower
it.
Turn counterclockwise to raise,
clockwise to lower.

8
Consumer Support Troubleshooting Tips Operating Instructions Safety InstructionsInstallation Instructions
Preparing to install the refrigerator.
Door Reversal
3 Cubic Foot Models and on some 4 Cubic Foot Models
1. Remove the small plug button on the left side of the door top cap.
2. Remove the two plug buttons or screws on the left side on top of the cabinet.
3. Remove the screw from the plastic hinge cover and remove the plastic hinge
cover by lifting it up by the front edge.
4. Remove the two screws from the top hinge and remove the top hinge.
5. Lift the door up and off the bottom hinge (right side).
6. Tilt the refrigerator cabinet back to remove the right leveling leg.
7. Remove the screws on the bottom hinge (right side) and the left leveling leg. Move
the bottom hinge to the left side and secure it with the screws and leveling leg.
IMPORTANT: The left leg has a spacer that must be moved to the right side leveling leg when
the door swing is reversed.
8. Screw the right leveling leg, with the spacer in place, back in place on the right
side.
9. Position the door on the left bottom hinge. With the magnetic gasket holding the
door in place, secure the top hinge with screws.
10.
Make sure the door is aligned with the refrigerator cabinet before continuing.
11. Replace the hinge cover on top of the hinge and secure the hinge cover with
screw.
12. Put the plug button in the hole on the right side of the door cap.
13. Put the three plug buttons or screws on the right side on top of the cabinet.
Leveling legs
Bottom
hinge
Plug button
Spacer
Hinge cover
Plug buttons
or screws Hinge
Screw

9
Consumer SupportTroubleshooting TipsOperating Instructions
Safety Instructions Installation Instructions
Problem Possible Causes What To Do
Refrigerator does not
Control in
“0”
position. •Move the control to a temperature setting.
operate
Refrigerator is unplugged. •Push the plug completely into the outlet.
The fuse is blown/circuit •Replace fuse or reset the breaker.
breaker is tripped.
Vibration or rattling
Front leveling legs (on some •See
Leveling Legs.
(slight vibration
models) need adjusting.
is normal)
Refrigerator is on an •Use shims to level the refrigerator.
uneven surface.
Motor operates for
Normal when refrigerator •Wait 24 hours for the refrigerator to completely
long periods or cycles
is first plugged in. cool down.
Often occurs when large •This is normal.
amounts of food are
placed in refrigerator.
Door left open. •Check to see if package is holding door open.
Hot weather or frequent •This is normal.
door openings.
Temperature control •See
About the control.
set at the coldest setting.
Not enough clearance from • Make sure there is enough air circulation around the
the wall. refrigerator.
Refrigerator too warm
Temperature control not •See
About the control.
set cold enough.
Warm weather or frequent •Set the temperature control one step colder.
door openings. See
About the control.
Door left open. •Check to see if package is holding door open.
Cabinet sides are warm. • This is normal for a hot wall type condenser.
Before you call for service… www.moffatappliances.ca
Troubleshooting Tips
Save time and money! Review the charts on the following
pages first and you may not need to call for service.

10
Problem Possible Causes What To Do
Refrigerator has odor
Foods transmitting odor •Foods with strong odors should be tightly wrapped.
to refrigerator. •Keep an open box of baking soda in the refrigerator;
replace every three months.
Interior needs cleaning. •See
Care and cleaning.
Moisture forms on
Not unusual during periods •Wipe surface dry.
outside of refrigerator
of high humidity.
Moisture collects inside
Too frequent or too long
(in humid weather, air
door openings.
carries moisture into
refrigerator when doors
are opened)
Refrigerator too cold
Temperature control set •See
About the control.
too cold.
Before you call for service…
Troubleshooting Tips
Consumer Support Troubleshooting Tips Operating Instructions Safety InstructionsInstallation Instructions

What is covered
Compressor
Sealed System (including
evaporator, condenser
tubing and refrigerant)
All Other Parts
How Long Warranted
(From Date of Sale)
One (1) year
One (1) year
One (1) year
Parts
Repair or Replace
at Mabe’s Option
One (1) year
One (1) year
One (1) year
Labour
One (1) year
One (1) year
One (1) year
11
Consumer Support
Operating Instructions
Safety Instructions Installation Instructions Troubleshooting Tips
Refrigerator Warranty.
What is not covered:
EXCLUSION OF IMPLIED WARRANTIES – Your sole and exclusive remedy is product repair as provided in this
Limited Warranty. Any implied warranties, including the implied warranties of merchantability or fitness for a
particular purpose, are limited to one year or the shortest period allowed by law.
Your refrigerator is warranted to be free of defects in material and workmanship.
Staple your receipt here.
Proof of the original purchase
date is needed to obtain service
under the warranty.
Terms and Conditions:
1.This warranty applies only for single Refrigerator has
been properly installed Refrigerator has been properly
installed according to the instructions supplied by
Mabe and is connected to an adequate and proper
utility service.
Damage due to abuse, accident, commercial use, and
alteration or defacing of the serial plate cancels all
obligations of this warranty.
Service during this warranty period must be
performed by an Authorized Mabe Service Agent.
2.Neither Mabe nor the Dealer is liable for any claims or
damages resulting from failure of the Refrigerator or
from service delays beyond their reasonable control.
3.To obtain warranty service, purchaser must present
the original Bill of Sale. Components repaired or
replaced are warranted through the remainder of the
original warranty period only.
4.This warranty is in addition to any statutory warranty.
5.This warranty is extended to the original purchaser
and any succeeding owner for products purchased in
Canada for home use within Canada. In home
warranty service will be provided in areas where it is
available and deemed reasonable by Mabe to provide.
• Service trips to your home to teach you how to use the
product.
• Damage to finish must be reported within 48 hours
following the delivery by contacting the retail outlet of
where it was purchased.
• Improper installation – proper installation includes
adequate air circulation to the refrigeration system,
adequate electrical, plumbing and other connecting
facilities.
• Replacement of house fuses or resetting of circuit
breakers.
• Replacement of light bulbs.
• Damage to product caused by accident, fire, floods or
acts of God.
• Loss of food due to spoilage.
• Proper use and care of product as listed in the
owner’s manual, proper setting of controls.
WARRANTOR IS NOT RESPONSIBLE FOR
CONSEQUENTIAL DAMAGE.
IMPORTANT
Keep this warranty and your bill of sale as proof of original purchase and purchase date.
Mabe Service is available coast to coast. If further help is needed concerning
this warranty, contact:
Manager, Consumer Relations,
Mabe Canada, Inc., Consumer Service
Suite 310, 1 Factory Lane,
Moncton, N.B. E1C 9M3
Warrantor: Mabe Canada Inc.

Printed in China
Operating Instructions Safety InstructionsInstallation InstructionsTroubleshooting Tips
Consumer Support
Consumer Support.
Moffat Appliances Website www.moffatappliances.ca
Have a question or need assistance with your appliance? Try the Moffat Appliances Website 24 hours
a day, any day of the year! For greater convenience and faster service, you can now download Owner’s
Manuals, Installation Instructions and product specifications.
Schedule Service www.moffatappliances.ca
Expert Mabe repair service is only one step away from your door. Call 1.800.561.3344 during normal
business hours.
Extended Warranties www.moffatappliances.ca
Purchase a Moffat extended warranty and learn about special discounts that are available while your
warranty is still in effect. You can purchase it on-line anytime, or call 1.888.261.2133 during normal
business hours. Service Protection Plus will still be there after your warranty expires.
Parts and Accessories www.moffatappliances.ca
Individuals qualified to service their own appliances can have parts or accessories sent directly to their
homes (VISA and MasterCard cards are accepted). Contact us by phone at 1.888.261.3055 during
normal business hours.
Instructions contained in this manual cover procedures to be performed by any user. Other
servicing generally should be referred to qualified service personnel. Caution must be
exercised, since improper servicing may cause unsafe operation.
Contact Us www.moffatappliances.ca
If you are not satisfied with the service you receive from Mabe, contact us on our Website with all the
details including your phone number, or write to:
Director, Consumer Relations, Mabe Canada Inc.
Suite 310, 1 Factory Lane
Moncton, N.B. E1C 9M3
Register Your Appliance www.moffatappliances.ca
Register your new appliance on-line- – at your convenience! Timely product registration will allow for
enhanced communication and prompt service under the terms of your warranty, should the need
arise. You may also mail in the pre-printed registration card included in the packing material.

www.electromenagersmoffat.ca
Manuel de l’utilisateur et
instructions d’installation
Réfrigérateurs
350A4502P659 29-5640 03/08
Sécurité . . . . . . . . . . . . . . . . . . . . . . . . . .2, 3
Utilisation
Caractéristiques du réfrigérateur . . . . . . . .5
Entretien et nettoyage . . . . . . . . . . . . . . .6
Réglage du bouton de commande . . . . .4
Installation . . . . . . . . . . . . . . . . . . . . . . 7, 8
Dépannage . . . . . . . . . . . . . . . . . . . . . 9, 10
Service à la clientèle
Garantie . . . . . . . . . . . . . . . . . . . . . . . . . 11
Service à la clientèle
. . . . . . . . . . . . . . . Dernière de couverture
Inscrivez ici les numéros de
modèle et de série :
Modèle ________________
Série __________________
Vous trouverez ces numéros sur une
étiquette située sur la paroi latérale
du réfrigérateur.
www.electromenagersmoffat.ca
MAR04

CONSIGNES DE SÉCURITÉ IMPORTANTES
LISEZ TOUTES LES INSTRUCTIONS AVANT D’UTILISER VOTRE APPAREIL.
AVERTISSEMENT!
Cet appareil doit uniquement être utilisé aux fins prévues et décrites dans ce manuel.
CONSIGNES DE SÉCURITÉ
Lors de l’utilisation d’appareils électriques, suivez les consignes de sécurité de base :
Ce réfrigérateur doit être installé conformément
aux instructions d’installation avant d’être utilisé.
Ne laissez pas les enfants grimper, s’asseoir, se tenir
debout ni se pendre aux clayettes de cet appareil.
Ils pourraient l’endommager et gravement se
blesser.
Ne touchez pas les surfaces froides du congélateur,
plus particulièrement lorsque vos mains sont
humides. Votre peau peut coller à ces surfaces
extrêmement froides.
Ne rangez pas et n’utilisez pas d’essence ou d’autres
vapeurs et liquides inflammables à proximité de cet
appareil ou de tout autre appareil électroménager.
Éloignez vos doigts des zones où vous pouvez
facilement vous faire pincer : les espaces entre les
portes, et entre les portes et les armoires, sont
toujours étroits. Soyez prudent lorsque vous fermez
les portes de l’appareil en présence d’enfants.
Débranchez l’appareil avant de le nettoyer et de le
réparer.
REMARQUE : Nous vous recommandons vivement de confier
les réparations à un technicien qualifié.
Tourner le bouton de température sur la
position
0
arrête le refroidissement, mais ne met
pas le réfrigérateur hors tension.
MISE AU REBUT APPROPRIÉE DU RÉFRIGÉRATEUR
Les enfants pris au piège ou morts d’asphyxie sont un
problème courant. Les réfrigérateurs abandonnés ou
mis au rebut sont toujours dangereux... même si ce
n’est que pour « quelques jours ». Si vous vous
débarrassez de votre vieux réfrigérateur, veuillez suivre
les instructions ci-dessous pour éviter tout accident.
Avant de mettre au rebut votre ancien appareil
de réfrigération :
Démontez les portes.
Laissez les clayettes en place afin d’empêcher les
enfants de grimper facilement à l’intérieur.
Élimination des CFC
Votre ancien réfrigérateur dispose d’un système de
réfrigération qui utilise des CFC (chlorofluorocarbures).
Les CFC sont considérés comme nocifs pour l’ozone
stratosphérique.
Si vous mettez votre ancien réfrigérateur au rebut,
assurez-vous qu’un technicien qualifié retire le
frigorigène à base de CFC pour que ce dernier soit
correctement éliminé. Si vous jetez intentionnellement
ce frigorigène à base de CFC, vous pouvez être soumis
à des amendes et à une peine d’emprisonement en
vertu de la loi sur l’environnement.
DANGER! RISQUE D’ENFERMEMENT POUR LES ENFANTS
2
Service à la clientèle
Dépannage Utilisation
SécuritéInstallation
Dépannage
Installation Sécurité
UtilisationDépannage Installation SécuritéUtilisation

3
Service à la clientèleDépannageUtilisation
Sécurité Installation
UTILISATION DE CORDONS PROLONGATEURS
En raison de risques de sécurité dans certaines situations, nous vous déconseillons fortement l’utilisation d’un
cordon prolongateur.
Cependant, si vous devez utiliser un cordon prolongateur, celui-ci doit absolument être homologué par CSA, de
type trifilaire avec mise à la terre, avec fiche et prise mises à la terre, pour une alimentation nominale de
15 ampères (minimum) et de 120 volts.
www.electromenagersmoffat.ca
RACCORDEMENT ÉLECTRIQUE
Ne coupez et ne retirez en aucun cas la troisième broche (mise à la terre) de la fiche du cordon
d’alimentation. Pour votre sécurité, cet appareil doit être correctement mis à la terre.
Pour diminuer les risques de choc électrique, le
cordon d’alimentation de cet appareil est muni d’une
fiche à 3 broches (mise à la terre) qui correspond à
une prise murale à 3 alvéoles (prise mise à la terre).
Faites vérifier la prise murale et le circuit par un
électricien qualifié pour vous assurer que la prise est
correctement mise à la terre.
Si la prise de courant est une prise murale standard à
2 alvéoles, c’est à l’utilisateur qu’incombent la
responsabilité et l’obligation de la faire remplacer par
une prise à 3 alvéoles correctement mise à la terre.
Le réfrigérateur doit toujours être le seul appareil
branché sur une prise de courant dont la tension
nominale correspond à celle indiquée sur la plaque
signalétique.
Cela assure de meilleures performances et évite toute
surcharge, et donc surchauffe, des circuits du domicile
qui pourrait être à l’origine d’un incendie.
Ne débranchez jamais le réfrigérateur en tirant sur
son cordon d’alimentation. Saisissez fermement la
fiche et sortez-la de la prise en tirant bien droit.
Réparez ou remplacez immédiatement tous les
cordons électriques effilochés ou endommagés.
N’utilisez pas de cordon qui présente des signes
d’usure ou de fissure.
Lorsque vous éloignez l’appareil du mur, faites
attention à ne pas le faire rouler sur le cordon
d’alimentation et à ne pas endommager ce dernier.

À propos du bouton de commande du réfrigérateur
Réglage du bouton de commande
4
Service à la clientèle Dépannage Utilisation Sécurité
Installation
Dépannage
Installation
SécuritéUtilisation
Dépannage Installation SécuritéUtilisation
0
1
2
3
4
5
6
7
Le bouton de sélection de la température est situé en haut de la caisse du réfrigérateur. La position
0
correspond à la position d’arrêt. Tournez le bouton sur le réglage
4
.
Une fois le réfrigérateur installé, attendez 24 heures avant de modifier le réglage initial.
Tournez le bouton de sélection vers la droite pour diminuer la température. Si vous positionnez le
7
du bouton
de sélection en face de la flèche, vous obtiendrez la température la plus basse.
Comme pour tout appareil de réfrigération, la température varie selon les différentes zones de la caisse.
La partie supérieure de la caisse est la moins froide. La partie la plus froide se situe en bas de l’appareil.

Service à la clientèleDépannageUtilisationSécurité Installation
5
Clayettes
Caractéristiques du réfrigérateur www.electromenagersmoffat.ca
Balconnets
Bac à fruits/légumes
Pour retirer une clayette, soulevez légèrement l’arrière de celle-ci et tirez-la vers vous. Certains
modèles disposent de clayettes à positions multiples, qui peuvent être installées à divers
niveaux.
Les balconnets de la porte fournissent un espace de rangement pratique pour les articles
fréquemment utilisés. Certains modèles disposent de portes assez profondes pour contenir de
grandes bouteilles.
Ce bac sert au rangement des fruits et des légumes.

Service à la clientèle Dépannage Utilisation
Sécurité
InstallationDépannage Installation
Sécurité
UtilisationDépannage Installation SécuritéUtilisation
6
Entretien et nettoyage du réfrigérateur
Nettoyage de l’extérieur
Nettoyage de l’intérieur
L’extérieur doit rester propre.
Nettoyez avec un chiffon propre légèrement imbibé de cire pour
électroménagers de cuisine ou de liquide vaisselle doux. Séchez et polissez à l’aide d’un linge
doux et propre.
N’essuyez pas le réfrigérateur avec un torchon sale ou une serviette humide. Ceux-ci peuvent laisser
un résidu qui pourrait endommager la peinture. N’utilisez pas de tampon à récurer, de poudre
nettoyante, d’agent de blanchiment (ou de produit qui en contienne) car ils peuvent rayer ou fragiliser
la peinture.
Protection de la peinture.
L’extérieur du réfrigérateur est recouvert d’une peinture cuite au four
de haute qualité. S’il est bien entretenu, le revêtement garde son aspect neuf et ne rouille pas
pendant de nombreuses années. Appliquez une couche de cire pour les électroménagers de
cuisine lorsque le réfrigérateur est encore neuf, puis au moins deux fois par an.
Pour éviter toute odeur désagréable,
laissez une boîte de bicarbonate de soude ouverte dans le
réfrigérateur.
Débranchez le réfrigérateur avant de le nettoyer.
Si cela n’est pas pratique, essorez bien l’éponge
ou le chiffon utilisés lorsque vous nettoyez autour du bouton de commande.
Utilisez une solution d’eau chaude et de bicarbonate de soude – environ une cuillère à soupe
(15 mL) de bicarbonate de soude pour 1 litre d’eau. Cela sert à nettoyer et à neutraliser les
odeurs. Rincez et essuyez.
Les autres pièces du réfrigérateur – dont les joints de porte, les bacs à fruits et légumes, et les
pièces en plastique – peuvent être nettoyées de la même manière.
Ne nettoyez aucune des pièces en plastique du réfrigérateur au lave-vaisselle.
Avant des vacances
En cas de vacances ou d’absences prolongées, retirez les aliments du réfrigérateur et
débranchez-le. Tournez le bouton sur
0
et nettoyez-en l’intérieur avec une solution composée
d’une cuillère à soupe (15 mL) de bicarbonate de soude et d’un litre d’eau. Laissez la porte
ouverte.
Avant un déménagement
Afin d’éviter d’endommager les pièces mobiles comme les clayettes et le bac à fruits/légumes,
immobilisez-les avec du ruban adhésif.
Assurez-vous que le réfrigérateur reste en position verticale lors du déménagement.

Service à la clientèleDépannageUtilisationSécurité Installation
7
Préparation avant l’installation du réfrigérateur www.electromenagersmoffat.ca
Lisez attentivement toutes ces instructions.
N’installez pas le réfrigérateur dans un endroit où la température peut descendre en dessous de 50 °F
(10 °C), car il ne fonctionnera pas assez souvent pour maintenir une bonne température intérieure.
Installez-le sur un sol assez solide pour le supporter une fois plein.
N’installez pas l’appareil à moins de 5 po (13 cm) d’une cuisinière.
N’installez pas l’appareil dans un zone renfoncée.
N’encastrez pas le réfrigérateur.
Emplacement du réfrigérateur
Laissez les dégagements suivants pour une installation facile et une bonne circulation de l’air :
Côtés : 1/2 po (1,3 cm)
Dessus : 2 po (5,1 cm)
Arrière : 2 po (5,1 cm) entre la surface arrière de la caisse et le mur
Dégagements
Pieds de mise à niveau (certains modèles)
Les
pieds réglables
à l’avant du réfrigérateur doivent être réglés de manière à ce que l’appareil
repose bien sur le sol et que l’avant soit légèrement surélevé (pour une fermeture facilitée de
la porte lorsque celle-ci est ouverte de moitié).
Pour régler les pieds de mise à niveau :
tournez-les
vers la gauche pour lever
le réfrigérateur,
vers
la droite pour l’abaisser
.
Tournez vers la gauche pour lever,
vers la droite pour abaisser.

8
Service à la clientèle Dépannage Utilisation SécuritéInstallation
Préparation avant l’installation du réfrigérateur
Inversion de la porte
Modèles de 3 pi³ (85 L) et certains modèles de 4 pi³ (113 L)
1. Retirez le petit cache situé à gauche de l’embout supérieur de la porte.
2. Retirez les deux petits caches ou vis situés en haut, à gauche de la caisse.
3. Retirez la vis du couvre-charnière en plastique puis enlevez le couvre-charnière en le
soulevant par son bord avant.
4. Retirez les deux vis de la charnière supérieure puis retirez la charnière supérieure.
5. Soulevez la porte et dégagez-la de la charnière inférieure (à droite).
6. Faites basculer le réfrigérateur vers l’arrière pour retirer le pied de mise à niveau droit.
7. Retirez les vis de la charnière inférieure (à droite) et le pied de mise à niveau gauche.
Déplacez la charnière inférieure vers le côté gauche et maintenez-la en place à l’aide des vis
et du pied de mise à niveau.
IMPORTANT : Le pied gauche dispose d’une entretoise qui doit être déplacée vers le pied de mise à
niveau droit lorsque la porte est inversée.
8. Vissez le pied de mise à niveau droit, avec l’entretoise en place, pour l’installer du côté
droit.
9. Installez la porte sur la charnière inférieure gauche. Le joint magnétique immobilisant la
porte, fixez la charnière supérieure avec des vis.
10.
Assurez-vous que la porte est alignée sur la caisse du réfrigérateur avant de continuer.
11. Remettez le couvre-charnière au-dessus de la charnière et fixez-le avec une vis.
12. Enfoncez le cache dans le trou du côté droit de l’embout de la porte.
13. Mettez les trois petits caches ou vis en haut, à droite de la caisse.
Caches ou vis
Couvre-charnière
Charnière
Cache
Charnière
inférieure
Pieds de nivellement
Rondelle
d’espacement
Vis
Other manuals for MAR04
1
Table of contents
Languages:
Other Moffat Refrigerator manuals

Moffat
Moffat MTE18 Operating instructions

Moffat
Moffat 20 Operating instructions

Moffat
Moffat MDE19DTNKWW Repair manual

Moffat
Moffat MAR04 Operating instructions

Moffat
Moffat MUL 514 User manual

Moffat
Moffat MBE11DSLSS Operating instructions

Moffat
Moffat PFSS6SKXSS Operating instructions

Moffat
Moffat 20 Operating instructions

Moffat
Moffat MWE22FYPKFS User manual

Moffat
Moffat MBE19DTNKWW Safety guide