AT-200 Air-Powered Crimp Tool
Doc No: TM-192790001 Release Date: 07-01-02 UNCONTROLLED COPY Page 9 o 18
Revision: D Revision Date:11-10-09
I the cam is not lined up, use the ollowing
procedure.
a) Disconnect the air supply with the cam
in the retracted position trigger is up.
b) Grasp the center section o the cam
with a long nose plier and rotate the
cam clockwise (CW) until the center
line o the wedge line up with (2) #1/4-
20 holes in power unit. See Figure 5
or the correct alignment.
c) Replace the head be ore cycling the
tool. Be sure both screws are in place
and tightened.
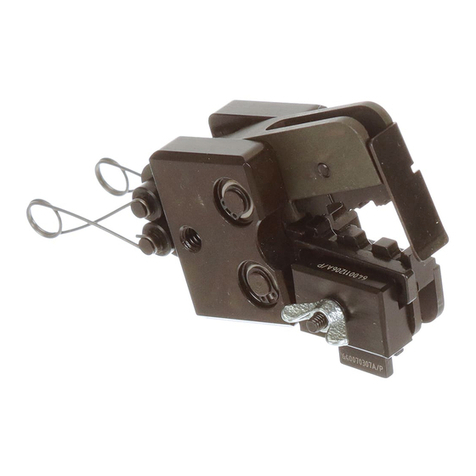
4. To replace the crimp tool head, hold power
unit in le t hand as shown in Figure 6.
5. Grasp the crimp tool head with the right
hand and with the terminal locator acing
you. Slide the crimp tool head assembly
into the body o the power unit until the side
plates o the crimp tool head butt against
the steps in the power unit. Be sure the jaw return springs clear the cam in the power unit. See Figure 6.
6. Line up the holes in the crimp tool head with the holes in the housing o the power unit.
7. Replace the (2) #1/4-20 screws and tighten securely. The tool is now ready or use.
2.2 Ins lation S pport Crimp Adj stment
(Older style fixed jaw air powered crimp tools heads)
1. The crimp tool heads or the insulated terminals and
the connectors eature an adjustable insulation
support crimp to accommodate varying wire insulation
diameters (See Figure 7) or old style crimp tool head.
2. The adjustment screw on each crimp head tool is set
at the actory at the M position. This setting will give
the best crimp on most wires. Two other adjustment
settings are available: S, the smallest con iguration
and L, the largest con iguration.
3. Crimp a terminal or connector and inspect the
insulation support sleeve crimp or con iguration. A
properly crimped sleeve snugly grasps the wire
insulation.
4. I the crimp con iguration is too loose, change the
adjustment setting by removing the air powered crimp
tool head rom the AT-200 and setting adjustment screw to the S position. Re-insert the air powered crimp tool
head into the AT-200 and crimp, and inspect the insulation support sleeve.
5. I crimp con iguration is too tight, change adjustment setting by removing the air powered crimp tool head rom
the AT-200 and setting adjustment screw to the L position. Re-insert the air powered crimp tool head into the
AT-200 and crimp, and inspect insulation support sleeve.
BUTTS UP AGAINST STEPS
LIGHT OIL (EVERY MONTH
OR 5,000 CRIMPS)
ADJUSTMENT SCREWS
