Please keep the product in a dry, clean, dust-free environment.
Keep corrosive chemicals, liquids and heat source away from the product to
prevent mechanics damage.
Use only a soft and dry cloth for cleaning the product.
Malfunction may be caused by dropping, impact of external force.
Do not attempt to disassemble the product. Doing so voids warranty.
Please have the product checked or repaired by authorized technicians if any
malfunctions happened.
Failure to follow all the instructions may result in mechanics damage.
Warranty does not apply to human errors.
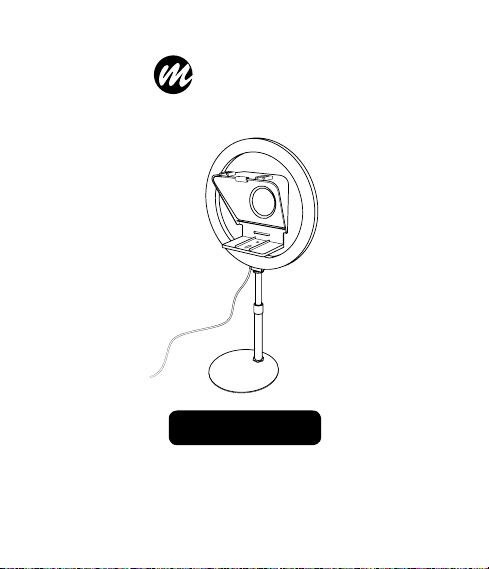
Caring For Your MOMAN Product
Product Introduction
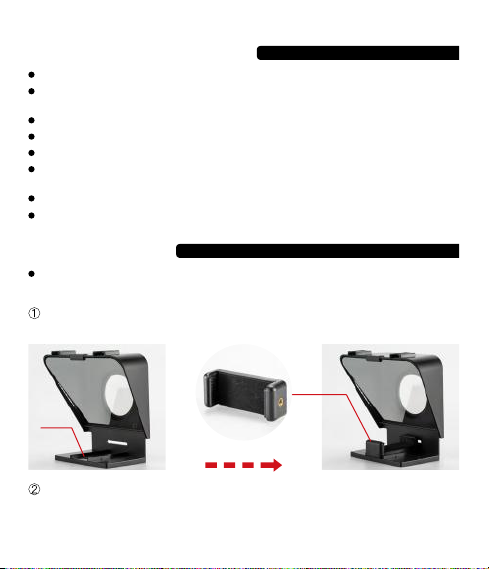
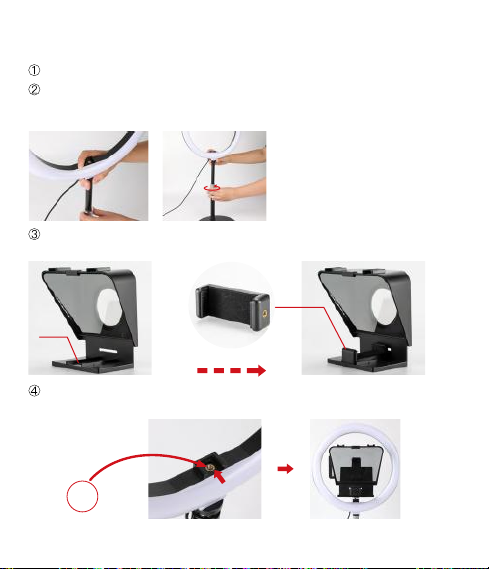
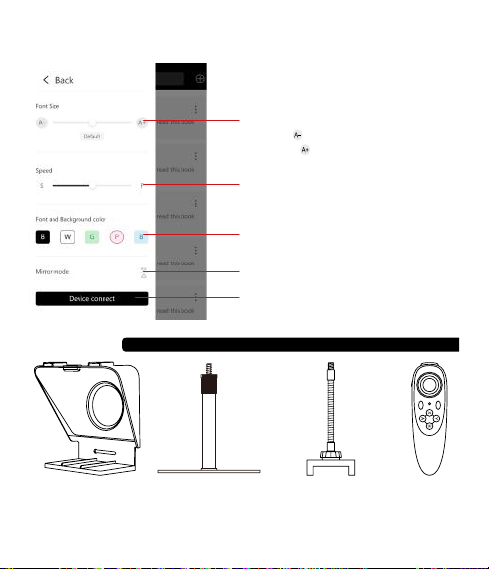
1. Teleprompter Installation for Phone
Insert the screw to [A], then attach the phone clamp to the screw. Regulate to
the proper position then tighten the screw.
How to Install Teleprompter
A
A
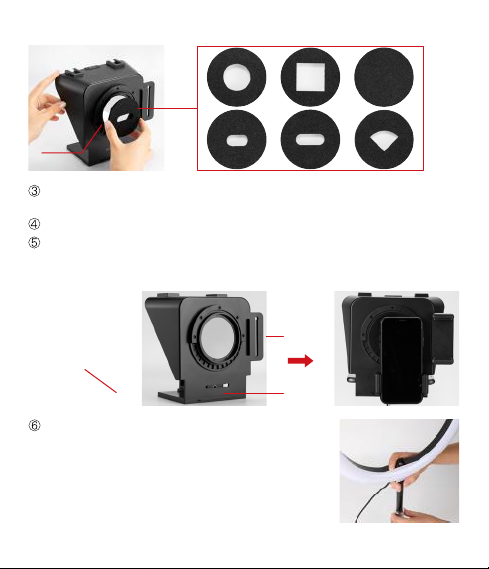
Attach a foam ring to [B].
B
Install the phone clamp to the teleprompter at [C1] or [C2] through the screw
and tighten to fix the clamp.
Set the phone on the phone clamp.
Turn on APP and place the phone on the front tray and adjust to the right
position accordingly.
Note: user should increase text size to prevent ghosting and to see clearly.
C2
C1
front tray
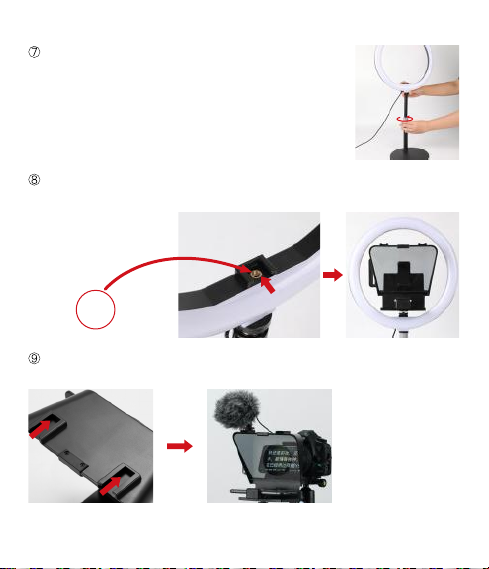
Install the ring light to the tabletop stand through
1/4 screw and spin to fix it.
Hold the arm firmly, in the meantime turn the knob
to lock it tightly to stretch/retract the tabletop stand to
suitable position.
(Note: Please hold the ring light while adjusting in case
of insufficient support.)
Attach the double layer cold shoe mount to the 1/4 screw at the bottom of the
teleprompter for connection with the ring light.
Optional: Equipping with accessories like microphone, through cold shoes
is possible.
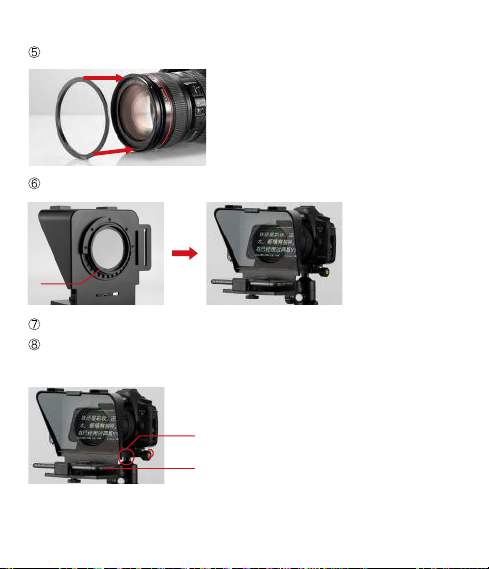
2. Teleprompter Installation for Camera
Install the ring light to the tabletop stand through 1/4 screw and spin to fix it
Hold the arm firmly, in the meantime turn the knob to lock it tightly to stretch/
retract the tabletop stand to suitable position.
(Note: Please hold the ring light while adjusting in case of insufficient support.)
Insert the screw to [A], then attach the phone clamp to the screw. Slide to the
proper position then tighten the screw to fix the clamp.
Attach the double layer cold shoe mount to the 1/4 screw at the bottom of the
teleprompter for connection with the ring light.
1/4 screw
phone
Choose the proper size of lens adapter and attach to the lens of camera.
Take off the original adapter ring and mount the camera to [B].
Set the camera to tripod through the 1/4 screw, then spin to lock it.
Optional: Equip the teleprompter with microphone through cold shoes.
How to Use RGB Ring Light
1. LED Array
2. 1/4 Mounting Socket
For connecting with teleprompter(via double
layer cold shoe mount) or phone holder
3. 1/4 Screw
4. USB Connector
5. Colour Light Switch
Altogether 3 light modes: white, warm
white and warm
8
9
6. RGB Switch
7. Brightness Increase
8. Brightness Decrease
9. Light Effect Switch
Altogether 35 light modes
10. Power Button
B
Turn on the APP and place the phone to the front tray.
Note: To avoid capturing the frame of teleprompter, please use longer
mid-focus lens for SLR vertical shooting.