manuals.online logo
Brands
  1. Home
  2. •
  3. Brands
  4. •
  5. Monacor
  6. •
  7. Amplifier
  8. •
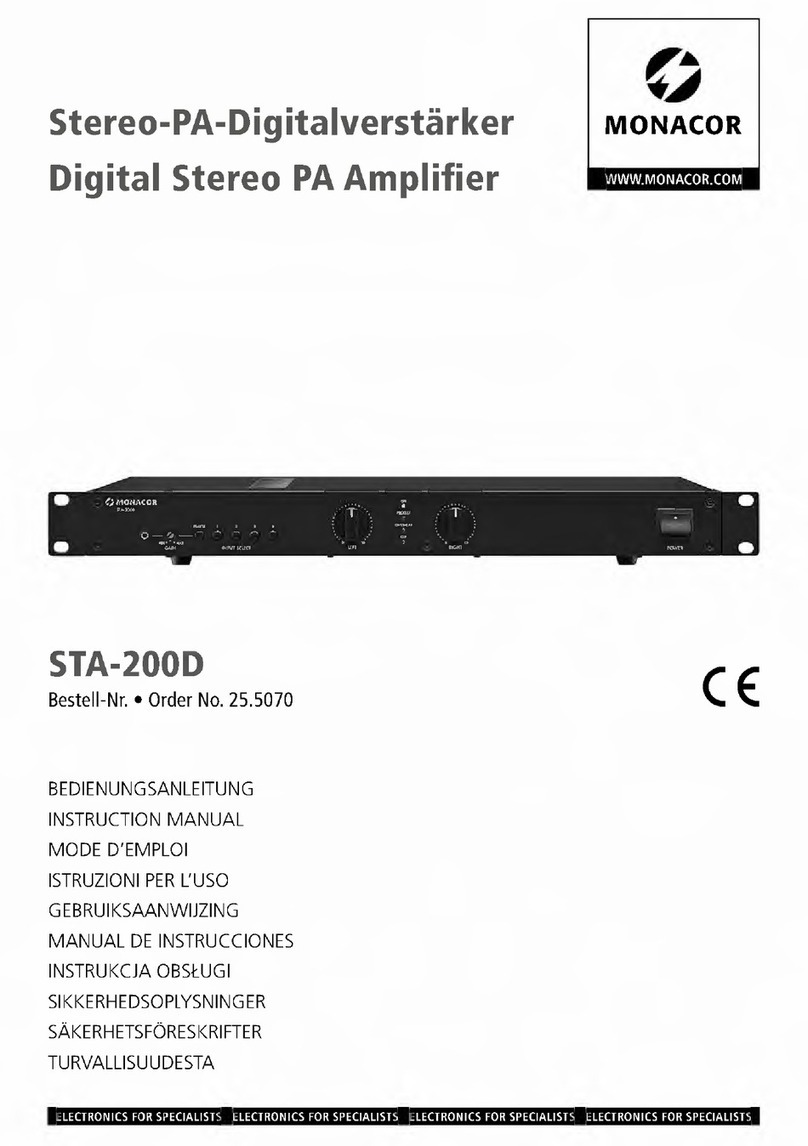
  9. Monacor IMG STAGELINE HPR-6 User manual

Monacor IMG STAGELINE HPR-6 User manual

HPR-6
Best.-Nr. 24.4210
wwwwww..iimmggssttaaggeelliinnee..ccoomm
Copyright©by MONACOR INTERNATIONAL GmbH & Co. KG, Bremen, Germany. All rights reserved. A-0344.99.02.09.2009
®
Stereo-Kopfhörer-
verstärker
1 Einsatzmöglichkeiten
Der HPR-6 verstärkt das Line-Ausgangssignal von
einem Audiogerät (z. B. CD-Spieler) zur Wiedergabe
über einen Kopfhörer oder über Kleinlautsprecher.
2 Hinweise für den sicheren Gebrauch
Die Geräte (Kopfhörerverstärker und Netzgerät) ent-
sprechen allen erforderlichen Richtlinien der EU und
sind deshalb mit gekennzeichnet.
GVerwenden Sie die Geräte nur im Innenbereich.
Schützen Sie sie vor Tropf- und Spritzwasser, hoher
Luftfeuchtigkeit und Hitze (zulässiger Einsatztempe-
raturbereich 0 – 40 °C).
GVerwenden Sie für die Reinigung nur ein trockenes,
weiches Tuch, niemals Chemikalien oder Wasser.
ACHTUNG! Das Netzgerät wird mit lebensgefährli-
cher Netzspannung versorgt. Nehmen Sie deshalb nie
selbst Eingriffe an diesem Gerät vor. Durch unsachge-
mäßes Vorgehen besteht die Gefahr eines elektri-
schen Schlages.
GWerden die Geräte zweckentfremdet, nicht richtig
angeschlossen, falsch bedient oder nicht fachgerecht
repariert, kann keine Haftung für daraus resultie-
rende Sach- oder Personenschäden und keine
Garantie für die Geräte übernommen werden.
3 Inbetriebnahme
1) Den Line-Ausgang des Audiogerätes (z. B. CD-Spie-
ler, Tape-Deck, Mischpult) an die beiden Cinch-
Buchsen INPUT (5) anschließen.
2) Den Kopfhörer an die 6,3-mm-Klinkenbuchse OUT-
PUT (1) anschließen. Alternativ lassen sich über
einen Stereo-Klinkenstecker auch zwei Kleinlautspre-
cher für den linken und rechten Kanal anschließen.
3) Den Kleinspannungsstecker des Netzgerätes in die
Buchse „12 V “ (2) stecken und das Netzgerät in
eine Steckdose (100 – 240 V~/50 – 60 Hz). Der Ver-
stärker ist damit betriebsbereit.
4) Mit dem Regler VOLUME (4) die Lautstärke einstel-
len und mit dem Regler BALANCE (3) die Balance.
Sollen die Geräte endgültig aus dem Betrieb
genommen werden, übergeben Sie sie zur
umweltgerechten Entsorgung einem örtli-
chen Recyclingbetrieb. 5) Nach dem Betrieb das Netzgerät aus der Steckdose
ziehen, damit kein Strom unnötig verbraucht wird.
4 Technische Daten
Eingangsempfindlichkeit: . . . 0,1–4V
Ausgangsleistung pro Kanal
an 4 Ω: . . . . . . . . . . . . . . . 525 mWRMS, 1,5 WMAX
an 8 Ω: . . . . . . . . . . . . . . . 330 mWRMS, 0,75 WMAX
an 32 Ω: . . . . . . . . . . . . . . 114 mWRMS, 0,2 WMAX
Frequenzbereich: . . . . . . . . . 19 – 40 000 Hz
Störabstand: . . . . . . . . . . . . . 69 dB
Klirrfaktor: . . . . . . . . . . . . . . . 0,1 %
Stromversorgung: . . . . . . . . .
12 V /100 mA über
beiliegendes Netzgerät
Änderungen vorbehalten.
VORSICHT! Stellen Sie die Kopfhörerlautstärke
nie sehr hoch ein. Hohe Lautstärken können auf
Dauer das Gehör schädigen! Das menschliche Ohr
gewöhnt sich an große Lautstärken und empfindet
sie nach einiger Zeit als nicht mehr so hoch. Darum
eine hohe Lautstärke nach der Gewöhnung nicht
weiter erhöhen.
Stereo Headphone Amplifier
1 Applications
The HPR-6 amplifies the line output signal of an audio
unit (e. g. CD player) for reproduction via headphones
or small speakers.
2 Safety Notes
The units (headphone amplifier and power supply unit)
correspond to all required directives of the EU and are
therefore marked with .
GThe units are suitable for indoor use only. Protect
them against dripping water and splash water, high
air humidity, and heat (admissible ambient tempera-
ture range 0 – 40 °C).
GFor cleaning only use a dry, soft cloth; never use
chemicals or water.
GNo guarantee claims for the units and no liability for
any resulting personal damage or material damage
ATTENTION! The power supply unit is supplied with
hazardous mains voltage. Leave servicing to skilled
personnel only. Inexpert handling or modification of the
unit may cause an electric shock hazard.
will be accepted if the units are used for other pur-
poses than originally intended, if they are not correctly
connected, operated, or not repaired in an expert way.
3 Operation
1) Connect the line output of the audio unit (e. g. CD
player, tape deck, mixer) to the two phono jacks
INPUT (5).
2) Connect the headphones to the 6.3 mm jack OUT-
PUT (1). Alternatively, it is also possible to connect
two small speakers for the left channel and the right
channel via a 6.3 mm stereo plug.
3) Connect the low-voltage plug of the power supply
unit to the jack “12 V ” (2), then connect the
power
supply unit to a mains socket (100 – 240 V~ /
50 – 60 Hz). Thus, the amplifier is ready for operation.
4) Adjust the volume with the control VOLUME (4) and
the balance with the control BALANCE (3).
If the units are to be put out of operation de-
finitively, take them to a local recycling plant
for a disposal which is not harmful to the
environment. 5) After operation, disconnect the power supply unit
from the mains socket to prevent unnecessary power
consumption.
4 Specifications
Input sensitivity: . . . . . . . . . 0.1 – 4 V
Output power per channel
at 4 Ω: . . . . . . . . . . . . . . 525 mWRMS, 1.5 WMAX
at 8 Ω: . . . . . . . . . . . . . . 330 mWRMS, 0.75 WMAX
at 32 Ω: . . . . . . . . . . . . . 114 mWRMS, 0.2 WMAX
Frequency range: . . . . . . . 19 – 40 000 Hz
S/N ratio: . . . . . . . . . . . . . . 69 dB
THD: . . . . . . . . . . . . . . . . . 0.1 %
Power supply: . . . . . . . . . . 12 V /100 mA via suplied
power supply unit
Subject to technical modification.
CAUTION! Never adjust the headphones to a very
high volume. Permanent high volumes may dam-
age your hearing! The human ear will get accus-
tomed to high volumes which do not seem to be that
high after some time. Therefore, do not further
increase a high volume after getting used to it.
Amplificateur casque stéréo
1 Possibilités dʼutilisation
Le HPR-6 amplifie le signal de sortie ligne dʼun appareil
audio (par exemple lecteur CD) pour la restitution via un
casque ou de petits haut-parleurs.
2 Conseils de sécurité et dʼutilisation
Les appareils (amplificateur casque et bloc secteur)
répondent à toutes les directives nécessaires de lʼUnion
européenne et portent donc le symbole .
GLes appareils ne sont conçus que pour une utilisation
en intérieur. Protégez-les des éclaboussures, de tout
type de projections dʼeau, dʼune humidité élevée et de
la chaleur (température ambiante admissible 0 –40 °C).
GPour le nettoyage, utilisez un chiffon sec et doux, en
aucun cas de produits chimiques ou dʼeau.
GNous déclinons toute responsabilité en cas de dom-
mages corporels ou matériels résultants si les appa-
ATTENTION ! Le bloc secteur est alimenté par une
tension dangereuse. Ne touchez jamais lʼintérieur de
lʼappareil car, en cas de mauvaise manipulation, vous
pouvez subir une décharge électrique.
reils sont utilisés dans un but autre que celui pour
lequel ils ont été conçus, sʼils ne sont pas correcte-
ment branchés, utilisés ou réparés par une personne
habilitée ; en outre, la garantie deviendrait caduque.
3 Fonctionnement
1) Reliez la sortie Ligne de lʼappareil audio (par
exemple lecteur CD, tape deck, table de mixage) aux
deux prises RCA INPUT (5).
2) Reliez le casque à la prise jack 6,35 OUTPUT (1). A
la place, on peut relier deux petits haut-parleurs pour
le canal gauche et le canal droit via une fiche jack
6,35 stéréo.
3) Mettez la fiche basse tension du bloc secteur dans la
prise “12 V ” (2) et reliez le bloc secteur à une prise
100 – 240 V~/50 – 60 Hz. Lʼamplificateur est ainsi
prêt à fonctionner.
4) Avec le réglage VOLUME (4), réglez le volume et
avec le réglage BALANCE (3), la balance.
Lorsque les appareils sont définitivement reti-
rés du service, vous devez les déposer dans
une usine de recyclage de proximité pour
contribuer à leur élimination non polluante. 5) Après le fonctionnement, débranchez le bloc secteur
de la prise secteur de manière à ne pas consommer
inutilement du courant.
4 Caractéristiques techniques
Sensibilité dʼentrée : . . . . . . . 0,1–4V
Puissance de sortie par canal
sous 4 Ω : . . . . . . . . . . . . . 525 mWRMS, 1,5 WMAX
sous 8 Ω : . . . . . . . . . . . . . 330 mWRMS, 0,75 WMAX
sous 32 Ω : . . . . . . . . . . . . 114 mWRMS, 0,2 WMAX
Bande passante : . . . . . . . . . 19 – 40 000 Hz
Rapport signal/bruit : . . . . . . 69 dB
Taux de distorsion : . . . . . . . . 0,1 %
Alimentation : . . . . . . . . . . . . 12 V /100 mA par
bloc secteur livré
Tout droit de modification réservé.
ATTENTION ! Ne réglez pas le volume du casque
trop fort. Un volume trop élevé peut, à long terme,
générer des troubles de lʼaudition. Lʼoreille
humaine sʼhabitue à des volumes élevés et ne les
perçoit plus comme tels au bout dʼun certain temps.
Nous vous conseillons donc de régler le volume et
de ne plus le modifier.
INPUT
LR
VOLUME BALANCE
OUTPUT
STEREO
HEADPHONE
AMPLIFIER
HPR-6
1
2
3
4
5
GB
D A CH
F B CH
HPR-6
Best.-Nr. 24.4210
wwwwww..iimmggssttaaggeelliinnee..ccoomm
Copyright©by MONACOR INTERNATIONAL GmbH & Co. KG, Bremen, Germany. All rights reserved. A-0344.99.02.09.2009
®
Amplificatore per cuffia stereo
1 Possibilità dʼimpiego
LʼHPR-6 amplifica il segnale dʼuscita Line di un appa-
recchio audio (p. es. di un lettore CD) per la riproduzione
con una cuffia o con degli altoparlanti piccoli.
2 Avvertenze di sicurezza
Gli apparecchi (amplificatore per cuffia e alimentatore
rete) sono conformi a tutte le direttive richieste dellʼUE
e pertanto portano la sigla .
GFar funzionare gli apparecchi solo allʼinterno di locali.
Proteggerli dallʼacqua gocciolante e dagli spruzzi
dʼacqua, da alta umidità dellʼaria e dal calore (tempe-
ratura dʼimpiego ammessa fra 0 e 40 °C).
GPer la pulizia usare solo un panno morbido, asciutto;
non impiegare in nessun caso prodotti chimici o
acqua.
GNel caso dʼuso improprio, di collegamenti sbagliati, di
ATTENZIONE! Lʼalimentatore rete funziona con peri-
colosa tensione di rete. Non intervenire mai al suo
interno; la manipolazione scorretta può provocare
delle scariche pericolose.
impiego scorretto o di riparazione non a regola dʼarte
degli apparecchi, non si assume nessuna responsa-
bilità per eventuali danni consequenziali a persone o
a cose e non si assume nessuna garanzia per gli
apparecchi.
3 Messa in funzione
1) Collegare lʼuscita Line dellʼapparecchio audio (p. es.
lettore CD, tape-deck, mixer) con le due prese RCA
INPUT (5).
2) Collegare la cuffia con la presa jack 6,3 mm OUT-
PUT (1). In alternativa, per mezzo di un jack stereo,
si possono collegare anche due altoparlanti piccoli
per il canale di sinistra e quello di destra.
3) Inserire la spina per alimentazione DC dellʼalimenta-
tore nella presa “12 V ” (2) ed inserire lʼalimenta-
tore in una presa di rete (100 – 240 V~/50 – 60 Hz).
Lʼamplificatore è ora pronto per funzionare.
Se si desidera eliminare gli apparecchi defi-
nitivamente, consegnarli per lo smaltimento
ad unʼistituzione locale per il riciclaggio.
4) Con il regolatore VOLUME (4) è possibile impostare
il volume e con il regolatore BALANCE (3) si regola
il bilanciamento.
5) Dopo lʼuso staccare lʼalimentatore dalla presa di rete
per non consumare inutilmente della corrente.
4 Dati tecnici
Sensibilità allʼingresso: . . . . 0,1–4V
Potenza dʼuscita per canale
con 4 Ω: . . . . . . . . . . . . . 525 mWRMS, 1,5 WMAX
con 8 Ω: . . . . . . . . . . . . . 330 mWRMS, 0,75 WMAX
con 32 Ω: . . . . . . . . . . . . 114 mWRMS, 0,2 WMAX
Gamma di frequenze: . . . . . 19 – 40 000 Hz
Rapporto S/R: . . . . . . . . . . . 69 dB
Fattore di distorsione: . . . . . 0,1 %
Alimentazione: . . . . . . . . . . 12 V /100 mA tramite
alimentatore in dotazione
Con riserva di modifiche tecniche.
ATTENZIONE! Mai tenere molto alto il volume delle
cuffie. A lungo andare, il volume eccessivo può pro-
curare danni allʼudito! Lʼorecchio si abitua agli alti
volumi e dopo un certo tempo non se ne rende più
conto. Non aumentare il volume successivamente.
Amplificador auricular estéreo
1 Posibilidades de utilización
El HPR-6 amplifica la señal de salida línea de un apa-
rato audio (por ejemplo lector CD) para la restitución vía
un auricular o altavoces pequeños.
2 Consejos de seguridad y de utilización
Los aparatos (amplificador auricular y alimentador)
cumplen con todas las directivas requeridas por la UE y
por lo tanto están marcados con el símbolo .
GLos aparatos están fabricados únicamente para una
utilización en interior. Protéjalos de salpicaduras, de
todo tipo de proyecciones de agua, de una humedad
elevada y del calor (temperatura ambiente admisible
0 – 40 °C).
GPara la limpieza, utilice un trapo seco y suave, no uti-
lice en ningún caso productos químicos o agua.
GDeclinamos toda responsabilidad en caso de daños
¡ATENCIÓN! El alimentador está alimentado por una
tensión peligrosa. No manipule nunca el interior del
aparato, en caso de manipulación inadecuada, podría
sufrir una descarga eléctrica mortal.
corporales o materiales resultandos si los aparatos
se utilizan para un fin diferente para el cual han sido
fabricados, si no están correctamente conectados,
utilizados o reparados por una persona habilitada;
además por todos estos mismos motivos los apara-
tos carecerían de todo tipo de garantía.
3 Funcionamiento
1) Conecte la salida línea del aparato audio (por ejem-
plo lector CD, tape deck, mesa de mezcla) a las dos
entradas RCA INPUT (5).
2) Conecte el auricular a la toma jack 6,35 OUTPUT (1).
También, puede conectar dos pequeños altavoces
para el canal izquierdo y el canal derecho vía una
toma jack 6,35 estéreo.
3) Ponga la toma baja tensión del alimentador en la
toma “12 V ” (2) y conecte el alimentador a un
enchufe de 100 – 240 V~/50 – 60 Hz. El amplificador
está entonces listo para funcionar.
4) Con el potenciómetro VOLUME (4), regule el volumen
y con el potenciómetro BALANCE (3), el balance.
Cuando los aparatos están definitivamente
sacados del servicio, deposite los aparatos
en una fábrica de reciclaje de proximidad para
contribuir a una eliminación no contaminante.
5) Después del funcionamiento, desconecte el alimen-
tador de la red de manera a no consumir corriente
inútilmente.
4 Características técnicas
Sensibilidad de entrada: . 0,1–4V
Potencia de salida por canal
Bajo 4 Ω: . . . . . . . . . . . 525 mWRMS, 1,5 WMAX
Bajo 8 Ω: . . . . . . . . . . . 330 mWRMS, 0,75 WMAX
Bajo 32 Ω: . . . . . . . . . . 114 mWRMS, 0,2 WMAX
Banda pasante: . . . . . . . . 19 – 40 000 Hz
Relación señal/ruido: . . . . 69 dB
Tasa de distorsión: . . . . . . 0,1 %
Alimentación: . . . . . . . . . . 12 V /100 mA por
alimentador entregado
Nos reservamos el derecho de modificación sin previo aviso.
¡ATENCIÓN! No regule el volumen del auricular
demasiado fuerte. Un volumen demasiado elevado,
puede a lo largo del tiempo, provocar problemas de
audición. La oreja humana se acostumbra a volú-
menes elevados y acaba por no percibirlos como
tales al cabo de un tiempo. Le aconsejamos enton-
ces de regular el volumen y de no modificarlo más.
Stereofoniczny wzmacniacz
słuchawkowy
1 Zastosowanie
HPR-6 jest stereofonicznym wzmacniaczem słuchaw-
kowym. Wzmacnia sygnał z wyjścia liniowego urządze-
nia audio (np. odtwarzacz CD) do poziomu odpowied-
niego dla słuchawek lub małych zestawów
głośnikowych.
2 Środki ostrożności
Urządzenia (wzmacniacz oraz zasilacz) spełniają
wymagania norm UE, dlatego zostały oznaczone sym-
bolem .
GUrządzenie jest przeznaczone tylko do użytku
wewnątrz pomieszczeń. Należy chronić przed dosta-
niem się jakiejkolwiek cieczy do środka urządzenia,
dużą wilgotnością oraz ciepłem (temperatura otocze-
nia powinna wynosić od 0 – 40 °C).
UWAGA! Zasilacz jest zasilany niebezpiecznym dla
życia napięciem zmiennym. Aby uniknąć porażenia
elektrycznego nie wolno otwierać urządzenia. Jego
naprawą powinien zajmować się tylko przeszkolony
personel.
GDo czyszczenie należy używać wyłącznie suchej,
miękkiej ściereczki. Nie wolno używać wody ani żad-
nych środków chemicznych.
GNie ponosi się odpowiedzialności za wynikłe uszko-
dzenia sprzętu lub obrażenia użytkownika w przy-
padku, gdy urządzenia są wykorzystywane w innych
celach niż to się przewiduje lub, jeśli są nieodpo-
wiednio zainstalowane, użytkowane lub naprawiane.
3 Obsługa
1) Podłączyć wyjście liniowe urządzenia audio (np. odt-
warzacz CD, magnetofon, mikser) do gniazd chinch
INPUT (5).
2) Do gniazda wyjściowego typu duży jack 6,3 mm
OUTPUT (1) podłączyć słuchawki. Alternatywnie do
tego gniazda można podłączyć także małe zestawy
głośnikowe.
3) Podłączyć wtyk zasilacza do gniazda “12 V ” (2), a
następnie wtyczkę sieciową zasilacza do gniazda
sieciowego (100 – 240 V~/50 – 60 Hz). Wzmacniacz
jest gotowy do pracy.
Aby nie zaśmiecać środowiska po całko-
witym zakończeniu eksploatacji urządzeń
należy je oddać do punktu recyklingu.
4) Ustawić głośność za pomocą regulatora VOLUME
(4) oraz balans za pomocą regulatora BALANCE (3).
5) Po zakończeniu pracy, odłączyć zasilacz z sieci, aby
nie pobierał on niepotrzebnie energii.
4 Dane techniczne
Czułość wejściowa: . . . . 0,1V–4V
Moc wyjściowa na kanał
przy 4 Ω: . . . . . . . . . . 525 mWRMS, 1,5 WMAX
przy 8 Ω: . . . . . . . . . . 330 mWRMS, 0,75 WMAX
przy 32 Ω: . . . . . . . . . 114 mWRMS, 0,2 WMAX
Pasmo przenoszenia: . . . 19 – 40 000 Hz
Stosunek S/N: . . . . . . . . 69 dB
THD: . . . . . . . . . . . . . . . . 0,1 %
Zasilanie: . . . . . . . . . . . .
12 V /100 mA z zasilacza
podłączonego do sieci
Z zastrzeżeniem do możliwych zmian.
UWAGA! Nigdy nie ustawiać bardzo dużej głoś-
ności! Stały, bardzo wysoki poziom dźwięku może
uszkodzić narząd słuchu. Ucho ludzkie adaptuje
się do dużych głośności, które po pewnym czasie
nie są już percepowane jako wysokie. Dlatego też,
nie wolno przekraczać raz już ustawionego maksy-
malnego poziomu głośności.
INPUT
LR
VOLUME BALANCE
OUTPUT
STEREO
HEADPHONE
AMPLIFIER
HPR-6
1
2
3
4
5
E
I
PL

This manual suits for next models

1

Other Monacor Amplifier manuals

Monacor PA-1450D User manual

Monacor

Monacor PA-1450D User manual

Monacor PA-M224 User manual

Monacor

Monacor PA-M224 User manual

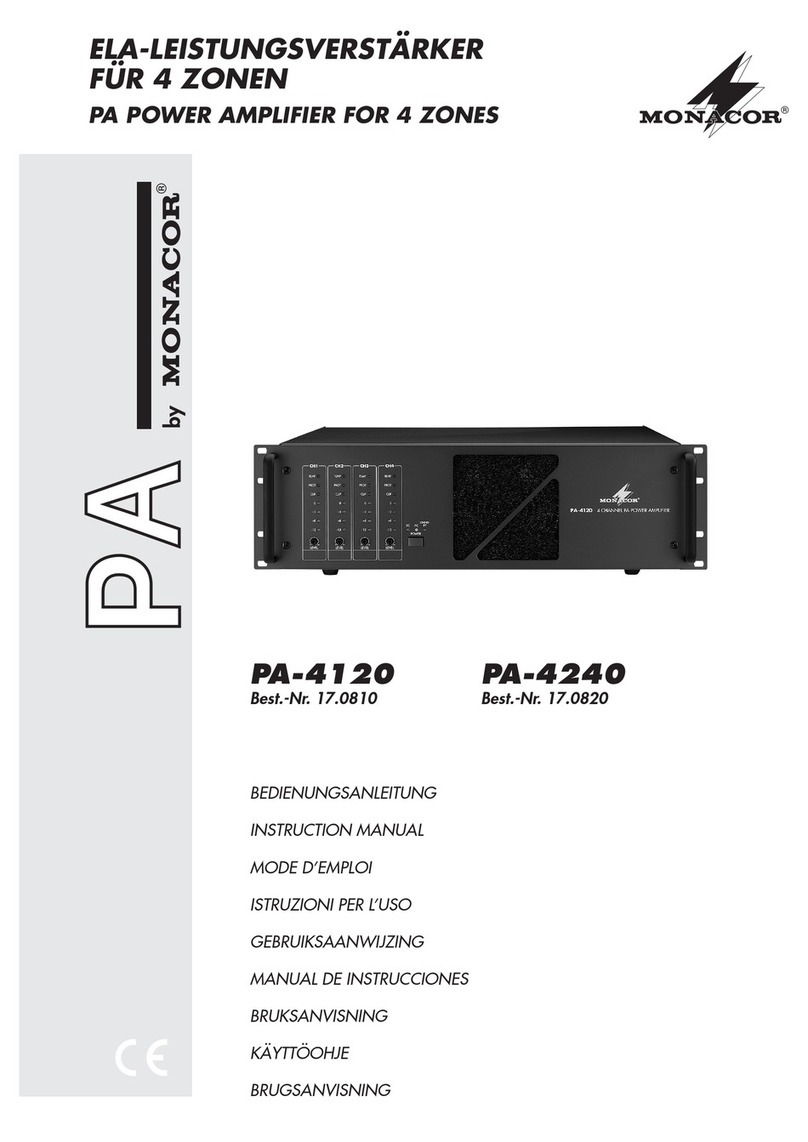
Monacor PA-4120 User manual

Monacor

Monacor PA-4120 User manual

Monacor PA-803 DAP User manual

Monacor

Monacor PA-803 DAP User manual

Monacor AKB-160 User manual

Monacor

Monacor AKB-160 User manual

Monacor IMG STAGE LINE 25.3250 User manual

Monacor

Monacor IMG STAGE LINE 25.3250 User manual

Monacor IMG STAGELINE TXS-872BOOST User manual

Monacor

Monacor IMG STAGELINE TXS-872BOOST User manual

Monacor PA-40120 User manual

Monacor

Monacor PA-40120 User manual

Monacor PA-306 User manual

Monacor

Monacor PA-306 User manual

Monacor PA-1120 User manual

Monacor

Monacor PA-1120 User manual

Monacor WAP-8 User manual

Monacor

Monacor WAP-8 User manual

Monacor TXA-620CD User manual

Monacor

Monacor TXA-620CD User manual

Monacor PA TXA-100SET User manual

Monacor

Monacor PA TXA-100SET User manual

Monacor IWA-05BT/WS User manual

Monacor

Monacor IWA-05BT/WS User manual

Monacor AKB-40WIFI User manual

Monacor

Monacor AKB-40WIFI User manual

Monacor PA-1120 User manual

Monacor

Monacor PA-1120 User manual

Monacor PA-890RCD User manual

Monacor

Monacor PA-890RCD User manual

Monacor SA-100 User manual

Monacor

Monacor SA-100 User manual

Monacor PA-704 User manual

Monacor

Monacor PA-704 User manual

Monacor PA-1500 User manual

Monacor

Monacor PA-1500 User manual

Monacor SA-130DMP User manual

Monacor

Monacor SA-130DMP User manual

Monacor STA-450D User manual

Monacor

Monacor STA-450D User manual

Monacor img Stage Line HPR-6 User manual

Monacor

Monacor img Stage Line HPR-6 User manual

Monacor TXA-500 User manual

Monacor

Monacor TXA-500 User manual

Popular Amplifier manuals by other brands

auna multimedia 10031404 manual

auna multimedia

auna multimedia 10031404 manual

T+A E-SERIES PA 1000 E user manual

T+A

T+A E-SERIES PA 1000 E user manual

AKG CA810 manual

AKG

AKG CA810 manual

Channel D Lino C 3.0 Installation and use manual

Channel D

Channel D Lino C 3.0 Installation and use manual

Canor TP106 VR user guide

Canor

Canor TP106 VR user guide

Sansui AU-5900 Service manual

Sansui

Sansui AU-5900 Service manual

JVC A-X3 Instruction book

JVC

JVC A-X3 Instruction book

True Systems P-SOLO Ribbon user manual

True Systems

True Systems P-SOLO Ribbon user manual

GLOCKENKLANG Bass Art Classic user manual

GLOCKENKLANG

GLOCKENKLANG Bass Art Classic user manual

Demon PMA-1520AE Service manual

Demon

Demon PMA-1520AE Service manual

Crown PowerTech PT 1.1 Specifications

Crown

Crown PowerTech PT 1.1 Specifications

Radio Shack MPS-50 owner's manual

Radio Shack

Radio Shack MPS-50 owner's manual

Hughes & Kettner Grand Meister 36 manual

Hughes & Kettner

Hughes & Kettner Grand Meister 36 manual

Monoprice 31027 user manual

Monoprice

Monoprice 31027 user manual

Fender Super Champ-XD Service Diagram

Fender

Fender Super Champ-XD Service Diagram

Interface Devices GA-160 Installation, operation & maintenance manual

Interface Devices

Interface Devices GA-160 Installation, operation & maintenance manual

Lab.gruppen C Series C 28 4 Specifications

Lab.gruppen

Lab.gruppen C Series C 28 4 Specifications

Radio Shack MPA 31 owner's manual

Radio Shack

Radio Shack MPA 31 owner's manual

manuals.online logo
manuals.online logoBrands
  • About & Mission
  • Contact us
  • Privacy Policy
  • Terms and Conditions

Copyright 2025 Manuals.Online. All Rights Reserved.