manuals.online logo
Brands
  1. Home
  2. •
  3. Brands
  4. •
  5. Monacor
  6. •
  7. Horn
  8. •
  9. Monacor IT-250TW User manual

Monacor IT-250TW User manual

ELECTRONICS FOR SPECIALISTS ELECTRONICS FOR SPECIALISTS ELECTRONICS FOR SPECIALISTS ELECTRONICS FOR SPECIALISTS
Druckkammer-Musikhorn
Music Horn Speaker
IT-250TW
Bestell-Nr. • Order No. 16.3190
INSTALLATIONSANLEITUNG
INSTALLATION INSTRUCTIONS
NOTICE D’INSTALLATION
ISTRUZIONI PER L’INSTALLAZIONE
INSTRUCCIONES DE INSTALACIÓN
INSTRUKCJA INSTALACJI
2
DeutschEnglish
Druckkammer-Musikhorn
Diese Anleitung richtet sich an Installateure mit
Fachkenntnissen in der 100-V-Beschallungstech-
nik. Bitte lesen Sie die Anleitung vor der Instal-
lation gründlich durch und heben Sie sie für ein
späteres Nachlesen auf.
1 Verwendungsmöglichkeiten
Dieser Druckkammerlautsprecher ist speziell
für den Einsatz in ELA-Beschallungsanlagen
konzipiert. Er ist mit einem Übertrager für den
Betrieb an 100-V-Anlagen ausgestattet, kann
aber auch direkt an niederohmige Verstärker-
ausgänge angeschlossen werden. Um eine
gute Musikwiedergabe zu erreichen, ist er als
2-Wege-System aufgebaut (16-cm-Tiefmittel-
töner und 2,5-cm-Hochtonhorn). Durch das
wetterfeste ABS-Gehäuse (IP66) eignet sich der
Lautsprecher auch für den Außenbereich.
2 Hinweise für den
sicheren Gebrauch
Der Lautsprecher entspricht allen relevanten
Richtlinien der EU und deshalb mit gekenn-
zeichnet.
•
Schützen Sie den Lautsprecher vor extremen
Temperaturen (zulässiger Einsatztemperatur-
bereich: −20°C bis +50°C).
•
Verwenden Sie zum Reinigen nur ein tro-
ckenes oder angefeuchtetes, weiches Tuch,
auf keinen Fall scharfe Reinigungsmittel oder
Chemikalien.
•
Wird der Lautsprecher zweckentfremdet,
nicht fachgerecht montiert, falsch ange-
schlossen oder überlastet, kann keine Haf-
tung für daraus resultierende Sach- oder Per-
sonenschäden und keine Garantie für den
Lautsprecher übernommen werden.
Soll der Lautsprecher endgültig aus
dem Betrieb genommen werden,
übergeben Sie ihn zur umweltgerech-
ten Entsorgung einem örtlichen Recy-
clingbetrieb.
3 Installation
WARNUNG Im Betrieb liegt berührungsge-
fährliche Spannung bis 100V an
der Lautsprecherleitung an. Die
Installation darf nur durch Fach-
personal erfolgen.
Achten Sie auf die Belastung des ELA-Ver-
stärkers durch die Lautsprecher. Eine Überlas-
tung kann den Verstärker beschädigen! Die
Summe der Leistungen aller angeschlossenen
Lautsprecher darf die Verstärkerleistung nicht
überschreiten.
1) Den Lautsprecher an geeigneter Stelle fest-
schrauben.
2) Vor dem Anschluss des Lautsprechers die
ELA-Anlage komplett ausschalten, damit die
Lautsprecherleitung spannungsfrei ist!
3) Die Anschlüsse des Lautsprechers befinden
sich unter dem Schutzdeckel auf der Rück-
seite. Den Deckel abschrauben.
4) Die Lautsprecherleitung durch die Kabel-
durchführung des Deckels stecken und an
die Schraubklemmen des Lautsprechers an-
schließen:
Klemmen-Nr. Nennbelastung Impedanz
1 2 50W 200Ω
2 3 25W 400Ω
3 4 12,5W 800Ω
1 3 9W 1,1kΩ
2 4 4,5W 2,2kΩ
1 4 3,5W 2,8kΩ
1 5 50W 8Ω!
+ − Pol
Beim Anschluss von mehreren Lautspre-
chern darauf achten, dass die Lautsprecher
alle gleich gepolt werden.
5) Den Schutzdeckel wieder anschrauben und
die Mutter der Kabeldurchführung festzie-
hen, sodass die Anschlüsse wettergeschützt
sind.
6) Den Lautsprecher auf die zu beschallende
Fläche ausrichten.
Änderungen vorbehalten.
Music Horn Speaker
These instructions are intended for installers
with sufficient knowledge in 100V technology
for PA applications. Please read the instructions
carefully prior to installation and keep them for
later reference.
1 Applications
This horn speaker is especially designed for
PA systems. It is equipped with a transformer
for operation at a 100V system but may also be
directly connected to low-impedance amplifier
outputs. To provide high-quality music repro-
duction, the speaker is designed as a 2-way sys-
tem (16cm bass-midrange speaker and 2.5cm
tweeter horn). Due to its weather-proof ABS
housing (IP66), the speaker is also suited for
outdoor applications.
2 Safety Notes
The speaker corresponds to all relevant direc-
tives of the EU and is therefore marked with .
•
Protect the speaker against extreme tem-
peratures (admissible ambient temperature
range: −20°C to +50°C).
•
For cleaning, only use a dry or slightly wet
cloth; never use aggressive detergents or
chemicals.
•
No guarantee claims for the speaker and no
liability for any resulting personal damage
or material damage will be accepted if the
speaker is used for other purposes than orig-
inally intended, if it is not correctly installed
or connected, or if it is overloaded.
If the speaker is to be put out of op-
eration definitively, take it to a local
recycling plant for a disposal which is
not harmful to the environment.
3 Installation
WARNING During operation, there is a haz-
ard of contact with a voltage of
up to 100V at the speaker ca-
ble. Installation must be made
by skilled personnel only.
Observe the load of the PA amplifier by the
speakers. An overload may damage the am-
plifier! The total load of all speakers connect-
ed must not exceed the amplifier power.
1) Fasten the speaker at a suitable place using
screws.
2) Prior to connecting the speaker, completely
switch off the PA system so that the speaker
cable does not carry any voltage.
3) The connections of the speaker are located
beneath the protection cover on the rear
side. Remove the cover.
4) Pull the speaker cable through the grommet
of the cover and then connect the speaker
cable to the screw terminals of the speaker:
Terminal no. Power rating Impedance
1 2 50W 200Ω
2 3 25W 400Ω
3 4 12.5W 800Ω
1 3 9W 1.1kΩ
2 4 4.5W 2.2kΩ
1 4 3.5W 2.8kΩ
1 5 50W 8Ω!
+ − pole
When connecting multiple speakers, make
sure that all speakers have the same polarity.
5) Screw the protection cover on the speaker
and tighten the nut of the grommet so that
the connections are weather-proof.
6) Align the speaker to the desired direction of
sound.
Subject to technical modifications.
Technische Daten Specifications IT-250TW
Nennbelastbarkeit
100-V-Betrieb
8-Ω-Betrieb
Power rating
100V operation
8Ω operation
50/25/12,5/9/4,5/3,5W
50W
Frequenzbereich Frequency range 150–15000Hz
Kennschalldruck (1W/1 m) SPL (1W/1 m) 97dB
Abstrahlwinkel horizontal/vertikal Radiation angle horizontal/vertical 100°/60°
Gehäuseschutzklasse Protective class of housing IP66
Einsatztemperatur Ambient temperature –20°C … +50°C
Abmessung (B × H × T), Gewicht Dimensions (W × H × D), weight 370 × 270 × 305mm, 4,1 kg
370
270
10 (3×)
305
3
FrançaisItaliano
Tromba di musica
a compressione
Queste istruzioni sono rivolte agli installatori che
possiedono delle conoscenze specifiche sufficien-
ti della tecnica di sonorizzazione a 100V. Vi pre-
ghiamo di leggerle attentamente prima dell‘in-
stallazione e di conservarle per un uso futuro.
1 Possibilità d’impiego
Questo diffusore a compressione è previsto
specialmente per l’impiego in impianti PA di
sonorizzazione. È equipaggiato con un trasfor-
matore per l’uso in impianti con uscita audio
100V, ma può essere collegato anche diret-
tamente alle uscite a bassa impedenza di un
amplificatore. Per ottenere una buona riprodu-
zione della musica è strutturato come sistema
a 2 vie (woofer/midrange di 16cm e tweeter a
tromba di 2,5cm). Grazie al contenitore in ABS,
resistente alle intemperie (IP66), il diffusore è
adatto anche per usi all’esterno.
2 Avvertenze per l‘uso sicuro
Il diffusore è conforme a tutte le direttive rile-
vanti dell’UE e pertanto porta la sigla .
•
Proteggere il diffusore da temperature
estreme (temperatura d’impiego ammessa:
−20°C a +50°C).
•
Per la pulizia usare solo un panno morbido,
asciutto o inumidito; non impiegare in nes-
sun caso detergenti aggressivi o prodotti
chimici.
•
Nel caso d’uso improprio, di montaggio non
a regola d’arte, di collegamento scorretto o
di sovraccarico del diffusore, non si assume
nessuna responsabilità per eventuali danni
consequenziali a persone o a cose e non si
assume nessuna garanzia per il diffusore.
Se si desidera eliminare il diffusore
definitivamente, consegnarlo per lo
smaltimento ad un’istituzione locale
per il riciclaggio.
3 Installazione
AVVERTI-
MENTO
Durante il funzionamento, nel
cavo di collegamento è presente
una tensione fino a 100V, perico-
losa in caso di contatto. L’instal-
lazione deve essere fatta solo da
personale qualificato.
Tener presente il carico dell’amplificatore PA
da parte degli altoparlanti. Un sovraccarico
può danneggiare l’amplificatore! La somma
delle potenze di tutti gli altoparlanti collega-
ti non deve superare la potenza dell’ampli-
ficatore.
1) Avvitare il diffusore in un posto adatto.
2) Prima di collegare il diffusore, spegnere
completamente l’impianto PA per togliere la
tensione dai cavi del diffusore!
3) I contatti del diffusore si trovano sotto il
coperchio protettivo sul retro. Svitare il co-
perchio.
4) Fare passare il cavo del diffusore attraverso
il passacavo del coperchio e collegare il mor-
setti a vite del diffusore:
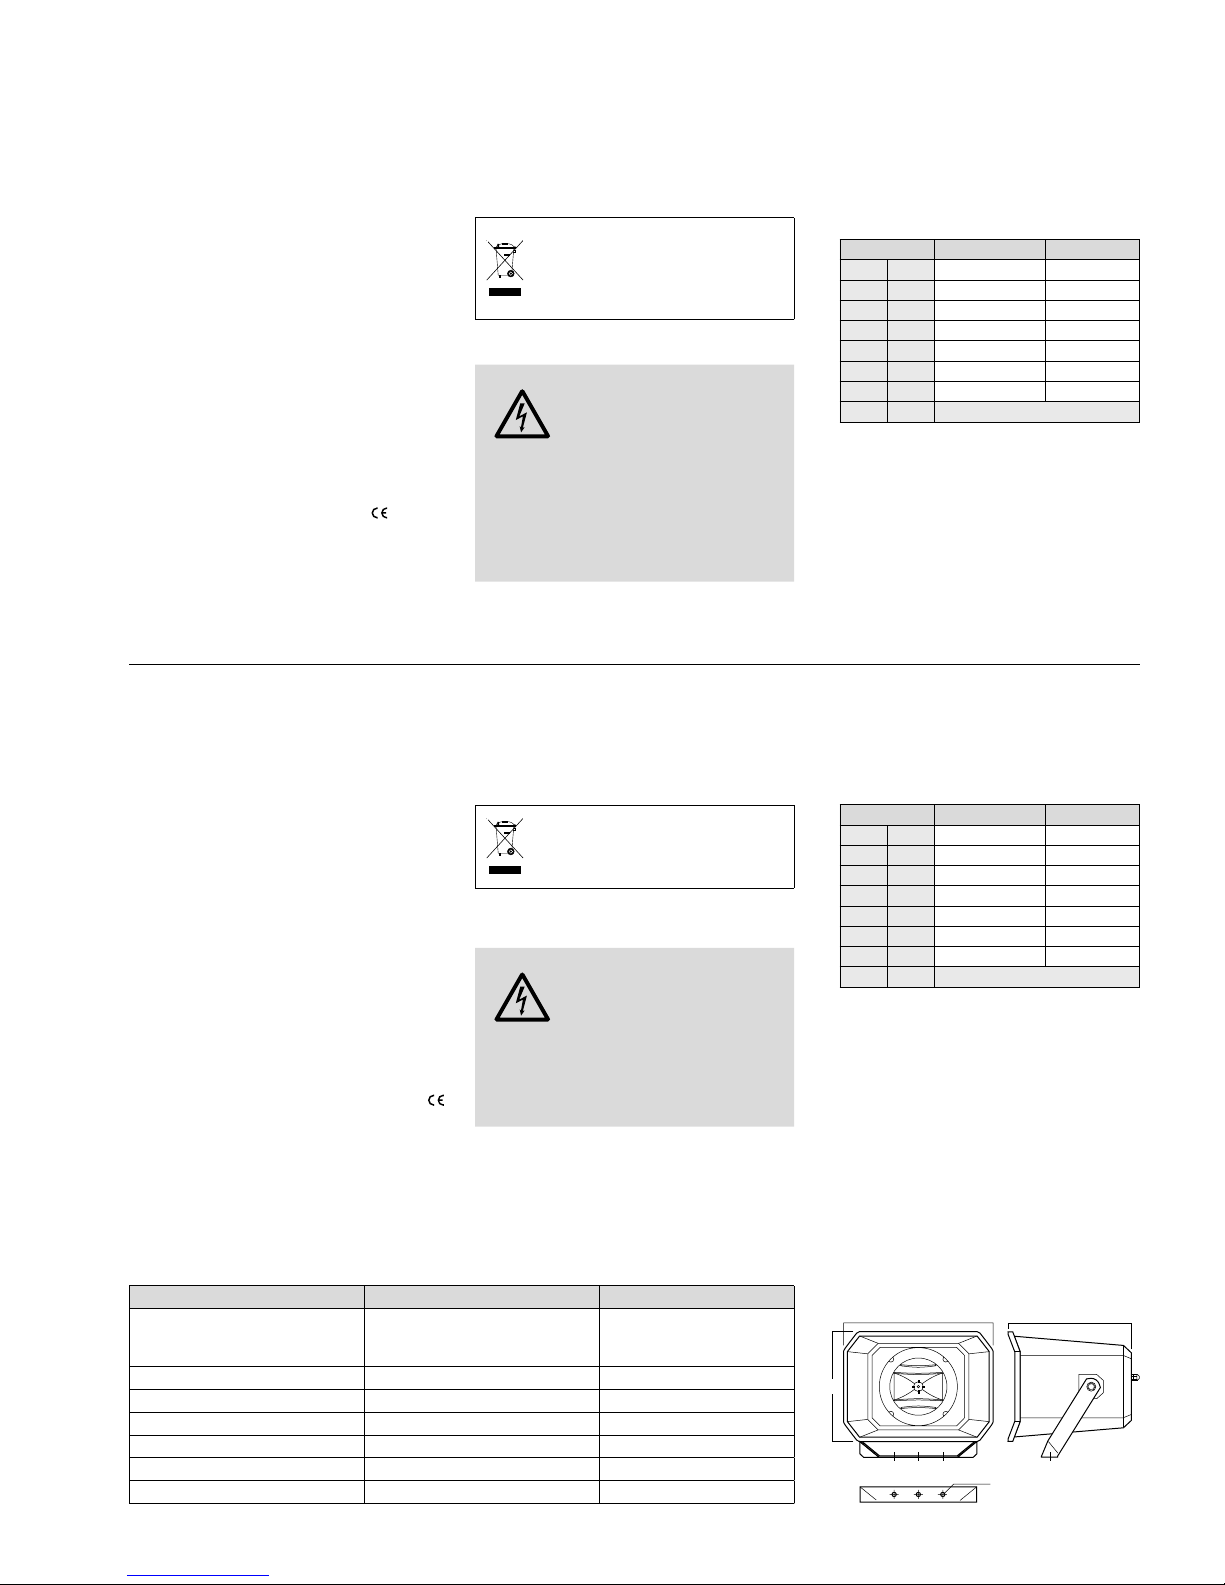
N. morsetto Potenza nominale Impedenza
1 2 50W 200 Ω
2 3 25W 400 Ω
3 4 12.5W 800 Ω
1 3 9W 1.1 kΩ
2 4 4.5W 2.2 kΩ
1 4 3.5W 2.8 kΩ
1 5 50W 8 Ω!
+ − polo
Se si collegano più diffusori fare attenzione
alla polarità identica di tutti i diffusori.
5) Avvitare nuovamente il coperchio protettivo
e stringere il dado del passacavo per proteg-
gere i contatti dalle intemperie.
6) Orientare il diffusore verso la zona da sono-
rizzare.
Con riserva di modifiche tecniche.
Pavillon musique à chambre
de compression
Cette notice s’adresse aux installateurs pos-
sédant des connaissances suffisantes en tech-
nique de sonorisation ligne 100V. Veuillez lire
la présente notice avec attention avant l‘instal-
lation et conservez-la pour pouvoir vous y re-
porter ultérieurement.
1 Possibilités d’utilisation
Ce haut-parleur à chambre de compression est
spécialement conçu pour une utilisation dans
des installations de sonorisation Public Adress.
Il est doté d’un transformateur pour un fonc-
tionnement dans des installations 100V, il peut
également directement être relié à des sor-
ties amplificateur basse impédance. Pour une
bonne restitution de la musique, il est conçu
comme un système 2 voies (haut-parleur de
grave médium 16cm et pavillon d’aigu 2,5cm).
Grâce au boîtier étanche en ABS (IP66), il est
également utilisable en extérieur.
2 Conseils d’utilisation et de sécurité
Le haut-parleur répond à toutes les directives
nécessaires de l’Union européenne et porte
donc le symbole .
•
Protégez le haut-parleur des températures
extrêmes (plage de température de fonction-
nement autorisée : −20°C à +50°C).
• Pour le nettoyage, utilisez uniquement un
chiffon sec ou légèrement humide, en aucun
cas de détergents abrasifs ou de produits
chimiques.
•
Nous déclinons toute responsabilité en cas
de dommages matériels ou corporels résul-
tants si le haut-parleur est utilisé dans un but
autre que celui pour lequel il a été conçu, s’il
n’est pas correctement installé ou branché
ou s’il y a surcharge; en outre, la garantie
deviendrait caduque.
Lorsque le haut-parleur est définitivement
retiré du service, vous devez le déposer
dans une usine de recyclage adaptée pour
contribuer à son élimination non polluante.
CARTONS ET EMBALLAGE
PAPIER À TRIER
3 Installation
AVERTISSE-
MENT
Pendant le fonctionnement, une
tension de contact dangereuse
jusqu’à 100V est présente au câble
haut-parleur. Seul un personnel
qualifié peut effectuer l‘installation.
Faites attention à la charge de l‘amplificateur
PA par les haut-parleurs. Une surcharge peut
endommager l‘amplificateur ! La somme des
puissances de l‘ensemble des haut-parleurs
reliés ne doit pas dépasser la puissance de
l‘amplificateur.
1) Vissez le haut-parleur à un endroit approprié.
2) Avant de brancher le haut-parleur, éteignez
complètement l’installation Public Adress
pour que le câble haut-parleur ne soit pas
porteur de tension.
3) Les branchements du haut-parleur se
trouvent sous le couvercle de protection sur
la face arrière. Dévissez le couvercle.
4) Faites passer le câble haut-parleur via le pas-
sage de câble et reliez-le aux bornes à vis du
haut-parleur :
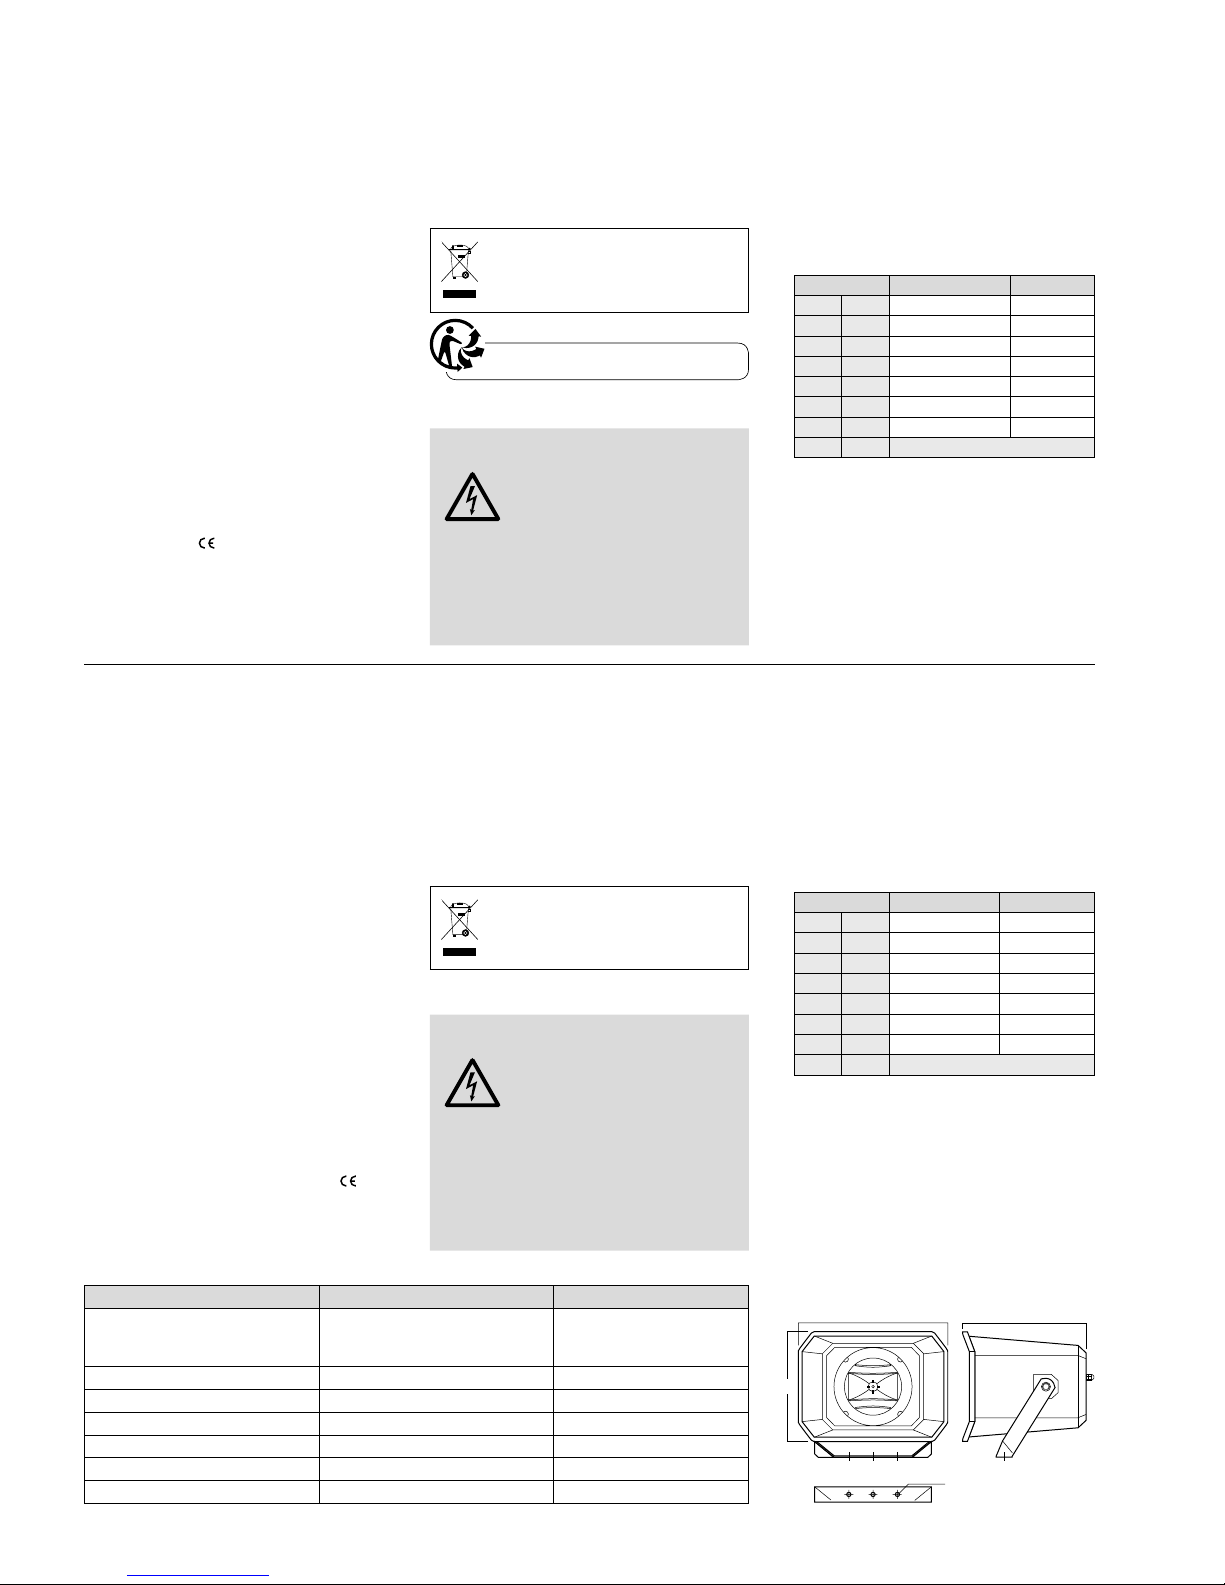
Numéro borne Puissance nominale Impédance
1 2 50W 200 Ω
2 3 25W 400 Ω
3 4 12,5W 800 Ω
1 3 9W 1,1 kΩ
2 4 4,5W 2,2 kΩ
1 4 3,5W 2,8 kΩ
1 5 50W 8 Ω!
+ − pôle
Si l’on branche plusieurs haut-parleurs, veil-
lez à ce que les haut-parleurs aient tous la
même polarité.
5) Revissez le couvercle de protection, serrez
l‘écrou du passage de câble de telle sorte
que les branchements soient protégés des
intempéries.
6) Orientez le HP vers la zone à sonoriser.
Tout droit de modification réservé.
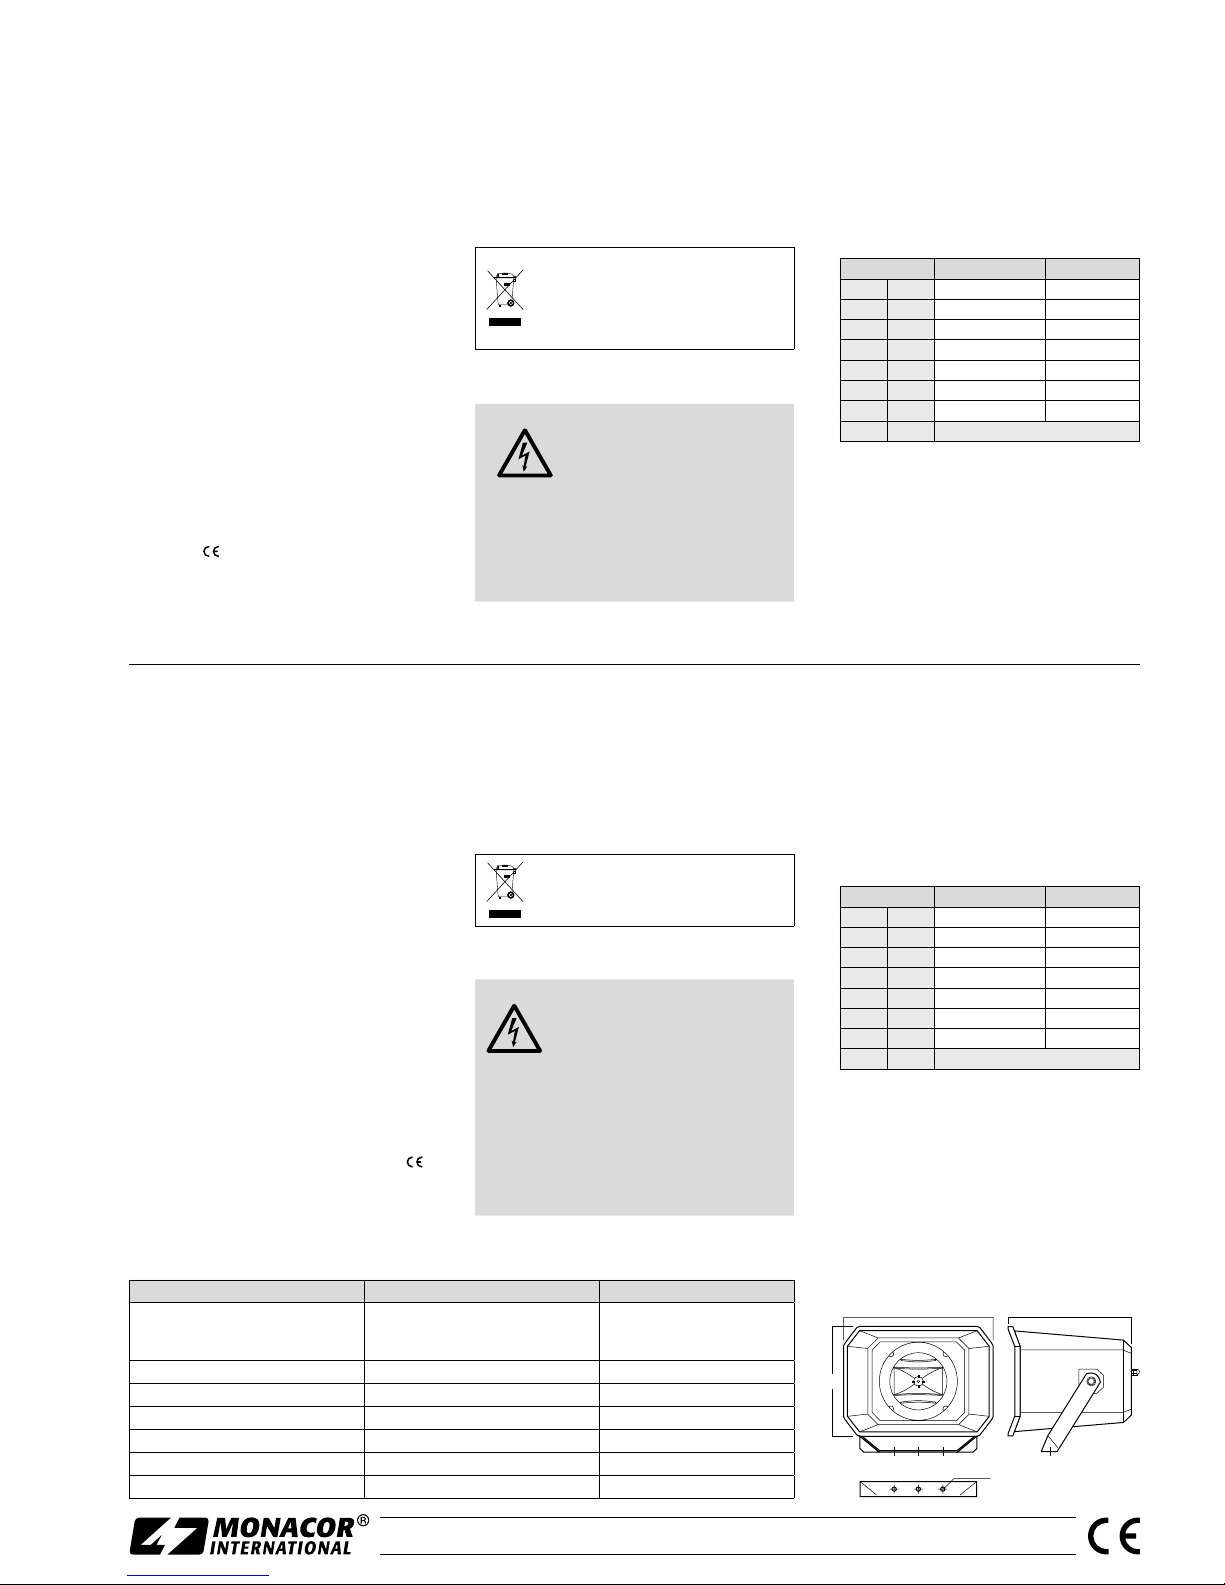
Caractéristiques techniques Dati tecnici IT-250TW
Puissance nominale
Fonctionnement 100V
Fonctionnement 8Ω
Potenza nominale
Funzionamento 100V
Funzionamento 8Ω
50/25/12,5/9/4,5/3,5W
50W
Bande passante Gamma di frequenze 150– 15 000Hz
Pression sonore nominale (1 W/1 m) Livello di press. sonora (1W/1m) 97dB
Angle de dispersion horiz./vertical Angolo d’irradiazione orizz./verticale 100°/60°
Classe de protection du boîtier Grado di protezione del contenitore IP66
Température fonc. Temperatura d‘esercizio –20°C … +50°C
Dimensions (l × h × p), poids Dimensioni (l × h × p), peso 370 × 270 × 305mm, 4,1 kg
370
270
10 (3×)
305
MONACOR INTERNATIONAL GmbH & Co. KG • Zum Falsch 36 • 28307 Bremen • Germany
Copyright©by MONACOR INTERNATIONAL. All rights reserved. A-1493.99.02.05.2018
EspañolPolski
Altavoz de Pabellón
Estas instrucciones van dirigidas a instaladores
con un conocimiento suficiente sobre la tecno-
logía de 100V en aplicaciones para megafonía.
Lea atentamente estas instrucciones antes de
la instalación y guárdelas para usos posteriores.
1 Aplicaciones
Este altavoz de pabellón se ha diseñado es-
pecialmente para aplicaciones en sistemas de
megafonía. Está equipado con un transfor-
mador para funcionar en un sistema de 100V
pero también se puede conectar directamente
a salidas de baja impedancia de un amplifica-
dor. Para ofrecer una reproducción musical de
gran calidad, el altavoz está diseñado como un
sistema de 2 vías (altavoz de graves-medios de
16cm y tweeter de pabellón de 2,5cm). Gra-
cias a su carcasa en ABS resistente a la intem-
perie (IP66), el altavoz también está adecuado
para aplicaciones en exteriores.
2 Notas de Seguridad
El altavoz cumple con todas las directivas rele-
vantes de la UE y por lo tanto está marcado con
el símbolo .
•
Proteja el altavoz de temperaturas extremas
(rango de temperatura ambiente admisible:
−20°C a +50°C).
•
Utilice sólo un paño suave y seco, o leve-
mente húmedo, para la limpieza; no utilice
nunca ni productos químicos ni detergentes
agresivos.
•
No podrá reclamarse garantía o responsabi-
lidad alguna por cualquier daño personal o
material resultante si el altavoz se utiliza para
otros fines diferentes a los originalmente
concebidos, si no se instala o conecta ade-
cuadamente o si se sobrecarga.
Si va a poner el altavoz fuera de servi-
cio definitivamente, llévelo a la planta
de reciclaje de la zona para que su
eliminación no sea perjudicial para el
medio ambiente.
3 Instalación
ADVERTENCIA Durante el funcionamiento, hay
peligro de contacto con un vol-
taje de hasta 100V en el cable
de altavoz. Sólo un técnico debe
realizar la instalación.
Preste atención a la carga del amplificador
de megafonía con los altavoces. ¡Una sobre-
carga podría dañar el amplificador! La carga
total de todos los altavoces conectados no
puede exceder la potencia del amplificador.
1) Fije el altavoz en un lugar adecuado utilizan-
do tornillos.
2) Antes de conectar el altavoz, desconecte
completamente el sistema de megafonía de
modo que el cable de altavoz no contenga
ningún voltaje.
3) Las conexiones del altavoz están colocadas
debajo de la tapa de protección de la parte
posterior. Extraiga la tapa.
4) Tire del cable de altavoz a través del ojal de
la tapa y luego conecte el cable de altavoz a
los terminales de tornillo del altavoz:
Nº de terminal Potencia nominal Impedancia
1 2 50W 200 Ω
2 3 25W 400 Ω
3 4 12.5W 800 Ω
1 3 9W 1.1 kΩ
2 4 4.5W 2.2 kΩ
1 4 3.5W 2.8 kΩ
1 5 50W 8 Ω!
+ − polo
Al conectar varios altavoces, asegúrese de
que todos los altavoces tienen la misma
polaridad.
5) Atornille la tapa de protección en el altavoz y
fije la tuerca del ojal para que las conexiones
sean resistentes a la intemperie.
6) Dirija el altavoz hacia la dirección que quiera
para el sonido.
Sujeto a modificaciones técnicas.
Głośnik tubowy
Niniejsza instrukcja przeznaczona jest instalato-
rów posiadających wiedzę w zakresie systemów
PA pracujących w technice 100 V. Przed rozpo-
częciem użytkowania proszę zapoznać się z in-
strukcją, a następnie zachować ją do wglądu.
1 Zastosowanie
Niniejszy głośnik tubowy przeznaczony jest
zastosowań w systemach radiowęzłowych,
pracujących w technice 100V, ale może być
podłączany również do wzmacniacza niskoim-
pedancyjnego. Zestaw 2-drożny wyposażony
jest w 16cm głośnik nisko-średniotonowy oraz
2,5cm tubowy głośnik wysokotonowy, dzięki
czemu głośnik charakteryzuje się dobrą jako-
ścią dźwięku, odpowiednią także do odtwarza-
nia muzyki. Dzięki obudowie wykonanej z od-
pornego na warunki atmosferyczne tworzywa
ABS (IP66), możliwy jest montaż głośnika na
zewnątrz.
2 Środki bezpieczeństwa
Głośnik spełnia wszystkie wymagania norm UE
dzięki temu został oznaczony symbolem .
•
Głośnik należy chronić przed ekstremalnymi
temperaturami (dopuszczalny zakres tempe-
ratur: −20°C do +50°C).
•
Do czyszczenia urządzenia należy używać su-
chej lub wilgotnej miękkiej tkaniny. Nie wol-
no stosować silnych środków chemicznych.
•
Producent ani dostawca nie ponoszą odpo-
wiedzialności za wynikłe szkody (uszkodze-
nie sprzętu lub obrażenia użytkownika), jeśli
urządzenie używano niezgodnie z przezna-
czeniem, nieprawidłowo zainstalowano bądź
poddano nieautoryzowanej naprawie.
Po całkowitym zakończeniu eksplo-
atacji urządzenie należy oddać do
punktu utylizacji odpadów.
3 Instalacja
UWAGA Podczas pracy urządzenia na przy-
łączu linii występuje napięcie osią-
gające do 100V, które stanowi po-
tencjalne zagrożenie dla zdrowia
lub życia. Podłączenie urządzenia
należy zlecić specjaliście.
Należy zwrócić uwagę na odpowiedni do-
bór mocy głośników do mocy wzmacniacza.
Przeciążenie może spowodować uszkodzenie
wzmacniacza PA! Sumaryczna moc wszyst-
kich podłączonych głośników nie może prze-
kraczać mocy wzmacniacza.
1) Przykręcić głośnik poprzez uchwyt montażo-
wy, w odpowiednim miejscu.
2) Przed przystąpieniem do podłączania, nale-
ży bezwzględnie wyłączyć wzmacniacz PA,
aby kabel głośnikowy nie znajdował się pod
napięciem.
3) Terminale głośnikowe wzmacniacza znaj-
dują się pod pokrywą ochronną. Należy ją
odkręcić.
4) Przeciągnąć kabel głośnikowy przez prze-
lot w pokrywie i podłączyć go do terminali
śrubowych w głośniku:
Nr terminala Moc Impedancja
1 2 50W 200 Ω
2 3 25W 400 Ω
3 4 12.5W 800 Ω
1 3 9W 1.1 kΩ
2 4 4.5W 2.2 kΩ
1 4 3.5W 2.8 kΩ
1 5 50W 8 Ω!
+ − biegun
W przypadku podłączania większej liczby
głośników, upewnić się że wszystkie głośniki
mają taką samą polaryzację.
5) Przykręcić ponownie pokrywę terminali gło-
śnikowych oraz nakrętkę zabezpieczającą
wlot kablowy przed wilgocią.
6) Skierować głośnik w odpowiednią stronę.
Z zastrzeżeniem możliwości zmian.
Especificaciones Specyfikacja IT-250TW
Potencia nominal
Funcionamiento a 100V
Funcionamiento a 8Ω
Moc
Praca 100V
Praca 8Ω
50/25/12,5/9/4,5/3,5W
50W
Rango de frecuencias Pasmo przenoszenia 150– 15 000Hz
SPL (1W/1 m) SPL (1W/1 m) 97dB
Ángulo de radiación horiz./vertical Kąt promieniowania poziom/pion 100°/60°
Protección de la carcasa Protective class of housing IP66
Temperatura ambiente Ambient temperature –20°C … +50°C
imensiones (B × H × P), peso Wymiary (S × W × G), waga 370 × 270 × 305mm, 4,1 kg
370
270
10 (3×)
305

Other Monacor Horn manuals

Monacor TM-6 User manual

Monacor

Monacor TM-6 User manual

Monacor IT-50 User manual

Monacor

Monacor IT-50 User manual

Monacor IT-400DTM User manual

Monacor

Monacor IT-400DTM User manual

Monacor PA TM-11 User manual

Monacor

Monacor PA TM-11 User manual

Monacor IT-400DT User manual

Monacor

Monacor IT-400DT User manual

Monacor IT-300TW User manual

Monacor

Monacor IT-300TW User manual

Monacor PA TM-45 User manual

Monacor

Monacor PA TM-45 User manual

Popular Horn manuals by other brands

Vixen Horns VXO8560/3418C installation guide

Vixen Horns

Vixen Horns VXO8560/3418C installation guide

Vixen Horns VXO8350/1264 installation guide

Vixen Horns

Vixen Horns VXO8350/1264 installation guide

Federal Signal Corporation 450E Installation and maintenance instructions

Federal Signal Corporation

Federal Signal Corporation 450E Installation and maintenance instructions

Federal Signal Corporation Vibratone 350WBX installation manual

Federal Signal Corporation

Federal Signal Corporation Vibratone 350WBX installation manual

Vixen Horns VXH4901B installation guide

Vixen Horns

Vixen Horns VXH4901B installation guide

Kleinn Air Horns RPTR-OBA/734 installation manual

Kleinn Air Horns

Kleinn Air Horns RPTR-OBA/734 installation manual

DS18 PRO-HP52 owner's manual

DS18

DS18 PRO-HP52 owner's manual

ESCO Technologies ETS-Lindgren 3115 manual

ESCO Technologies

ESCO Technologies ETS-Lindgren 3115 manual

Mania MEGAHORN instruction manual

Mania

Mania MEGAHORN instruction manual

Valcom V-1038 brochure

Valcom

Valcom V-1038 brochure

System Sensor SpectrAlert S1224MCK Installation and maintenance instructions

System Sensor

System Sensor SpectrAlert S1224MCK Installation and maintenance instructions

Valcom FlexHorn VIP-483-IC Mounting instructions

Valcom

Valcom FlexHorn VIP-483-IC Mounting instructions

SWEEX SWMEGA25 manual

SWEEX

SWEEX SWMEGA25 manual

Ex-Tech SD125 Technical manual

Ex-Tech

Ex-Tech SD125 Technical manual

Assured AUTOMOTIVE Bull Horn ACHRKS-444 Install

Assured AUTOMOTIVE

Assured AUTOMOTIVE Bull Horn ACHRKS-444 Install

Optimus AC-650T instruction manual

Optimus

Optimus AC-650T instruction manual

FONESTAR MF-114SU instruction manual

FONESTAR

FONESTAR MF-114SU instruction manual

Biamp Active Standard LVH-900AS Series manual

Biamp

Biamp Active Standard LVH-900AS Series manual

manuals.online logo
manuals.online logoBrands
  • About & Mission
  • Contact us
  • Privacy Policy
  • Terms and Conditions

Copyright 2025 Manuals.Online. All Rights Reserved.