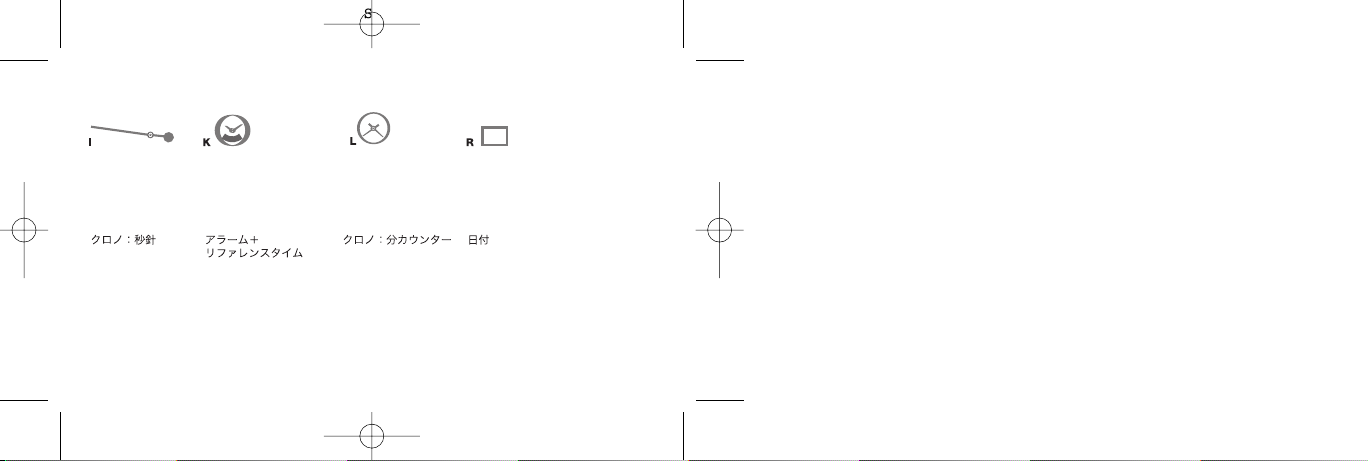
Small
minute hand
Reference time
Reference time
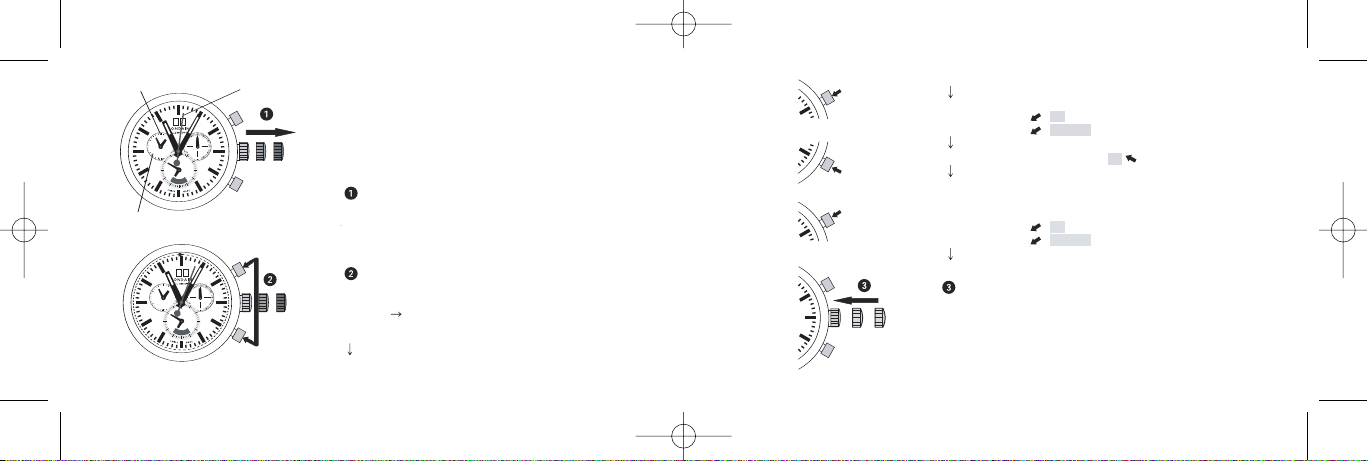
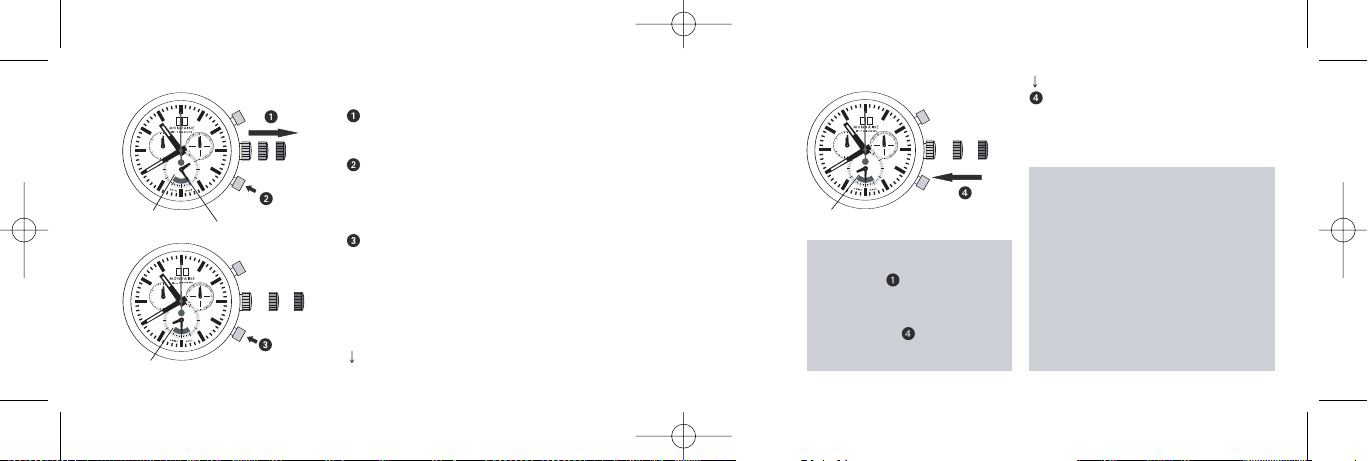
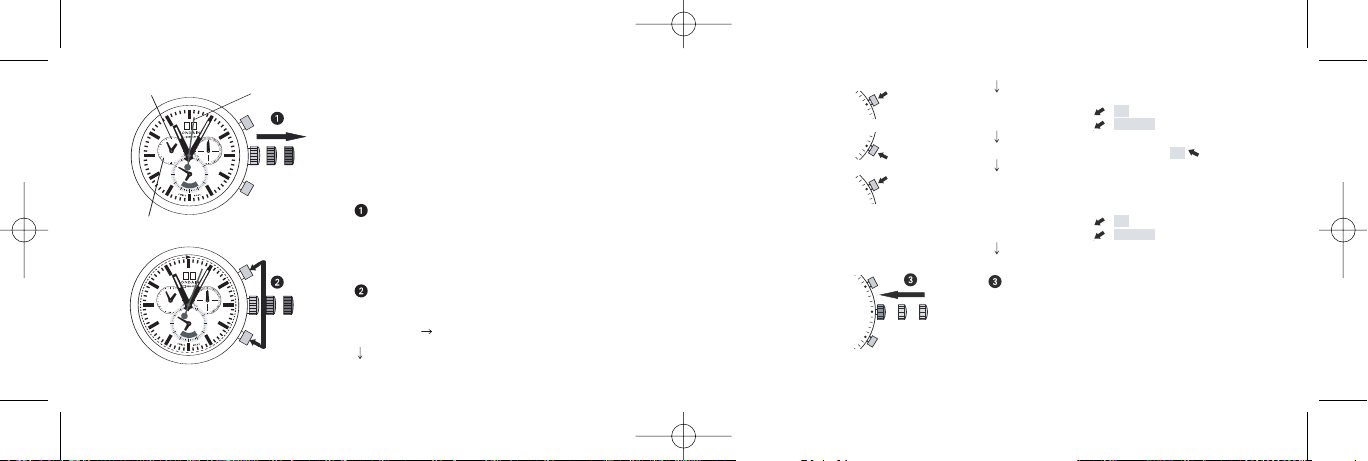
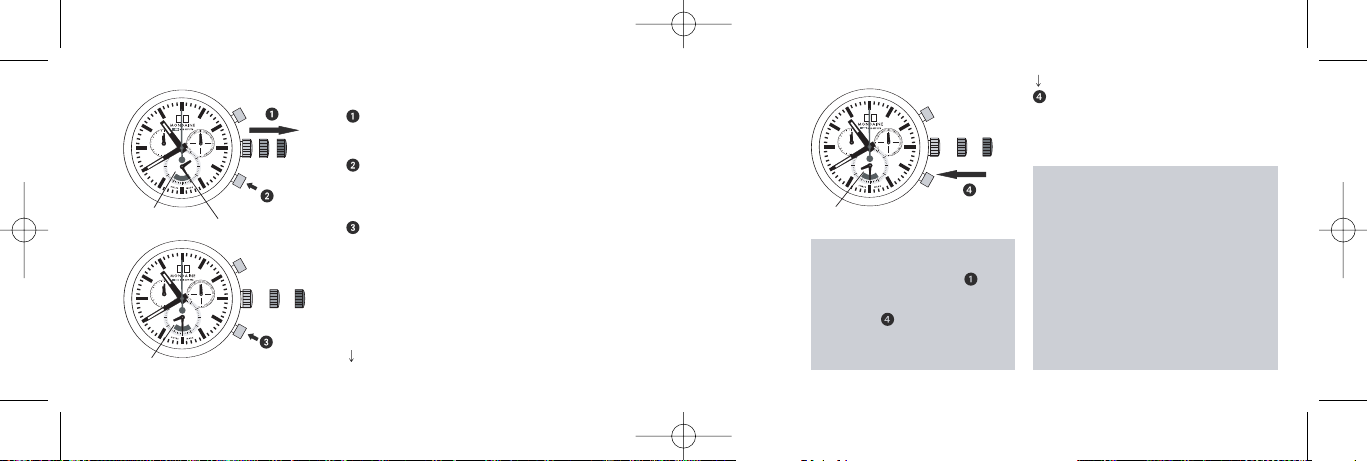
Setting the reference time
*Pull out the crown to position III
(second hand stops. The display changes
from alarm time to reference time.)
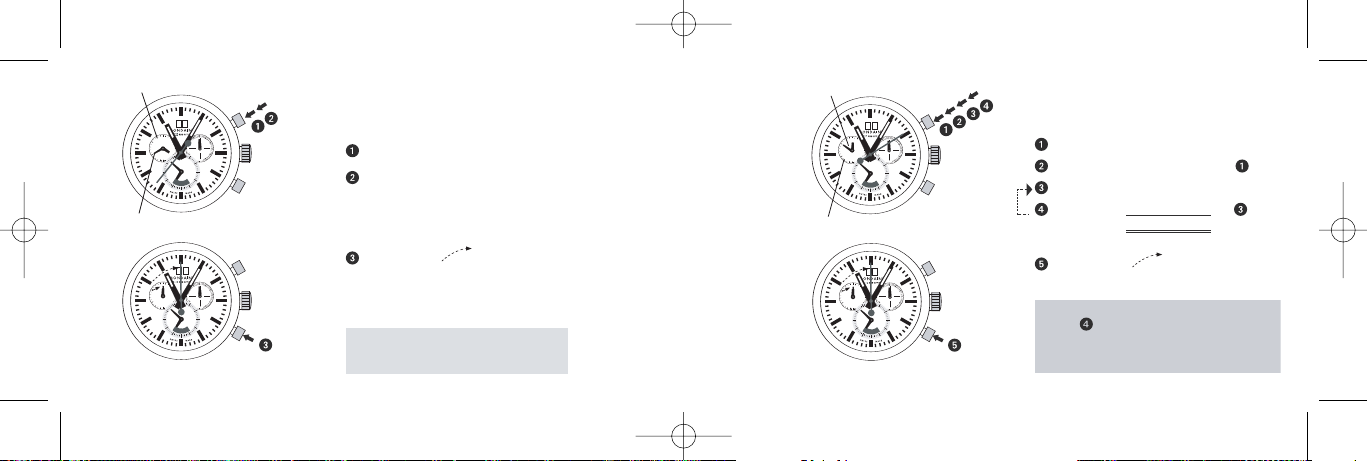
Activating the setting mode
Press the push-button for at least
2 seconds. As soon as the small minute
hand jumps forwards one minute, this
mode is active.
Short pressing (less than 1 second):
the reference time is moved forwards by
the minute.
Medium pressing: (1–2 seconds):
the reference time is moved forwards by
the hour.
Long pressing (longer than 2 seconds):
the reference time is moved forwards until
the push-button is released.
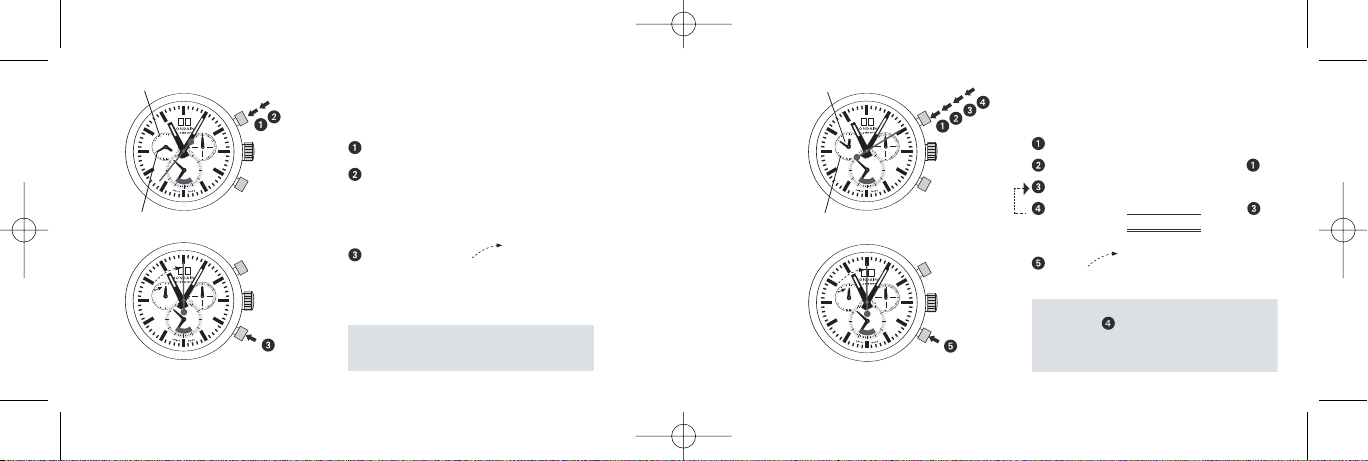
Pleasenote:
*In order to set the time to the
exactsecond, mustbe pulled
outwhen the second hand is in
position «60» (III ).
Once the hour and minute hands
have been set, mustbe pushed
back into position Iat the exact
second.
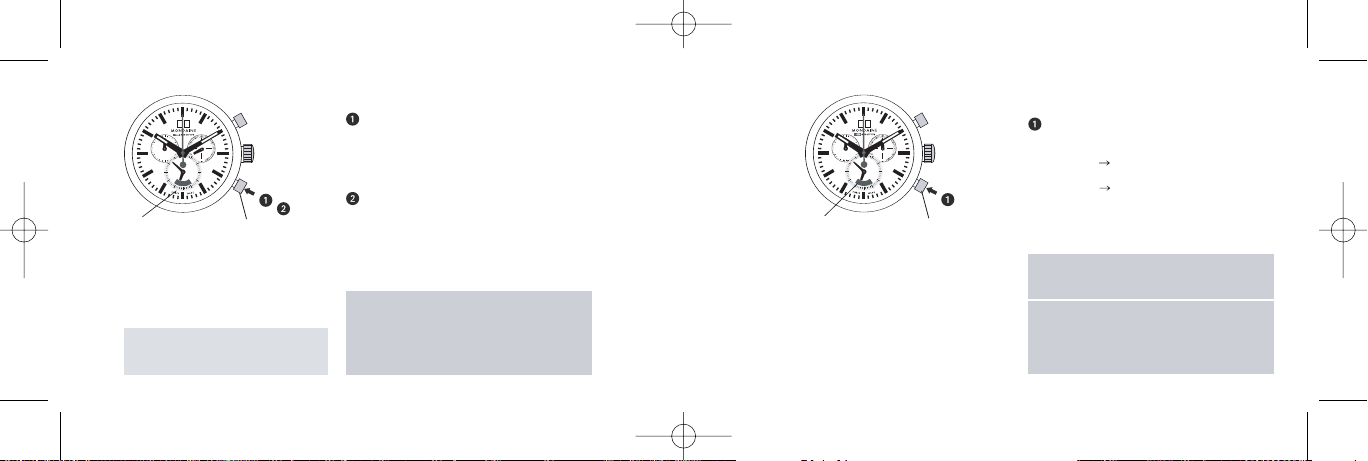
What is the reference time?
The current time is displayed by means of
the hour and minute hand.
Parallelto the current time, the reference
time runs in the background: the alarm time
refers itself to this referencetime. Thus,
resetting the time also requires the identical
correction of the referencetime.
If the referencetime is not synchronised
with the current time, this results in the alarm
signal being emitted at a different
time to the set alarm time.
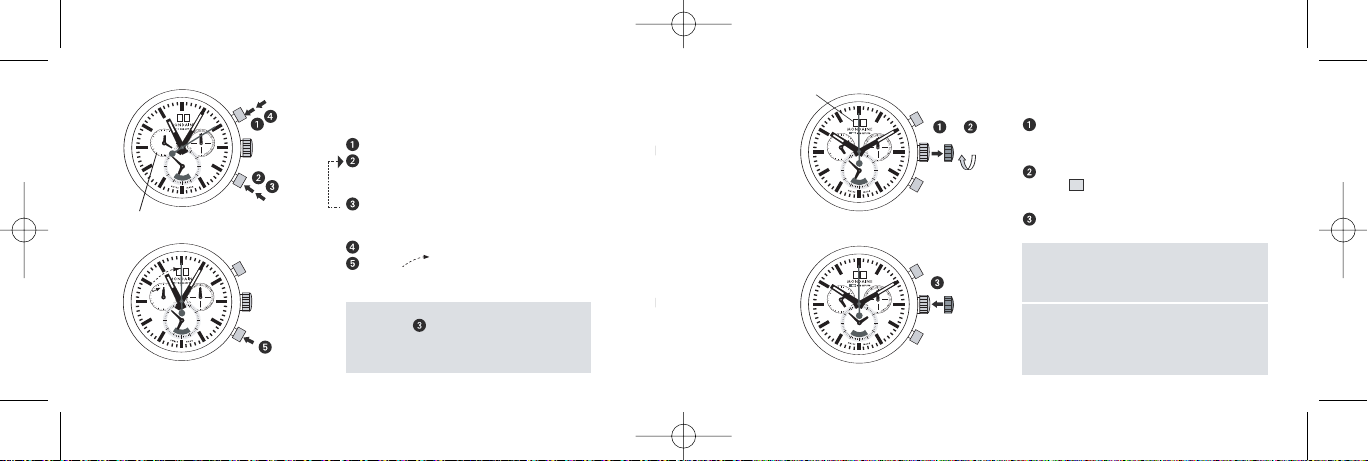
Alarm time
*Push the crown back into position I
(the display changes from referencetime
to alarm time).
Asignal indicates that the alarm is
switched off.
I II III
12
8
4
31
III III
12
12
8
4
31
III III
12
8
4
31
12
93
A
L
A
R
M
93
A
L
A
R
M
12
93
A
L
A
R
M
Small
minute hand
Reference time
Reference time
Setting the reference time
*Pull out the crown to position III
(second hand stops. The display changes
from alarm time to reference time.)
Activating the setting mode
Press the push-button for at least
2 seconds. As soon as the small minute
hand jumps forwards one minute, this
mode is active.
Short pressing (less than 1 second):
the reference time is moved forwards by
the minute.
Medium pressing: (1–2 seconds):
the reference time is moved forwards by
the hour.
Long pressing (longer than 2 seconds):
the reference time is moved forwards until
the push-button is released.
Pleasenote:
*In order to set the time to the
exactsecond, mustbe pulled
outwhen the second hand is in
position «60» (III ).
Once the hour and minute hands
have been set, mustbe pushed
back into position Iat the exact
second.
What is the reference time?
The current time is displayed by means of
the hour and minute hand.
Parallelto the current time, the reference
time runs in the background: the alarm time
refers itself to this referencetime. Thus,
resetting the time also requires the identical
correction of the referencetime.
If the referencetime is not synchronised
with the current time, this results in the alarm
signal being emitted at a different
time to the set alarm time.
Alarm time
*Push the crown back into position I
(the display changes from referencetime
to alarm time).
Asignal indicates that the alarm is
switched off.
I II III
12
8
4
31
III III
12
12
8
4
31
III III
12
8
4
31
12
93
A
L
A
R
M
93
A
L
A
R
M
12
93
A
L
A
R
M
GGMD037_Sport II Chrono Alarm_IS 30.4.2009 9:46 Uhr Seite 8