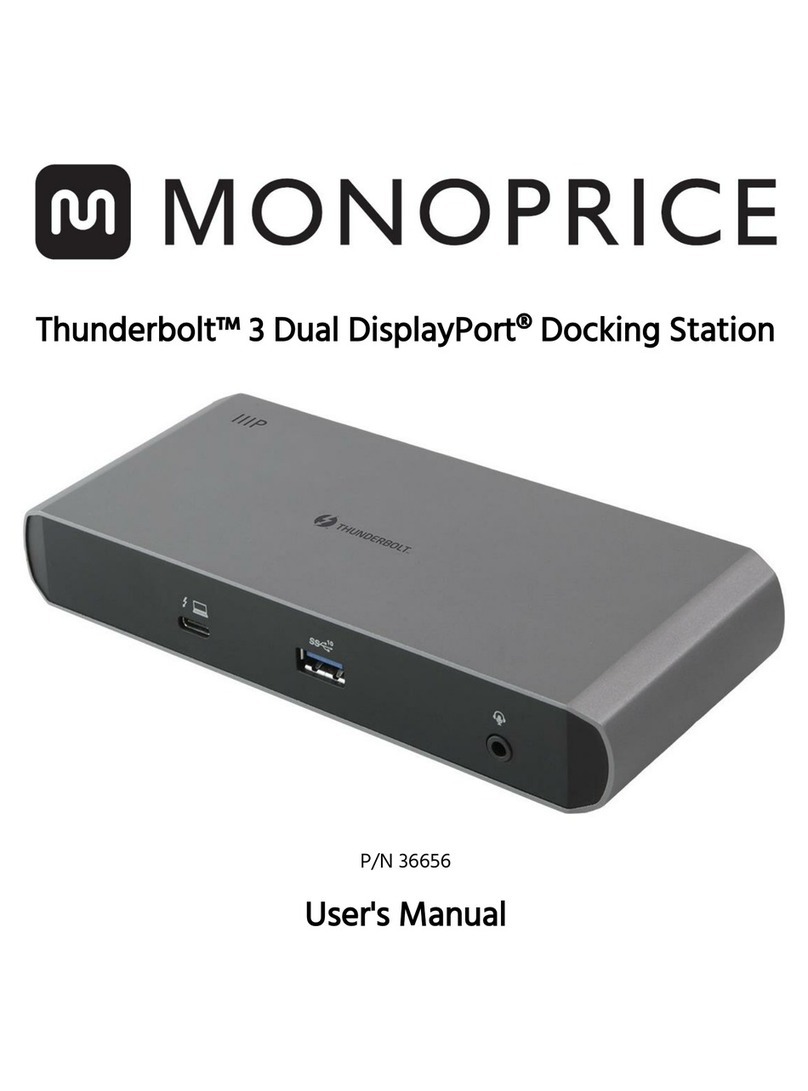
Monoprice 11501 User manual


2
CONTENTS
I
NTRODUCTION
................................................................................................................ 3
F
EATURES
.................................................................................................................. 3
S
YSTEM
R
EQUIREMENTS
........................................................................................... 3
P
ACKAGE
C
ONTENTS
................................................................................................. 3
H
ARDWARE
S
ETUP
P
ROCESS
............................................................................................ 4
SUPPORTED COMMON DISPLAY RESOLUTIONS ............................................................... 5
N
N
O
OT
TE
ES
S
....................................................................................................................... 5
INSTALLATION IN WINDOWS 7/8 ..................................................................................... 6
D
EVICE
D
RIVER
I
NSTALLATION
................................................................................ 6
V
ERIFYING
D
EVICE
D
RIVER
I
NSTALLATION
.............................................................. 8
D
EVICE
D
RIVER
U
N
-
INSTALLATION
.......................................................................... 9
INSTALLATION IN WINDOWS XP/VISTA......................................................................... 10
D
EVICE
D
RIVER
I
NSTALLATION
.............................................................................. 10
V
ERIFYING
D
EVICE
D
RIVER
I
NSTALLATION
............................................................ 12
D
EVICE
D
RIVER
U
N
-
INSTALLATION
........................................................................ 14
F
UNCTION
D
ESCRIPTION
................................................................................................ 15
USB
TO
E
THERNET
.................................................................................................. 15
USB
TO
A
UDIO
........................................................................................................ 15
ACCESS USB 3.0DISPLAY DEVICE UTILITY ........................................................... 15
DISPLAY ID –Smart Display Device ID Detection............................................ 15
DISPLAY RESOLUTION –Fast Access to Display Resolution Setting.................. 15
DISPLAY ROTATION .......................................................................................... 16
DISPLAY MODES ............................................................................................... 16
IDENTIFY MONITORS........................................................................................ 17
MULTI-DISPLAY CONTROL PANEL.................................................................... 17
DISPLAY SETTINGS ........................................................................................... 18
FIXED POSITION ............................................................................................... 18
K
KM
M
S
SW
WI
IT
TC
CH
H.................................................................................................................. 19
FUNCTION LIST ................................................................................................... 19
GETTING STARTED: MAC.................................................................................. 19
GETTING STARTED: WINDOWS........................................................................ 22
SETTING INSTRUCTIONS................................................................................... 26
Preferences Setup .................................................................................................... 28
Q
Q&
&A
A.............................................................................................................................. 30
T
TR
RO
OU
UB
BL
LE
ES
SH
HO
OO
OT
TI
IN
NG
G
T
TI
IP
PS
S............................................................................................... 31
Known Issues .......................................................................................................... 31
General Recommendation........................................................................................ 31
Media Playback....................................................................................................... 31
Others...................................................................................................................... 32
R
EGULATORY
C
OMPLIANCE
.......................................................................................... 33
USB 3.0 DOCKING STATION

4
H
ARDWARE
S
ETUP
P
ROCESS
Follow these steps to quickly install your new USB 3.0 Docking Station.
1. Ensure that the Docking Station is NOT connected to your computer. Do not
connect it until instructed to do so.
2. Insert the driver CD and follow the instructions to install the device driver.
3. Connect the 2nd display device (monitor/projector) to the VGA or HDMI connector of
USB 3.0 Video Dock and switch it on. Then, plug the power adapter (4A/5V) into
the USB 3.0 Docking Station.
4. After system reboot, plug the USB 3.0 micro-B cable into the Docking Station
and plug the other end into the USB
port onyour computer (host PC). The device
driver will be configured automatically.
After driver configuration, the USB 3.0
Docking Station is ready to use.
5. under the
hidden icons”on Windows 7/8, and the icons on the lower
You will see two icons
“Show
right toolbar on Windows XP.
If the extended display is blank or a duplicate of your main screen, right click the
desktop of your system, select ”Screen resolution” from the menu in Windows 7/8or
“Properties” in Windows XP and select “Extend these displays” on “Display
Properties”.
USB 3.0 DOCKING STATION

5
SUPPORTED COMMON DISPLAY RESOLUTIONS:
Aspect Ratio
Resolution
Color Depth
Wide Screen Display
16:9
2048 x 1152
16,32 bits
16:10
1920 x 1200
16,32 bits
16:9
1920 x 1080
16,32 bits
16:10
1680 x 1050
16,32 bits
16:9
1600 x 900
16,32 bits
16:10
1440 x 900
16,32 bits
16:9
1366 x 768
16,32 bits
16:9
1360 x 768
16,32 bits
16:10
1280 x 800
16,32 bits
15:9
1280 x 768
16,32 bits
16:9
1280 x 720
16,32 bits
Standard Display
4:3
1600 x 1200
16,32 bits
4:3
1400 x 1050
16,32 bits
5:4
1280 x 1024
16,32 bits
4:3
1280 x 960
16,32 bits
4:3
1152 x 864
16,32 bits
4:3
1024 x 768
16,32 bits
4:3
800 x 600
16,32 bits
Monitor refresh frequency: 60 Hz,
(Resolution: 1152 x 864 is 75Hz)
N
N
O
OT
TE
ES
S
Do not connect the Docking Station to a USB hub. Connect directly to the USB port
on your motherboard or expansion card.
A System reboot is required for the driver installation.
The Apple USB interface connection kit is required for iPad / iPad2 to use the
switching function.
“Windows Media Player”and “Media Player Classic”are the recommended toolsfor
video playback.
USB 3.0 DOCKING STATION

6
INSTALLATION IN WINDOWS 7/8
D
EVICE
D
RIVER
I
NSTALLATION
Installing the device driver enables your computer’s operating system to recognize the
docking station and its ports once it’s connected. Please check your operating system and
refer to the appropriate installation procedure to begin installing the device driver.
This section illustrates the device driver installation procedure for computersrunning the
Windows Vista/7/8 operating system. Please make sure the USB 3.0 Docking Station is
unplugged from your PC or Notebook before you run the setup program.
Step1.
Insert the included CD into the CD-ROM drive; the setup program should launch
automatically. If the setup program does not begin automatically, click
Start
Run, and enter “D:\setup.exe”(where D: is the path of your CD-ROM drive)
and then click OK.
Step 2.
Driver Installation Wizard, click
“Next” to continue.
Step3.
License Agreement; please review it
and check “I accept the terms of
the license agreement.”Click
“Next”to accept the License
Agreement.
USB 3.0 DOCKING STATION

7
Step4.
Setup is searching for installed features…..
Step5.
Select “Yes, I want to restart my
computer now”, and click “Finish”
to complete the driver installation.
Step6.HARDWAREDEVICEDRIVERINSTALLATION (after systemreboot)
Connect the 2nd monitor to the VGA (DB15) or HDMI connector of the USB 3.0 Docking
Station and switch it on. Connect the AC power adapter to USB 3.0 Docking Station and
plug it into an AC power outlet.
Plug the USB 3.0 Docking Station into an
available USB 3.0 port onyour computer.
The device driver software setup will begin
automatically.
After the driver is configured, you click
“Show hidden icons”and see two icons
on the taskbar. The extended display will
be shown on the 2nd monitor. The USB 3.0 Docking
Station is now ready for use.
USB 3.0 DOCKING STATION

8
V
ERIFYING
D
EVICE
D
RIVER
I
NSTALLATION
(W
INDOWS
7)
The following procedure allows you to verify the device driver installation.
Right click “Computer”→ “Properties”→ “Device Manager”.
Connect the USB 3.0 Docking Station, then double-click “Network adapter”, “Sound,
video and game controllers”, and “Universal Serial Bus controllers”.
Begin verification by making sure the highlighted devices were added to the system.
USB 3.0 DOCKING STATION

9
D
EVICE
D
RIVER
U
N
-
INSTALLATION
Step 1.
Start menu:
Please click “Start”→
“Setting”→“Program
and Features”.
ClassicStartmenu:
Please click “Start”→
“Settings”→“Control
Panel”→“Program
and Features”.
Select “Installer for
USB Graphics Device & LAN 12.x.x.xxxx.0185 (driver version number)”item. Click
“Uninstall”button.
Step 2.
Click “OK”to continue.
Step 3.
Select “Yes, I want to
restart my computer now”
and click “Finish” to reboot.
After reboot, the
driver un-installation
will be complete.
USB 3.0 DOCKING STATION

10
INSTALLATION IN WINDOWS XP/VISTA
D
EVICE
D
RIVER
I
NSTALLATION
Installing the device driver enables your computer’s operating system to recognize the
USB 3.0 Docking Station and its ports once it’s connected. Please check your operating
system and refer to the appropriate installation procedure to begin installing the device
driver.
This section illustrates the device driver installation procedure for computersrunning the
Windows XP operating system. Please make sure the USB 3.0 Docking Station is
unplugged from your computer before executing the setup program.
Step 1.
Insert the included CD into the CD-ROM drive; the setup program should launch
automatically. If the setup program does not begin automatically, click Start
Run, and
enter “D:\setup.exe”(where D: is the path of your CD-ROM drive) and then click OK.
Step 2.
Driver Installation Wizard, click “Next”
to continue.
Step3.
License Agreement; please review it
and check “I accept the terms of
the license agreement.”Click
“Next”to accept the License
Agreement.
USB 3.0 DOCKING STATION

11
Step 4.
Setup is searching for installed
features…...
※
When the Microsoft Windows Security warning dialogue box appears, please select
“Continue Anyway” to continue with the installation. This will not affect the device driver
installation and the device usage.
Step5.
Click “Finish”to complete the setup.
Plug the USB 3.0 Docking Station
into an available USB port onyour
computer. The device driver will be
configured automatically.
Step6.HARDWARE DEVICE DRIVER INSTALLATION
a. Connect the 2nd display device (monitor/projector) to the VGA or HDMI
connector on the Docking Station and switch it on.
b. Plug the USB 3.0 Docking Station into an available USB port on your computer.
The device driver will be configured automatically.
※
When the Hardware Installation Wizard dialog appears, please select “No, not this time”
and click “Next” to continue. Click “Continue Anyway” when the Microsoft Software warning
dialogue box appears. Then, click “Finish” to complete the Hardware Wizard.
c. Reboot the computer.
d. After rebooting you computer, the Docking Station is ready for use.
You will see these icons in the lower right toolbar, and the extended
display will be shown on the attached display device. The USB 3.0 Docking
Station is now ready for use.
USB 3.0 DOCKING STATION

12
V
ERIFYING
D
EVICE
D
RIVER
I
NSTALLATION
The following procedure allows you to verify the device driver installation.
Click “My computer”→ “Properties” →“Hardware” →“Device Manager”.
Connect the USB 3.0 Docking Station, then double-click “Display adapters”,
“Network adapter”, “Sound, video and game controllers”, and “Universal Serial Bus
controllers”.
Begin verification by making sure highlighted devices were added to the system.
USB 3.0 DOCKING STATION

13
USB 3.0 DOCKING STATION

14
D
EVICE
D
RIVER
U
N
-
INSTALLATION
Step 1.
Start menu:
Please click “Start”→“Control
Panel”→Add or Remove Programs”.
Classic start menu:
Please click “Start”→“Settings”→
“Control Panel”→“Add or Remove
Programs”.
Select “Installer for USB Graphics
Device & LAN 12.x.x.xxxx.0185
(driver version number)”item. Click
“Remove”button.
Step 2.
Unplug the USB 3.0 Docking Station and
click “OK” to continue.
Step 3.
Select “Yes, I want to restart my
computer now” and click “Finish” to
reboot.
After reboot, the driver un-
installation will be complete.
USB 3.0 DOCKING STATION

15
F
UNCTION
D
ESCRIPTION
This section describes the main functions provided by the USB 3.0 Docking Station.
USB
TO
E
THERNET
It supports10/100Mbps Ethernet connectivity and is compliant with the IEEE802.3u
100BASE-TX and IEEE802.3 10BASE-T standards.
USB
TO
A
UDIO
It includes one Microphone input and one Stereo Speaker
output.
*When connect to the HDMI display device, HDMI will
be the default USB Audio device.
ACCESS USB 3.0 DISPLAY DEVICE UTILITY
Make sure the USB 3.0 Docking Station is attached to the computer.
You should see these icons under the “Shown hidden icons”on Windows 7 or these
icons on the lower right toolbar on Windows XP. Right-click the icon to access
the various functions of the Docking Station.
DISPLAY ID –Smart Display Device
ID Detection
The USB 3.0 Docking Station supports VESA defined
DDC/EDID. The utility will show the display device
ID whenever it is attached to the USB 3.0 Docking
station.
DISPLAY RESOLUTION –Fast Access to Display
Resolution Setting
The default resolution is:
1024 x768 @32-bit.
USB 3.0 DOCKING STATION

16
DISPLAY ROTATION
4 options are available: 0°, 90°, 180°,and 270°
under the Extended or Primary display modes.
DISPLAY MODES
“EXTENDED”DISPLAY MODE (DEFAULT)
The default display mode. This feature allows the attached
display device to work as an extension of your main desktop.
The extended working space improves work efficiency.
You may change the relative positionsof this extended
display under the Display Settings.
“MIRROR”DISPLAY MODE
This feature allows the second display to show the
same contents as your primary display (mirroring the
display).
The screen resolution setting of the second display
will be the same as the main screen's resolution.
“PRIMARY”DISPLAY MODE
This feature allows you to set the display connected to the
docking station as the primary display. The display
connected directly to your computer will then function as the
extended or mirrored display.
Please be advised that some display utilities and drivers that
ship with certain AGP and built-in display adapters may
prevent this option from working on some systems. You may
disable the other utility program (usually found in the same toolbar located on the
bottom right hand corner) to make this function work properly.
USB 3.0 DOCKING STATION

17
“OFF”DISPLAY MODE
This option disables the video output from USB 3.0 Docking
Station.
IDENTIFY MONITORS
Display IDs will be shownin the upper right corner of all
attached display devices.
MULTI-DISPLAY CONTROL PANEL
A series of hotkeys allows you to quickly move the active
window or cursor to the desired display.
The default hotkeys can be found in the
Hotkey List of “Multi-Display Control
Panel”.
For example: Ctrl + 2means: to move the
window to the Display 2.
USB 3.0 DOCKING STATION

18
DISPLAY SETTINGS
Fast access to the system “Display Settings”
Under Windows 7
Please right click on the desktop of your system, it will pop up a
screen and select “Screen resolution”(a) or go to “START”→
“Control Panel”→ “Appearance and Personalization”→ “Adjust
screen resolution” (b). Then, select “Extend these displays”on
the Display Properties.
※You also can press key and tap Pto select the display modes in Windows 7/ 8.
FIXED POSITION
It will retain the last setting of the display location after the computer is restarted.
USB 3.0 DOCKING STATION

19
K
KM
M
S
SW
WI
IT
TC
CH
H
FUNCTION LIST
Function Behavior
for OS
Windows to
Windows
Mac to MAC
Windows to MAC
Windows to iPad
Mac to iPad
Windows to
Android
Mac to
Android
Keyboard & Mouse Control Switching
Use the mouse to
move off the edge
of the screen
Yes
X
X
Use mouse middle
button to switch
Yes
X
Yes
Use hotkey toggle
[Alt+S] to switch
Yes
Yes
Yes
Keyboard sharing
Yes
Yes
Yes
Clipboard Sharing
Text Share
Yes
X
X
Picture Share
Yes
X
X
Data Transfer
Drag and Drop
Yes
X
X
GETTING STARTED: MAC
Follow the steps below to start the application:
1.Connect to the Mac computer:
Plug the included USB 2.0 mini B cable into the Docking Station. Plug the
other end into a USB port on the second computer.
2. When you initially connect the Docking Station to a Mac computer,a window will
appear that says, “Keyboard Setup Assistant”. Follow the instructions to select the
keyboard Type for your language.
USB 3.0 DOCKING STATION

20
USB 3.0 DOCKING STATION
Other manuals for 11501
1
Table of contents
Other Monoprice Docking Station manuals

Monoprice
Monoprice 44834 User manual

Monoprice
Monoprice Thenderbolt 3 Dual DisplayPort User manual

Monoprice
Monoprice MP-022FM User manual

Monoprice
Monoprice 29434 User manual

Monoprice
Monoprice 44735 User manual

Monoprice
Monoprice Thunderbolt 36656 User manual

Monoprice
Monoprice 11501 User manual

Monoprice
Monoprice Thunderbolt 3 User manual

Monoprice
Monoprice 5146 User manual