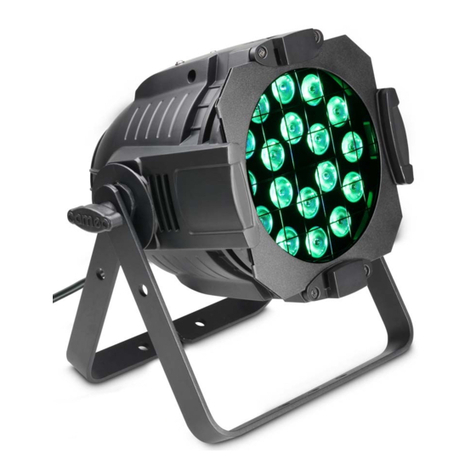
monster tower Light Bar Quick start guide

MTLB-V1-051506 Page 1of 5Copyright 2002-2006, Monster Tower, Inc
Monster Tower Light Bar
Installation Instructions
and Owners Manual
NOTES ON INSTALLING AND USING YOUR NEW TOWER LIGHTS
Tower lights will reach a high temperature when operating. Do not touch or wash the
lights for 10 minutes after use.
Only use “H3 55W 12V” Halogen light bulb and fuse for replacement. These are available
at most auto parts stores. Anything exceeding 55W/15Amp could result in damage to
your boat wiring.
Use appropriate gauge wire for all connections. Consult wiring diagrams & wire sizing
chart for details.
Use of a relay is highly recommended unless you confirm your switch can support a 20
amp load. An inline fuse is required (see wiring diagram)
Tower lights are not for wakeboarding at night, which is illegal in every state.
There are countless methods of wiring lights. Please contact a marine wiring specialist if
you need assistance. We have provided the most complete information we have found
within this document.
It is highly recommended that you use a relay and a fuse with each set of lights.

MTLB-V1-051506 Page 2of 5Copyright 2002-2006, Monster Tower, Inc
Monster Beam Tower Lights Parts List
Item Qty Description
12Tower Collar Bracket
24Delrin Collar Inserts
31Tower Light Bar with Four Lights
44M8x25 Socket Head Cap Screws
Standard “Two plus two” light bar with two facing forward and two facing rear
Light bar with four lights facing the same direction by turning around the end lights
Lead wires with common ground (Black) and Red and Blue Power leads

MTLB-V1-051506 Page 3of 5Copyright 2002-2006, Monster Tower, Inc
Attaching the light bar to the tower
Attach the Collar Bracket (Item 1) to the tower using M8x25 bolts (Item 4) and the Collar Inserts
(Item 2) that matches your size tower (2-1/2” are provided for Monster Towers and a universal kit
with 1-1/2”, 1-5/8”, 1-3/4”, 1-7/8”, 2” and 2-1/4” are provided for other towers).
Turning the lights to all face the same direction
You can easily turn the outside lights so all four lights face in the same direction.
1) Remove Light Bolts on each end of the light
2) Remove End Cap
3) Remove Bracket Bolts to remove the bracket
4) Remove threaded bar and insert into the opposite railing
5) Re-assemble and align the center hole of the bracket where the wire exits the tube
IMPORTANT –Tighten bracket bolts BY HAND, then ¼ of a turn ONLY or the
threads may be stripped.
Light Bolt
Bracket Bolt
End Cap

MTLB-V1-051506 Page 4of 5Copyright 2002-2006, Monster Tower, Inc
Wiring Recommendations
We recommend using a SPST relay (Single Pole Single Throw) with your switch and appropriate
gauge wiring. Relays are readily available at auto parts stores.
Not using a relay could cause excessive heat in the wiring and switch and create a risk of fire
because of the amount of power being drawn by the high output lights. A relay works by using a
switch to run 12 volts to the relay. The relay acts as an electrical switch that activates and draws
power straight from the battery connection and sends it to the lights or accessory. The power
actually going to the switch never gets routed to the lights.
See diagrams and wiring size chart at the end of this document for options & details.
Running Wires Through The Tower
The following is specific to running wires on a Monster Tower, otherwise consult your tower
installation manual or provider for instructions on running wire inside your tower.
When you add speakers or lights to your Monster Tower, you can hide the wires inside of the rear
legs of the tower as well as in the straight cross member of the top section. Since the mating
parts insert ½” inside each end of the rear leg you can drill 1” away from the weld lines. For the
top section cross member you will need to place the hole 3” from the weld line to clear the
rotating collar assembly. The hole size will depend on what size wire you are running and how
many items you need to wire. The maximum hole size we recommend is ½” but normally smaller
is all that is needed.
We recommend covering the exposed wiring with 3/8” or 1/2” wiring loom and electrical tape for a
professional, watertight appearance.
½”
1”

MTLB-V1-051506 Page 5of 5Copyright 2002-2006, Monster Tower, Inc
-Wiring Option Diagrams and Wire Sizing Chart Follows -

12V Fuse Block
+-
12 Volt Battery
Switch
NOTE "A"
Bosch Standard
Relay (MR76)
(Note: Radio Shack 12V
Automotive Relay (275-226)
is same less unused contact 87a)
Typically Found Under Dash
Not
Used
Wire Nut
Negative (Ground)
Buss Bar
See Note A
Option 1
Single Switch w/ Relay
NOTE: In this configuration, use 20 Amp Fuse for Relay &
4 Amp Fuse for Switch.
NOTE: See Wire Sizing Chart to determine proper gauge
wire for each connection. Each PAIR of lights draws 10
Amps (20 Amps total for single relay). Each switch used
in conjunction with a relay will draw less than 4 Amps.
Wire sizes apply to both Power & Ground wires.

12V Fuse Block
+-
12 Volt Battery
Switch
NOTE "A"
Bosch Standard
Relay (MR76)
(Note: Radio Shack 12V
Automotive Relay (275-226)
is same less unused contact 87a)
Typically Found Under Dash
Not
Used
Negative (Ground)
Buss Bar
Switch
Not
Used
See Note A
Option 2
Dual Switches w/ Relays
NOTE: In this configuration, use 10 Amp Fuse for Relays &
4 Amp Fuse for Switches.
NOTE: See Wire Sizing Chart to determine proper
gauge wire for each connection. Each PAIR of lights
draws 10 Amps per relay. Each switch used in
conjunction with a relay will draw less than 4 Amps.
Wire sizes apply to both Power & Ground wires.

12V Fuse Block
+-
12 Volt Battery
Typically Found Under Dash
Wire Nut
Negative (Ground)
Buss Bar
Switch
Rated for 20+ Amps
NOTE: See Wire Sizing Chart to determine proper
gauge wire for each connection. Each PAIR of lights
draws 10 Amps therefore, each single switch used
without a relay will draw up to 20 Amps. Wire sizes
apply to both Power & Ground wires.
NOTE: In this configuration, use 20 Amp Fuse for Switch.
Option 3
Single Switch w/o Relay

12V Fuse Block
+-
12 Volt Battery
Typically Found Under Dash
Negative (Ground)
Buss Bar
Switch
Rated for 10+ Amps
Switch
Rated for 10+ Amps
NOTE: In this configuration, use 10 Amp Fuse for each Switch.
NOTE: See Wire Sizing Chart to determine proper
gauge wire for each connection. Each PAIR of lights
draws 10 Amps therefore, each switch used without
a relay will draw up to 10 Amps. Wire sizes apply to
both Power & Ground wires.
Option 4
Dual Switches w/o Relays

Table of contents


