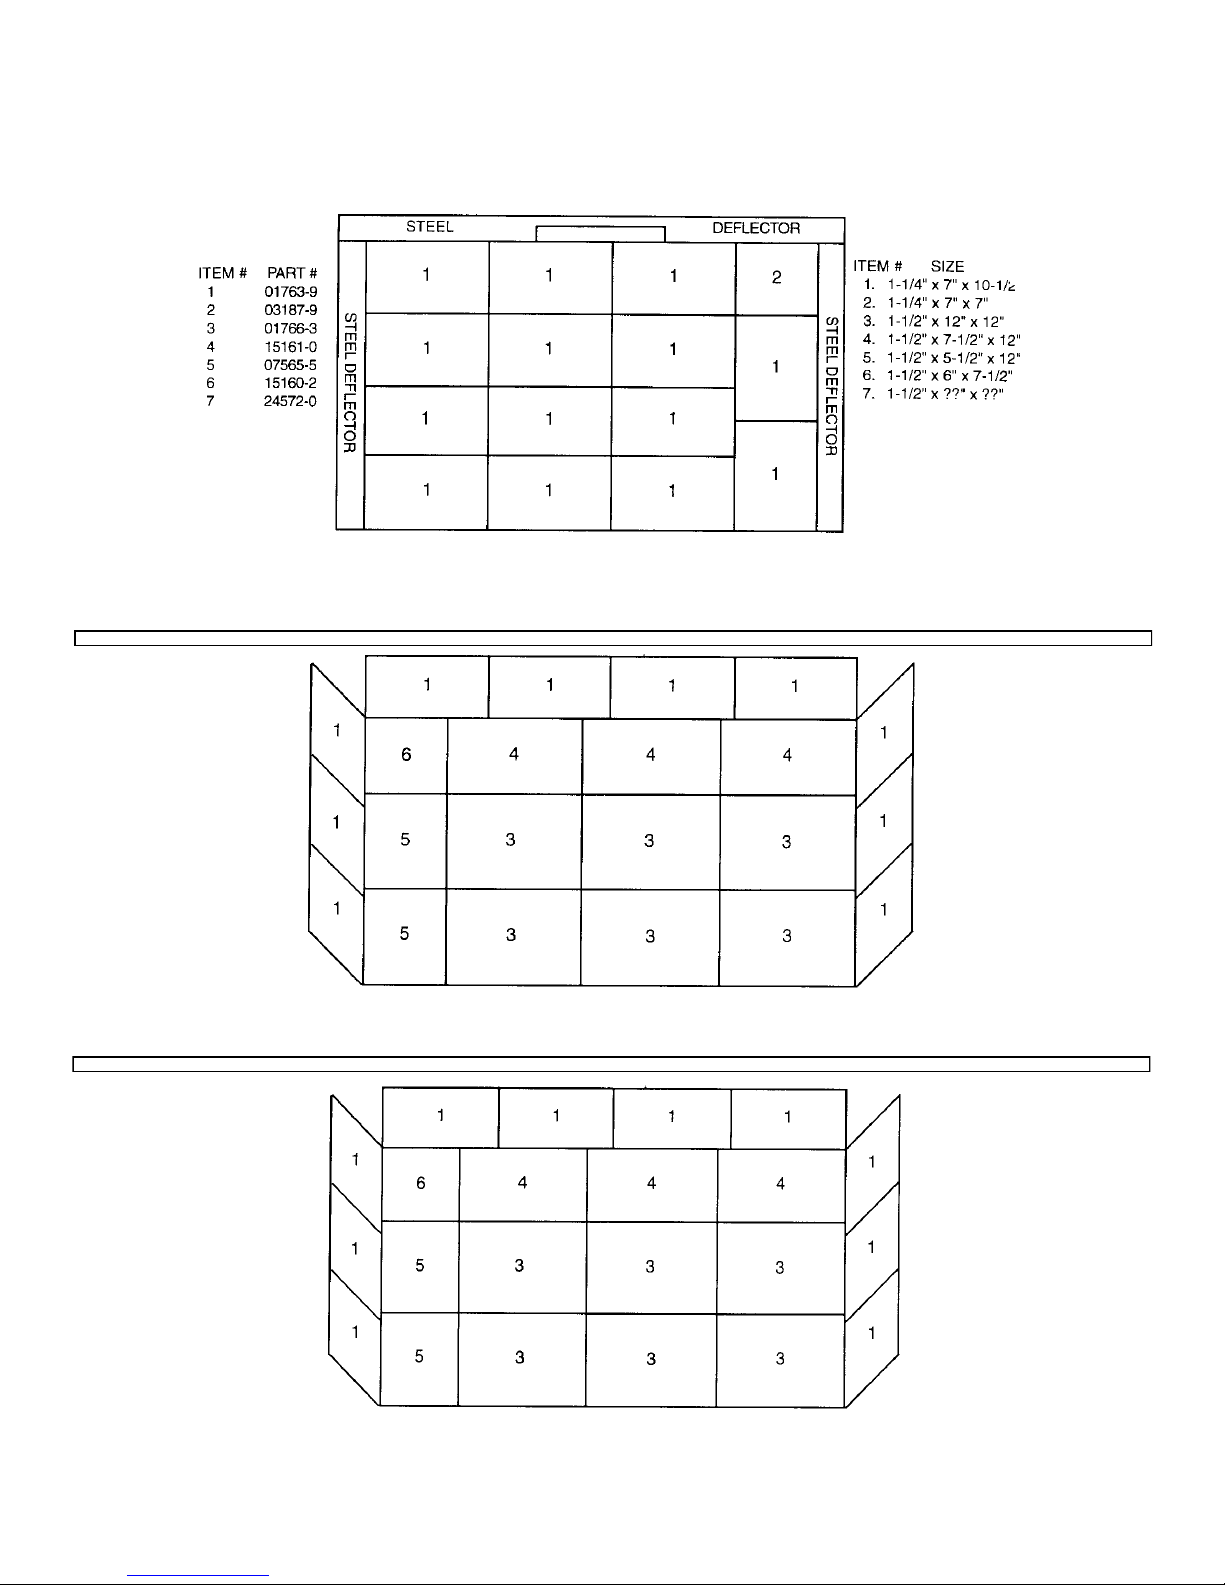
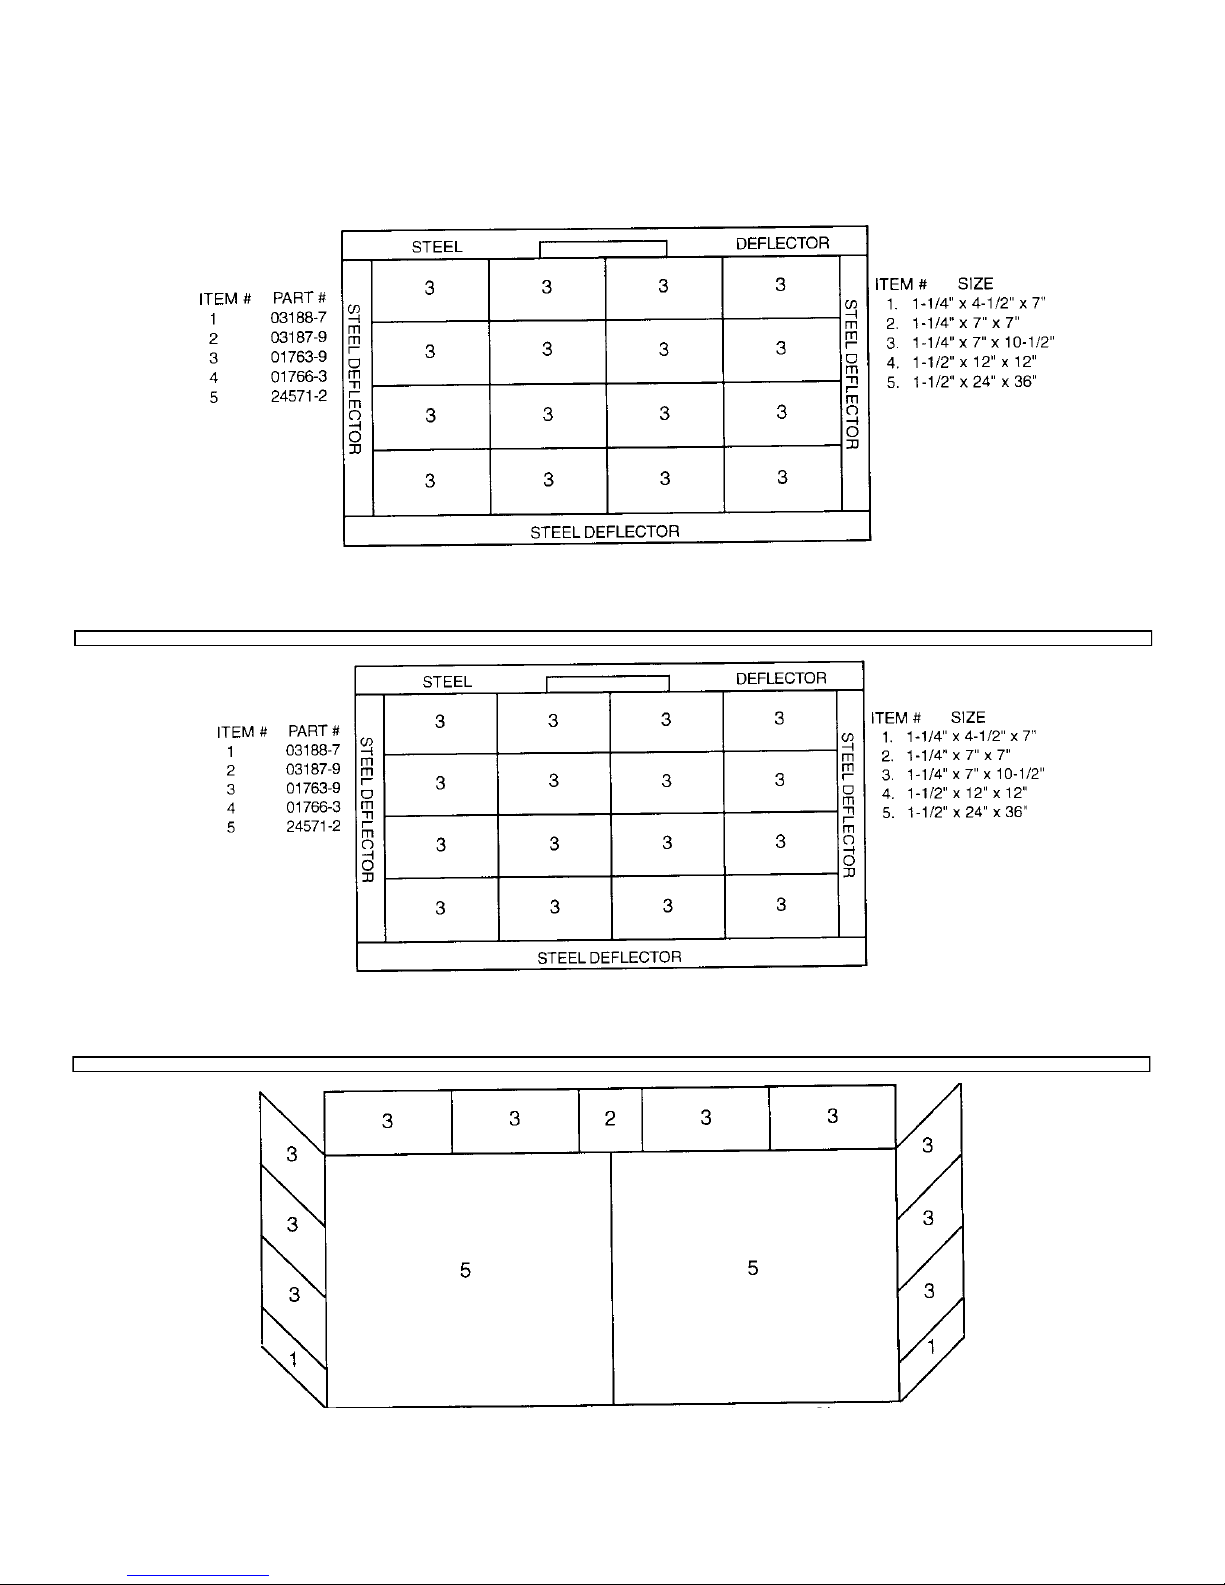
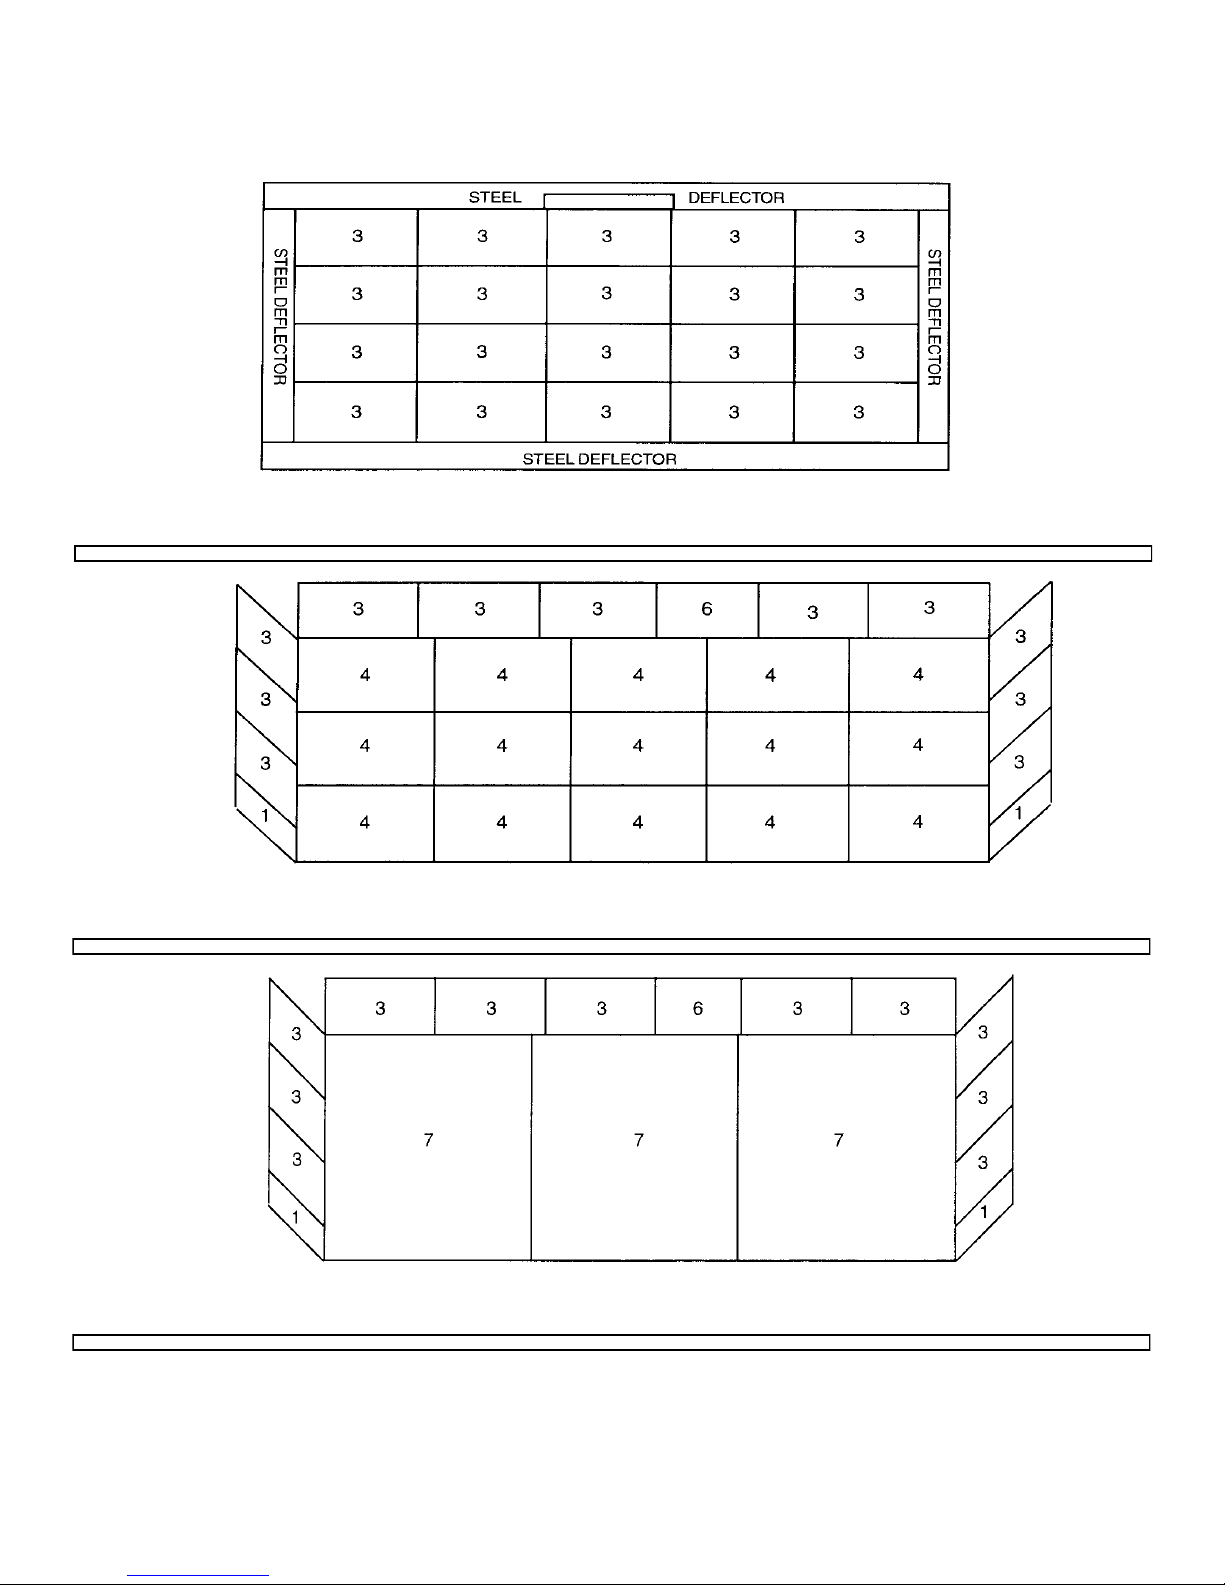
5
INSTALLATION
SETTING IN PLACE
Your Montague pizza oven has been shipped in sections for easy handling. Remove all packing
material and accessories from oven interior. Sections may be turned on their sides to go through
doorway after removal of tile, desk, deck supports, and other loose parts. After all sections are at
location, assemble and replace parts previously removed.
MODELS 13P-1, 14P-1 & 15P-1: Attach legs to unit with the screws that are provided. Set in final
location.
MODELS 23P-2, 24P-2 & 25P-2: Attach legs to bottom section with the screws that are provided.
Set bottom section in final location and place on top section on bottom section. Attach trim strip
across front between the two oven sections.
When oven is in permanent position, level entire unit by placing carpenter’s level on oven bottom
and adjust the foot on the bottom leg so that oven is level from front to back and side to side.
ASSEMBLY
Install door handle and secure with the screws that are provided. Install flue deflector or down
draft diverter. Either a flue deflector or down draft diverter is shipped with every unit. The flue de-
flector is intended for use when the oven is installed under a properly designed hood. When oven
is directly connected to vent system, the down draft diverter must be used.
GAS CONNECTION
Before connecting oven to the gas supply line, be sure that all new piping has been cleaned and
purged to prevent any foreign matter from being carried into the controls by the gas. In some cas-
es, filters or drops are recommended. A separate Gas Shut-Off Valve must be installed adjacent
to each oven and be located in an accessible area. It is important that adequately sized piping be
run directly to point of connection at oven, with as few elbows and tees as possible. Consult local
gas company for proper sizing and gas pressure.
Each oven is equipped with an appliance gas pressure regulator for use with natural gas. This
gas pressure regulator is factory adjusted for the manifold pressure specified on the nameplate.
Connect each oven separately using a 3/4” pipe or larger. If flexible or semiflexible connectors are
used, it is recommended that an AGA listed flexible connector with an I.D. equal to 3/4” pipe be
used. Avoid sharp bends or kinks.
Pipe joint compounds that are used should be resistant to the action of liquefied petroleum gases.
ALL PIPE JOINTS SHOULD BE TESTED FOR LEAKS USING A SOAP AND WATER SOLU-
TION BEFORE OPERATING THE OVEN. DO NOT USE AN OPEN FLAME.