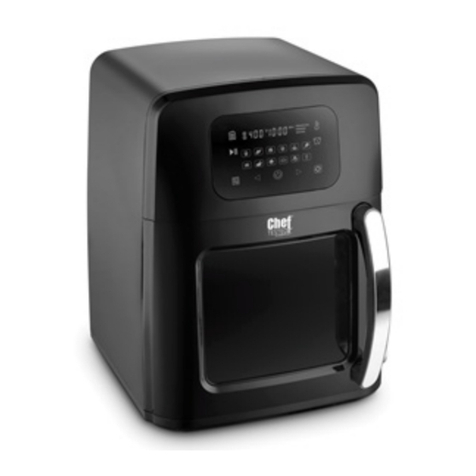
Montgomery Ward Chef Tested AF-605 User manual

Instruction Manual
ITEM: 774859
Wards.com 1•888•557•3848
Montgomery Ward Customer Service
8:00 am to Midnight, Monday through Friday
Recipes
and tips
inside!
Wards.com 1•888•557•3848
Multi-Function Air Fryer

Thank you for purchasing your Chef Tested Multi-Function Air
Fryer by Montgomery Ward. Put through the paces by the
experts, we guarantee that it will perform to the
highest standard, time after time, with all the convenience, easy
cleanup and durability you rely on from Wards.
3
Important Safeguards ................... 3
Electrical Safety ...............................4
Specications.................................... 4
Parts & Features............................... 5
How to Use.....................................6-9
Helpful Hints ...................................... 9
Cleaning & Care.............................. 10
Troubleshooting...............................11
Recipes and Notes................... 12-19
Return Information ...................... 20
Warranty..............................................21
Thank you
for your
purchase!
Table of Contents
21•888•557•3848
Wards.com
Important Safeguards
READ CAREFULLY BEFORE USING AND SAVE THESE INSTRUCTIONS!
• FOR HOUSEHOLD USE ONLY. DO NOT use this appliance for other than its
intended use.
• Remove all packaging materials and labels before rst use. DO NOT allow
children to play with packaging materials.
• Wash all removable parts before rst use. See Cleaning & Care.
• A short cord is provided to reduce the hazards resulting from entanglement
or tripping. DO NOT drape the cord over the counter or tabletop where it can
be pulled on or tripped over. DO NOT wrap the cord tightly around the appli-
ance, as this could cause the cord to fray or break.
• We DO NOT recommend using an extension cord with this appliance. However,
if an extension cord is used, the marked electrical rating should be at least as
great as the electrical rating of this appliance.
• CLOSE SUPERVISION IS NECESSARY WHEN USING THIS APPLIANCE NEAR
CHILDREN.
• A re may occur if this appliance is used near ammable materials, including
curtains, towels, walls, etc. DO NOT place any paper, plastic, or other nonfood
items in the appliance. DO NOT place the appliance or its cord on or near a
heated surface or in a heated oven.
• This appliance should always be used on a stable, dry, heat-resistant surface.
• DO NOT use near water. DO NOT plug in or operate with wet hands.
• DO NOT use an accessory or attachment not recommended by Wards, as this
may cause injury or damage the appliance.
• Always use oven mitts when handling hot food or appliances. DO NOT attempt
to move an appliance when it is hot or has hot contents.
• DO NOT operate this appliance with an external timer or remote control.
• DO NOT use outdoors.
• Turn off and unplug this appliance when not in use.
• DO NOT cover any vents when the appliance is operating.
• This appliance cooks with little or no cooking oil. DO NOT attempt to deep fry
foods in oil in this appliance.
• THERE ARE NO SERVICEABLE PARTS INSIDE THIS APPLIANCE.
• DO NOT USE AN APPLIANCE WITH A DAMAGED CORD OR PLUG, AFTER
THE APPLIANCE MALFUNCTIONS OR HAS BEEN DAMAGED IN ANY MANNER.
• DO NOT operate the appliance without food inside.
• Old appliances/tools contain valuable materials that can be recycled. Dispose
of old appliances/tools using appropriate collection systems in accordance with
local and federal regulations.

Parts & Features
Specications
Electrical Safety
41•888•557•3848
Wards.com
45
This appliance is equipped with a polarized plug in which one prong is wider than
the other. This is a safety feature to reduce the risk of electrical shock. The plug will
t into a polarized outlet only one way. If you are unable to insert the plug into the
outlet, try reversing the plug. If it still does not t, contact a qualied electrician. DO
NOT attempt to modify the plug in any way. Montgomery Ward cannot accept any
liability for damage or injury resulting from failure to observe these safety procedures.
POWER RATING 120V, 60Hz, 1700W
CORD LENGTH 28"
DIMENSIONS 12"W x 15"H x 13"D
MODEL AF-605
1. Door
2. Door Handle
3. Rotisserie Button/Power Light/Temp. Light
4. Time Control Knob (0–60 Minutes)
5. Menu
6. Temperature Control Knob (175–400oF)
7. Oven Housing
8. Wire Trays (3, not shown)
9. Nonstick Drip Tray (not shown)
10. Rotisserie Equipment (see page 8)
7
6
5
3
2
1
4
........

1•888•557•3848
Wards.com 7
6
How to Use (cont.)
How to Use
Note: The rst time the appliance heats up, a small a mount of smoke and
odor may be generated due to production-related residue. This is
normal.
WARNINGS:
• Keep all sides of the oven at least 5"from all walls, cabinets, etc. when in
operation.
• DO NOT place anything on top of the appliance.
• During cooking, hot steam is released through the air outlet opening in the
back of the appliance. Keep your hands and face at a safe distance from the
steam.
• Be careful of hot steam when removing hot food from the appliance.
• Use oven mitts when removing hot foods or pans.
• DO NOT prepare extremely greasy foods, like sausages, in the air fryer.
AIR FRY WITH WIRE TRAYS
1. Connect the plug to an electrical outlet.
2. Open the door and insert the food on a wire tray(s). Insert the drip tray under
the wire tray(s).
3. Close the door.
4. Set the temperature and time for cooking per your recipe, or refer to the menu
listed above the control panel. The power light will come on and the fan will
start.
5. The temperature light will turn on, then turn off when the oven reaches the
set temperature. During the cooking process, this light will go off and on,
indicating the heating element is switching off and on to maintain the set
temperature.
6. The timer will count down the cooking time.
7. Excess oil from the food will collect in the drip tray.
8. To pause cooking, open the oven door. To cancel cooking, turn the timer to 0.
9. When the timer has counted down to 0, a bell will sound and the oven will
switch off automatically.
10. Unplug the appliance when nished cooking.
Thin frozen fries 15-20 400
Thick frozen fries 20-25 400
Potato gratin 25-30 400
Steak 10-15 360
Pork chops 10-15 360
Hamburger 10-15 360
Sausage roll 13-15 400
Drumsticks 25-30 360
Chicken breast 15-20 360
BBQ Skewer 18-25 400
Chicken 30-40 400
Spring rolls 8-10 400
Frozen chicken nuggets 6-10 400
Frozen sh ngers 6-10 400
Cheese snacks 8-10 360
Stuffed vegetables 10 320
Cake 20-25 320
Quiche 20-22 360
Mufns 15-18 400
FOOD TIME (MINS.) TEMP. (oF)
The table below shows estimated time and temperature for cooking some basic
foods. This information may vary depending on size or cut of food.
Note: Be sure to clean the appliance and its accessories after every use.

1•888•557•3848
Wards.com
89
How to Use (cont.) How to Use (cont.)
11. Use the rotisserie tool to carefully remove the food from the oven.
12. Unplug the appliance when nished cooking.
AIR FRY WITH THE ROTISSERIE
1. Connect the plug to an electrical outlet.
2. Open the door and insert the drip tray
at the lowest setting.
3. Prepare your food (maximum 4 lbs.):
• Use the rotisserie basket (A) for light
items that will cook better if tossed
during cooking (fries, veggies, etc.).
• Use the kabob assembly: 2 round ends
(B) attach to the rod (C) and hold up to
10 kabob skewers.
• Use the rotisserie rod with forks (C) to
assemble the traditional rotisserie to
cook a roast or whole chicken. The rod
goes through the food and the forks are
secured on each side of the food. Use
butcher’s twine, as needed, to bind the
food (to help balance or hold in wings so
they don’t burn).
• Use the rotisserie tool (D) to carefully lift
and load the food into the oven. First
insert the left end of the rod into the
rotisserie socket on the oven interior
then rest the right end into the bracket
on the right side.
A
D
C
B
4. Close the door. Set the temperature and time for cooking per your recipe. The
power light will come on and the fan will start.
5. Press the rotisserie button. The indicator light will come on and the
rotisserie will begin to turn. Check the food carefully to make sure it is turning
smoothly (not opping or rubbing). If needed, stop the rotisserie and remove
the food to rebalance it.
6. The temperature light will turn on, then turn off when the oven reaches
the set temperature. During the cooking process, this light will go off and on,
indicating the heating element is switching off and on to maintain the set
temperature.
7. The timer will count down the cooking time.
8. Excess oil from the food will collect in the drip tray.
9. To pause cooking, open the oven door. To cancel cooking, turn the timer to 0.
10. When the timer has counted down to 0, a bell will sound and the oven will
switch off automatically.
Helpful Hints
Tips R
• Snacks that can be prepared in a conventional oven can also
be prepared in the air fryer.
• Use premade dough to prepare lled snacks quickly and
easily.
• Place a baking tin or oven dish on a wire tray if you want to
bake a cake or if you want to fry fragile ingredients.
• Reheat foods at 300oF for up to 10 minutes.

Wards.com
10 11
Cleaning & Care
Wards.com
Wards.com 1•888•557•3848 11
10
1. Turn off and unplug the appliance.
2. Always allow the appliance to cool completely before cleaning.
3. The door can be removed for cleaning, if desired, by sliding the white plastic
switch on the inside of the door to the left. Hand wash the door in warm, soapy
water with a soft cloth. Dry thoroughly.
4. Wipe the interior and exterior of the oven with a damp cloth.
5. DO NOT use abrasive brushes or pads, or harsh cleaning solutions.
6. DO NOT use metal utensils to clean the drip tray (this may damage the nonstick
coating).
7. Use a sponge or rubber spatula to remove any stuck-on food or residue.
8. All accessories are dishwasher safe.
9. DO NOT immerse any electrical appliance, cord or plug into water.
10. Ensure all parts are dried thoroughly before reassembling and using this
appliance.
Troubleshooting
Problem Possible cause Solution
The air fryer does not
work.
The appliance is not
plugged in.
The timer is not set.
Plug the cord into an
outlet.
Set the timer.
The ingredients fried with
the air fryer are not done.
The amount of food is
too large.
The set temperature is
too low.
The set cooking time is
too short.
Cook a smaller amount.
Increase the temperature.
Increase the cooking
time.
Air fried snacks are not
crispy when they come
out of the air fryer.
You used a type of snack
meant to be prepared in
a traditional deep fryer.
Use oven snacks or light-
ly brush some oil onto
the snacks for a crispier
result.
Homemade fries are not
crispy when they come
out of the air fryer.
Fries weren’t properly
prepared.
Rinse the potato pieces
to remove starch, then
pat them dry and toss
in a little olive oil before
cooking.

Wards.com 1•888•557•3848 13
12
Recipes
Recipes
Crispy Air-Fried Chicken
1½ cups our ½tsp. cayenne pepper
1 tsp. pepper 1 cup milk
1½tsp. salt 6 chicken thighs (skin on)
1. To avoid cross contamination, wash hands, cutting boards, utensils, etc. after
touching raw poultry. DO NOT rinse raw poultry.
2. In a large bowl, whisk together the dry ingredients. Pour milk into another bowl.
3. Dredge chicken pieces in the dry ingredients, then in the milk, then back into
the dry ingredients. Shake off any excess.
4. Put the coated chicken pieces onto 1 or 2 racks (1 in the high position, 1 in the
low or medium position) in the oven. Leave a little space between each piece.
5. Close the oven door and set the oven to 360oF for 50 minutes. Rotate the
racks twice while cooking. Chicken is done when internal temperature is 165° F.
Serves 4–6
Loaded Smashed Potatoes
2 medium leftover baked potatoes ½cup sour cream
2 tsp. olive oil 1 green onion, chopped
2 strips of bacon, cooked and crumbled salt & pepper
¼cup cheddar cheese, shredded
1. Place the cooked potatoes on a plate or cutting board and carefully smash
them (with skin on) with the back of a spatula.
2. Place the potatoes on a wire tray. Drizzle with olive oil, sprinkle on the
bacon and cook at 400oF in the top position for about 5 minutes.
3. Sprinkle on the cheese and cook at 400oF until melted.
4. Serve with sour cream and green onions. Salt & pepper to taste.
Serves 2
Veggie Egg Bake
8 eggs, beaten 6 oz. mushrooms, chopped
¼cup milk 6 grape tomatoes, sliced
½cup cheddar cheese, shredded 3 green onions, chopped
½cup spinach, chopped salt & pepper to taste
1 small zucchini, thinly sliced
1. To avoid cross contamination, wash hands after touching raw eggs.
2. Mix all ingredients together in a medium bowl.
3. Spray an 8"round, oven-safe pan with cooking spray. Pour mixture into
pan and place the pan on a wire tray in the lowest position. Bake at 325° F
for 40–50 minutes.
4. Egg bake is done when eggs are set in the center.
Serves 4–6
Meatloaf
1 lb. lean ground beef 1–2 slices bread, cubed
½medium onion, minced 2 eggs
½stalk celery, minced salt & pepper, to taste
1 clove garlic, minced ½cup ketchup
1. To avoid cross contamination, wash hands after touching raw meat.
2. In a medium bowl, mix all ingredients, except the ketchup, with your
hands.
3. Press the meat mixture into an 8"round, oven-safe pan and top with the
ketchup.
4. Place the pan on a wire tray in the lowest position and bake at 400oF for 30
minutes. When done, the internal temperature at the center of the meatloaf
should be 160oF (add more time if needed).
Serves 4

14 15
1•888•557•3848
Wards.com
Recipes
Recipes
Rotisserie Chicken
1 tsp. salt 1 tsp. onion powder
¼tsp. pepper 1 tsp. paprika
1 tsp. garlic powder 4 lb. whole chicken
1. DO NOT rinse raw poultry. To avoid cross contamination, wash hands, utensils,
cutting boards, etc. after touching raw poultry.
2. In a small bowl, mix together the salt, pepper, garlic powder, onion powder and
paprika to make a rub.
3. Remove the giblets and sprinkle some of the rub inside the chicken.
4. Center the chicken on the rotisserie rod and attach securely with both forks.
5. Tie the chicken with twine to hold the wings and legs in (so they don’t burn).
6. Spread the remaining rub all over the chicken (and under the skin, if desired).
7. Use the rotisserie tool to lift the chicken into place in the oven.
8. Cook at 400oF for 60–80 minutes.
9. Reset the timer, as needed, until chicken reaches internal temperature of
180° F.
10. Use the rotisserie tool to carefully remove the chicken to a cutting board or
platter. Let rest 10–15 minutes before removing the rotisserie assembly and
carving.
Serves 4
Quick and Delicious Shrimp
¼tsp. cayenne pepper
½tsp. Old Bay® seasoning
12 oz. small-medium raw shrimp, peeled and deveined
2 tsp. olive oil
1–2 Tbsp. salted butter, melted
1. To avoid cross contamination, wash hands, utensils, cutting boards, etc. after
touching raw seafood.
2. In a small bowl, thoroughly mix the cayenne and Old Bay®. Set aside.
3. Place the shrimp in a large bowl, and toss with the olive oil. Then, while stirring
the shrimp, sprinkle over the seasoning mix and coat evenly.
4. Put the shrimp onto a wire tray(s) in a single layer.
5. Place the tray(s) in the medium position in the oven and cook at 355oF for 5–12
minutes. Shrimp will be opaque and pink when done.
6. When shrimp is done, toss with the melted butter and serve.
Serves 2–3
Apple Hand Pies
2 small apples, peeled and diced 2 tsp. cornstarch
2 Tbsp. honey 2 tsp. water
½tsp. cinnamon 1 premade 9"pie crust
½tsp. nutmeg
1. Cook the rst 4 ingredients in a saucepan over medium–high heat on a
stovetop for about 5 minutes.
2. Mix the cornstarch and water in a cup and pour it into the apple mixture. Heat
another minute, stirring until the mixture thickens. Remove from heat.
3. Roll out the pie crust and cut into 4 equal pieces.
4. Divide the apple mixture between the 4 crust pieces and fold each crust over
to make 4 triangular pies. Press the edges to close.
5. Place the pies on a wire rack in the low or medium position in the oven.
6. Cook at 375° F for 15 minutes or until crust is brown and crispy.
Serves 4

16 17
1•888•557•3848
Wards.com
NotesRecipes
______________________________________________________
______________________________________________________
______________________________________________________
______________________________________________________
______________________________________________________
______________________________________________________
______________________________________________________
______________________________________________________
______________________________________________________
______________________________________________________
______________________________________________________
______________________________________________________
______________________________________________________
______________________________________________________
______________________________________________________
______________________________________________________
______________________________________________________
______________________________________________________
______________________________________________________
Pasta Salad with Roasted Vegetables
1 green pepper, chopped 4 green onions, chopped
2 small zucchinis, sliced 1 pint grape tomatoes, halved
8 oz. fresh mushrooms, sliced 6 oz. pitted black olives, drained
3 cloves garlic, minced 1 cup pepperoncini, chopped
2 Tbsp. olive oil 16 oz. zesty Italian salad dressing
salt & pepper Parmesan cheese
12 oz. rotini, cooked and rinsed
1. In a large bowl, toss the pepper, zucchini, mushrooms and garlic with the
olive oil. Salt & pepper to taste.
2. Pour the vegetables into a round 8"oven-safe pan. Place the pan on a wire
tray set in the lowest position and cook at 400° F for 10 minutes. Stir and
cook another 10 minutes.
3. Let the roasted vegetables cool.
4. In a large bowl, combine the cold rotini with the onions, tomatoes, olives,
pepperoncini and the roasted vegetables.
5. Add the salad dressing, stir well and refrigerate 1 hour before serving.
6. Serve with freshly grated Parmesan cheese.
Serves 10–12
Cajun Snack Mix
1 cup rice squares cereal 1 cup sesame sticks
1 cup wheat squares cereal ¼cup butter, melted
1 cup cocktail peanuts 2 tsp. Cajun seasoning
1 cup miniature pretzels
1. Mix the rst 5 ingredients in a large bowl, and stir well.
2. In a small bowl, combine the butter and Cajun seasoning.
3. Slowly pour the butter over the dry ingredients and stir well to evenly coat.
4. Put the snack mix in a single layer onto the wire trays and cook at 400° F for 4
minutes. Rotate the racks and cook for another 4 minutes. Repeat if needed.
5. When done, pour the mix out onto cookie sheets to cool. Store in an airtight
container.
Makes 5 cups

18 19
1•888•557•3848
Wards.com
Notes
Notes
______________________________________________________
______________________________________________________
______________________________________________________
______________________________________________________
______________________________________________________
______________________________________________________
______________________________________________________
______________________________________________________
______________________________________________________
______________________________________________________
______________________________________________________
______________________________________________________
______________________________________________________
______________________________________________________
______________________________________________________
______________________________________________________
______________________________________________________
______________________________________________________
______________________________________________________
______________________________________________________
______________________________________________________
______________________________________________________
______________________________________________________
______________________________________________________
______________________________________________________
______________________________________________________
______________________________________________________
______________________________________________________
______________________________________________________
______________________________________________________
______________________________________________________
______________________________________________________
______________________________________________________
______________________________________________________
______________________________________________________
______________________________________________________
______________________________________________________
______________________________________________________

1•888•557•3848
Wards.com
12 13
If any item, for any reason, does not meet your expectations, just
return it to us. We’ll gladly either:
• Refund your merchandise amount
• Credit your account
• Send a replacement
You can return any unused item in its original packaging within 60
days of its receipt for a full refund of the purchase price (excluding
shipping and handling charges).
Please send returns to:
Montgomery Ward, Inc.
Attn: Customer Returns
2000 Harrison Suite 100
Clinton, IA 52732-6676
When returning an item:
• Use the original packaging and pack it securely.
• Please adequately insure your item in case you need to
make a claim with the carrier you choose for returning your
item.
• Include your order number and reason for return.
• We recommend keeping the receipt for 4 weeks.
Montgomery Ward, Inc. warrants this Chef Tested product
to be free from defects in material and workmanship
for one year from provable date of purchase.
Within this warranty period,
Montgomery Ward will repair or
replace, at its option, defective parts of this Chef Tested
product at no charge provided the product is returned
freight prepaid with proof of purchase to
Montgomery Ward.
Allow 2–4 weeks for return shipping.
This warranty does not cover improper installation, misuse,
abuse or neglect on part of the owner. Warranty is also
invalid in any case that the product is taken apart or
serviced by an unauthorized service station.
This warranty gives you specic legal rights and they may
vary from state to state.
THE FOREGOING WARRANTIES ARE IN LIEU OF ALL
OTHER WARRANTIES AND CONDITIONS,
EXPRESS OR IMPLIED, INCLUDING
BUT NOT LIMITED TO THOSE OF MERCHANTABILITY
OR FITNESS FOR A PARTICULAR PURPOSE.
1 Year Limited Warranty
Montgomery Ward Customer Service
8:00 am to Midnight CST, Monday through Friday
Wards.com 1•888•557•3848
Returns
20 21
1•888•557•3848
Wards.com

1514
This manual suits for next models
1
Table of contents
Other Montgomery Ward Fryer manuals

Montgomery Ward
Montgomery Ward Chef Tested 791281 User manual

Montgomery Ward
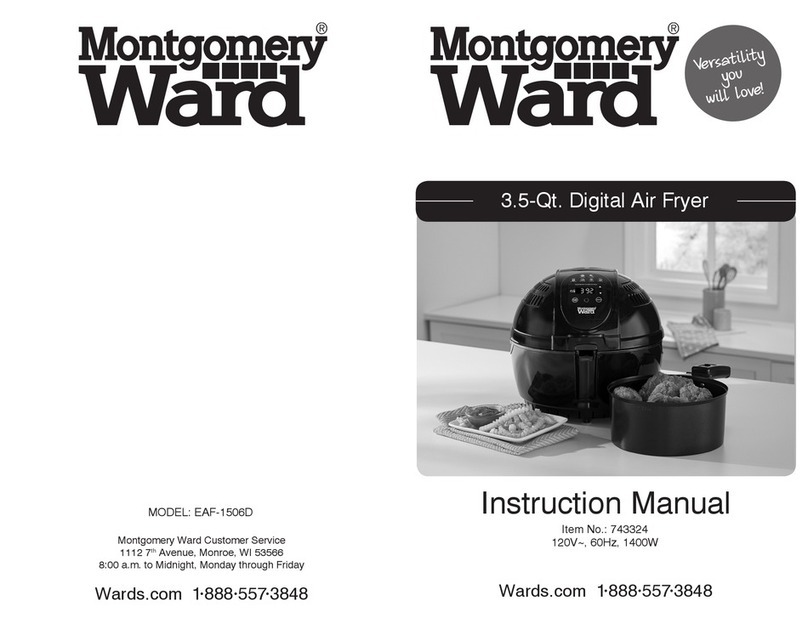
Montgomery Ward EAF-1506D User manual

Montgomery Ward
Montgomery Ward Chef TESTED 796463 User manual

Montgomery Ward
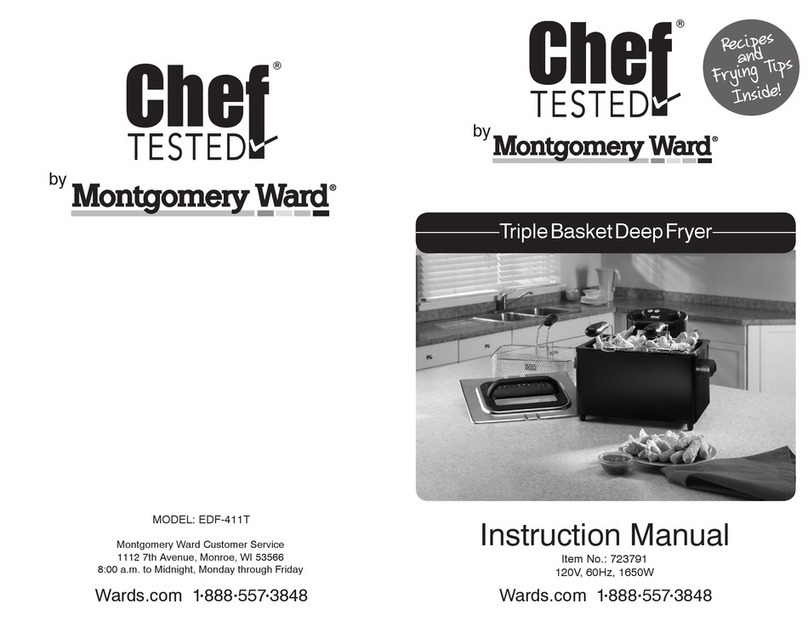
Montgomery Ward Chef TESTED EDF-411T User manual

Montgomery Ward
Montgomery Ward EDF-402DR User manual

Montgomery Ward
Montgomery Ward Chef Tested 767976 User manual
Popular Fryer manuals by other brands

ARDES
ARDES ARFRYA05L Instructions for use

Frymaster
Frymaster FootPrint Pro Series Installatie- en gebruikshandleiding

Frymaster
Frymaster FOOTPRINT H50 Service and parts manual

emerio
emerio AF-125323 instruction manual

Insignia
Insignia NS-AF50MBK9 user guide

Sencor
Sencor SFR 5320WH Translation of the original manual