2
ASSEMBLY & INSTALLATION
Pre-Assembly
NOTE: Some parts may come preassembled.
Determine whether you will install the planter base
and follow “Planter Base Assembly” or “Alternate
Ground Mounting” before proceeding.
Planter Base Assembly with Ground
Stake (Figure 2)
NOTE: To provide additional stability for the solar
lamp post and planter, follow the steps below
to add the Ground Stake (G), or see figure 3 and
follow the instructions for wall mounting the unit.
Step 1: Select the ground area where you wish to locate
the solar lamp post and planter, and insert the Ground
Stake (G), leaving the small section at the top of the
ground stake exposed above ground. CAUTION: Never
push the fixture into the ground by pressing
down on any of the components from above. In
compacted, clay, or hard soils, moisten the ground
with water before inserting the Ground Stake (G)
into the ground to avoid breakage. Do not force the
Ground Stake (G) into the ground. Use an item such
as a screwdriver to create a pilot hole in the ground
first before installing the Ground Stake (G).
Step 2: Once the Ground Stake (G) is firmly in the ground,
place the Planter Base (H) over the top of the ground stake
until secure.
CAUTION: To prevent product damage or personal
injury from tip-over, lamp post planter base must
be placed on a flat, level surface, and must be filled
with a minimum of 10 lbs (4.54 kgs) of soil, gravel,
or stone.
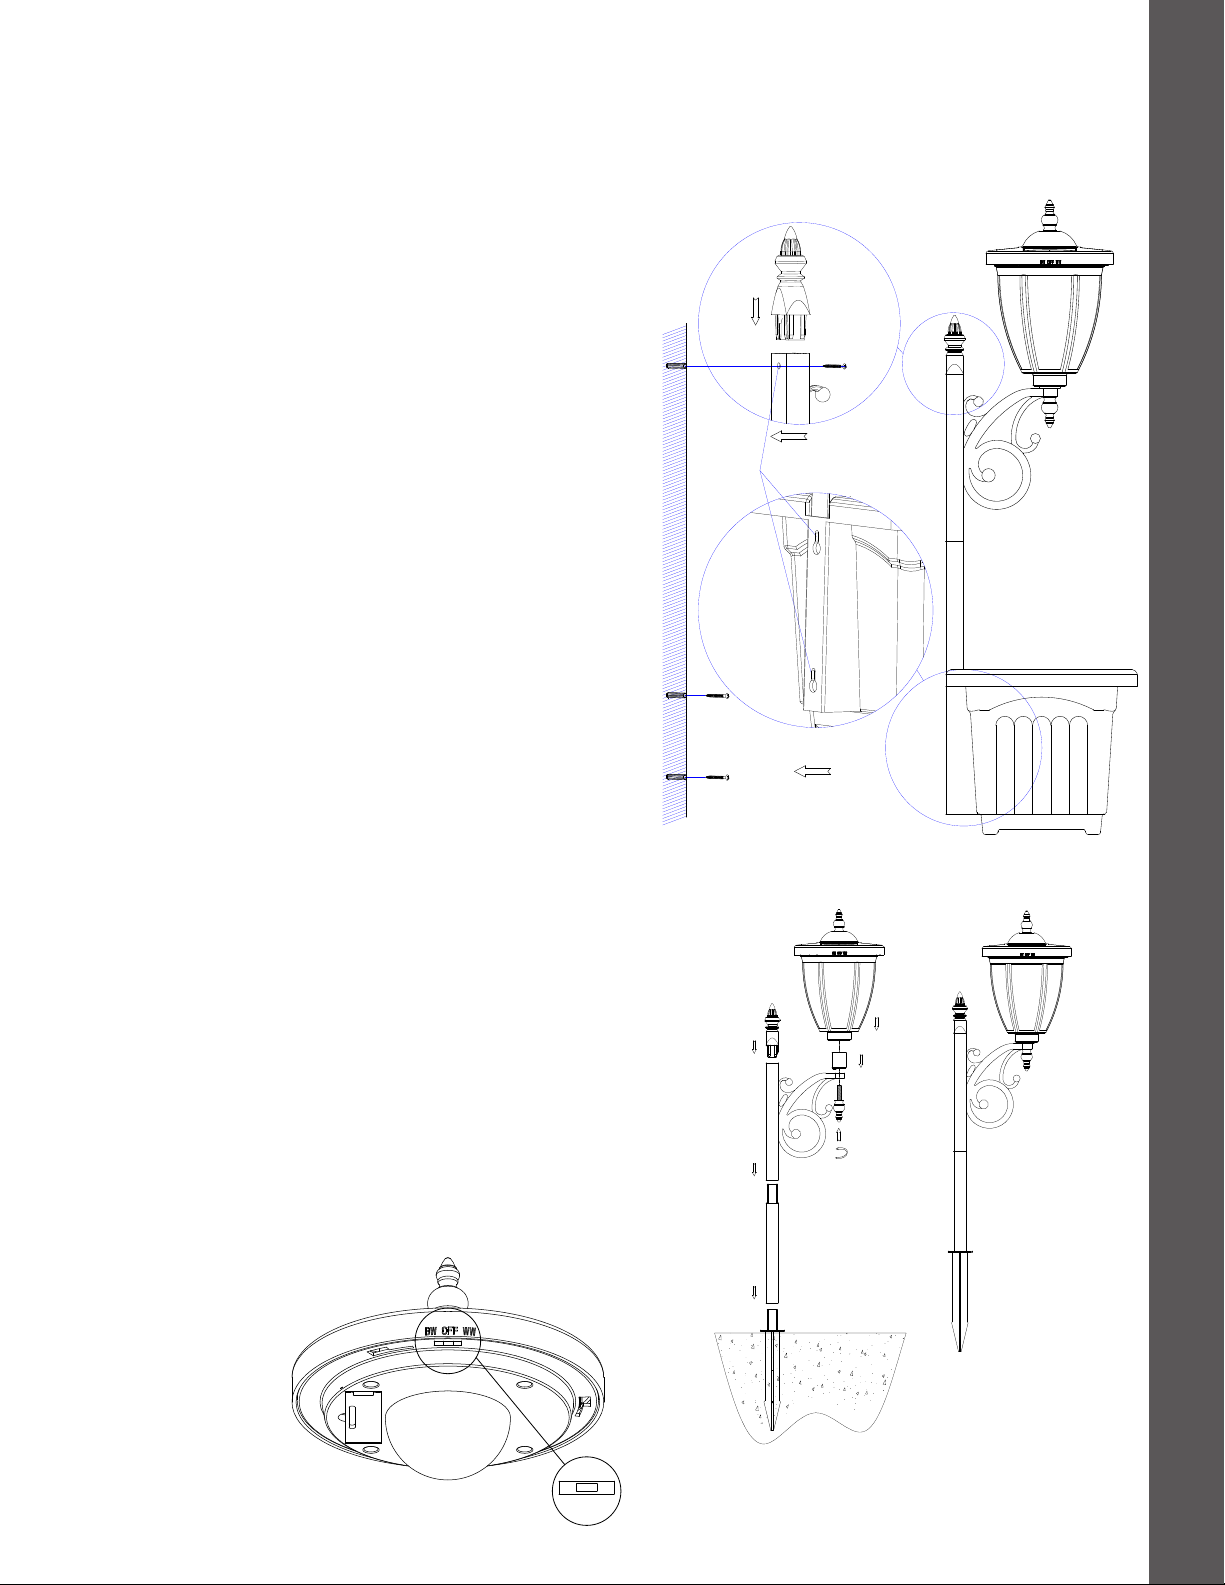
Planter Base Assembly (Figure 1)
Step 1: Insert the base of the Extension Post (F) over the
adapter on the top of the Planter Base (H) until secure.
Step 2: Insert the base of the Decorative Post (C) over the
adapter on the top of the Extension Post (F) until secure.
Step 3: Insert the base of the Top Finial (D) into the top of
the Decorative Post (C) until secure.
Step 4: Line up the Lantern Adapter (B) above the top of
the scrolled arm of the Decorative Post (C). From below,
secure the Lantern Adapter (B) to the Decorative Post (C)
by tightening the Bottom Finial (E) in a clockwise direction
until secure.
Step 5: Place the Lamp Head (A) over the Lantern Adapter
(B). Carefully press down until secure.
NOTE: To provide additional stability for the solar
lamp post and planter, follow the steps below
to add the Ground Stake (G), or see figure 3 and
follow the instructions for wall mounting the unit.
CAUTION: To prevent product damage or personal
injury from tip-over, lamp post planter base must
be placed on a flat, level surface, and must be filled
with a minimum of 10 lbs (4.54 kgs) of soil, gravel,
or stone.
figure 1
figure 2