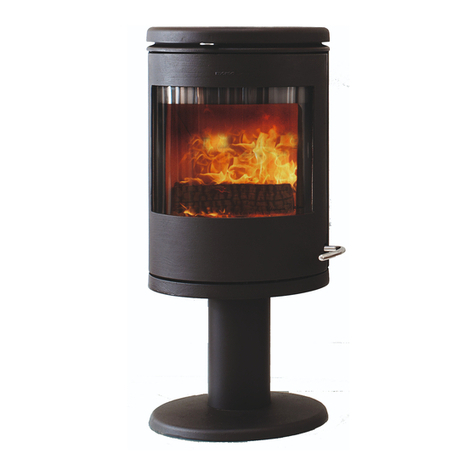
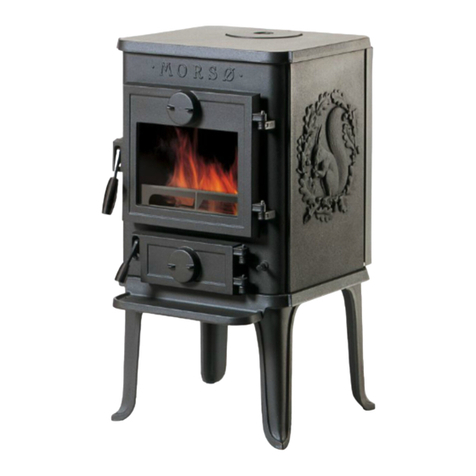
Morso Panther User manual

1
MORSØ JERNSTØBERI A/S . DK-7900 NYKØBING MORSMORSØ JERNSTØBERI A/S . DK-7900 NYKØBING MORS
MORSØ JERNSTØBERI A/S . DK-7900 NYKØBING MORS
ebsite: wwwebsite: www
ebsite: www.morsoe.com.morsoe.com
.morsoe.com.morsoe.com
.morsoe.com
Panther - Gas StovesPanther - Gas Stoves
Panther - Gas Stoves
Model No. 553
INSTINST
INSTINST
INSTALLAALLA
ALLAALLA
ALLATION INSTRUCTIONSTION INSTRUCTIONS
TION INSTRUCTIONSTION INSTRUCTIONS
TION INSTRUCTIONS
This appliance meets the requirements of the European Gas Directive
BeforBefor
BeforBefor
Before installing ensure installing ensur
e installing ensure installing ensur
e installing ensure that the local distribution conditionse that the local distribution conditions
e that the local distribution conditionse that the local distribution conditions
e that the local distribution conditions
(identification of the type of gas and pr(identification of the type of gas and pr
(identification of the type of gas and pressuressur
essuressur
essure)e)
e)e)
e)
and the adjustment of the appliance arand the adjustment of the appliance ar
and the adjustment of the appliance are compatiblee compatible
e compatiblee compatible
e compatible
This is not a Do It Yourself product
This appliance must be installed by a competent person
These instructions must be left with the userThese instructions must be left with the user
These instructions must be left with the user
Distributed by: Morsø UK, VDistributed by: Morsø UK, V
Distributed by: Morsø UK, Valley Drive, Swift Valley Drive, Swift V
alley Drive, Swift Valley Drive, Swift V
alley Drive, Swift Valleyalley
alleyalley
alley, Rugby, Rugby
, Rugby, Rugby
, Rugby,,
,,
,
CV21 1TW WCV21 1TW W
CV21 1TW Warks, England - wwwarks, England - www
arks, England - wwwarks, England - www
arks, England - www.morsoe.com.morsoe.com
.morsoe.com.morsoe.com
.morsoe.com
Byappointmentto theRoyalDanishCourt

2
As supplied, this stove is for use with natural gas (G20)
When converted using conversion kit no. 555311 this appliance is for
use with propane gas (G31)
This appliance is for use in the United Kingdom (GB) and the Republic
of Ireland (IE) only.
LIST OF COMPONENTSLIST OF COMPONENTS
LIST OF COMPONENTS
Cast iron stove containing gas burner unit & interior flueway
1 Door handle with fixing screw
1 Ceramic rear base piece
1 Pair of ceramic front base pieces
1 Set of 3 top coals
1 Pair of ceramic firebox side walls
1 8mm nut & olive
1 Key for window
1 Set of Installation and user’s instructions
1Fluesealingrope
APPLIANCE DAAPPLIANCE DA
APPLIANCE DATT
TT
TAA
AA
A
Thisproductusesfueleffectpieces,fireboxsidewallsandgasketscontaining
RefractoryCeramicFibres(RCF),whichareman-madevitreoussilicatefibres.
Excessiveexposuretothesematerialsmaycausetemporaryirritationtoeyes,
skin and respiratory tract. Consequently, it makes sense to take care when
handlingthese articlestoensurethatthereleaseofdustiskepttoaminimum.
ToensurethatthereleaseoffibresfromtheseRCFarticlesiskepttoaminimum,
during installation and servicing we recommend that you use a HEPA filtered
vacuum to remove any dust and soot accumulated in and around the stove
before and after working on the stove. When replacing these articles we
recommend that the replaced items are not broken up, but are sealed within
aheavydutypolythenebag,clearlylabelledasRCFwaste.Thisisnotclassified
as “hazardous waste” and may be disposed of at a tipping site licensed for
the disposal of industrial waste. Protective clothing is not required when
handling these articles, but we recommend you follow the normal hygiene
rules of not smoking, eating or drinking in the work area and always wash
your hands before eating or drinking.
Thisappliancedoesnot containanycomponentmanufacturedfromasbestos
or asbestos related products.

3
GasGas
GasGas
Gas Natural (G20)Natural (G20)
Natural (G20)Natural (G20)
Natural (G20) Propane (G31)*Propane (G31)*
Propane (G31)*Propane (G31)*
Propane (G31)*
Inlet Pressure 20mbar 37mbar
Input Max. (Gross) 6.8kW 6.8kW
Min. (Gross) 3.1kW 3.0kW
Output Max. (Gross) 4.9kW 4.9kW
Min. (Gross) 2.2kW 2.1kW
Burner Test Pressure (Cold) 18.7+0.75mbar 36.5+0.75mbar
Gas Connection 8mm pipe 8mm pipe
Burner Injector Cat.82 Size 420 Cat. 92 Size 200
Gas rate 0.639m3/h 0.253m3/h
Efficiency class 2 2
GENERAL INSTGENERAL INST
GENERAL INSTALLAALLA
ALLAALLA
ALLATION REQUIREMENTSTION REQUIREMENTS
TION REQUIREMENTSTION REQUIREMENTS
TION REQUIREMENTS
The installation must be in accordance with these instructions.
For the user’s protection, in the United Kingdom it is the law that all gas
appliancesareinstalledbycompetentpersonsinaccordancewiththecurrent
editionoftheGasSafety(InstallationandUse)Regulations.Failure to install
the appliance correctly could lead to prosecution. The Council for the
Registration of Gas Installers (CORGI) requires its members to work to
recognised standards.
In the United Kingdom the installation must also be in accordance with:
a) All the relevant parts of local regulations.
b) Thecurrent editionoftheBuildingRegulations issued by the Department
of the Environment and the Welsh Office or the Building Standards
(Scotland)Regulationsissued by the ScottishDevelopmentDepartment.
c) All relevant codes of practice.
d) The relevant parts of the current editions of the following British
Standards:-
BS 1251
BS 5440 Part 1
BS 5440 Part 2
BS 5871 Part 1
BS 6891
BS 8303
In the Republic of Ireland the installation must also conform to the relevant
parts of:
a) The current edition of IS 813
b) All relevant national and local rules in force.

4
The hearthThe hearth
The hearth must be made from a non-combustible material and be at least
600mm wide x 500mm deep x 12mm thick
ClearancesClearances
Clearances from combustible and non-combustible materials must be at
least those shown in figure 1
The flueThe flue
The flueThe flue
The flue may be: (a) A conventional open flue.
(b) A metallicgasfluepipea diameter of 125 mm. The
connection collar is for 150 mm dia. flue pipe. The
flue installation dimensions are shown in figure 1.
• Norestrictorplate or flue damperispermitted.Where a variable damper
isfittedit mustberemovedorbepermanently fixedintheopen position.
• The flue must be swept before the appliance is installed.
VV
VV
Ventilation:entilation:
entilation:entilation:
entilation:IntheUnitedKingdom (GB) no special ventilation bricks or vents
are required in the room for this appliance.
In the Republic of Ireland (I.E.), permanent ventilation must comply with the
regulations currently in force.
Location:Location:
Location:Location:
Location: This appliance must not be installed in a private garage or any
room,whichcontainsabath,orshowerorwheresteamisregularlypresent.
FigurFigur
FigurFigur
Figure 1e 1
e 1e 1
e 1

5
PrPr
PrPr
Propane gas appliancesopane gas appliances
opane gas appliancesopane gas appliances
opane gas appliancesmustnotbeinstalled in a cellar,basementorother
roomwhichis built entirelybelowgroundlevel (See GasSafety(Installation&
Use)Regulations).
POSITIONING THE STOVEPOSITIONING THE STOVE
POSITIONING THE STOVE
1. Decide on whether the stove is to be used in rear or top outlet set-up
andremove the appropriateoutletcoverplate.The cover plate must be
securely attached to the unused flue outlet.
2 Place the stove in position on the hearth ensuring that the minimum
dimensions specified in figure 1 are adhered to. Connect the flue pipe
to the outlet and seal in place.
3. Due to its weight there is normally no requirement for additional fixing
with this appliance. However, where the stove may be subjected to
somevibration(e.g. transit in anarrowboat),thelegsshould be secured
withwoodenblocksorbysomemeansthat preventslateralmovement.
CONNECTING THE GAS SUPPLCONNECTING THE GAS SUPPL
CONNECTING THE GAS SUPPLYY
YY
Y
• A nut and olive are provided for an 8mm pipe inlet connection to the
elbowat the bottom frontoftheappliance. The elbow can berotatedto
allow a connection from any direction. The elbow includes a valve for
isolating the gas supply.
• The supply pipe must be rigid material. Flexible pipe must not be used.
• Note: Prior to connecting the gas supply it is advisable to blow out the
gas supply so that any dirt which may be present in the pipe is cleared
and cannot enter the gas valve or pilot burner and so cause a blockage
• Withthesupplyconnectedpressurecheck the installation pipework for
gas soundness. In the United Kingdom check in accordance with the
current editionofBS6891.IntheRepublicof Irelandcheckinaccordance
with the rules in force.
FITTING THE CERAMIC FIREBOX WFITTING THE CERAMIC FIREBOX W
FITTING THE CERAMIC FIREBOX WALLS & FUEL BEDALLS & FUEL BED
ALLS & FUEL BEDALLS & FUEL BED
ALLS & FUEL BED
1. The windows are secured with a locking screw. Remove the screw with
the Allen key supplied. See figure 2. Open the windows.
2. Place theceramicwalls againstthefireboxsides.Locatethe backedges
of the walls in the tabs at the back corners of the firebox. See figure 3.
3. Place the ceramic rear base coal in position. The front of the coal must
restbehindthetwostopsattherearoftheburnerandnotrestontopof

6
them.See figure 4.
4. Place the left front coal behind the metal lip at the front of the burner.
See figure 5.
5. Place the right front coal behind the metal lip at the front of the burner.
Its left side should rest over the projection on the left front coal. See
figures 5 & 6.
6. The double top coals are marked “L” and “R”. Place the coal marked
“L” behind the front left coal. Place the coal marked “R” behind the
front right coal. Place the single coal between the two double coals.
See figure 7.
7. Close and secure the windows by refitting the locking screw.
FigurFigur
FigurFigur
Figure 2e 2
e 2e 2
e 2
FigurFigur
FigurFigur
Figure 3e 3
e 3e 3
e 3
FigurFigur
FigurFigur
Figure 4e 4
e 4e 4
e 4
FigurFigur
FigurFigur
Figure 5e 5
e 5e 5
e 5

7
See figure 8.
If the firIf the fir
If the fire is ture is tur
e is ture is tur
e is turned ofned of
ned ofned of
ned off or the flames go out, wait at least 3 minutesf or the flames go out, wait at least 3 minutes
f or the flames go out, wait at least 3 minutesf or the flames go out, wait at least 3 minutes
f or the flames go out, wait at least 3 minutes
beforbefor
beforbefor
before attempting to re attempting to r
e attempting to re attempting to r
e attempting to relight. A safety device in the contrelight. A safety device in the contr
elight. A safety device in the contrelight. A safety device in the contr
elight. A safety device in the control stops theol stops the
ol stops theol stops the
ol stops the
firfir
firfir
fire being ture being tur
e being ture being tur
e being turned back on until it is safe.ned back on until it is safe.
ned back on until it is safe.ned back on until it is safe.
ned back on until it is safe.
- Turn the left hand control knob fully clockwise.
- Push in the right control knob and, while keeping it depressed, turn
anticlockwise through the ignition position marked and up to the
pilot position marked . The spark should light the pilot.
- If the pilot does not ignite, keep the knob depressed for a few seconds
to purge air from the supply pipes. Then turn back to the off position
marked •and repeat the ignition procedure.
- When the pilot has lit, keep the right hand control knob depressed for a
few seconds to allow the pilot flame to stabilise then release it. If the
pilot does not remain alight ensure that the air has been purged.
- Partially depress the right control knob and turn to the main burner
positionmarked .The mainburnershould nowlightatits lowposition.
- The left-hand knob is for burner flame adjustment. Turning it
anticlockwise should gradually increase the flame height.
- The flame height control does not have to be re-set every time the fire
is lit. It can be kept at any position enabling the customer to use the
right hand control only to ignite the burner at the set flame height.
- Aftercheckingturn the right hand knob tooff. Depressthe controlknob
partially at the pilot position ( ), turn clockwise to off (•) and release
the knob. If any resistance is felt when turning, release the downwards
pressure on the knob before continuing to turn.
CHECK FULL OPERACHECK FULL OPERA
CHECK FULL OPERATING SEQUENCETING SEQUENCE
TING SEQUENCETING SEQUENCE
TING SEQUENCE
FigurFigur
FigurFigur
Figure 6e 6
e 6e 6
e 6 FigurFigur
FigurFigur
Figure 7e 7
e 7e 7
e 7

8
FigurFigur
FigurFigur
Figure 8e 8
e 8e 8
e 8
CHECK REFERENCE PRESSURECHECK REFERENCE PRESSURE
CHECK REFERENCE PRESSURE
The burner aeration is non-adjustable. The appliance is pre-set to give the
correct heat input on Natural Gas at 20 mbar (8in w.g) inlet pressure and no
further adjustment is necessary. The burner pressure should be checked at
the pressure test point located at the side of the control unit (See figure 9) .
Thepressure check should be carriedoutusingacalibratedpressuregauge
after removing the test point screw. The fire should be alight and the left
hand control knob at its fully anticlockwise setting (Maximum flame height).
The pressure setting should be within the limits shown on page 3 of this
manual(Appliance data).Afterchecking thepressure,turnoffthefire,remove
the pressure gauge and replace the pressure test sealing screw. Relight the
fire and test all gas joints for soundness using a suitable leak detection
fluid.
FigurFigur
FigurFigur
Figure 9e 9
e 9e 9
e 9

9
CHECK FOR SPILLAGECHECK FOR SPILLAGE
CHECK FOR SPILLAGE
A spillage check must be made beforA spillage check must be made befor
A spillage check must be made before leaving the installed appliancee leaving the installed appliance
e leaving the installed appliancee leaving the installed appliance
e leaving the installed appliance
with the customerwith the customer
with the customer. Make this with all the ceramic coals in position.. Make this with all the ceramic coals in position.
. Make this with all the ceramic coals in position.. Make this with all the ceramic coals in position.
. Make this with all the ceramic coals in position.
1. Close all doors and windows in the room containing the appliance.
2. Light the appliance and turn the flame-height control to the maximum
position.
3. Leave the appliance on for 5 minutes.
4. Hold a lighted smoke match close to the draught diverter outlet at the
back of the stove. See figure 10.
5. The installation is satisfactory if the smoke is drawn into the appliance.
6. If the smoke is not drawn into the appliance, leave the appliance alight
at the maximum setting for a further ten minutes and then repeat the
test.
7. If the smoke is still not drawn into the appliance, turn off the appliance
andallowtocool.Checktheflueinstallationandclearance ofthe draught
diverter from the rear surface. If no solution can be found, turIf no solution can be found, tur
If no solution can be found, turIf no solution can be found, tur
If no solution can be found, turn ofn of
n ofn of
n offf
ff
f
the appliance and disconnect it. Advise the customer of the prthe appliance and disconnect it. Advise the customer of the pr
the appliance and disconnect it. Advise the customer of the problemoblem
oblemoblem
oblem
and strand str
and strand str
and stress that the appliance must not be used until the press that the appliance must not be used until the pr
ess that the appliance must not be used until the press that the appliance must not be used until the pr
ess that the appliance must not be used until the problem isoblem is
oblem isoblem is
oblem is
solvedsolved
solvedsolved
solved. If necessary seek expert advice.
8. If the above test is satisfactory, open all internal connecting doors,
hatches, etc. in the room. Keep all doors and windows that open to the
outside of the building closed. Switch on any extractor fan installed in
the same room as the appliance or a connecting room. Open all doors
and other openings between the fan and the appliance. Recheck for
spillage as above. The installation is satisfactory if the smoke is drawn
into theappliance. If the test is not satisfactoryIf the test is not satisfactory
If the test is not satisfactoryIf the test is not satisfactory
If the test is not satisfactory,,
,,
,turur
urur
urn ofn of
n ofn of
n off the appliancef the appliance
f the appliancef the appliance
f the appliance
and disconnect it. Advise the customer of the prand disconnect it. Advise the customer of the pr
and disconnect it. Advise the customer of the problem and stroblem and str
oblem and stroblem and str
oblem and stressess
essess
ess
that the appliance must not be used until the prthat the appliance must not be used until the pr
that the appliance must not be used until the problem is solved.oblem is solved.
oblem is solved.oblem is solved.
oblem is solved.

10
• Explain to the customer that the appliance has a flame failure & spillage
monitoring system. Point out the explanation of this system shown in
the user’s instructions under “Operating the fire”. Advise that if the fire
goes out for any reason wait at least three minutes before relighting.
Stress that if the monitoring system repeatedly shuts off the fire, the
appliance should be switched off and a specialist should be consulted.
• Advise the customer that the windows can be opened for cleaning the
interior by using the special key supplied. StrStr
StrStr
Stress that the windowess that the window
ess that the windowess that the window
ess that the window
locking scrlocking scr
locking screw should be rew should be r
ew should be rew should be r
ew should be refitted afterwarefitted afterwar
efitted afterwarefitted afterwar
efitted afterwards to prds to pr
ds to prds to pr
ds to prevent inadvertentevent inadvertent
event inadvertentevent inadvertent
event inadvertent
opening when the stove is alight.opening when the stove is alight.
opening when the stove is alight.
••
••
•StrStr
StrStr
Stressess
essess
ess that nothat no
that nothat no
that no extra coals must be added over and above thoseextra coals must be added over and above those
extra coals must be added over and above thoseextra coals must be added over and above those
extra coals must be added over and above those
supplied with the appliance and that any rsupplied with the appliance and that any r
supplied with the appliance and that any replacements must onlyeplacements must only
eplacements must onlyeplacements must only
eplacements must only
be the authorised sparbe the authorised spar
be the authorised spares. Wes. W
es. Wes. W
es. Warar
arar
arn that ignoring this advice could causen that ignoring this advice could cause
n that ignoring this advice could causen that ignoring this advice could cause
n that ignoring this advice could cause
incomplete clearance of the princomplete clearance of the pr
incomplete clearance of the products of combustion withoducts of combustion with
oducts of combustion withoducts of combustion with
oducts of combustion with
consequent health hazarconsequent health hazar
consequent health hazards.ds.
ds.ds.
ds.
• Advisethecustomerthatthetop,front,sidesandbackoftheappliance
are working surfaces and become very hot during use and, therefore
care should be exercised, particularly with the young, elderly or infirm.
FINAL REVIEW & CUSTOMER BRIEFINGFINAL REVIEW & CUSTOMER BRIEFING
FINAL REVIEW & CUSTOMER BRIEFING
• Visuallyinspectthestove.Cleanoffanymarksincurredduringinstallation.
• Advisethecustomerhow to operate theappliance.Advisethecustomer
that they should read their Owner’s guide before operating the fire and
always follow the advice in the section headed “Cleaning”.
FigurFigur
FigurFigur
Figure 10e 10
e 10e 10
e 10

11
SERSER
SERSER
SERVICINGVICING
VICINGVICING
VICING
•
Always turAlways tur
Always turn ofn of
n ofn of
n off the gas supply beforf the gas supply befor
f the gas supply beforf the gas supply befor
f the gas supply before commencing any servicinge commencing any servicing
e commencing any servicinge commencing any servicing
e commencing any servicing
•
This product uses fuel effect pieces, burner compartment wallsThis product uses fuel effect pieces, burner compartment walls
This product uses fuel effect pieces, burner compartment walls
and gaskets containing Refractory Ceramic Fibrand gaskets containing Refractory Ceramic Fibr
and gaskets containing Refractory Ceramic Fibres (RCF), whiches (RCF), which
es (RCF), whiches (RCF), which
es (RCF), which
are man-made vitreous silicate fibres. Excessive exposure to theseare man-made vitreous silicate fibres. Excessive exposure to these
are man-made vitreous silicate fibres. Excessive exposure to these
materials may cause temporary irritation to eyes, skin andmaterials may cause temporary irritation to eyes, skin and
materials may cause temporary irritation to eyes, skin and
rr
rr
respiratory tract. Consequentlyespiratory tract. Consequently
espiratory tract. Consequentlyespiratory tract. Consequently
espiratory tract. Consequently, it makes sense to take car, it makes sense to take car
, it makes sense to take car, it makes sense to take car
, it makes sense to take care whene when
e whene when
e when
handling these articles to ensure that the release of dust is kept tohandling these articles to ensure that the release of dust is kept to
handling these articles to ensure that the release of dust is kept to
a minimum. Ta minimum. T
a minimum. To ensuro ensur
o ensuro ensur
o ensure that the re that the r
e that the re that the r
e that the release of fibrelease of fibr
elease of fibrelease of fibr
elease of fibres fres fr
es fres fr
es from these RCFom these RCF
om these RCFom these RCF
om these RCF
articles is kept to a minimum, during installation and servicing wearticles is kept to a minimum, during installation and servicing we
articles is kept to a minimum, during installation and servicing we
rr
rr
recommend that you use a HEPecommend that you use a HEP
ecommend that you use a HEPecommend that you use a HEP
ecommend that you use a HEPA filterA filter
A filterA filter
A filtered vacuum to red vacuum to r
ed vacuum to red vacuum to r
ed vacuum to remove anyemove any
emove anyemove any
emove any
dust and soot accumulated in and around the fire before and afterdust and soot accumulated in and around the fire before and after
dust and soot accumulated in and around the fire before and after
working on the fire. When replacing these articles we recommendworking on the fire. When replacing these articles we recommend
working on the fire. When replacing these articles we recommend
that the replaced items are not broken up, but are sealed within athat the replaced items are not broken up, but are sealed within a
that the replaced items are not broken up, but are sealed within a
heavy duty polythene bag, clearly labelled as RCF waste. This isheavy duty polythene bag, clearly labelled as RCF waste. This is
heavy duty polythene bag, clearly labelled as RCF waste. This is
not clasified as “hazardous” waste and may be disposed of at anot clasified as “hazardous” waste and may be disposed of at a
not clasified as “hazardous” waste and may be disposed of at a
tipping site licensed for the disposal of industrial waste. Protectivetipping site licensed for the disposal of industrial waste. Protective
tipping site licensed for the disposal of industrial waste. Protective
clothing is not required when handling these articles, but weclothing is not required when handling these articles, but we
clothing is not required when handling these articles, but we
recommend you to follow the normal hygiene rules of not smoking,recommend you to follow the normal hygiene rules of not smoking,
recommend you to follow the normal hygiene rules of not smoking,
eating or drinking in the work area and always wash your handseating or drinking in the work area and always wash your hands
eating or drinking in the work area and always wash your hands
before eating or drinking.before eating or drinking.
before eating or drinking.
• Check that the appliance is clean and that no matter is blocking the
burner or pilot which may cause imperfect flames or prevent a correct
electrode spark.
• After servicing, make sure that the ceramic walls and fuel effect pieces
are replaced correctlyas described inthe installation instructions.Make
sure that the window locking screw is in place.
•
Always test for gas soundness after servicing the appliance.Always test for gas soundness after servicing the appliance.
Always test for gas soundness after servicing the appliance.
• Hand these instructions, the owner’s guide and the window key to the
customer.
••
••
•Recommend that the appliance should be serviced and the flueRecommend that the appliance should be serviced and the flue
Recommend that the appliance should be serviced and the flueRecommend that the appliance should be serviced and the flue
Recommend that the appliance should be serviced and the flue
checked by a competent personchecked by a competent person
checked by a competent person
(In the UK preferably a CORGI(In the UK preferably a CORGI
(In the UK preferably a CORGI
rr
rr
registeregister
egisteregister
egistered person)ed person)
ed person)ed person)
ed person)
at least annuallyat least annually
at least annually..
..
.
If the appliance is in prIf the appliance is in pr
If the appliance is in premisesemises
emisesemises
emises
in the United Kingdom occupied by a tenant, point out that by lawin the United Kingdom occupied by a tenant, point out that by law
in the United Kingdom occupied by a tenant, point out that by law
a landlord must have any gas appliance, flue and pipework whicha landlord must have any gas appliance, flue and pipework which
a landlord must have any gas appliance, flue and pipework which
is situated in a tenant’is situated in a tenant’
is situated in a tenant’s prs pr
s prs pr
s premises checked for safety at least everyemises checked for safety at least every
emises checked for safety at least everyemises checked for safety at least every
emises checked for safety at least every
12 months.12 months.
12 months.

12 72146400.morsøbogtrykkeri%97 72 10 44
This manual suits for next models
1
Table of contents
Other Morso Stove manuals
Popular Stove manuals by other brands

Ravelli
Ravelli Circular 7 Use and maintenance manual

Fired Up Corporation
Fired Up Corporation Adam instruction manual

VARDE OVNE
VARDE OVNE Farso 1 quick guide

MCZ
MCZ LOOP AIR 8 M1 installation guide

Termomax
Termomax TX1 User instructions

EVA Stampaggi
EVA Stampaggi HYDRO CURVED FRONT 20 KW instruction manual