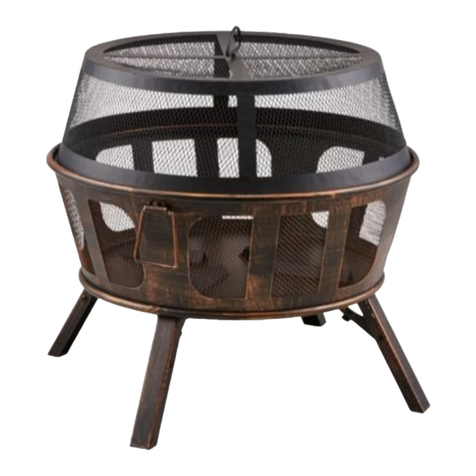
Mosaic SRFP12119B Owner's manual

Smokeless Fire Pit
Please keep this instruction manual for future reference
Item#: 175277
Assembly Instructions
& User's Manual
READ INSTRUCTION MANUAL BEFORE ATTEMPTING TO ASSEMBLE OR
OPERATE THIS PRODUCT.
Adult assembly required.
Keep screws and parts out of reach of children.
Customer Service: (888) 909-3888, 7:30 am to 4:30 pm,
Monday thru Friday Pacific Standard Time
--------------------------------------OR-------------------------------------
Customer Service: (888) 922-2336, 7:00 am to 10:00 pm CST (daily)
Live Chat at: www.academy.com
Email: [email protected]
(Made in China)
Warning:
Model#: SRFP12119B

Page 1 of 11
Table of Contents
Assembly Instructions .....................................................................
Product Use or Instructions ................................................................9
6-8
Care and Maintenance.......................................................................
Warranty Information..........................................................................
Warnings..........................................................................................2
Parts and Hardware ........................................................................4
10
11
Table of Contents ...............................................................................1
REMINDER
BEFORE ASSEMBLY
Verify that all parts are included with your fire pit BEFORE you begin assembly by checking the Parts and
Hardware List. For your convenience, some parts may be pre-assembled or attached to fire pit components.
If all parts are not included, do not attempt to assemble fire pit. Call the toll free number on the cover
page for replacement parts.
Leave hardware installed HALF-TIGHTENED on the fire pit during assembly until unit is completely
assembled, then finish tightening all hardware installed.
YOUR OWNER’S MANUAL
Keep and store this Owner’s Manual for future reference – it contains important instructions and
procedures for safety and maintenance.

Warnings
1. DO NOT use this fire pit without reading this entire document and all WARNINGS, cautions and
instructions.
2. This item is for outdoor use only, and shall NOT be used in a building, garage or any other
enclosed area.
3. DO NOT use this fire pit for indoor heating. TOXIC carbon monoxide fumes can accumulate and
cause asphyxiation or death.
4. This fire pit is NOT for commercial use.
5. This fire pit is NOT to be operated by children.
6. This fire pit is NOT to be used in or on boats or recreational vehicles.
7. Always use in accordance with all applicable local, state and national codes. Contact your local fire
department for details on outdoor burning.
8. When using this fire pit, exercise the same precautions you would with any open fire.
9. The use of alcohol, prescription, or non-prescription drugs may impair the consumer’s ability to
properly assemble or safely operate this fire pit.
10. This fire pit is for use with dry, seasoned hardwood. It will burn hotter, more completely, and create
less smoke.
11. DO NOT burn charcoal briquette, lump charcoal, manufactured logs, driftwood, trash, leaves,
papers, cardboard, plywood, painted, stained, or pressure-treated wood. Avoid using softwoods
such as pine or cedar that can throw sparks.
12. DO NOT alter this fire pit in any manner.
13. DO NOT use this fire pit until it is COMPLETELY assembled and all parts are securely fastened
and tightened.
WARNING
For Outdoor Use Only
(outside any enclosure)
WARNING
!
!
Save these instructions for future reference. If you are assembling this fire pit for someone
else, give this manual to to save for future reference.
1. Improper installation, adjustment, alteration, service, or maintenance may result in
property damage, injury, or death.
2. Read the installation, operation, maintenance instructions thoroughly before installing
or servicing this equipment.
3. Failure to follow these instructions could result in a fire or explosion, which could cause
property damage, personal injury, or death.
WARNING
FOR YOUR SAFETY
!
Page 2 of 11

Warnings
14. DO NOT store or use gasoline or other flammable vapors or liquids in the vicinity of this or any
other appliance.
15. DO NOT store or use an LP gas cylinder within 10 feet (3.05 m) of this fire pit while it is in operation.
16. DO NOT use this fire pit near automobiles, trucks, vans or recreational vehicles.
17. DO NOT use in an explosive atmosphere. Keep outdoor area clean and free from combustible
materials, gasoline and other flammable liquids.
18. DO NOT use this fire pit under an overhead or near any unprotected combustible constructions.
Avoid using near or under overhanging trees and shrubs.
19. Always use this fire pit on a hard level non-combustible surface such as concrete, rock or stone.
An asphalt or blacktop surface may not be acceptable for this purpose. DO NOT use on wooden decks.
20. Always empty this fire pit before each use.
21. DO NOT wear flammable or loose clothing when operating this fire pit.
22. DO NOT use in windy conditions.
23. DO NOT use gasoline, kerosene, diesel fuel, lighter fluid to relight fires.
24. Keep all electrical cords away from a hot fire pit.
ti l
itnu tip erif hcuot TON od ,snrub diova oT .noitarepo ni nehw toh era ti
p erif siht fo secafrus llA.52
has completely cooled unless you are wearing protective gear (potholders, gloves, BBQ mittens, hot
pads etc). Never touch ashes or coals to see if they are hot.
26. DO NOT leave a lit fire pit unattended, especially around children and pets.
27. DO NOT attempt to move or store this fire pit until ashes and coals are completely extinguished.
28. DO NOT remove ashes or coals until they are completely extinguished.
29. Use heat-resistant gloves or hot pads when contacting handles.
30. DO not add additional firewood until the fire burns down.
31. DO NOT lean over this fire pit when lighting or when in use.
32. Avoid breathing smoke from the fire and avoid getting it into your eyes.
33. This fire pit should be thoroughly inspected and cleaned on a regular basis.
34. After a period of storage and/or non-use, check for signs of damage and creosote build-up.
DO NOT operate until necessary repairs and/or clean up is executed.
35. Death, serious injury or damage to property may occur if the above is not followed exactly.
Page 3 of 11
WARNING:
This product can expose you to chemicals including soot, which is known to the State of California to cause
cancer and reproductive toxicity, and carbon monoxide, which is known to the State of California to cause
birth defects or other reproductive harm. For more information, go to: www.P65Warnings.ca.gov.

Parts and Hardware
A
B
C
BB
AA
G
D
F
E
TOOLS REQUIRED (Not included):
Phillips screwdriver
1
Page 4 of 1

Parts List
Hardware
Picture
Qty
Qty
12
27
AA
BB
A
1
B
1
C
3
D
1
E
3
DescriptionPart #
DescriptionHardware #
M6 x 10 Screw
M4 x 10 Screw
Fire Bowl
Heat Insulated Plate
Leg
Inner Tube
Baffle
Ash Tray
Picture
F
1
Leg Support
G
3
Page 5 of 1

Assembly Instructions
Step 2 2
Step 1 1
Attach the leg supports (G) to the legs (C)
.detartsulli sa )BB( swercs 01 x 4M )21( htiw
Choose a good, clear, level assembly area and get a friend to help you put your fire pit together.
Lay cardboard down to protect fire pit finish and assembly area.
Page 6 of 11
BB x12
M4 x 10 Screw
Hardware Used
AA x6
M6 x 10 Screw
Hardware Used
Attach the heat insulated plate (B) to the
leg supports (G) with (6) M6 x 10 screws
(AA) as illustrated.
C
BB
AA
G
B
B
AA
G
G

Assembly Instructions
Step 4 4
Step 3 3
Attach the inner tube (D) to the fire bowl
(A) with (6) M4 x 10 screws (BB) as
illustrated. Then place the bottom of fire
bowl upward.
Attach the leg assembly to the bottom of
fire bowl (A) with (6) M6 x 10 screws (AA)
as illustrated.
Page 7 of 11
DA
A
AA
BB
BB x6
M4 x 10 Screw
Hardware Used
AA x6
M6 x 10 Screw
Hardware Used
Note: The inner tube installation is optional.
This step can be ignored, see instructions
on page 9.

Assembly Instructions
Step 6 6
Step 5 5
Attach the baffles (E) to the bottom of fire
bowl (A) with (9) M4 x 10 screws (BB) as
illustrated.
Place the ash tray (F) onto the heat
insulated plate (B) as illustrated.
Page 8 of 1
E
A
BB
BB x9
M4 x 10 Screw
Hardware Used
B
F

Product Use or Instructions
Lighting
Using firewood
1. Make sure there is no ash in the bottom of fire bowl.
2. Start by placing dry kindling and small wood pieces in the fire bowl.
Note: Do not overfill with wood that covers or extends above the top air holes.
3. Use a match to light kindling or small wood pieces.
4. As the ember bed gets hotter, start adding in 1-3 pieces of wood.
As those catch, add enough wood to fill the fire bowl.
Using wood pellets
1. Make sure there is no ash in the bottom of fire bowl.
2. Place 100% natural hardwood pellets in the fire bowl, and put
kindling or a natural fire starter on to the pellets.
Note: Do not overfill with pellets that covers or extends above the
top air holes.
3. Ignite the kindling or fire starter to allow the fire to start.
Extinguishing
1. Allow fire to burn itself out.
2. DO NOT use water to extinguish as this is dangerous and can cause damage to this outdoor fire pit.
Page 9 of 11
Firewood placement #1
Inner tube installed Inner tube not installed
Firewood placement #2
Inner tube installed Inner tube not installed
Max usage: 33 LB, Min usage: 11 LB
4. If you need to add pellets, it is recommended to add near the end
of fire burning, and add pellets by batches, each time 1.1 ~ 2.2 lbs is appropriate.

Care and Maintenance
Inspecting
This fire pit should be inspected on a regular basis to ensure product safety and longer product life.
DO NOT attempt to inspect this fire pit until the fire is COMPLETELY out and cool to the touch.
1. Check components for any signs of damage or rust.
2. If damage to any component is detected, DO NOT operate until repairs are executed.
Cleaning
This fire pit should be cleaned on a regular basis to promote safer experiences and longer product life.
Note: After repeated use, a slight discoloration of the finish may occur.
DO NOT attempt to clean this fire pit until the fire is COMPLETELY out and cool to the touch.
DO NOT use oven cleaner or abrasive cleaners as they will damage this product.
DO NOT clean any part of this fire pit in a self cleaning oven as it may damage the finish.
1. Wipe exterior surfaces with a mild dishwashing detergent or baking soda.
2. For stubborn surfaces use a citrus based degreaser and a nylon scrubbing brush.
3. Rinse and clean with water.
4. Remove built-up creosote from components with a chimney cleaning product.
Storage
DO NOT move or store this fire pit until the fire is COMPLETELY out and cool to the touch.
1. Once the fire is out, coals or pellets are cold and fire pit is cool to the touch, remove ashes and
properly dispose.
2. Store the fire pit in a dry location to maximize product life.
3. Store assembled in a location away from children and pets.
Page 10 of 11
Due to extremely high temperatures during burning, discoloration of the fire pit will occur and this is
considered normal. Stainless steel has better resistance to rust, however, it is not rust-proof.
Prolonged exposure to moisture may result in staining and/or rusting.
Due to extremely high temperatures inside when use, the fire pit may show signs of staining
and / or rust. This is normal and will not affect normal use or functions.

Warranty Information
The appliance has been manufactured under the highest standards of quality
and workmanship. We warrant to the original consumer purchaser that all
aspects of this product will be free of defects in material and workmanship for
one year (1) from the date of purchase. A replacement for any defective part will
be supplied free of charge for installation by the consumer. Defects or damage
caused by the use of other than genuine parts are not covered by this warranty.
This warranty shall be effective from the date of purchase as shown in the
purchaser’s receipt.
This warranty is valid for the original consumer purchaser only and excludes
industrial, commercial or business use of the product, product damage due
to shipment or failure which results from alteration, product abuse, or product
misuse, whether performed by a contractor, service company, or consumer.
We will not be responsible for labor charges and / or damage incurred in
installation, repair or replacement, nor for incidental or consequential damage.
Need help?
call our toll free number at:
or 1 (888)-922-2336
e-mail us at:
#USTOMERSERVICE ACADEMYCOM
Page of
This manual suits for next models
1
Table of contents
Other Mosaic Outdoor Fireplace manuals

Mosaic
Mosaic FSMVPT6012 Owner's manual

Mosaic
Mosaic FSMVPT2042 Owner's manual

Mosaic
Mosaic SRGF11634 Owner's manual

Mosaic
Mosaic FSMVPT6022 Owner's manual

Mosaic
Mosaic FSMVPT6004 Installation instructions

Mosaic
Mosaic SRLF370AB Owner's manual

Mosaic
Mosaic G-FTB-10004 User manual

Mosaic
Mosaic SRGF22010 Owner's manual

Mosaic
Mosaic Wolfgang FSMVPT6026 Owner's manual
Popular Outdoor Fireplace manuals by other brands

Endless Summer
Endless Summer GAD1499M owner's manual

Garden Oasis
Garden Oasis D71 M15145 Use and care guide

Sunjoy
Sunjoy D-FT009PST Assembly instruction

Landmann
Landmann 25722 Assembly and use instructions

Blaze
Blaze BLZ-FP-PELLET owner's manual

Regency
Regency Horizon HZO42-NG Owners & installation manual