TM/MC
3
6
5
4
IMPORTANT
OPERATION
This product is equipped with an Auto Shut-Off Digital Pressure Gauge. The digital
gauge can be used to monitor air pressure when inflating your desired objects and
can automatically shut off once pre-set desired pressure is reached.
Pressure Pre-set
The pre-set pressure is factory set at 45 PSI when manufactured.
1. The product records latest pre-set pressure. For example, if your pre-set pressure
gauge is 45 PSI, the product records the pre-set pressure at 45 PSI for the next
time.
2. Before reaching desired pressure, the compressor can shut off manually by
moving the inflator switch to position ‘0’.
OPERATION
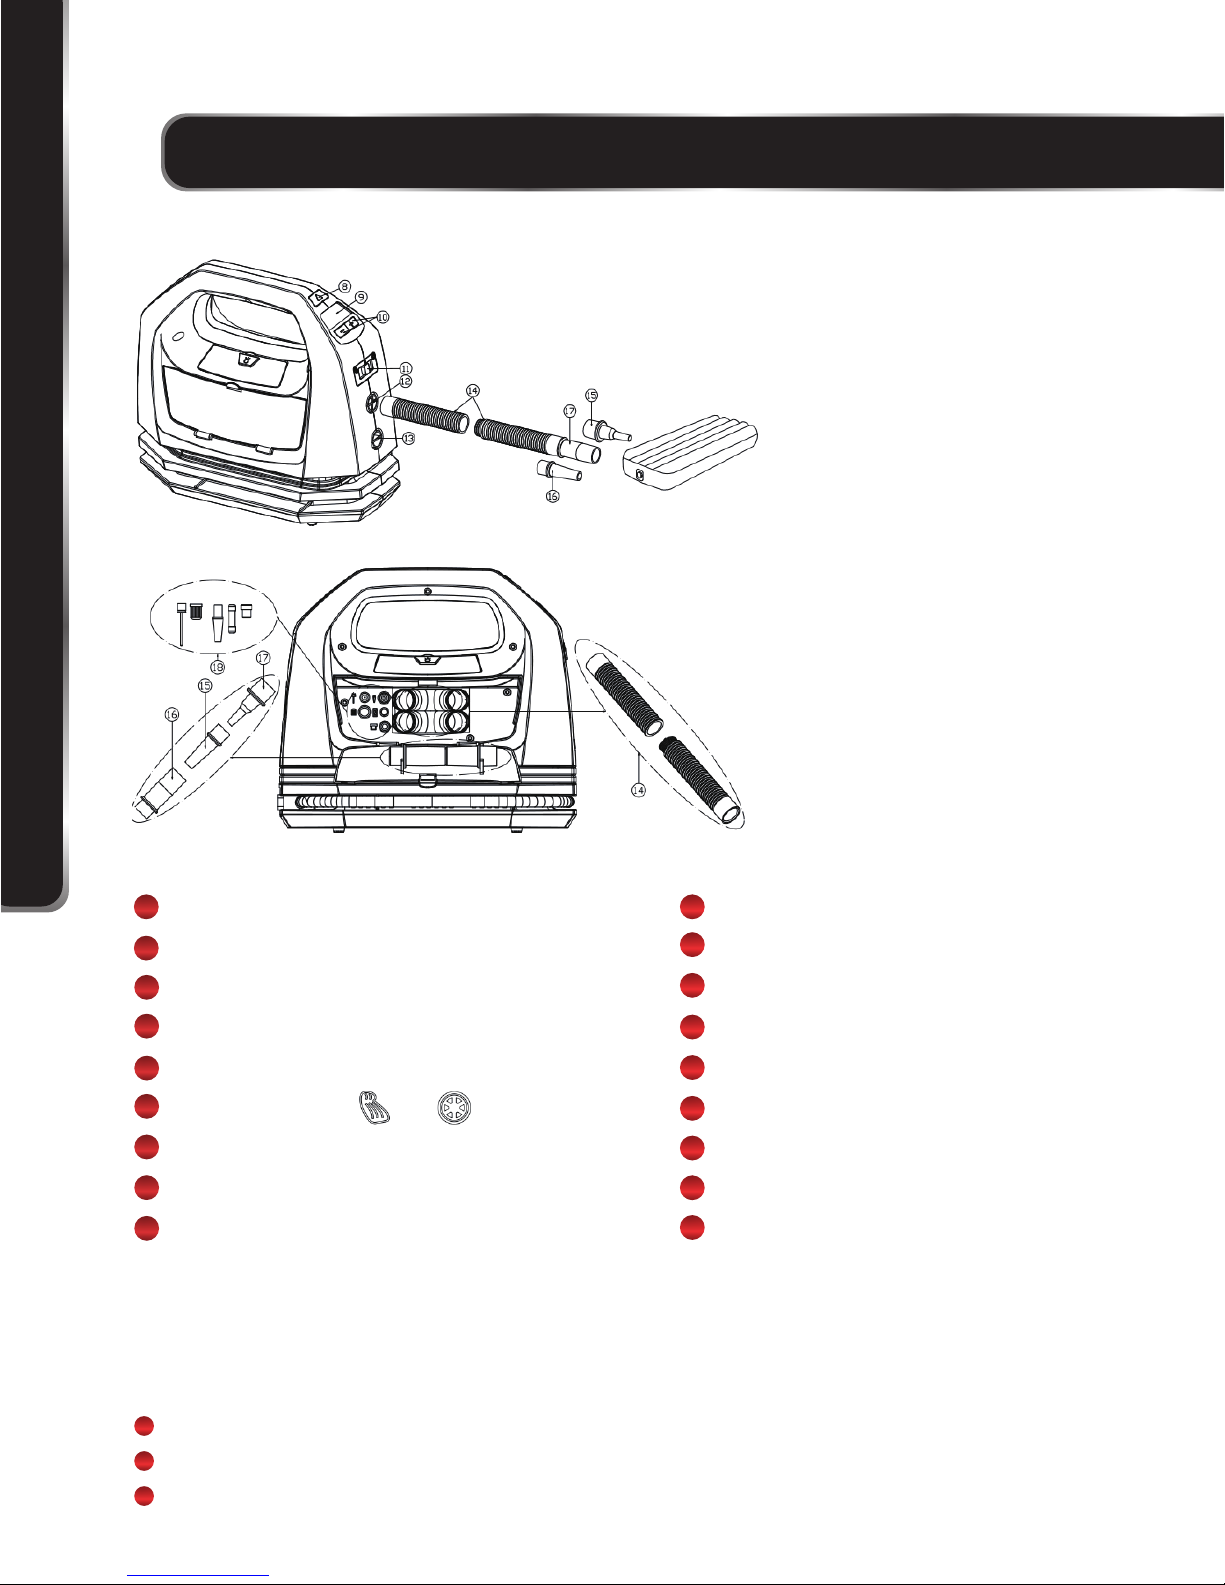
11
9
10
7
8
1
2
3
Press pressure pre-set buttons ‘+’ or ‘-’ to check the pre-set pressure. The pre-set
pressure is set at 45 PSI when manufactured.
Adjust your desired pressure by pressing the pre-set buttons ‘+/-’. Press button ‘+’
to increase the pressure and press button ‘-’ to decrease the pressure. Once the
desired pressure is reached, stop pressing the pre-set buttons. The display will
return to 0 PSI automatically. That means the pressure is preset successfully. The
product is ready for inflating.
In the process of inflating, the pre-set pressure can be adjusted without stopping
work. Press button ‘+’ to increase the pressure and press button ‘-’ to decrease the
Do not allow children to handle or operate this compressor.
Do not use this product for other than its intended use.
Do not disassemble or tamper with this compressor.
Inspect air compressor before use. If cracked, broken or damaged parts are found,
have them repaired or replaced by a qualified technician.
Never expose the air compressor to rain, frost or temperatures above 30oC (86oF) or
temperatures below -30oC (-22oF).
Never use on people or animals.
Make sure the cord is not exposed to hot objects, oil or sharp edges.
WARNING! For your own safety, you should only use accessories and parts specified
in the instructions, or recommended for use by the manufacturer.