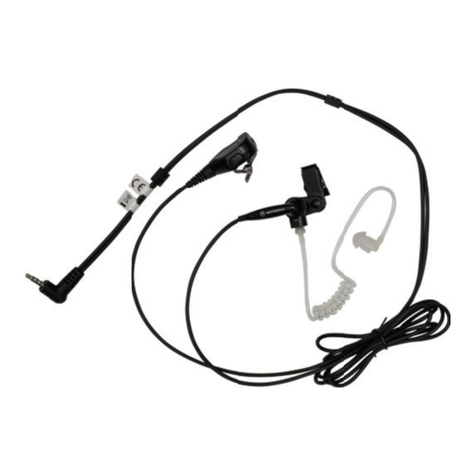
Motorola solutions NTN2571 User manual

OPERATIONS
CRITICAL
WIRELESS
en-US fr-CA es-LA pt-BR
zh-TW
zh-CN
ko-KR fr-FRes-ES
it-IT
de-DE
nl-NL ru-RUpt-PT
68012002053.book Page 1 Wednesday, December 28, 2016 2:35 PM

68012002053.book Page 2 Wednesday, December 28, 2016 2:35 PM

i
English
OPERATIONS CRITICAL
WIRELESS
TABLE OF CONTENTS
Foreword . . . . . . . . . . . . . . . . . . . . . . . . . . . . . . . . . . iii
Introduction . . . . . . . . . . . . . . . . . . . . . . . . . . . . . . . . .1
What Is In Your Package . . . . . . . . . . . . . . . . . . . . . .1
Device Features . . . . . . . . . . . . . . . . . . . . . . . . . . . . .3
Clothing Clip Assembly/Disassembly . . . . . . . . . . . . .3
Charging Your device . . . . . . . . . . . . . . . . . . . . . . . . .5
Attaching Your Integrated Microphone/Receiver
Headset (Earpiece) . . . . . . . . . . . . . . . . . . . . . . . . . . .5
Wearing Your Integrated Microphone/Receiver
Headset . . . . . . . . . . . . . . . . . . . . . . . . . . . . . . . . . . . .6
Securing Your Earpiece . . . . . . . . . . . . . . . . . . . . . . .6
Powering On/Off Device . . . . . . . . . . . . . . . . . . . . . . .7
Wireless HOST . . . . . . . . . . . . . . . . . . . . . . . . . . . . . .7
Pairing Your Audio Device . . . . . . . . . . . . . . . . . . . . .8
Pairing Your Remote PTT . . . . . . . . . . . . . . . . . . . . . .8
Subsequent Connection . . . . . . . . . . . . . . . . . . . . . . .9
Language Or Tone Selection . . . . . . . . . . . . . . . . . .10
Volume Control . . . . . . . . . . . . . . . . . . . . . . . . . . . . .10
PTT . . . . . . . . . . . . . . . . . . . . . . . . . . . . . . . . . . . . . .10
Receiving Audio . . . . . . . . . . . . . . . . . . . . . . . . . . . .10
Dark Mode . . . . . . . . . . . . . . . . . . . . . . . . . . . . . . . . .11
Battery Alerts . . . . . . . . . . . . . . . . . . . . . . . . . . . . . . .11
68012002053.book Page i Wednesday, December 28, 2016 2:35 PM

iii
English
FOREWORD
Product Safety and RF Exposure Compliance
ATTENTION!
The radio is restricted to occupational use only to satisfy
ICNIRP/FCC RF energy exposure requirements. Before using
this product, read the RF energy awareness information and
operating instructions in the Product Safety and RF Exposure
booklet enclosed with your radio (Motorola Solutions
Publication part number 6881095C98 (US) or 6864117B25
(EMEA)) to ensure compliance with RF energy exposure limits.
This device complies with part 15 of the FCC Rules. Operation
is subject to the following two conditions: (1) This device may
not cause harmful interference, and (2) this device must accept
any interference received, including interference that may
cause undesired operation. Any changes or modifications
not expressly approved by Motorola Solutions may void
the user’s authority to operate this device.
Battery Information:
Battery is shipped with a nominal charge between 30 and 50%.
Battery should be stored between -10°C (14°F) and 30°C
(86°F) to minimize permanent capacity loss.
Caution: Storing your fully charged accessory in high-
temperature conditions may permanently reduce the life of the
internal battery.
Note: The battery is not a user replaceable part.
Before using this product, read the operating
instructions for safe usage contained in the
Product Safety and RF Exposure booklet
enclosed with your radio.
!
C a u t i o n
68012002053.book Page iii Wednesday, December 28, 2016 2:35 PM

iv
English
Important Information:
• Do not charge your accessory in temperatures below
0°C (32°F) or above 45°C (113°F). Conditions inside a
parked car can exceed this range. Do not store your
accessory in a parked car. Do not store your accessory
in direct sunlight.
• Storing your fully charged accessory in high-temperature
conditions may permanently reduce the life of the inter-
nal battery.
• Battery life may temporarily shorten in low-temperature
conditions.
Waste (disposal) of your Electronic and
Electric Equipment
The European Union's WEEE directive requires that products
sold into EU countries must have the crossed out trashbin label
on the product (or the package in some cases). As defined by
the WEEE directive, this crossed out trashbin label means that
customers and end users in EU countries should not dispose of
electronic and electrical equipment or accessories in
household waste. Customers or end-users in EU countries
should contact their local equipment supplier representative or
service centre for information about the waste collection
system in their country.
Warning: Never dispose of batteries in a fire because
they may explode.
032376o
68012002053.book Page iv Wednesday, December 28, 2016 2:35 PM

v
English
ACOUSTIC SAFETY
Exposure to loud noises from any source for extended periods
of time may temporarily or permanently affect your hearing.
The louder the radio's volume, the less time is required before
your hearing could be affected. Hearing damage from loud
noise is sometimes undetectable at first and can have a
cumulative effect.
To protect your hearing:
• Use the lowest volume necessary to do your job.
• Turn up the volume only if you are in noisy surroundings.
• Turn down the volume before adding headset or ear-
piece.
• Limit the amount of time you use headsets or earpieces
at high volume.
• When using the radio without a headset or earpiece, do
not place the radio's speaker directly against your ear.
68012002053.book Page v Wednesday, December 28, 2016 2:35 PM

vi
English
FM Approved as intrinsically safe as Division 1, Class I, II, II.
Group C, D, E, F, G, T3C.
To maintain Intrinsic Safety approval, please follow the
following instructions:
Operational Cautions for Intrinsic Safe
Equipment:
•DO NOT operate radio communications
equipment in a hazardous atmosphere
unless it is a type especially qualified (for
example, FM,UL, CSA, or CENELEC
approved).
•DO NOT operate a unit that has been
approved as intrinsically safe product in a
hazardous atmosphere if it has been
physically damaged (for example, cracked
housing) to avoid unsafe condition.
•DO NOT charge unit in a hazardous
atmosphere.
Operational Caution:
•DO NOT disassemble an intrinsically safe
product in any way that exposes the internal
circuits of the unit. This could result in unsafe
condition in hazardous areas.
• Unauthorized modification, or incorrect repair
or service to the intrinsically safe product
could adversely affect the certification rating
and result in unsafe condition in hazardous
areas.
• Use of non-Motorola Solutions parts or
substitution of parts will void the intrinsic
safety approval rating of the Motorola
Solutions unit and could result in unsafe
condition in hazardous areas.
!
C a u t i o n
68012002053.book Page vi Wednesday, December 28, 2016 2:35 PM

vii
English
OPERATION MODE CONFIGURATION
By default, the wireless device is compatible with the radio
ONLY. To work with WAVE 5000 Mobile Client, choose WAVE
5000 on Operation Mode at Accessory Programming Software
(APS).
The APS tool allows you to select two modes of operation:
• Radio mode – configuring the wireless device to be used
with your radio.
• Wave5k mode – configuring the wireless device to be
used with the Wave 5000 Mobile Client on a smart-
phone.
68012002053.book Page vii Wednesday, December 28, 2016 2:35 PM

viii
English
68012002053.book Page viii Wednesday, December 28, 2016 2:35 PM

1
English
INTRODUCTION
The Operations Critical Wireless (OCW) Earpiece, uses
Bluetooth®v2.1 Secure Simple Pairing to ease the pairing
process, it automatically pairs when you turn on the Bluetooth
Host (Radio or Bluetooth Adapter) and your earpiece for the
first time. This earpiece is engineered for optimal performance,
it is lightweight, has a comfortable fast push-to-talk, provides
exceptional audio in loud environments as well as an extended
battery life for long work shifts. Secure Simple Pairing provides
you a flexible solution that is ruggedly reliable and Bluetooth
certified to streamline your work flow and strengthen your
workplace communications.
The Operations Critical Wireless PTT is the fast and flexible
way to connect with any wireless host (Radio or Adapter)
seamlessly. It is compact, lightweight and features a large
easy-to-access PTT. It is easy to put the device in your pocket
or clip it on a clothing. As there is no microphone on the PTT,
the host will decide the mic used on this PTT Press.
The minimum line-of-sight range for the wireless device is 30
feet. However, the range of signal can be affected depending
on the surrounding environmentl. When the headset and host
exceed the range of the wireless system, the wireless device
issues an alert sound, indicating that the wireless system is not
operational. The link is automatically restored once the units
are back within communication range.
WHAT IS IN YOUR PACKAGE
• Wireless Device with PTT
• Clothing Clip
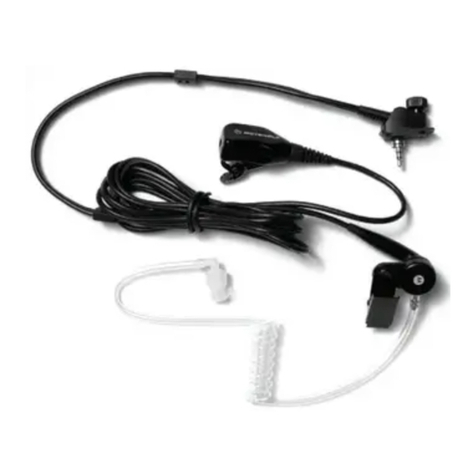
• Integrated Microphone/Receiver Earpiece with attached
Collar Clip
• User Manual
• Spare Ear Tube
• Foam Windscreen
• Silicone Earstrap
• Charger
68012002053.book Page 1 Wednesday, December 28, 2016 2:35 PM

2
English
OPERATIONS CRITICAL WIRELESS
Collar Clip
Flower Tip
Earpiece
Portion
Microphone
USB and Charger
Volume Down
Volume Up
PTT
Swivel Clothing
Clip
Power / Multi Funtion
Button (MFB)
Battery LED
Ear Strap
Recess on
Front Housing
Acoustic Tube Wind Screen
68012002053.book Page 2 Wednesday, December 28, 2016 2:35 PM

3
English
THE OPERATIONS CRITICAL WIRELESS
INTEGRATED MICROPHONE/RECEIVER HEADSET
DEVICE FEATURES
•PTT
• Bluetooth v2.1
• Private listening without occluding the ear
• Loud, clear audio
• Comfortable Earpiece for all day wear
• Volume Control
• Compatible with Wave 5000 Mobile Client and Telephony
Calls on a smartphone
CLOTHING CLIP ASSEMBLY/DISASSEMBLY
The following steps describe how to assemble your Wireless
Device’s clothing clip:
1. Place the clip horizontally in
the clip track area.
2. Slide the clip upward until a
click sound is heard.
68012002053.book Page 3 Wednesday, December 28, 2016 2:35 PM

4
English
3. After assembly.
The following steps describe how to disassemble your
Wireless Device’s clothing clip:
1. Rotate the clip 90 °C
(clockwise/anti-cloclwise).
2. Lift up the metal spring and
slide the clip out of the back
cover.
3. While lifting the metal
spring, slide the clip out of
the back cover with your
thumb.
68012002053.book Page 4 Wednesday, December 28, 2016 2:35 PM

5
English
CHARGING YOUR DEVICE
Prior to using the device for the first time, it should be fully
charged. Recommended charging time is three (3) hours.
Note: Ensure that the dust cap is fitted back on the USB port,
upon removing it from the charger.
Refer to Table 1 for charging status indicators:
ATTACHING YOUR INTEGRATED
MICROPHONE/RECEIVER HEADSET
(EARPIECE)
The following steps describe how to attach/detach your
earpiece:
1. To attach and lock the earpiece, push the connector in and
turn the connector clockwise until the stop is reached.
2. To unlock and detach the earpiece, turn the connector
counterclockwise so that the “unlock” symbol aligns with the
recess on the front housing and pull the connector out.
Note:
•Please attach your earpiece prior to establishing the connection
with radio.
•If the earpiece is replaced or re-attached, the accessory must be
powered off and powered back on to ensure proper detection
and operation of the earpiece with the accessory.
•The wireless link is dropped upon accidental or intentional
removal of the earpiece from the device.
State LED Indication
Charging (when connected via USB
to PC or wall charger)
Red LED illuminated
90% charged battery capacity Green LED blinking
100% charged battery capacity Green LED illuminated
Table 1: Battery Charging LED Indicators
68012002053.book Page 5 Wednesday, December 28, 2016 2:35 PM

6
English
WEARING YOUR INTEGRATED MICROPHONE/
RECEIVER HEADSET
The Integrated Microphone/Receiver Headset represents a
breakthrough in voice processing technology. The receiver and
microphone are both built into a lightweight, ergonomic
earpiece, which enables you to hear and be heard even in high
noise conditions. It does not block normal hearing which allows
important background sounds to be heard.
The earpiece can be worn on either ear by swiveling the flower
tip of the ear tube accordingly.
Note: If poor transmit audio is experienced in windy conditions,
install the foam windscreen to decrease wind noise.
1. Ensure the ear tube is
facing the ear canal.
2. Place the earpiece over
your ear for correct fit.
3. After placing the earpiece firmly on your ear, ensure that the
flower tip of the ear tube is correctly oriented towards the
ear canal.
4. Use your finger to insert the
ear tube into your ear canal.
5. Use the collar clip to secure the earpiece.
SECURING YOUR EARPIECE
1. Once the earpiece is placed
firmly on your ear, you can
secure it by connecting the
strap around your ear as
shown on the right.
68012002053.book Page 6 Wednesday, December 28, 2016 2:35 PM

7
English
Cleaning and Hygiene:
1. Before each use, clean the
exterior of the ear tube with
an alcohol swab.
2. Remove the ear tube to
clean and disinfect the
interior of the ear tube
weekly.
POWERING ON/OFF DEVICE
Press the power on/off button.
Figure 1: Power ON/OFF Button
WIRELESS HOST
A wireless host can be a radio either with Wireless capability or
with a Wireless adapter. The wireless host can connect to
multiple devices simultaneously - 1 Audio device (e.g.
earpiece) and Data device (e.g. Remote PTT).
The following wireless device functionalities are Host
Dependent:
Power
LED Indication
(Audio and
Standalone PTT
Device)
Tone
Indication
(Audio Device)
Voice
Prompt
(Audio Device)
On
Hold for 2
second.
Blue LED Blinks 3
times then OFF
“Motorola
Solutions”
“Motorola
Solutions”
Off
Hold for 3
seconds.
Blue LED Blinks 3
times then POWER
OFF
Power Off
Tone
“Power Off”
Table 2: Power ON/OFF LED and Tone Indicators
68012002053.book Page 7 Wednesday, December 28, 2016 2:35 PM

8
English
•Connecting Multiple Devices: Depending on the host,
user may have to connect the audio device first.
•Volume: Depending on the host, your wireless device may
have localized volume control or volume control that is in
sync with the radio.
Note: If you are unsure whether your device supports wireless
functionality, or to get more information on the host features,
please refer to the respective host manual.
PAIRING YOUR AUDIO DEVICE
First time connection steps:
1. Verify that both the host and the wireless device are
powered ON (First time only: Once the wireless device is
powered ON, if not previously selected, the wireless device
will instruct the user to select language or tone, and then it
goes into Pairing Mode automatically.)
2. Both the wireless device and wireless host must be within
pairing range (recommended pairing range is within 1
meter).
3. Once the devices are paired successfully, a ring indication
is played on the audio device.
4. Press the MFB button on the wireless device to start the
connection process.
5. Wireless Link Connected with Host indication is provided
upon successful link establishment (refer to Table 3 on
page 9).
6. Your wireless device is now ready to be used.
PAIRING YOUR REMOTE PTT
Figure 2: Remote PTT
First time connection steps:
68012002053.book Page 8 Wednesday, December 28, 2016 2:35 PM

9
English
1. Ensure that device and host are in pairing mode.
2. Both the wireless device and wireless host must be within
pairing range (recommended pairing range is within 1
meter).
3. Wireless Link Connected with Host indication is provided
upon successful link establishment (refer to Table 3 on
page 9).
Note:Please refer to the host manual to put the host in pairing
mode.
SUBSEQUENT CONNECTION
Same Host:
If the Bluetooth link is lost, connection will be automatically
reestablished when the host and device come within 30 meter
range.
New Host:
1. Put the wireless device in Pairing Mode by powering ON
while pressing PTT Button simultaneously.
2. Follow steps from Pairing Your Audio / Remote PTT Device.
State
LED Indication
(Audio and
Standalone PTT
Device)
Tone
Indication
(Audio Device)
Voice
Prompt
(Audio Device)
Entered
Pairing Mode
Blue LED Blinking – “Pairing
Cleared”
Not Paired Blue LED Blinking Pairing Ready
Tone
“Searching
For Host”
Paired
Successfully
Blue LED Solid for 2
seconds
Pairing
Successful
Tone
–
Wireless Link
Connected
with Host
Blue LED
Heartbeat: Long
OFF and Short ON
Connected
Tone
“Headset
Connected”
Table 3: Wireless Link and Pairing Indicators
68012002053.book Page 9 Wednesday, December 28, 2016 2:35 PM

10
English
LANGUAGE OR TONE SELECTION
1. Powering OFF the wireless device.
2. Powering ON the wireless device while pressing the PTT
Button simultaneously until the prompt to select language.
3. Pressing PTT Button to select designated language or tone.
VOLUME CONTROL
The Operations Critical Wireless device has 8 volume levels.
The volume level is controlled using the radio volume control or
the device’s Volume Up/Volume Down buttons (refer to Table 4
for volume indicators).
Wireless Link
Disconnected
from Host
Blue LED Solid ON Disconnected
Tone every 2
minutes for 10
minutes
“Headset
Disconnected”
Button Push Tone Indication
(Audio Device)
Volume Up Volume Tone with increased loudness
Volume Down Volume Tone played with decreased
loudness
Volume Up and Hold Volume Tone played continuously with
increasing loudness
Volume Down and Hold Volume Tone played continuously with
decreasing loudness
Table 4: Volume Indicators
State
LED Indication
(Audio and
Standalone PTT
Device)
Tone
Indication
(Audio Device)
Voice
Prompt
(Audio Device)
Table 3: Wireless Link and Pairing Indicators
68012002053.book Page 10 Wednesday, December 28, 2016 2:35 PM
Table of contents
Languages:
Other Motorola solutions Security System manuals
Popular Security System manuals by other brands

MOOSE
MOOSE Z800 Specification, installation and programming guide

FRIEDLAND
FRIEDLAND Bronze Installation & operating manual

American Dynamics
American Dynamics Intellex DV16000 Installation and operating instructions

Visonic
Visonic SR-730 PG2 - installation instructions

Gent
Gent vigilon installation instructions

Alarmtech
Alarmtech MC 240-S45 instruction manual