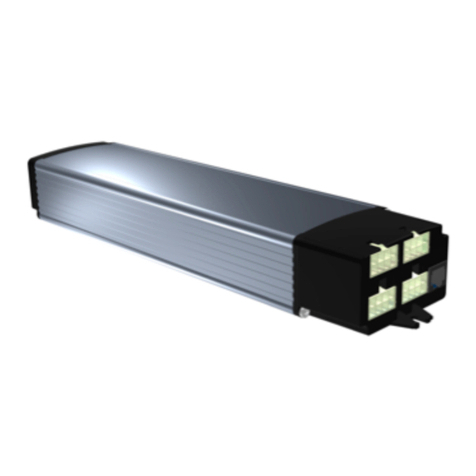
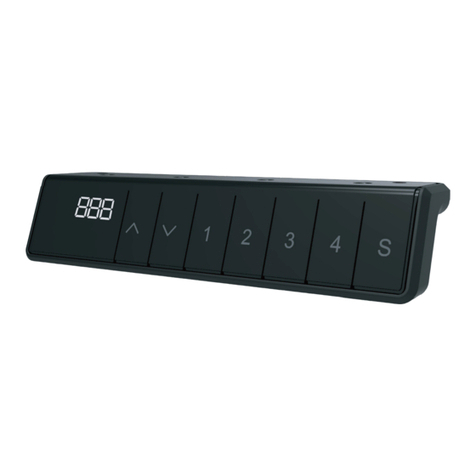
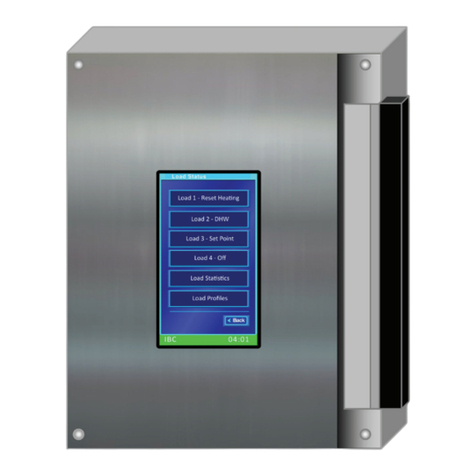
MOVETEC LC Series User guide

Instruction LTC 11_4
- 1 -
Installation and operating
instruction
LC/LTC Series

Laing Innotech GmbH + Co. KG Althuette Germany Instruction LTC 11_5
- 2 -
Table of contents
Table of contents ..................................................................................................- 2 -
1 The LTC table controller....................................................................................- 5 -
1.1 Application.....................................................................................................- 5 -
1.2 For whom this document is prepared for........................................................- 5 -
1.3 Preconditions for the use of this document....................................................- 5 -
1.4 Safety instructions.........................................................................................- 5 -
1.4.1 Indications for all Laing Table Controllers and all accessories (products).............- 6 -
1.4.2 Indications for the operation of height adjustable tables .......................................- 6 -
1.5 Design of the table controllers.......................................................................- 6 -
1.6 Specifications................................................................................................- 7 -
1.6.1 Controller for mains connection LTC .....................................................................- 7 -
1.6.2 Controller for DC-operation LTCD .........................................................................- 7 -
1.6.3 Controller for battery-operation LTCB....................................................................- 8 -
1.7 Environmental conditions ..............................................................................- 8 -
1.8 Dimensions controller for mains connection LTC...........................................- 9 -
1.8.1 Controller without OptoSense................................................................................- 9 -
1.8.2 Controller with OptoSense...................................................................................- 10 -
1.9 Dimensions controller for DC-operation LTCD.............................................- 10 -
1.10 Dimensions controller for battery-operation LTCB .....................................- 11 -
1.11 Options......................................................................................................- 11 -
1.12 Delivery contents.......................................................................................- 11 -
2 Installation of the controllers..........................................................................- 12 -
2.1 Controllers without OptoSense....................................................................- 12 -
2.2 Battery controller LTCB...............................................................................- 12 -
2.3 Controller with OptoSense...........................................................................- 13 -
2.4 Controller with GyroSense / GraviSense .....................................................- 14 -
2.5 Installation of the control panels..................................................................- 14 -
2.5.1 Rectangular control panels ..................................................................................- 14 -
2.5.2 Oval control panels ..............................................................................................- 15 -
2.6 Electrical connection....................................................................................- 16 -
2.6.1 Connectable Motors.............................................................................................- 17 -
2.6.2 Pin assignment controller.....................................................................................- 17 -
2.7 Connection of the motors ............................................................................- 18 -
2.8 Connection of the control panels and other control options..........................- 18 -
2.8.1 Control panels with cable.....................................................................................- 18 -
2.8.2 Connection of two control panels.........................................................................- 18 -
2.8.3 Connection of up to 11 control panels .................................................................- 19 -
2.8.4 OptoSense ...........................................................................................................- 19 -
2.9 Wireless control panel LM4RW ...................................................................- 19 -
2.9.1 Connection...........................................................................................................- 20 -
2.9.2 Mounting the wireless control panel.....................................................................- 20 -
2.9.3 Pairing the control panel and the controller .........................................................- 20 -
2.9.4 Battery change.....................................................................................................- 21 -
2.10 Mains connection LTC...............................................................................- 21 -
2.11 Connection LTCD......................................................................................- 22 -
2.12 Connection, battery change and charging of the LTCB..............................- 22 -
2.13 Preconditions for the start of operation of the controller.............................- 23 -
3 Start of operation .............................................................................................- 24 -
3.1 Current based collision detection.................................................................- 24 -
3.2 GyroSense based collision detection...........................................................- 24 -
3.3 GraviSense based collision detection..........................................................- 25 -
3.4 Adjusting the sensitivity level by the user.....................................................- 25 -
3.5 Reference run..............................................................................................- 26 -
3.6 Determining the stroke by the reference run................................................- 27 -

Instruction LTC 11_4 Laing Innotech GmbH + Co. KG Althuette Germany
- 3 -
3.7 Safety zone .................................................................................................- 27 -
3.8 Safety Input .................................................................................................- 28 -
3.9 Automatic motor recognition........................................................................- 29 -
4 Controlling through control panels.................................................................- 30 -
4.1 All Control panels ........................................................................................- 30 -
4.2 Control panels with memory keys................................................................- 30 -
4.3 Recall memory position with 2-Button control panel without height indication - 30
-
4.4 Control panels with height indication............................................................- 31 -
4.5 Controlling the controller by OptoSense.......................................................- 31 -
4.6 Configuration of the controller through the “LM” control panels (control panels
without height indication)...................................................................................- 32 -
4.6.1 Store memory positions with “LM” control panels ............................................... - 32 -
4.6.2 User height limit adjustment by “LM” control panels ........................................... - 32 -
4.6.3 Minimum stroke ................................................................................................... - 33 -
4.6.4 Changing the sensitivity of the collision detection by “LM” control panels .......... - 33 -
4.6.5 Initiating a reference run by “LM” control panels ................................................. - 34 -
4.7 Configuration of the controller through the “LD” control panels (with height
indication)..........................................................................................................- 35 -
4.7.1 Operation of “LD” control panels without memory keys ...................................... - 35 -
4.7.2 Storing memory positions by the “LD” control panels ......................................... - 35 -
4.7.3 Activating button mode of the memory keys by the “LD” control panels ............. - 35 -
4.7.4 User height limit adjustment by the “LD” control panels...................................... - 36 -
4.7.5 Stroke limitation adjustment by “LD” control panels ............................................ - 37 -
4.7.6 Minimum stroke ................................................................................................... - 38 -
4.7.7 Changing the sensitivity of the collision detection by the “LD” control panels .... - 39 -
4.7.8 Initiating a reference run by the “LD” control panels ........................................... - 39 -
4.7.9 Adjusting direction of the reference run............................................................... - 40 -
4.7.10 Changing height indication from centimeter to inch by the “LD” control panels - 40 -
4.7.11 Entering the info menu by the “LD” control panel.............................................. - 41 -
4.7.12 Shifting the height indication by the “LD” control panels ................................... - 41 -
4.7.13 Defining the rounding for height indication by “LD” control panels ................... - 41 -
4.7.14 Resetting user settings by the “LD” control panel ............................................. - 42 -
4.7.15 Activating the BLE module ................................................................................ - 42 -
4.7.16 Resetting the controller name ........................................................................... - 43 -
4.7.17 Activating the pairing mode............................................................................... - 43 -
4.7.18 Deleting connections to wireless control panels ............................................... - 44 -
4.7.19 Resetting the private mode for the app............................................................. - 44 -
4.7.20 Entering the option menu by the “LD” control panel.......................................... - 45 -
4.7.21 Resetting the number of connected motors ...................................................... - 46 -
4.7.22 Resetting the Safety Adapter ............................................................................ - 46 -
4.7.23 Setting the starting point for the safety zone..................................................... - 47 -
4.7.24 Displaying the last error by the “LD” control panel ............................................ - 48 -
4.7.25 Synchronization of 2 controllers by the ”LD” control panel................................ - 48 -
5 Synchronization of up to 6 controllers by HUB..............................................- 49 -
5.1 Port designation...........................................................................................- 50 -
5.2 Configuration...............................................................................................- 50 -
5.2.1 Connecting the controllers to the HUB................................................................ - 51 -
5.2.2 Remaining ports .................................................................................................. - 51 -
5.3 HUB startup.................................................................................................- 51 -
5.4 Operation.....................................................................................................- 52 -
5.5 Connecting a PC to the HUB.......................................................................- 52 -
5.6 Exchanging a controller ...............................................................................- 52 -
5.7 HUB Menu handling.....................................................................................- 53 -
5.7.1 Restarting the HUB by the „LD“ control panel ..................................................... - 53 -
5.7.2 Deleting the configurations stored in the HUB by the “LD” control panel............ - 53 -
5.7.3 Adjusting the number of controllers connected to the HUB by the “LD” control panel -
54 -

Laing Innotech GmbH + Co. KG Althuette Germany Instruction LTC 11_5
- 4 -
5.7.4 Choosing the HUB port for transferring the configuration by the “LD” control panel ..-
54 -
5.7.5 Displaying the last error in HUB mode by the “LD” control panel ........................- 55 -
6 BLE Option.......................................................................................................- 55 -
7 WiFi Option.......................................................................................................- 56 -
8 Status and failure modes indicated by the LED.............................................- 56 -
8.1 Menu codes for control panels without height indication “LM”......................- 57 -
8.2 Menu codes indicated by the “LD” control panels ........................................- 58 -
8.3 Failure codes indicated by the control panels..............................................- 63 -
9 Sound signals...................................................................................................- 72 -
10 Directives and approvals...............................................................................- 73 -
10.1 Directives followed.....................................................................................- 73 -
10.2 Approvals for European Controllers (230V versions).................................- 73 -
10.3 Approvals for USA and Canada (115V versions).......................................- 73 -

Instruction LTC 11_4 Laing Innotech GmbH + Co. KG Althuette Germany
- 5 -
1 The LTC table controller
Thank you for choosing our controller. The well-shaped controllers can be easily
mounted below a tabletop or into a crossbar of a height adjustable table. A
variety of control panels and control modes enable the user to find the optimum
solution for many applications.
This instruction describes how to install and how to operate the controller.
1.1 Application
The LTC Controller series is designed and can be exclusively used to control
motors for the height adjustment of tables. It has to be verified that the
performance parameters of the motors and the connections of the motors fit the
parameters and connections of the controller.
Attention: If used for other applications neither the function nor the safety can be
ensured! Therefore, such use is not permitted, and warranty will be voided if used
in applications outside the table height adjustment area.
1.2 For whom this document is prepared for
This document is an installation and operation instruction for the LTC series
Laing Table Controllers and its accessories. The document is dedicated to
manufacturers of height adjustable table frames and tables.
This document is not intended for end users!
1.3 Preconditions for the use of this document
This document describes installation and operation of the controllers. It is
assumed, that the controller has already been configured for the application in
which it is intended to be used. All parameters for the table the controller is
intended to be mounted to, have to be programmed before the actual installation.
Do not install the system before programming!
1.4 Safety instructions
Attention: There are no parts inside the controller which are serviceable or
repairable by the user! Do not open the controller. If opened, the warranty will be
void.

Laing Innotech GmbH + Co. KG Althuette Germany Instruction LTC 11_5
- 6 -
1.4.1 Indications for all Laing Table Controllers and all accessories (products)
Before any work is done with the products, read the instruction manual and follow
the instructions!
Attention: The products may only be used as intended. Danger may occur if
products are used in another way or in other applications than the intended ones.
•The installation may only be performed by qualified personnel with the
required knowledge and the required capabilities!
•When making electrical connections, applicable electrical codes must be
observed in respect to the way the connection is made, as well as who is
authorized to perform such connection!
•Electrical installations can only be made by authorized personnel!
•Operation outside the specified operation limits is not allowed!
•Operation outside the specified environmental conditions is not allowed!
1.4.2 Indications for the operation of height adjustable tables
•Operation of a height adjustable table is only allowed after being instructed
by a person familiar with the product or after thorough study of the
instruction manual.
•Children are not allowed to play with the table.
•When operated, no persons are allowed on the tabletop
•Danger of collision! The table must be placed in a way that it can operate
without colliding with any objects like drawers or windowsills!
•Danger of injury by squeezing! The table must be placed and operated
in a way that no person can be squeezed between the tabletop or other
parts of the table and other objects in the vicinity of the table.
•Children under the age of 8 and persons with mental or physical
disabilities are only allowed to operate the table if they have been
sufficiently familiarized with the operation of the table and if it is certain,
that they will not be overburdened with the operation of the table.
•Use of the table is only permitted in closed buildings where it can be
insured the no water or high humidity can get to the electrical parts.
•The controllers are manufactured and tested using the utmost care.
Should there be a problem, please contact our service department.
1.5 Design of the table controllers
•Highly efficient switching power supply drives one, two, three or four motor
channels (controllers for mains connection)
•The motor channels are controlled by a powerful processor

Instruction LTC 11_4 Laing Innotech GmbH + Co. KG Althuette Germany
- 7 -
•The controller can be configured to a wide variety of applications by an
easy-to-use configuration software
•The aluminum housing provides superior heat dissipation which is why in
most applications the cool down time is not determined by the controller
but by the motors connected to the controller
•Optional port for the OptoSense Sensor
•Optional integrated collision detection
•Status indication by LED or by control panels with height indication
•A bus connection is provided for the following uses
oConnection of the control panels
oConfiguration of the controller by PC
oFirmware update
oSynchronization of up to six controllers
•An internal extension port is provided for the optional placement of a WiFi
or BLE module. The BLE module enables the operation by wireless control
panels
1.6 Specifications
Type LTC 302 LTC 383 LTC 384
Max. output power 300 W 380 W 380 W
Output voltage 24 V 24 V 24 V
Output current total 15 A 19 A 19 A
Motor channels 2 3 4
Max. current per channel 9 A 9 A 9 A
Synchronization by HUB or LD by HUB or LD by HUB or LD
1.6.1 Controller for mains connection LTC
Input voltage 230 V 50/60 Hz 230 V 50/60 Hz 230 V 50/60 Hz
Input current 2,9 A 3,5 A 3,5 A
Frequency 50-60 Hz 50-60 Hz 50-60 Hz
Standby power 250 mW 250 mW 250 mW
1.6.2 Controller for DC-operation LTCD
Input voltage 10 V - 36 V 10 V -3 6 V 10 V - 36 V

Laing Innotech GmbH + Co. KG Althuette Germany Instruction LTC 11_5
- 8 -
Input current 15 A 22 A 30 A
Frequency DC DC DC
Standby power 12 V 80 mW 100 mW 130 mW
Standby power 24 V 180 mW 220 mW 250 mW
1.6.3 Controller for battery-operation LTCB
Battery voltage 32 V 32 V 32 V
Input current 13 A 13 A 13 A
Frequency DC DC DC
Standby power -
battery and controller 5 mW 5 mW 5 mW
1.7 Environmental conditions
The environmental conditions are valid for all controllers and accessories
Environmental temperature for storage and transport: min: -20°C to max: 60°C
min: -4°F to max: 140°F
Environmental temperature for operation: min: 5°C to max: 45°C
min: 41°F to max: 113°F
Max. humidity for storage, transport and operation: 95% non-condensing

Instruction LTC 11_4 Laing Innotech GmbH + Co. KG Althuette Germany
- 9 -
1.8 Dimensions controller for mains connection LTC
1.8.1 Controller without OptoSense

Laing Innotech GmbH + Co. KG Althuette Germany Instruction LTC 11_5
- 10 -
1.8.2 Controller with OptoSense
1.9 Dimensions controller for DC-operation LTCD
For the differing measurements of the OptoSense option see “controller for mains
connection”

Instruction LTC 11_4 Laing Innotech GmbH + Co. KG Althuette Germany
- 11 -
1.10 Dimensions controller for battery-operation LTCB
For the differing measurements of the OptoSense option see “controller for mains
connection”
1.11 Options
The following options can be ordered with the controller
•WiFi module: the controller will be supplied with an integrated WiFi
module. All table functions can be controlled through WiFi
•BLE module: the controller will be supplied with an integrated BLE module.
All table functions can be controlled through BLE, this can be done for
example by a smart phone app. This also is required for the wireless
control panel.
•OptoSense option: the controller will be supplied with the OptoSense
sensor and a connector inside the controller for the OptoSense sensor.
This sensor allows the user to control the table by gestures.
•GyroSense/ GraviSense option: the controller will be supplied with an
integrated collision detection sensor.
1.12 Delivery contents
The controller will be supplied in bulk packages, these contain the controller only.
The power cable, motor cables, control panels and OptoSense sensors will be
supplied in separate bulk package boxes. Fixing screws are not provided.

Laing Innotech GmbH + Co. KG Althuette Germany Instruction LTC 11_5
- 12 -
2 Installation of the controllers
2.1 Controllers without OptoSense
The controller will be attached to the bottom of the tabletop by two screws, one
on each fixing point at the ends of the controller. A suitable fastener size is #8
wood screw. The length is determined by the thickness of the tabletop; however,
it should be a minimum of ½ inch. When using other size screws, it is important,
that the shaft of the screw is not wider than the slot in the fixing point and that the
head is not bigger in diameter than 3/8 inch. The torque is determined by the
material of the tabletop, it is important that the fixing points at the endcap of the
controller don’t get deformed.
The controller can also be mounted on the cross bar, in this case the mounting
can be done by M4 metric screws with a spring washer to secure the connection.
2.2 Battery controller LTCB
For mounting the battery controller, the battery has to be removed from the
controller. Through the adapter “A” the controller can be mounted with the same
screw distance as the controller for mains connection.
Alternatively, it’s possible to screw the controller directly through hole “B”. In both
cases it is mandatory that the screw head is not higher than 1/8 inch. Otherwise
the battery can’t be inserted into the controller.
Important! When the controller with GyroSense or GraviSense option is used,
the controller has to be mounted directly to the bottom of the tabletop to ensure
an optimal function of the collision detection.
B
A

Instruction LTC 11_4 Laing Innotech GmbH + Co. KG Althuette Germany
- 13 -
2.3 Controller with OptoSense
The controller with OptoSense can only be mounted directly below the tabletop. It
cannot be mounted onto the cross bar!
First a 25/64” hole has to be drilled in the position where the OptoSense sensor
shall be located.
Then the controller will be positioned below the tabletop in a way that the
centering stud of the endcap on the motor connection side of the controller will
reach into the 25/64” hole (see sketch).
Now the controller is positioned in reference to the tabletop. The controller can
now be screwed to the bottom of the tabletop by two screws, one on each fixing
point at the ends of the controller. A suitable fastener size is #8 wood screw. The
length is determined by the thickness of the tabletop; however, it should be
minimum ½ inch. When using other size screws, it is important, that the shaft of
the screw is not wider than the slot in the fixing point and that the head is not
bigger in diameter then 3/8 inch. The torque is determined by the material of the
tabletop, it is important, that the fixing points at the endcap of the controller will
not be deformed.
Now the OptoSense sensor can be inserted carefully into the hole in the tabletop
from the top of the table. Potentially the sensing element has to be rotated by a
The picture shows a cross section
through the controller and the
tabletop. It can be seen, that the
centering stud of the controller
endcap reaches into the hole in the
tabletop to position the controller.
The picture shows the OptoSense
sensor which has to be inserted
into the top of the controller
through a hole in the tabletop.

Laing Innotech GmbH + Co. KG Althuette Germany Instruction LTC 11_5
- 14 -
maximum of 90° until it can be inserted with little force into the controller. Once
the edge of the transparent cover of the sensor reaches the table top the force
must be increased up to about 200N to insert the cover into the hole. The cover
must be pressed in until the rim of the cover reaches the surface of the tabletop.
The retention force of the transparent cap is dependent on the material of the
tabletop. Should the force be too big (too much force needed to insert) or too little
(sensor comes out easily) the diameter of the hole in the table top must be
adjusted in 4/1000th” steps up or down until the cover can be inserted with
maximum 200N and the sensor does not come out easily.
2.4 Controller with GyroSense / GraviSense
The sensing element of the GyroSense and the GraviSense for the collision
detection is contained in the controller itself. This is why the controller with the
GyroSense or GraviSense option must be mounted directly to the bottom of the
tabletop as otherwise the movement of the tabletop cannot be properly sensed.
The standard setting assumes that the controller will be mounted in parallel to the
cross bar which connects the two legs of the table. Should the controller be
mounted perpendicular to the cross bar, the configuration of the controller must
be adapted to that. Without that, a reliable collision detection will not be possible.
For the successful function of the GyroSense and the GraviSense, it is very
important that the table stands with all legs on the floor so that it cannot wobble. If
the table can wobble the GyroSense or the GraviSense may react to the
wobbling instead of a collision.
2.5 Installation of the control panels
2.5.1 Rectangular control panels
The square control panels will be mounted from the bottom to the edge of the
tabletop in a way that the keys will be easily accessible. The cable must be
attached to the bottom of the tabletop in a way that it does not put tension on the
control panel or the controller but also does not hang loose.

Instruction LTC 11_4 Laing Innotech GmbH + Co. KG Althuette Germany
- 15 -
2.5.2 Oval control panels
For the installation of the oval control panels an appropriate pocket and a ½” hole
have to be machined into the tabletop. The cable will be put through the hole
from the top, then the control panel will be pressed from the top into the pocket.
While inserting the control panel make sure the control panel will not be
pressed too hard, if required the size of the pocket has to be adjusted. The
cable must be attached to the bottom of the tabletop in a way that it does not put
tension on the control panel or the controller but also does not hang loose.
Cutout for control panels with two and four buttons IC series

Laing Innotech GmbH + Co. KG Althuette Germany Instruction LTC 11_5
- 16 -
Cutout for control panels with six buttons IC series
Cross section table cut-out
2.6 Electrical connection
The picture shows the output connection side of
the controller.
•1 Motor 1
•2 Motor 2
•3 Motor 3 (LTC 383 and LTC 384)
•4 Motor 4 (LTC 384 only)
•5 Control panel and bus connection
4 3
2 1 5

Instruction LTC 11_4 Laing Innotech GmbH + Co. KG Althuette Germany
- 17 -
2.6.1 Connectable Motors
The controllers are designed to be connected to motors with the following ratings.
Besides the suitable rating, it is required that the motor connectors correspond to
the pin assignment shown under “Pin assignment for motors” below.
Nominal voltage 24 V
Maximum current 8 A
Number of hall sensors (90°) 2
Hall sensor supply voltage 5 V
Maximum current hall sensors 50 mA
2.6.2 Pin assignment controller
Pin assignment motor Pin assignment bus
1 Motor connection 1 9 +5V output
2 Hall sensor 1 10 RS 485 A
3 Ground 11 RS 485 B
4 Hall sensor +5 V 12 +5V input
5 Optional 2 13 Analog control panel
6 Optional 1 14 Ground
7 Hall sensor 2
1
2
3
5
6
7
8
9
10
11
12
13
14
4

Laing Innotech GmbH + Co. KG Althuette Germany Instruction LTC 11_5
- 18 -
8 Motor connection
2.7 Connection of the motors
The motors must have an 8 pole Molex plug and must comply with the
requirements described under “Connectable motors”
The motors may then be plugged into the connectors of the controller in the order
shown on the controller cover. When plugged in, the snap-in pin will retain the
plug. Make sure to press the snap-in pin when unplugging a motor to avoid
damage to the plug or to the controller.
2.8 Connection of the control panels and other control options
2.8.1 Control panels with cable
The control panels with cable must be plugged into the connector 5 of the
controller. Make sure that the plug is locked by the snap-in. To unplug, the snap-
in pin must be pressed, not doing so may result in plug or controller damage!
2.8.2 Connection of two control panels
The controllers can be controlled by two control panels. To do so the Y-connector
is required. The connections must be made as shown on the picture. The Y-
connector is connected to the controller, a control panel with height indication is
connected to the second port, a control panel without height indication to the
third.

Instruction LTC 11_4 Laing Innotech GmbH + Co. KG Althuette Germany
- 19 -
Attention! It is not possible to connect two control panels with height indication
or two control panels without height indication to one controller. This will result in
a malfunction of the controller. Should more control panels be required see next
step.
2.8.3 Connection of up to 11 control panels
It is possible to control one controller by up to 11 control panels. To do so the
HUB LH 6 is required. The controller will be connected to one port of the HUB, to
the other ports of the HUB, control panels can be connected in any combination
of control panels with height indication and without height indication. Where a
controller or control panel with height indication is connected, a control panel
without height indication can be added by using a Y-connector.
When more than one control panel is used, the control panel activated first is in
control, pressing a button on another control panel while a control panel is still in
use, will stop the movement. This also applies when the movement is initiated by
OptoSense, BLE or Wifi.
2.8.4 OptoSense
When the OptoSense is used there is no control panel required. The OptoSense
is ready to use after insertion into the controller. In addition to the OptoSense
another control panel can be connected.
2.9 Wireless control panel LM4RW

Laing Innotech GmbH + Co. KG Althuette Germany Instruction LTC 11_5
- 20 -
2.9.1 Connection
The wireless keyboard LM4RW can be connected to any controller that is
equipped with a BLE Module. Make sure the BLE module in the controller is
activated through the Wizard or the LD control panel before using the keyboard.
In addition to the wireless control panel, other control panels can be connected to
the controller.
2.9.2 Mounting the wireless control panel
Attention: It is mandatory, that the keyboard will be mounted in a position, from
where the movement of the table can be observed while pressing! Mounting the
keyboard outside the range of sight is not allowed!
The control panel LM4RW will be supplied with an adhesive tape on the bottom.
Peel off the protective film and glue the keyboard to the desired place. The place
should not be further away of the controller than about 5 feet. Where required the
control panel can be fixed with a screw too.
2.9.3 Pairing the control panel and the controller
First the control panel has to be paired to the controller. After plugging the
controller in to the mains, the controller is ready for pairing for the first 15
seconds. If the controller is plugged in already, the mains cable has to be
unplugged until the LED in the controller goes off, so wait about 20 seconds until
plugging it back in.
While the controller is ready for pairing, press the keyboard “up“ and “down“ keys
on the control panel simultaneously, until you hear a sound from the motors
connected to the controller. If the melody goes upwards, the keyboard is paired to
the controller. Now the controller can be controlled by the keyboard.
If the keyboard has been paired to the controller before already, the pairing action
will result in an unpairing of the keyboard. This is indicated by a descending
melody given out by the motors. After being unpaired the controller will not react
to the keyboard commands anymore.
The pairing can also be started through the wizard. For this the pairing mode has
to be activated on the “basic“ page. By pressing the “up“ and “down“ key of the
keyboard simultaneously within 15 seconds of activation of the controller the
same effect as described above will occur.
Up to 15 keyboards can be paired with one controller, a keyboard can be paired
with an unlimited number of controllers.
This manual suits for next models
4
Table of contents
Other MOVETEC Controllers manuals
