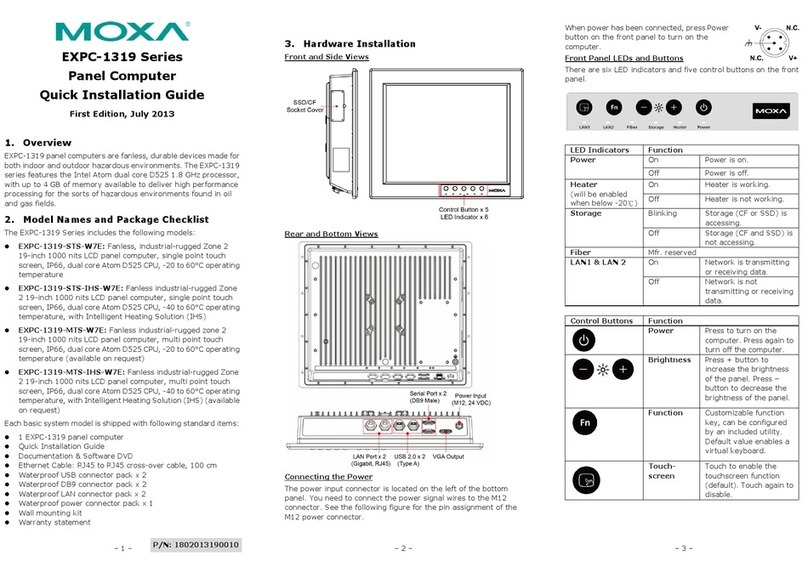
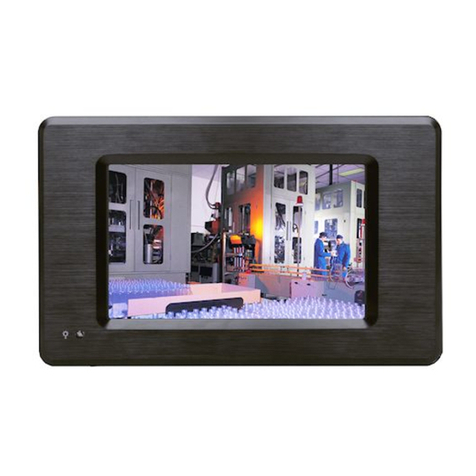
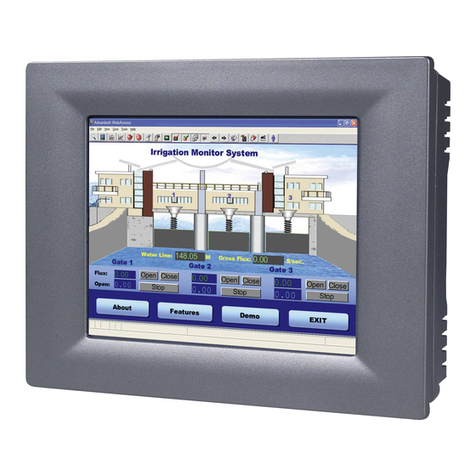
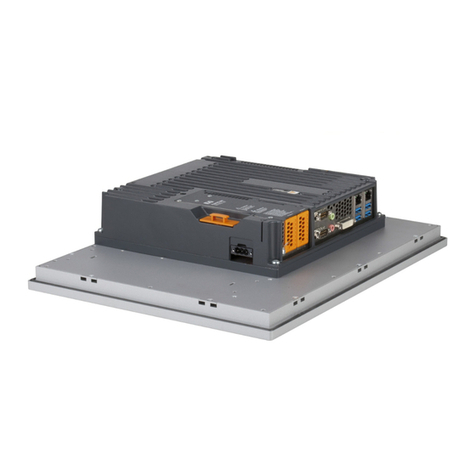
Moxa Technologies EXPC-1319 Series User manual

EXPC-1319 Series Hardware Manual
Second Edition, January 2014
www.moxa.com/product
© 2014 Moxa Inc. All rights reserved.
Reproduction without permission is prohibited.

EXPC-1319 Series Hardware Manual
The software described in this manual is furnished under a license agreement and may be used only in accordance with
the terms of that agreement.
Copyright Notice
Copyright ©2014 Moxa Inc.
All rights reserved.
Reproduction without permission is prohibited.
Trademarks
The MOXA logo is a registered trademark of Moxa Inc.
All other trademarks or registered marks in this manual belong to their respective manufacturers.
Disclaimer
Information in this document is subject to change without notice and does not represent a commitment on the part of
Moxa.
Moxa provides this document as is, without warranty of any kind, either expressed or implied, including, but not limited
to, its particular purpose. Moxa reserves the right to make improvements and/or changes to this manual, or to the
products and/or the programs described in this manual, at any time.
Information provided in this manual is intended to be accurate and reliable. However, Moxa assumes no responsibility for
its use, or for any infringements on the rights of third parties that may result from its use.
This product might include unintentional technical or typographical errors. Changes are periodically made to the
information herein to correct such errors, and these changes are incorporated into new editions of the publication.
Technical Support Contact Information
www.moxa.com/support
Moxa Americas
Toll
-free: 1-888-669-2872
Tel:
+1-714-528-6777
Fax:
+1-714-528-6778
Moxa China (Shanghai office)
Toll
-free: 800-820-5036
Tel:
+86-21-5258-9955
Fax:
+86-21-5258-5505
Moxa Europe
Tel:
+49-89-3 70 03 99-0
Fax: +49-89-3 70 03 99-99
Moxa Asia
-Pacific
Tel:
+886-2-8919-1230
Fax: +886-2-8919-1231

Table of Contents
1. Introduction...................................................................................................................................... 1-1
Overview...........................................................................................................................................1-2
Model Descriptions and Package Checklist..............................................................................................1-2
Appearance........................................................................................................................................1-3
Features............................................................................................................................................1-4
Hardware Specifications ......................................................................................................................1-5
LED Indicators and Buttons..................................................................................................................1-7
LCD Panel and Touch screen ................................................................................................................1-7
Moxa Intelligent Heating Solution .........................................................................................................1-8
2. Hardware Installation ....................................................................................................................... 2-1
Placement Options..............................................................................................................................2-2
Desktop .....................................................................................................................................2-2
Mounting....................................................................................................................................2-2
Wall Mounting.............................................................................................................................2-2
Other Mounting Solutions ....................................................................................................................2-3
Yoke Mounting............................................................................................................................2-3
Panel Mounting ...........................................................................................................................2-4
VESA Mounting ...........................................................................................................................2-5
Wiring Requirements...........................................................................................................................2-5
Connecting the Power Supply...............................................................................................................2-6
Connecting the Interfaces....................................................................................................................2-6
Connecting to a Display.......................................................................................................................2-7
Connecting USB Devices......................................................................................................................2-7
Connecting Serial Devices....................................................................................................................2-8
Connecting LAN Ports..........................................................................................................................2-9
Replacing the SSD ............................................................................................................................2-11
Installing the CompactFlash Card........................................................................................................ 2-11
3. Touch Screen Calibration .................................................................................................................. 3-1
Calibrating the Touch Screen................................................................................................................3-3
Standard Calibration....................................................................................................................3-3
Advanced Calibration ...................................................................................................................3-3
PenMount Calibration Utility Parameters ................................................................................................3-4
Turn off EEPROM Storage.............................................................................................................3-4
Touch Screen Cursor Settings .......................................................................................................3-4
Edge Compensation.....................................................................................................................3-5
4. BIOS Setup........................................................................................................................................ 4-1
Entering the BIOS Setup Utility ............................................................................................................4-2
BIOS Main Page..................................................................................................................................4-2
Modifying BIOS Settings ......................................................................................................................4-3
Advanced Settings.......................................................................................................................4-3
Security Settings.........................................................................................................................4-9
Power Settings..........................................................................................................................4-10
Boot Settings............................................................................................................................4-12
Exit Settings.............................................................................................................................4-13
Upgrading the BIOS..........................................................................................................................4-15
A. Safety Installation Instructions ........................................................................................................ A-1
B. Statement of Regulatory Approval .................................................................................................... B-1
1
1. Introduction
Thank you for purchasing the Moxa EXPC-1319 series x86 industrial panel computer.
This manual introduces the hardware installation, connector interfaces, and BIOS setup of the EXPC-1319. For
software configuration and management, please refer to the user’s manual for your operating system.
The following topics are covered in this chapter:
Overview
Model Descriptions and Package Checklist
Appearance
Features
Hardware Specifications
LED Indicators and Buttons
LCD Panel and Touch screen
Moxa Intelligent Heating Solution

EXPC-1319 Series Hardware Introduction
1-2
Overview
The EXPC-1319 panel computers are fanless, durable devices made for both indoor and outdoor hazardous
environments. The EXPC-1319 series features the dual core Intel Atom D525 1.8 GHz processor, with up to 4
GB of memory available to deliver high performance processing. The EXPC-1319 is Zone 2 certified, and comes
with two electrically isolated, software-selectable RS-232/422/485 serial ports alongside two Gigabit LAN ports,
providing reliable serial and high speed Ethernet LAN transmissions with full network redundancy.
The EXPC-1319 computers come with a patented, fanless, streamlined enclosure designed for highly efficient
heat dissipation, making this one of the most reliable industrial platforms available for harsh, hot outdoors
environments like oil and gas fields or drilling platforms. In addition, EXPC-1319 computers come with an
expanded set of self-health diagnostics that communicate over SNMP and may also be ordered with Moxa’s
Intelligent Heating Solution (IHS), a heating utility for use in extremely low temperature (-40°C) environments.
Finally, these computers feature capacitive touch screen controls with glass-film- glass bonding, making them
scratch- and glare-resistant and easy to read even during the peak daylight hours.
Model Descriptions and Package Checklist
The EXPC-1319 Series includes the following models:
EXPC-1319-STS-W7E: Fanless, industrial-rugged Zone 2 19-inch 1000 nits LCD panel computer, single
point touch screen, IP66, dual core Atom D525 1.8 GHz CPU, -20 to 60°C operating temperature
EXPC-1319-STS-IHS-W7E: Fanless industrial-rugged Zone 2 19-inch 1000 nits LCD panel computer,
single point touch screen, IP66, dual core Atom D525 1.8 GHz CPU, -40 to 60°C operating temperature,
with Intelligent Heating Solution (IHS)
EXPC-1319-MTS-W7E: Fanless industrial-rugged zone 2 19-inch 1000 nits LCD panel computer, multi
point touch screen, IP66, dual core Atom D525 1.8 GHz CPU, -20 to 60°C operating temperature
(available on request)
EXPC-1319-MTS-IHS-W7E: Fanless industrial-rugged Zone 2 19-inch 1000 nits LCD panel computer,
multi point touch screen, IP66, dual core Atom D525 1.8 GHz CPU, -40 to 60°C operating temperature,
with Intelligent Heating Solution (IHS) (available on request)
Each model is shipped with following standard items:
1 EXPC-1319 panel computer
Quick Installation Guide
Documentation & Software DVD
Ethernet Cable: RJ45 to RJ45 cross-over cable, 100 cm
Waterproof USB connector pack x 2
Waterproof DB9 connector pack x 2
Waterproof LAN connector pack x 2
Waterproof power connector pack x 1
Wall mounting kit
Warranty statement

EXPC-1319 Series Hardware Introduction
1-3
Appearance
Front and Side Views
Rear and Bottom Views

EXPC-1319 Series Hardware Introduction
1-4
Dimensions
Features
Zone 2 certified component for panel mounting in hazardous area applications
High performance dual core Intel Atom D525 1.8GHz platform with low power consumption
19-inch scratch-resistant anti-glare 1000 nits LCD panel
Self-health diagnostics software package for remote predictive maintenance
-40 to 60°C wide operating temperature (with built-in Intelligent Heater)
Totally sealed IP66 / NEMA 4X panel computer (not for using in hazardous environments)
Fanless, streamlined enclosure for highly efficient heat dissipation
Touch screen control button to enable/disable touch screen
Optional WLAN, 100M fiber optical interface

EXPC-1319 Series Hardware Introduction
1-5
Hardware Specifications
Computer
CPU:
Intel dual core Atom D525 1.8 GHz processor
OS:
Windows 7 for embedded systems
System Chipset:
Intel Pineview-D+ ICH8M
BIOS:
16-Mbit Flash BIOS SPI type with ACPI
Graphics Controller:
Integrated Intel GMA3150 graphics controller
Video Output:
VGA output, waterproof DB15 (female) connector
System Memory:
4 GB capacity, 2 GB pre-installed: 2 slots of 2 GB DDR3-800 SO-DIMM SDRAM
Automatic Reboot Trigger:
Built-in so
ftware programmable watchdog timer for system resets, configurable
from 1 to 255
second timeout intervals
Expansion Bus:
1 PCI-104 slot, 1 mini PCIe socket
USB:
2 USB 2.0 hosts, waterproof circular type A connector
KB/MS:
PS/2 keyboard/mouse interface (Y-type cable) with waterproof connector (optional
, not for using in
hazardous environments)
Storage
Storage Expansion:
• On
-board CompactFlash socket x 1
• One extra on
-board SATA interface, supporting configurable RAID 0/1
Storage Support:
Removable 32 GB industrial grade SSD (operating temperature: -40 to 85°C) to store OS,
;
supports up to 256 GB
Display
Panel Size:
19-inch SXGA, 1000 nits LED backlit LCD
Aspect Ratio:
5:4
Response Time:
5 ms
Contrast Ratio:
1000:1
Viewing Angles:
•
Horizontal: 170° (left to right)
• Vertical: 160° (up to down)
Max Colors:
16.7 M colors
Graphics Controller:
Integrated Intel GMA3150 graphics controller
Video Output:
VGA output, waterproof DB15 (female) connector
Resolution:
• VGA: 640 x 480
• SVGA:
800 x 600
• XGA: 1024 x 768
• SXGA: 1280 x 1024
Touch screen
EXPC
-1319-STS: Resistive single point glass-film-glass
EXPC
-1319-MTS: Capacitive multi point (available on request, not for using in hazardous environments)
Note: All EXPC
-1319 touch screens are scratch resistant and anti-
glare, suitable for use outdoors around heavy
equipment.
Ethernet Interface
Hardware Interface:
Waterproof RJ45 connector
LAN:
2 auto-sensing 10/100/1000 Mbps ports
Optical Fiber Interface:
2 multimode 100M fiber optic ports with waterproof Q-ODC connector
(available on
request
)
WLAN:
1 802.11b/g/n interface (available on request)
Magnetic Isolation Protection:
1.5 kV built-in
Serial Interface
Serial Standards:
2 RS-232/422/485 ports, software-selectable
Connector Type:
Waterproof DB9 (male)

EXPC-1319 Series Hardware Introduction
1-6
Baudrate:
Up to 38,400 bps
Isolation Protection:
2 kV
Serial Communication Parameters
Data Bits:
5, 6, 7, 8
Stop Bits:
1, 1.5, 2
Parity:
None, Even, Odd, Space, Mark
Flow Control: RTS/CTS, XON/XOFF, ADDC® (automatic data direction control) for RS-485
Serial Signals
RS
-232: TxD, RxD, DTR, DSR, RTS, CTS, DCD, GND
RS
-422: TxD+, TxD-, RxD+, RxD-, GND
RS
-485-4w: TxD+, TxD-, RxD+, RxD-, GND
RS
-485-2w: Data+, Data-, GND
LEDs and Buttons
LEDs:
Power (on/off), heater (on/off), storage (blinking/off), LAN port communication x 2 (on/off), fiber
communication
(reserved)
Control Buttons:
System on/off, brightness adjustment x 2, touch screen on/off, programmable "Fn" button
Physical Characteristics
Housing:
Aluminum
Weight:
• 10.7 kg (without Intelligent Heating Solution)
• 11.9 kg (with Intelligent Heating Solution)
Dimensions:
483 x 408 x 99 mm (19.02 x 16.06 x 3.90 in)
Mounting:
Mounting holes for VESA 75/100, yoke mounting, and panel mounting
Environmental Limits
Operating Temperature:
• Without Intelligent Heating Solution:
-20 to 60°C (-4 to 140°F)
• With Intelligent
Heating Solution: -40 to 60°C (-40 to 140°F)
Storage Temperature:
-40 to 80°C (-40 to 176°F)
Ambient Relative Humidity:
5 to 95% (non-condensing)
Anti-Vibration: 2 g rms, 5-500 Hz frequency, compliant with IEC 60068-2-6 standard
Anti
-Shock: 20 g, half sine wave under system operating, 11 ms duration, compliant with IEC 60068-2-27
standard
Power Requirements
Input Voltage:
•
Typical 24 VDC
•
External 100 to 240 VAC isolated power supply unit (available on request, not for using in hazardous
environments
)
Connector:
M12, customizable
Power Consumption:
• Without Intelligent Heating Solution: 60 W
• With Intelligent Heating Solution: 120 W
Standards and Certifications
Hazardous Environments:
UL Class 1 Division 2, ATEX/IECEx Zone 2 certified component
EMC:
EN 55022 Class B, EN 55024-4-2, EN 55024-4-3, EN 55024-4-4, FCC Part 15 Subpart B Class A
Mechanical:
IP66, NEMA 4X
Green Product: RoHS, cRoHS, WEEE
Warranty
Warranty Period:
3 years for computer system, 1 year for LCD panel
Details:
See www.moxa.com/warranty

EXPC-1319 Series Hardware Introduction
1-7
LED Indicators and Buttons
The EXPC-1319 comes with six LED indicators and five control buttons on the bottom of the front panel.
LED Indicators Function
Power On Power is on.
Off Power is off.
Heater On Heater is working. (Note that this function will be enabled when
below -20˚C)
Off Heater is not working.
Storage Blinking Storage (SSD or CF) is accessing.
Off Storage (SSD and CF) is not accessing.
Fiber Reserved for optional function
LAN1 & LAN 2 On Network is transmitting or receiving data.
Off Network is not transmitting or receiving data.
Control Buttons Function
Power Press to turn on the computer. Press again to turn
off the computer.
Brightness Press +button to increase the brightness of the
panel. Press – button to decrease the brightness of
the panel.
Function Customizable function key, can be configured by
the utility. The default value will enable a virtual
keyboard function. Refer to Software User’s
Manual for configuration details.
Touch screen Touch to enable the touch screen function
(default). Touch again to disable.
LCD Panel and Touch screen
The EXPC-1319 comes with 1000 nits TFT LCD panel with touch screen bonding.
The 1000 nits TFT LCD panel means the panel’s brightness at its central point is 1000 cd/m2. Due to the
characteristics of liquid crystal in TFT LCD panels, even though the EXPC-1319 will work properly between -20
and 60˚C (-40 to 60˚C with Intelligent Heating Solution), to extend the panel’s life Moxa recommends
maintaining the working temperature between 0 and 50˚C whenever possible. Some areas on the LCD panel
might distort some colors to black at extremely high temperatures, or respond sluggishly at extremely low
temperatures.
The touch screen used on the EXPC-1319 includes hardened resistive glass-film-glass single point touch screen
(STS) or a capacitive type multipoint touch screen (MTS). Different touch screen technologies allow different

EXPC-1319 Series Hardware Introduction
1-8
light transmission rates to decrease the brightness of LCD panel. Usually the light transmission rate of resistive
type touch screens is around 80%, while for capacitive types it is around 85% to 90%. Please note that the
screen is composed of hardened, scratch-resistant glass, and its anti-glare coating can still be scratched using
any abrasive with Mohs rating greater than 6. Please note that the capacitive type multipoint touch screen
(MTS) model cannot be used in the hazardous environments.
Notice: Please calibrate your touch screen every time you reboot the system to ensure the touch screen works
properly. To review touch screen calibration, please refer to the Touch screen Calibration section in Chapter
4 of the EXPC-1319 Windows Embedded Standard 7 User’s Manual.
Moxa Intelligent Heating Solution
The EXPC-1319 may be ordered with Moxa’s patented Intelligent Heating Solution, to extend the effective
range of the platform’s operating temperature, with the caveats below. EXPC-1319 computers equipped with
IHS feature the heating solution on the display panel.
The Intelligent Heating Solution will automatically initiate once the ambient temperature drops
below -20˚C.
It takes about 40 to 50 minutes for the Intelligent Heating Solution to warm up the display panel.
Once IHS has completed the heating cycle, the LED indicator for the Heater will turn off. Until the
warming up cycle is completed, the display may be distorted or otherwise function poorly.
Moxa Intelligent Heating Solution remains (minimally) powered up and operating even after the
computer has been taken offline. This is to ensure its automated response when ambient
temperatures drop below 0˚C.
IHS may only be turned off by disconnecting the power supply.
IHS requires a 120 W power supply.
NOTE
To ensure that the IHS
has been completely stopped, make sure to remove the power source after shutting
down the EXPC
-1319.

2
2. Hardware Installation
The EXPC-1319 Series of panel computers are compact and rugged, making them suitable for any industrial
application that requires EMC Level 4 compliance. The LED indicators allow users to monitor performance and
identify trouble spots quickly, and multiple ports are provided for connecting a variety of different devices. The
EXPC-1319 hardware platform is stable, reliable, and easy to maintain, allowing you to spend your time on
application development rather than troubleshooting networking bugs. This chapter describes the hardware
installation and interfaces of EXPC-1319 panel computers.
The following topics are covered in this chapter:
Placement Options
Desktop
Mounting
Wall Mounting
Other Mounting Solutions
Yoke Mounting
Panel Mounting
VESA Mounting
Wiring Requirements
Connecting the Power Supply
Connecting the Interfaces
Connecting to a Display
Connecting USB Devices
Connecting Serial Devices
Connecting LAN Ports
Replacing the SSD
Installing the CompactFlash Card

EXPC-1319 Series Hardware Hardware Installation
2-2
Placement Options
Desktop
Place your EXPC-1319 on a clean, flat, well-ventilated desktop. For better ventilation, leave some space
between the EXPC-1319 and other equipment. Do not place equipment or objects on top of the EXPC-1319, as
this might damage the computer’s internal components.
Mounting
The EXPC-1319 comes with a variety of mounting methods for different field sites. Before mounting, refer to
the following figure for the dimensions of the screw holes used for different mounting methods.
Wall Mounting
The EXPC-1319 comes with a wall mounting kit.
Follow these steps to mount the EXPC-1319 on a wall:
Step 1: Use screws to attach the mounting ears to the back of the computer. Each mounting ear
requires three screws.
ATTENTION!
For maximum safety, at least two persons should work together to lift, place, and
fasten the computer to
its
mounting point
. Before you lift or move the computer, first verify both it and any power to the system
is turned
off
. In addition, make sure you have prepared the correct screws for a wall mounting.

EXPC-1319 Series Hardware Hardware Installation
2-3
Step2: Fasten the computer to the wall using three screws per ear.
NOTE
To make sure the panel computer will be securely installed on a wall,
we suggest you to use M5 screws
of a
suitable length to guarantee the computer remains securely fastened to the mounting point
. The
screw holes
penetrate
8 mm into the computer’s case. W
hen choosing screws for installation, remember to account for the
thickness of the mounting surface.
Other Mounting Solutions
The EXPC-1319 computers have reserved various mounting holes for users to mount the computer with
different solutions, including yoke mounting, panel mounting, and VESA mounting. See the following section
for detailed descriptions.
Yoke Mounting
The EXPC-1319 comes with six screw holes for a yoke mount. These screws holes are the same size as those
for the wall mounting. Place the panel onto the mounting plate, fasten the computer using these holes.

EXPC-1319 Series Hardware Hardware Installation
2-4
NOTE
To make sure the panel computer will
be securely installed on the yoke, use M4 screws.The screw holes
penetrate 8 mm into the computer’s case.
When choosing screws for
installation, remember to account for the
thickness of the mounting surface.
Refer to Appendix B: Statement of Regulatory Approval for the
technical
details regarding regulation Class 1 Div. 2 devices.
Panel Mounting
Follow these steps to install the EXPC-1319 on a panel cabinet.
1. Place the gasket between the EXPC-1319 and the enclosure, and use eight M6 screws to penetrate the
enclosure and gasket, so that the gasket can be securely fasten on two sides of the panel mounting holes
on the back of the EXPC-1319.
NOTE
To make sure the panel computer will
remain securely installed in the cabinet, use M6 screws of a suitable
length
. The screw holes penetrate 6 mm into the computer’s case. When choosing screws for installation,
remember to account for the thickness of the mounting surface.
2. Install the mounting brackets from inner part of the computer, and use M4 screws to fasten the brackets.
Four screws are required per side.
NOTE
For the installation in hazardous environments, refer to
Explosion Hazard section in Appendix B.

EXPC-1319 Series Hardware Hardware Installation
2-5
VESA Mounting
The EXPC-1319 comes with two sets of holes reserved for VESA mounts (FDMI): VESA 100 and VESA 75. Refer
to the following figures for the specific locations of the VESA mounting screw holes.
NOTE
To make sure the panel computer will be securely installed on a wall,
we suggest you to use the screws
with the
specifications of
M4. The screw holes penetrate 6 mm into the computer’s case. When choosing screws for
installation, remember to account for the thickness of the mounting surface.
Refer to
Appendix B: Statement
of Regulatory Approval
for the technical details regarding regulation Class 1 Div. 2 devices.
Wiring Requirements
The following common safety precautions should be observed before installing any electronic device:
•Strive to use separate, non-intersecting paths to route power and networking wires. If power wiring and
device wiring paths must cross, make sure the wires are perpendicular at the intersection point.
•Keep the wires separated according to interface. The rule of thumb is that wiring that shares similar
electrical characteristics may be bundled together.
•Do not bundle input wiring with output wiring. Keep them separate.
•When necessary, it is strongly advised that you label wiring to all devices in the system.
ATTENTION
Do not run signal or communication wiring and power wiring in the same conduit. To avoid interference, wires
with different signal characteristics
(i.e., different interfaces) should be routed separately.

EXPC-1319 Series Hardware Hardware Installation
2-6
ATTENTION
Safety First!
Be sure to disconnect the power cord before installing and/or wiring your device.
Caution!
High Electrical Current!
Verify
the maximum possible current for each wire gauge, especially for the power cords
. Observe all electrical
codes dictating the maximum current allowable for each wire
gauge.
If the current goes above the maximum ratings
(120 W)
, the wiring could overheat, causing serious damage to
your equipment.
Caution! High
Temperatures!
Be careful when handling the unit. When the unit is plugged in, the internal components generate
a lot of
heat
which may leave
the outer casing too hot to touch.
Connecting the Power Supply
The power connector is located at the far left of the bottom panel. When wiring the machine for power, refer to
the following figure for the pinout of the M12 power connector. Please take care to guarantee your power cable
uses the correct pinout.
When power has been connected, press the power button on the front panel to turn on the computer.
Connecting the Interfaces
The EXPC-1319 comes with various interfaces located on the bottom panel. All of these connectors have been
shipped with protective caps and tethers. If you wish to detach the tethers from the computer the screws
securing them to the rear panel will need to be removed. To keep water out of the enclosure and preserve the
life of the EXPC-1319, leave the protective caps in place (with their tethers) whenever the hardware interfaces
are not used.

EXPC-1319 Series Hardware Hardware Installation
2-7
Connecting to a Display
The EXPC-1319 comes with a 19-inch LED-backlit LCD display. Because the configuration of a 2nd or alternate
display may be required, the EXPC-1319 also comes with a VGA interface on its bottom panel. The VGA
hardware interface is a standard D-Sub 15-pin female connector; to ensure that the monitor image remains
clear, be sure to tighten the monitor cable after connecting it to the EXPC-1319 computer. The pin assignments
are shown below.
WARNING
When th
e external VGA display is not in use, make sure that the protective cap and the tether tail have
been
securely fasten
ed so that the waterproof function can work well. Please note that when reinstalling the
protective cap
, it must be fully tightened to insure the unit is sealed correctly to meet the IP66 enclosure
rating.
You may refer to Appendix B: Statement of Regulatory Approval for the technical details
regarding
regulation Class 1 Div. 2 devices
.
DB-15 Female VGA Connector
Pin No. Signal Definition Pin No. Signal Definition
1 Red 9 VCC
2 Green 10 GND
3 Blue 11 NC
4 NC 12 DDC2B Data
5 GND 13 HSYNC
6 GND 14 VSYNC
7 GND 15 DDC2B Clock
8 GND
Connecting USB Devices
The EXPC-1319 embedded computer has two USB 2.0 ports on the bottom panel. All of the ports are UHCI, Rev
2.0 compliant and support Plug & Play and hot swapping. These ports can be used to connect USB devices such
as a keyboard, mouse, USB flash disk, and USB CD-ROM. In addition, both USB ports support system boot up,
which can be activated by modifying the BIOS settings. BIOS configuration is described in detail in Chapter 4:
BIOS Setup. Follow the steps below to wire up the USB connectors.
Step 1: Disassemble the waterproof USB
connector into four parts. Thread the end of the
wire you intend to connect through parts 4, 3, and
2, in that order.
Step 2: Connect the wires to the USB head
according to the pinout shown in the table below.
Step 3: When finished, assemble the USB parts,
and connect the USB connector on the bottom
panel of the EXPC-1319. Make sure the connector

EXPC-1319 Series Hardware Hardware Installation
2-8
has been securely fastened to ensure the
waterproof function.
Pin Number Assignment
1 VCC
2 DATA-
3
DATA+
4 Ground
WARNING
To keep the EXPC
-1319 within the IP66 rating’s waterproof specifications, when the
USB ports are not in use
operators must replace the protective caps and the tethers,
and make sure they
have been properly fastened. Please note that when reinstalling
the
protective caps they must be tightened to 136 N-cm (12 in-lbs) to ensure the
unit is sealed to IP6
6 specifications.
In addition,
because of the danger posed by the maximum 5V @ 500 mA power
supply
of standard USB ports, care must be taken to protect the EXPC-1319 from
power accidents
in damp environments. To guarantee safety from severe electrical
shoks or electrocution, in damp conditions users
should disconnect the entire
computer
from its power source before connecting or disconnecting any USB
devices
.
You may r
efer to Appendix B: Statement of Regulatory Approval for the
technical
details regarding regulation Class 1 Div. 2 devices.
Connecting Serial Devices
The EXPC-1319 comes with two RS-232/422/485 serial ports with DB9 male connector.
Step 1: Disassemble the waterproof DB9 connector
into four parts.
Step 2: Connect the serial signal wires with the correct
pin definition. See the following figure and table.
Step 3: When finished, assemble the DB connector
parts, and connect to the DB9 connector on the bottom
panel of the EXPC-1319. Make sure the connector has
been securely fastened to ensure the waterproof
function.
The pin assignments for RS-232/422/485 serial ports are shown in the following table:
DB-9 Male Port RS-232/422/485 Pinouts
Pin RS-232 RS-422 RS-485-4W RS-485-2W
1 DCD TxDA(-) TxDA(-) –
2 RxD TxDB(+) TxDB(+) –
3 TxD RxDB(+) RxDB(+) DataB(+)
4 DTR RxDA(-) RxDA(-) DataA(-)
5 GND GND GND GND
6
DSR
–
–
–
7 RTS – – –
8 CTS – – –

EXPC-1319 Series Hardware Hardware Installation
2-9
WARNING
When the
serial ports are not in use, make sure that the protective caps and the tethers have been securely
fasten
ed to keep water from entering the enclosure. Please note that when reinstalling the protective caps
th
e screws which keep them in place must be tightened to 136 N-cm (12 in-lbs) to ensure the unit is sealed
to IP6
6 specifications. You may refer to Appendix B: Statement of Regulatory Approval for the technical
detail
s regarding regulation Class 1 Div. 2 devices.
Connecting LAN Ports
The EXPC-1319 has two 10/100/1000 Mbps LAN ports. These LAN ports come with waterproof RJ45 connectors.
Follow the steps below to connect the LAN ports.
By default, the LAN ports use DHCP addressing to assign network IP addresses. For detailed network
configuration, please refer to the EXPC-1319 Win 7 Embedded Software Manual.
Step 1: Disassemble the waterproof RJ45 LAN
connector into four parts.
Step 2: Users need to connect the twisted pair
wire to the correct pinouts. For pinouts, refer to
the figure and table just below.
Step 3: Pass LAN twisted pair through parts 4,
3, and 2, in that order, then connect it to the
RJ45 head. When finished, reassemble the LAN
parts, and insert the RJ45 head into the bottom
panel of the EXPC-1319. Make sure the
connector is securely fastened to ensure full
water resistance.
Pin No.
100 Mbps Signal 1000 Mbps Signal
1 ETx+ TRD (0)+
2 ETx- TRD (0)-
3 ERx+ TRD (1)+
4 -- TRD (2)+
5 -- TRD (2)-
6 ERx- TRD (1)-
7 -- TRD (3)+
8 -- TRD (3)-
Table of contents
Other Moxa Technologies Touch Panel manuals

Moxa Technologies
Moxa Technologies MPC-2000 Series User manual

Moxa Technologies
Moxa Technologies MPC-122-K User manual

Moxa Technologies
Moxa Technologies MPC-2190 Series User manual

Moxa Technologies
Moxa Technologies EXPC-1319-STS-W7E User manual

Moxa Technologies
Moxa Technologies MPC-2190X User manual

Moxa Technologies
Moxa Technologies MPC-2150 Series User manual

Moxa Technologies
Moxa Technologies MPC-2121 Series User manual

Moxa Technologies
Moxa Technologies MPC-2240 Series User manual

Moxa Technologies
Moxa Technologies MPC-2240 Series User manual

Moxa Technologies
Moxa Technologies MPC-2150 Series User manual